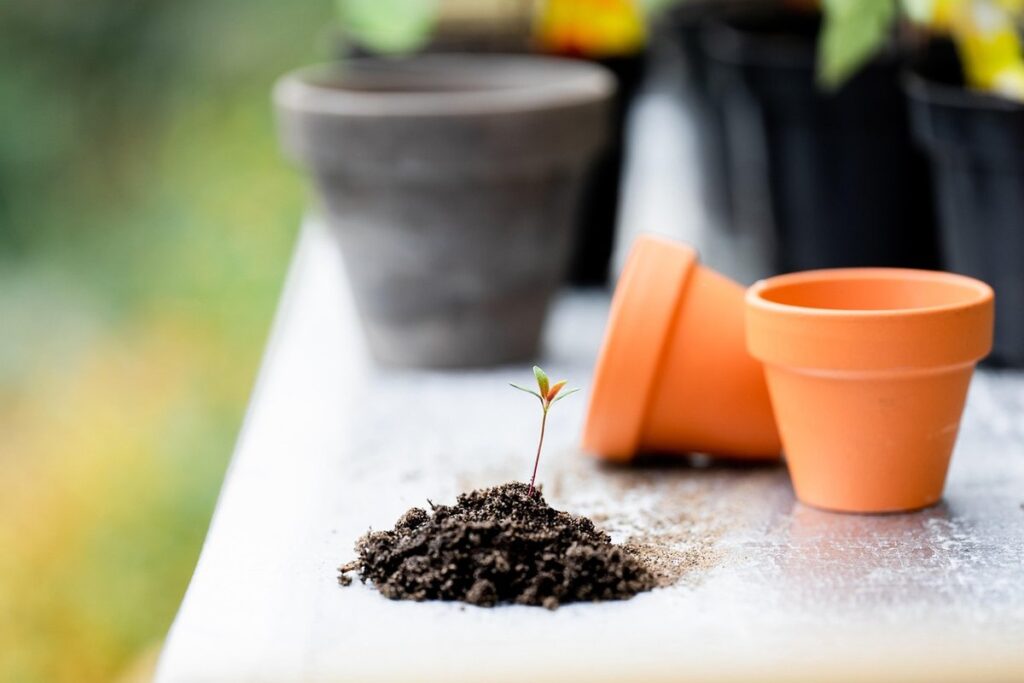
Making your own potting soil at home can be a game-changer for gardeners on a budget or those looking for complete control over their plant’s growing environment. Not only is DIY potting soil cost-effective, but it also allows you to choose the right ingredients and ratios that cater specifically to your plants’ needs. Store-bought potting mixes often contain additives and fertilizers that can be detrimental to certain types of plants or the environment. In this article, we’ll walk you through a simple and effective recipe for creating your own potting soil mix at home using readily available materials. We’ll cover the essential ingredients, their ratios, and techniques to ensure you end up with a healthy and thriving plant. By following our DIY recipe, you can create a customized potting soil that promotes optimal growth and helps your plants flourish.
Choosing the Right Ingredients
When it comes to making potting soil, selecting the right ingredients is crucial for your plants’ health and growth. Let’s break down what you need to know about choosing the perfect mix of materials.
Understanding the Purpose of Each Ingredient
When creating your own potting soil recipe, it’s essential to understand the role of each ingredient and how they contribute to a well-balanced mix. Let’s break down some common components you’ll likely encounter: peat moss, vermiculite, perlite, and organic matter.
Peat moss is a primary ingredient in most potting mixes, providing acidity and water retention properties. It helps maintain the soil’s pH level and prevents over-drying. Vermiculite, on the other hand, is used to improve drainage and prevent waterlogged conditions. This lightweight, porous material allows excess moisture to escape while keeping roots well-oxygenated.
Perlite is another essential component that enhances aeration and reduces soil density. Its primary function is to break up clay particles and prevent compaction, which can hinder root growth. Finally, organic matter like compost or worm castings plays a crucial role in replenishing the soil’s nutrient supply and supporting microbial life.
To create an effective potting mix, it’s essential to combine these ingredients in the right proportions. A general rule of thumb is to use 20-30% peat moss, 10-20% vermiculite, 5-10% perlite, and 50-60% organic matter. Adjusting this ratio will depend on your specific plant requirements and soil type.
Commonly Used Materials for DIY Potting Soil
When it comes to creating a well-balanced potting mix, you’ll want to use materials that provide optimal drainage, retain moisture, and support healthy root growth. Here are some commonly used ingredients for DIY potting soil:
Coconut coir is an excellent choice for improving drainage and aeration in your potting mix. This sustainable alternative to peat moss can help reduce waterlogged soil while maintaining moisture levels. It’s also rich in fiber, which supports beneficial microbial activity.
Compost is another essential ingredient that adds vital nutrients and organic matter to your potting mix. You can use store-bought compost or make your own by recycling kitchen scraps and yard waste. Worm castings, also known as vermicompost, are a nutrient-rich byproduct of worm digestion. They’re packed with microorganisms that promote plant growth and defense.
When combining these materials, remember to balance their proportions according to the specific needs of your plants. For example, if you’re growing vegetables or herbs, use more compost and worm castings for optimal nutrient delivery.
Gathering Ingredients and Tools
To get started, you’ll need to gather a few essential ingredients and tools for making your own potting soil, which we’ll outline below. Let’s take a look at what you’ll need!
Measuring the Right Proportions
When it comes to making potting soil from scratch, measuring out ingredients accurately is crucial. It’s easy to get carried away with enthusiasm and end up with a batch that’s either too dense or too light.
To avoid this, make sure you’re using the right tools for the job: a balance or scale specifically designed for gardening or cooking use. These will give you precise measurements in grams or ounces, allowing you to add just the right amount of each ingredient.
Don’t rely on volume measurements alone – it’s surprising how different ingredients can be when measured by weight versus volume. For example, peat moss is incredibly light and fluffy, while perlite is extremely dense. Using a balance will help you strike the perfect balance in your potting mix.
Take a few minutes to double-check your measurements before mixing everything together. Trust us: it’s worth the extra effort to get it right the first time!
Essential Tools for Mixing and Blending
When it comes to creating a uniform potting soil, having the right tools for the job is essential. You’ll want to make sure you have all the necessary equipment on hand before starting your DIY potting soil recipe. A good quality shovel or spade is a must-have for digging and mixing ingredients together.
In addition to a shovel, a trowel is also a useful tool for scooping out small amounts of dry ingredients or mixing wet components into the potting soil. You’ll also need a mixing bowl that’s large enough to hold all your ingredients comfortably. A stainless steel or plastic bowl is ideal as they’re easy to clean and won’t rust.
For larger batches, an electric mixer can be a real time-saver. These machines are specifically designed for heavy-duty mixing and blending and can help you get the job done quickly and efficiently. When choosing a mixer, look for one with multiple speed settings to ensure you’re not over- or under-mixing your ingredients.
Remember to also have a set of gloves on hand to protect your hands from dry ingredients and soil particles. With these essential tools in place, you’ll be well on your way to creating your own high-quality potting soil at home.
Preparing the Ingredients
Before you start mixing and blending, it’s crucial to prepare your ingredients properly, so let’s break down the essential steps for measuring and organizing each component.
Sterilizing and Rinsing Materials
Sterilizing and rinsing ingredients is an essential step in creating potting soil. To prevent pests and diseases from affecting your plants, it’s crucial to eliminate any potential contaminants. One way to sterilize ingredients is by using heat. For example, you can heat compost at 160°F (71°C) for 1-2 hours to kill off any weed seeds or pests.
Another method is using chemical sterilization agents like hydrogen peroxide. Mix 3% hydrogen peroxide with water according to the manufacturer’s instructions and soak your ingredients for several hours before rinsing them thoroughly. This will help eliminate fungal diseases, nematodes, and other microorganisms that can harm plants.
It’s also important to rinse your ingredients thoroughly after sterilization to remove any remaining chemicals or debris. You can use a fine-mesh sieve or cheesecloth to filter out small particles. This step is crucial in maintaining the quality of your potting soil and ensuring it remains free from contaminants.
When rinsing, use cold water to prevent washing away beneficial microorganisms that are essential for plant growth. By following these steps, you can create a clean and safe environment for your plants to thrive.
Mixing Wet and Dry Components
When mixing wet and dry components, it’s essential to achieve the right balance. Dry materials like perlite or vermiculite help improve drainage and aeration, while peat moss adds moisture retention and nutrients. To combine them effectively:
* Start by measuring out the desired amount of dry ingredients according to your recipe.
* Sift or aerate these components to prevent clumping and ensure even distribution.
* Gradually add in the wet component (such as peat moss) while mixing thoroughly.
* Use a gentle folding motion with a large spoon or spatula, working from the bottom up. This will help distribute the liquid evenly without compacting the mixture.
* Continue mixing until the dry and wet components are fully incorporated and the mixture resembles a uniform blend.
It’s crucial to note that overmixing can lead to compacted particles, reducing soil’s water-holding capacity. Stop mixing once you’ve achieved an even balance of wet and dry materials, as further mixing will only cause harm.
Creating the Potting Soil Mix
Now that we’ve discussed the ingredients, let’s dive into creating the perfect blend of potting soil by mixing them together just right. We’ll walk you through this crucial step next.
Combining Ingredients in Specific Ratios
When combining ingredients for your potting soil mix, it’s essential to follow a specific recipe. This will ensure that your soil has the right balance of nutrients and structure for optimal plant growth.
Start by measuring out the dry ingredients first, such as peat moss, vermiculite, and perlite. Use a digital scale or measuring cups to get accurate measurements. For example, if your recipe calls for 2 parts peat moss to 1 part vermiculite, you would measure out 200 grams of peat moss and 100 grams of vermiculite.
Next, add the wet ingredients, such as compost or manure tea, to the dry ingredients in a separate container. Mix well until everything is fully incorporated. Be careful not to overmix, as this can lead to compacted soil that won’t drain properly.
Some key ratios to keep in mind include:
* 2:1 peat moss to vermiculite
* 1:1 compost to perlite
* 3:1 coconut coir to worm castings
Remember to adjust these ratios based on your specific plant needs and climate. For example, if you’re growing vegetables that prefer acidic soil, you may want to use more peat moss and less vermiculite.
When mixing your ingredients, it’s essential to get the right balance of air pockets and water-holding capacity. This will ensure that your plants have access to oxygen and moisture as needed.
Adding Essential Nutrients and pH Adjusters
When creating your potting soil mix, it’s essential to incorporate essential nutrients and pH adjusters for optimal plant growth. Fertilizers provide the necessary macronutrients and micronutrients for healthy root development, stem growth, and fruit production.
Choose a balanced fertilizer that is specifically designed for containers, such as 10-10-10 NPK (nitrogen-phosphorus-potassium). You can also use organic options like fish bone meal or alfalfa meal. Follow the package instructions for application rates, usually between 1/4 to 1 teaspoon per gallon of potting soil mix.
For pH adjusters, you’ll need either lime to raise the pH (alkaline) or sulfur to lower it (acidic). Test your potting soil mix with a pH meter or pH test kit to determine its current pH level. Most plants prefer a slightly acidic to neutral pH between 6.0 and 7.0. If necessary, add small amounts of lime or sulfur according to the manufacturer’s instructions.
Remember that over-fertilizing can harm your plants, so start with a light application rate and adjust as needed based on plant growth and soil conditions.
Testing and Optimizing the Potting Soil Mix
Now that you have a custom potting soil mix, it’s time to put it to the test. This section will guide you through testing and optimizing your DIY potting soil recipe for optimal plant growth.
Understanding pH Levels and Their Importance
When testing and optimizing your potting soil mix, it’s essential to understand pH levels and their importance. pH is a measure of how acidic or alkaline the soil is, with a range of 0-14. A pH level between 6.0 and 7.0 is considered neutral, while values below 6.0 are acidic and above 7.0 are alkaline.
Most plants thrive in slightly acidic to neutral pH levels, but some may require more extreme conditions. For example, azaleas and rhododendrons prefer a low pH of around 5.5-6.5. On the other hand, cacti and succulents can tolerate higher pH levels up to 8.0.
To test your potting soil’s pH level, you can use a DIY kit or send it to a lab for analysis. The most common method is using litmus paper or pH testing strips, which provide an instant reading. However, these methods may not be as accurate as more advanced testing kits like the one using pH indicator powder.
It’s crucial to monitor your potting soil’s pH level regularly and adjust it accordingly to ensure optimal plant growth.
Adapting Your Recipe Based on Plant Requirements
When working with different plant types, it’s essential to adjust your potting mix recipe accordingly. Each plant has unique requirements, and getting it right can make a significant difference in their growth and health.
For example, if you’re growing plants that prefer well-draining soil like cacti or succulents, you’ll want to increase the amount of perlite or sand in your mix to prevent waterlogged conditions. On the other hand, plants like ferns and peace lilies thrive in moist environments, so you can reduce the proportion of perlite and add more peat moss.
Another factor to consider is the pH level of your potting mix. Some plants, such as azaleas and blueberries, require acidic soil with a lower pH, while others like roses and tomatoes prefer slightly alkaline conditions. To adjust for this, you can add elemental sulfur or lime to your mix to bring the pH within the desired range.
Some popular plants that have specific potting mix requirements include:
• Succulents and cacti: High perlite or sand content, well-draining
• Ferns and peace lilies: High peat moss content, moist conditions
• Azaleas and blueberries: Acidic pH (around 4.5-6), high peat moss content
• Roses and tomatoes: Slightly alkaline pH (around 6.0-7.0), balanced mix with compost
By considering these factors and making adjustments to your potting mix recipe, you can create a tailored blend that meets the specific needs of each plant.
Troubleshooting Common Issues with DIY Potting Soil
We’ve all been there – a beautiful potting mix that just won’t drain right, or plants struggling to thrive in soil that’s too dense. Let’s troubleshoot these common issues together.
Addressing pH Imbalance or Nutrient Deficiencies
If you’ve created your own potting soil recipe and are experiencing pH imbalance or nutrient deficiencies, don’t worry – it’s an easy fix. To address these common issues, start by testing the pH level of your potting soil using a pH meter or testing kit. Most plants prefer a slightly acidic to neutral pH range between 6.0 and 7.0.
If your pH is too high (alkaline), add elemental sulfur or peat moss to lower it. Conversely, if your pH is too low (acidic), mix in some dolomitic limestone to raise it. Be cautious not to over-correct, as this can be just as detrimental as the initial imbalance.
Another potential issue is nutrient deficiencies. If you notice yellowing leaves, stunted growth, or other signs of malnutrition, re-examine your potting soil recipe and consider adding a balanced fertilizer or individual nutrients like nitrogen, phosphorus, or potassium. You can also try using compost tea or worm castings to provide beneficial microbes and micronutrients.
By adjusting the pH level and nutrient balance in your DIY potting soil, you’ll be well on your way to creating an ideal growing environment for your plants.
Tips for Preventing Pests and Diseases in Your Garden
When creating your own potting soil mix, it’s essential to take preventive measures against pests and diseases that can harm your plants. A healthy and balanced soil mixture will help promote root growth and reduce the risk of issues arising.
One way to prevent pests is by incorporating ingredients with natural pest-repelling properties into your potting mix. For instance, crushed eggshells provide a physical barrier for slugs and snails while also adding calcium to the soil. You can also use neem cake or diatomaceous earth to repel insects naturally.
To avoid diseases, ensure that you’re using clean ingredients and following proper mixing techniques. Keep your workspace sanitized, and wash your tools frequently. You should also sterilize any materials like containers or seed trays before using them with the potting mix.
Adequate air circulation around plants is vital for preventing moisture buildup, which can lead to fungal diseases. By incorporating perlite or vermiculite into your mix, you’ll improve drainage and aeration.
Frequently Asked Questions
Can I use leftover potting soil to create my new DIY mix, or should I start from scratch?
You can repurpose some of your old potting soil, but it’s essential to mix it with fresh ingredients to avoid contamination and nutrient depletion. Start by adding a 1:1 ratio of fresh peat moss, vermiculite, or perlite to the leftover soil. This will help replenish nutrients and ensure your new mix is balanced.
How do I store my homemade potting soil to maintain its effectiveness?
To keep your DIY potting mix effective, store it in an airtight container, such as a plastic bin or bag. Keep the container away from direct sunlight, moisture, and extreme temperatures. You can also add a desiccant packet to absorb excess moisture.
Can I use coconut coir as a substitute for peat moss?
Yes, coconut coir is a viable alternative to peat moss. It provides similar benefits while being more sustainable and environmentally friendly. However, keep in mind that it may require additional pH adjustments, as coconut coir tends to be slightly alkaline.
How often should I re-pot my plants using the DIY potting soil mix?
Re-pot your plants every 6-12 months or when they show signs of nutrient depletion. This ensures your plants continue to receive the necessary nutrients and aeration. Monitor your plant’s growth, and adjust the frequency based on their specific needs.
What are some common mistakes to avoid when creating my own potting soil mix?
Common pitfalls include incorrect pH levels, inadequate aeration, and over-reliance on single ingredients. To avoid these issues, carefully measure and balance your ingredients, ensure proper mixing techniques, and test your final product before using it in your garden.