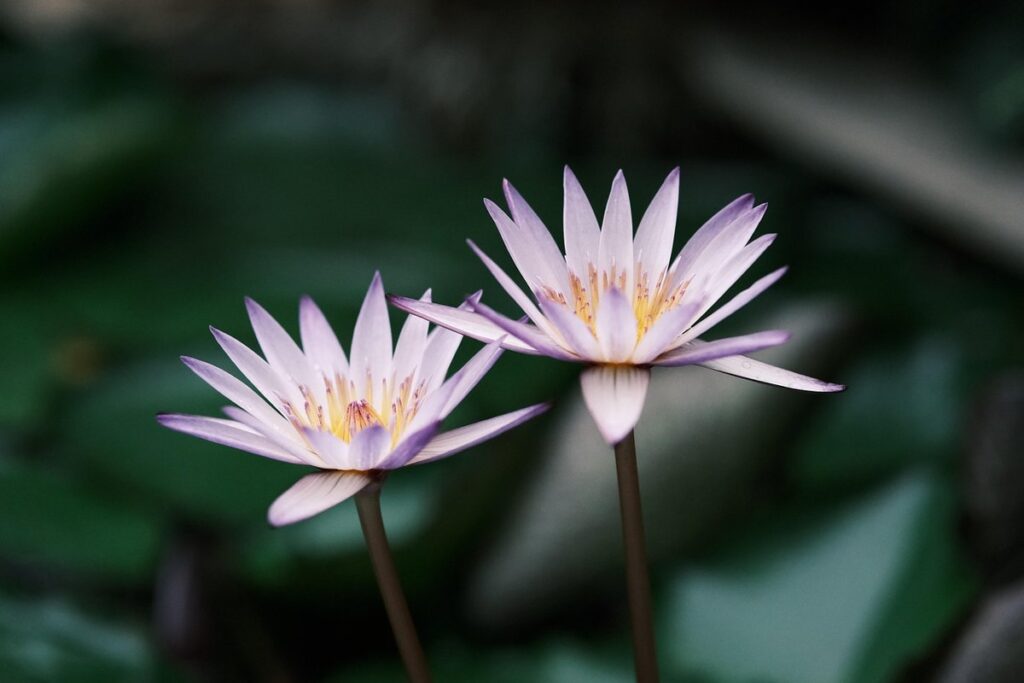
Peace lilies are known for their elegant white blooms, but if your plant is struggling to flower, you’re not alone. Many peace lily owners face this issue, and it can be frustrating when you’re trying to enjoy the beauty of your plant. The lack of flowers on your peace lily isn’t just a matter of aesthetics; it can also indicate underlying problems that need attention. From improper lighting to pests and diseases, there are several reasons why your peace lily might not be blooming. In this article, we’ll explore the common causes of a non-flowering peace lily and provide effective solutions to encourage blooming, including tips on proper care, pest control, and pruning techniques to get your plant back on track.
Why Your Peace Lily Isn’t Blooming
You’ve noticed your peace lily isn’t blooming and you’re wondering what’s going wrong. Let’s explore the possible reasons behind this issue together.
Lack of Bright Light
When it comes to encouraging your peace lily to bloom, bright light is one of the most critical factors to consider. Peace lilies typically require a certain amount of direct sunlight to produce flowers. However, the intensity and duration of the light can greatly impact flowering. For example, if your peace lily is exposed to too much direct sunlight, it may become scorched or discolored, which can further hinder blooming.
To promote healthy growth and flowering, it’s essential to provide your peace lily with bright, indirect light. East- or west-facing windows are ideal for these plants, as they receive gentle morning or afternoon sun without being exposed to harsh midday rays. If you’re unable to place your peace lily near a window, consider using grow lights that emit low-wattage intensity. Aim for 12-14 hours of light exposure daily to encourage blooming.
Keep in mind that some varieties of peace lilies can tolerate lower light conditions, but even these will benefit from some direct sunlight or supplemental lighting. Monitor your plant’s response to the new light arrangement and adjust accordingly.
Insufficient Watering or Overwatering
Correct watering is crucial for peace lilies to bloom. When it comes to these tropical plants, getting the moisture level just right can be a challenge. If you overwater, you risk drowning your peace lily’s roots and depriving them of oxygen. This will not only prevent blooming but also lead to root rot and other issues.
On the flip side, underwatering will cause stress to the plant, making it more difficult for it to produce flowers. To avoid this, check the soil moisture by sticking your finger into the top inch of soil. If it feels dry, it’s time to water. If you’re unsure, wait another day or two before checking again.
A good rule of thumb is to water your peace lily once a week during the spring and summer months when it’s actively growing. During fall and winter, reduce watering to once every 10-14 days as growth slows down. Adjusting your watering schedule accordingly will help prevent overwatering and promote healthy blooming.
Temperature Extremes
Temperature extremes can significantly impact your peace lily’s flowering potential. Peace lilies prefer a consistent temperature between 65°F (18°C) and 80°F (27°C), but they can tolerate temperatures as low as 55°F (13°C) or as high as 90°F (32°C) for short periods.
However, prolonged exposure to extreme temperatures can cause stress, leading to flowering issues. If your peace lily is exposed to temperatures below 55°F (13°C), it may go dormant, stopping flowering altogether. On the other hand, temperatures above 85°F (29°C) can cause the plant to drop its buds or not produce flowers at all.
When moving your peace lily to a new environment, acclimate it gradually to the new temperature range. Start by placing the plant in a room with a similar temperature for a few days before moving it to its final location. This will help prevent shocking the plant and ensure a smooth transition. Keep in mind that sudden changes in temperature can cause more harm than good, so patience is key when introducing your peace lily to a new environment.
Peace Lily Soil and Fertilization Issues
When it comes to peace lilies not flowering, soil and fertilization issues are often a culprit. Let’s dive into how to address these potential problems and get your plant blooming again.
Poor Soil Quality
When it comes to growing peace lilies, the type of soil used is often overlooked but plays a crucial role in their overall health and blooming success. One common issue that can prevent peace lilies from flowering is poor soil quality, particularly if the potting mix lacks proper drainage.
Peace lilies thrive in well-draining soils that allow excess water to escape quickly, preventing root rot and other problems associated with standing water. If your peace lily’s potting mix is dense or heavy, it can cause water to collect around the roots, leading to root rot and ultimately preventing blooming. To address this issue, consider repotting your peace lily in a high-quality potting mix specifically designed for tropical plants like peace lilies.
If repotting isn’t feasible, you can try adding amendments to improve soil drainage and fertility. Mix in 1-2 tablespoons of perlite or sand to increase the soil’s water-holding capacity while allowing excess moisture to drain away. This will help ensure your peace lily receives the right balance of nutrients and water to promote healthy growth and blooming.
Inadequate Fertilization
Fertilizers play a crucial role in promoting healthy plant growth, including encouraging peace lilies to produce flowers. A balanced fertilizer provides essential nutrients like nitrogen, phosphorus, and potassium that support overall plant development. However, using the right type of fertilizer is key – peace lilies prefer a slightly acidic to neutral soil pH, ranging from 5.5 to 7.0.
When selecting a fertilizer for your peace lily, look for products labeled as “balanced” or “all-purpose,” containing equal amounts of nitrogen (N), phosphorus (P), and potassium (K). Avoid high-nitrogen fertilizers, which can promote leaf growth but inhibit flowering. A general-purpose 20-20-20 fertilizer is a good starting point.
For optimal results, apply a balanced fertilizer during the growing season, typically from spring to fall. Dilute the recommended dosage to half-strength to avoid burning your plant’s roots. For example, if the package recommends using one tablespoon of fertilizer per gallon of water, use only half that amount for your peace lily. This will ensure you provide essential nutrients without over-fertilizing and potentially hindering flowering.
Pest and Disease Problems
Let’s dive into some common issues that might be causing your peace lily to skip blooming, such as pest and disease problems. These can easily go unnoticed if you’re not checking your plant regularly.
Common Peace Lily Pests
When it comes to peace lilies not flowering, pests can often be the culprits behind this issue. These pesky critters feed on the plant’s nutrients and energy, making it difficult for the peace lily to produce blooms.
Some of the most common pests that infest peace lilies include spider mites, mealybugs, scale insects, and aphids. Spider mites are tiny, spider-like creatures that spin webs on the leaves and stems of the plant. Mealybugs are small, white, cottony-looking bugs that feed on the sap of the plant, causing curled or distorted leaves.
To manage these pests, you can try using neem oil or insecticidal soap as a natural control method. Mix the solution according to the label instructions and spray it directly on the affected areas. For more severe infestations, you may need to use chemical pesticides, but be sure to follow the instructions carefully to avoid harming your plant.
It’s also essential to maintain good hygiene practices when tending to your peace lily. Regularly inspect the plant for signs of pests and treat any infestations promptly to prevent them from spreading.
Fungal Diseases Affecting Peace Lilies
Fungal diseases can be devastating to peace lily plants, and root rot is one of the most common afflictions. This condition occurs when the roots become waterlogged, creating an ideal environment for fungal growth. As a result, the plant’s vascular system becomes compromised, preventing it from absorbing essential nutrients.
Root rot symptoms include yellowing leaves, soft stems, and a foul odor emanating from the soil. If left unchecked, root rot can spread to other parts of the plant, ultimately leading to its demise. To prevent root rot, ensure that your peace lily is planted in well-draining potting mix and avoid overwatering.
When treating an infected peace lily, remove any affected roots and repot the plant in a sterile potting mix. Apply a fungicide specifically designed for indoor plants, following the product’s instructions carefully. Prune any damaged leaves or stems to prevent further spread of the disease.
Monitor your peace lily closely for signs of fungal diseases and take prompt action if you notice any unusual changes. Regular repotting, proper watering habits, and good air circulation can go a long way in maintaining a healthy peace lily.
Plant Health Issues
Let’s dive into some common plant health issues that might be causing your peace lily not to bloom, such as root rot and pests.
Root Bound Conditions
When peace lilies become root bound, their ability to bloom can be severely impaired. This condition occurs when the roots of the plant outgrow its container and need more room to expand. As a result, the plant may stop producing new flowers or fail to rebloom altogether.
To determine if your peace lily is root bound, gently remove it from its pot and inspect the roots. If they’re wrapped around each other or circling the inner edges of the container, it’s likely time for repotting. To avoid causing damage, start by watering the plant thoroughly a day before repotting to make the soil easier to handle.
Choose a pot that is only 1-2 sizes larger than the original one, and gently loosen the roots with your fingers or a blunt instrument like a chopstick. Avoid cutting any of the roots, as this can cause shock and potentially lead to further problems. Once the roots are relaxed, place them in the new pot and firm the soil gently around them. Water sparingly after repotting to prevent waterlogged soil.
Symbiotic Relationships in Peace Lilies
Beneficial microorganisms play a crucial role in maintaining plant health, including promoting flowering. In the case of peace lilies, these microbes help break down nutrients and make them available to the plant. Research has shown that plants with a balanced microbial community are more likely to produce flowers.
To promote symbiotic relationships between your peace lily and beneficial microorganisms, practice organic gardening methods such as using compost tea or worm casting liquid as a fertilizer. These natural amendments enhance soil biodiversity and provide essential nutrients for optimal growth. You can also encourage beneficial microbes by repotting your peace lily in well-draining potting mix infused with beneficial bacteria.
Another way to nurture beneficial microorganisms is through proper watering habits. Avoid overwatering, which can lead to root rot and disrupt the delicate balance of beneficial microbes. Instead, water your peace lily when the top inch of soil feels dry to the touch. By adopting these organic gardening practices, you can create a healthy environment for your peace lily to thrive and potentially produce beautiful flowers.
Common Mistakes Leading to No Flowers
When a peace lily isn’t producing flowers, it can be frustrating – but many of these issues are avoidable by identifying and correcting common mistakes. Let’s take a closer look at what might be going wrong.
Misunderstanding Dormancy Periods
When it comes to peace lilies, many gardeners assume that if they’re not blooming, it’s because the plant is stressed or neglected. However, dormancy periods can also play a significant role in this scenario. A dormancy period for a peace lily is essentially a time when the plant stops producing flowers and focuses on growing new foliage. This natural cycle usually occurs after the plant has finished flowering.
Environmental factors can impact how long these dormancy periods last or even trigger them prematurely. For instance, a sudden drop in temperature or an increase in watering frequency can cause a peace lily to skip its normal blooming period altogether. On the other hand, some gardeners intentionally induce dormancy by withholding water and fertilizers for a few weeks, which can actually stimulate new blooms.
To avoid confusion, it’s essential to understand that a dormancy period is not necessarily a sign of stress or neglect but rather a natural part of your peace lily’s growth cycle.
Expecting Instant Blooms
One of the most common misconceptions about peace lilies is that they will bloom instantly after being planted. Unfortunately, this isn’t the case. Peace lilies typically take time to adjust to their new environment and develop the necessary energy reserves before producing flowers.
It can take anywhere from 6-18 months for a peace lily to produce its first flower, depending on factors such as light, water, temperature, and nutrition. During this period, the plant will focus on developing its roots and foliage rather than flowering. If you’re eager to see your peace lily bloom, make sure it’s receiving sufficient light (high indirect sunlight or artificial lighting). Aim for around 12-14 hours of bright light per day.
To encourage blooming, also ensure that your peace lily is receiving the right amount of water and nutrients. Avoid overwatering, which can lead to root rot and suppress flowering. Use a balanced fertilizer during the growing season (spring-fall) to promote healthy growth and blooming potential. By being patient and providing optimal care, you’ll be more likely to enjoy those beautiful white blooms on your peace lily.
Encouraging Peace Lily Flowers with Proper Care
To encourage blooming on your peace lily, let’s dive into the essential care practices that will help bring out the best in these beautiful flowers. Regular watering and fertilization are key steps to get started.
Adjusting Environmental Conditions
To encourage your peace lily to bloom, it’s essential to create an environment that simulates its natural habitat. One of the most critical factors is light, as peace lilies require bright, indirect light to produce flowers. If you’re keeping your plant in a low-light area, consider moving it to a brighter spot or supplementing with grow lights.
Temperature also plays a crucial role, and peace lilies prefer temperatures between 65-80°F (18-27°C). Avoid placing them near heating vents, radiators, or drafty windows. Consistent temperatures will help your plant thrive and promote blooming.
Watering schedules are another critical aspect to consider. Peace lilies need moist soil but can be susceptible to root rot if the soil is too wet. Water your peace lily when the top inch of soil feels dry, and avoid getting water on the leaves or crown. This will help prevent diseases that might cause your plant to produce no flowers.
By adjusting these environmental conditions, you’ll create a welcoming space for your peace lily to bloom.
Tips for Pruning and Maintenance
Regular pruning is essential for promoting healthy growth and blooming in peace lilies. When peace lily flowers fail to appear, it’s often a sign that the plant needs attention. Pruning not only helps maintain the plant’s appearance but also encourages new blooms.
For tropical peace lilies (Spathiphyllum wallisii), remove any dead or dying leaves and flower stalks. Cut back the tallest stalks by one-third to promote bushy growth. Use a pair of sharp, sterile scissors to prevent spreading diseases.
In contrast, for species like Spathiphyllum cannifolium, prune back the leaves to about half their length. This helps reduce moisture loss through transpiration and directs energy towards flowering.
When pruning your peace lily, always work from the base upwards to avoid damaging new growth. Prune during the spring or summer months when the plant is actively growing. This allows the plant to recover quickly and direct its energy towards producing new flowers.
Frequently Asked Questions
What are the most common mistakes peace lily owners make that prevent blooming?
Peace lily owners often mistake a dormant period for a lack of flowering potential. This can lead to overfertilization or repotting, which can further stress the plant and hinder blooming. Be patient and give your peace lily time to bloom naturally.
How long does it take for my peace lily to recover from pests or diseases?
After treating your peace lily for pests or diseases, allow 2-3 weeks for the plant to fully recover before expecting new growth or flowering. Monitor your plant closely during this period and adjust care accordingly to prevent future issues.
Can I propagate my peace lily from a section with no flowers?
Yes. Peace lilies can be propagated from leaf cuttings or division, even if the original plant is not blooming. This method allows you to create new plants that may produce more flowers than the original.
What are some signs of root bound conditions in peace lilies?
Peace lily roots can become constricted when potting media dries out too quickly, causing stress and hindering growth. Check for yellowing leaves or slow growth, which may indicate a need to repot your peace lily into a larger container with fresh soil.
How often should I water my peace lily during its blooming season?
During the flowering period, increase watering slightly but avoid overwatering. Water your peace lily thoroughly when the top 1-2 inches of potting media feels dry to the touch. Reduce watering after blooming has stopped to prevent rot and stress on the plant.