Propagating nerve plants can be a game-changer for any plant enthusiast, as it allows you to multiply your favorite varieties and share them with friends. But if you’re new to plant propagation, it’s easy to get intimidated by the process. Not anymore! With this comprehensive guide, we’ll walk you through the different methods of propagating nerve plants, from leaf cuttings to division, and provide expert tips for success.
In this article, we’ll cover everything you need to know to successfully reproduce your beloved nerve plant. You’ll learn how to prepare your mother plant, choose the right propagation method, and care for your new baby plants until they’re ready to thrive on their own. By following our step-by-step guide, you’ll be well on your way to multiplying your favorite nerve plant varieties and enjoying a lush, thriving collection.
Introduction to Nerve Plant Propagation
Let’s dive into the basics of propagating nerve plant, starting with a fundamental understanding of how to multiply this unique and fascinating species.
What is Nerve Plant Propagation?
Nerve plant propagation is the process of creating new plants from existing ones, either through division, leaf cuttings, or stem sections. This essential skill for plant enthusiasts allows them to multiply their favorite nerve plants, share them with friends and family, or simply have a constant supply of fresh plants.
When it comes to propagating nerve plants, understanding the different methods is crucial. Division involves separating the roots of mature plants, while leaf cuttings involve rooting individual leaves on a new potting mix. Stem sections, on the other hand, require cutting a section of the stem and allowing it to develop its own root system.
By mastering these techniques, you can expand your nerve plant collection and share the joy with others. Whether you’re looking to start a small indoor garden or create a unique gift for a fellow plant enthusiast, nerve plant propagation is an essential skill to possess. With practice and patience, you’ll be able to successfully propagate nerve plants and enjoy the rewards of having more of these beautiful, delicate specimens in your life.
Importance of Propagation in Nerve Plants
Propagating nerve plants offers numerous benefits that make it an essential practice for both hobbyists and professional growers. One of the primary advantages is increasing their numbers. By propagating nerve plants, you can multiply them rapidly, ensuring a steady supply of these unique and captivating plants. This is particularly useful when trying to maintain a balanced environment or share plants with fellow enthusiasts.
Propagation also opens up opportunities for creating new hybrids by crossing different varieties, which can lead to the development of even more fascinating traits. For instance, combining the variegation patterns of two different nerve plant species could result in an entirely new and striking appearance.
Another significant benefit is cost reduction. By propagating your own plants, you’ll no longer need to rely on external sources, thereby saving money that would have been spent on purchasing additional plants or seedlings. Furthermore, propagation allows for a level of control over the process, enabling you to select specific traits and cultivate healthier plants.
Understanding Nerve Plant Anatomy for Successful Propagation
To successfully propagate your nerve plant, it’s essential to understand its unique anatomy and how it affects the rooting process. Let’s break down the key components of a nerve plant stem.
Leaf Structure and Function
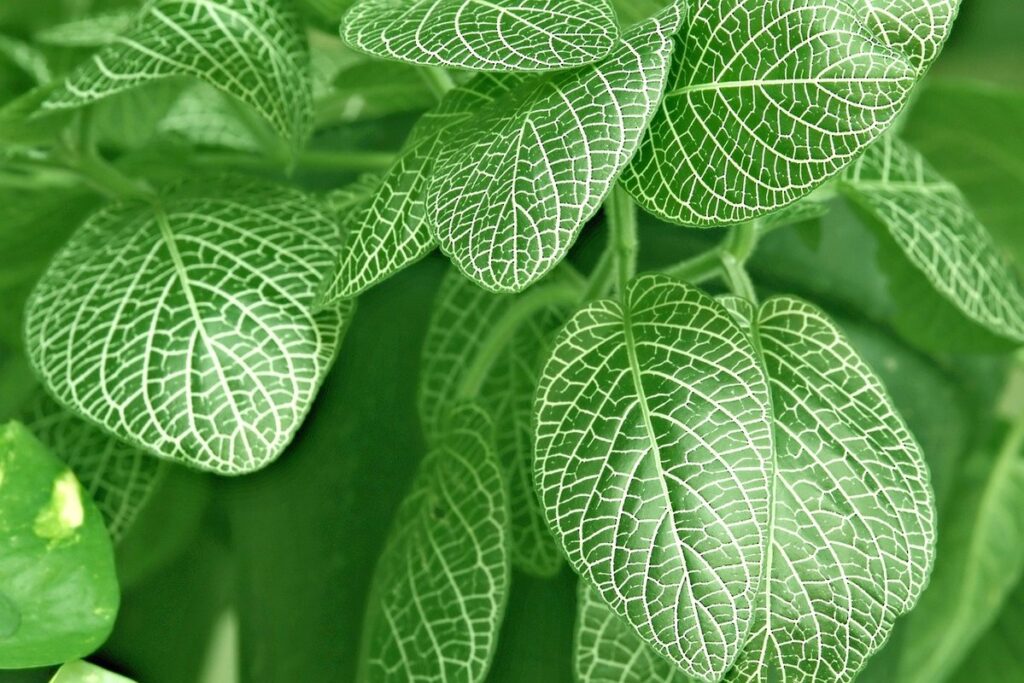
The nerve plant’s (Fittonia spp.) unique leaf structure and function are essential to understand for successful propagation. The leaves of the nerve plant are typically small, round, or oval-shaped and have a prominent network of veins that resemble nerves, hence its common name.
One key feature of the nerve plant’s leaves is their thick, fleshy texture, which helps retain moisture and protects them from environmental stressors. This adaptation allows the plant to thrive in low-light conditions, making it an excellent choice for indoor spaces with limited natural light.
In terms of function, the veins on the leaf surface play a crucial role in transporting nutrients and water throughout the plant. The dense network of veins enables efficient nutrient distribution, supporting healthy growth and development.
When propagating nerve plants, understanding their leaf structure is vital. When selecting leaves for propagation, look for those with multiple nodes (points where leaves meet the stem), as these will have a higher chance of producing new roots. Avoid leaves that are too old or damaged, as they may not produce viable cuttings.
Root Development and Its Role in Propagation
Roots play a crucial role in nerve plant propagation, as they are responsible for absorbing water and nutrients from the soil. To encourage healthy root development, it’s essential to provide your nerve plant with optimal growing conditions. Make sure the potting mix is well-draining, and the plant is not overwatered, which can lead to rot and weaken the roots.
When rooting nerve plant cuttings, use a sharp, sterile knife or pruning tool to minimize damage to the stem and encourage the development of new roots. Dip the cut end into a rooting hormone powder or liquid to stimulate root growth. Place the cutting in a glass of water or a propagation tray filled with a moistened potting mix. Keep the environment humid by covering the container with a clear plastic bag.
Within 2-4 weeks, you should start to see roots emerging from the node where the stem was cut. Once the new roots are around 1-2 inches long, transfer the cutting into a small pot filled with well-draining potting mix. Avoid handling the roots excessively, as this can cause damage and slow down further growth.
Methods of Nerve Plant Propagation
To successfully propagate your nerve plant, you’ll want to learn multiple methods that cater to your needs and environment, so let’s dive into the most popular techniques.
Stem Cuttings Method
Propagating nerve plants using stem cuttings is a popular and effective method. To get started, you’ll need a few pieces of equipment, including a sharp, clean knife or pruning tool, a potting mix specifically designed for propagation, and a clear plastic bag or cloche to maintain humidity.
To take the cuttings, choose healthy stems with at least two sets of leaves. Cut just below a node using your pruning tool, making sure each cutting is around 2-3 inches long. Remove lower leaves to prevent them from rotting in the potting mix, leaving only the top set of leaves intact.
Prepare the potting mix by moistening it slightly, then plant the cuttings about 1-2 inches deep, burying the node. Cover with a clear plastic bag or cloche to maintain humidity and warmth, which will encourage rooting. Place in bright, indirect light but not direct sunlight, as this can cause the cutting to dry out.
Rooting typically takes 7-14 days, during which time you should keep the soil consistently moist but not waterlogged. Once roots have developed, remove the bag or cloche and transfer the new plant to a well-draining potting mix in a small pot. Keep the soil lightly watered and fertilized as usual for your nerve plants.
Leaf Cuttings Method
When it comes to propagating nerve plants using leaf cuttings, timing is crucial. The best time to take leaves is during the spring and summer months when the plant is actively growing. Choose healthy leaves with at least two nodes, as these will have a higher chance of rooting successfully.
To prepare the leaves for propagation, carefully twist or cut them from the mother plant, making sure each section has at least one node. Remove lower leaves to prevent moisture loss, and trim any weak or damaged areas to promote root development. Next, dip the cut ends into a rooting hormone powder or liquid to stimulate root growth.
Once prepared, place the leaf cuttings in a propagation tray filled with a well-draining potting mix, such as perlite or vermiculite. Water gently but thoroughly, and provide bright indirect light. Keep the soil consistently moist during this period, but avoid overwatering, which can lead to root rot. With proper care, you should start to see roots develop within 1-3 weeks.
Propagation through Division
Now that you know how to propagate nerve plant through leaf cuttings, let’s dive into another reliable method: division. This technique involves separating healthy roots and rhizomes from the mother plant.
Preparing Nerve Plant Roots for Division
When preparing to divide a nerve plant, it’s crucial to carefully separate the roots without causing damage. This step is often overlooked but is essential for successful division. To begin, gently remove the pot from its container and examine the root system. You’ll notice that the roots of the nerve plant are thin and fibrous, making them prone to breakage.
To minimize the risk of damage, use a sharp, sterile tool or a chopstick to carefully tease apart the roots. Start by separating the largest roots first, working your way down to the smaller ones. Be cautious not to pull on the roots too aggressively, as this can cause them to snap. Instead, gently wiggle and loosen them until they separate cleanly.
Once you’ve separated the roots, inspect each section for any signs of damage or rot. If you notice any damaged areas, it’s best to discard that portion of the plant and start again with a healthy section. By taking the time to carefully separate the roots, you’ll give your nerve plant the best chance at thriving in its new home.
Dividing Established Plants
When dividing established nerve plants, it’s essential to prepare properly to avoid damaging the roots and ensure healthy growth. Start by choosing a mature plant with multiple stems, as this will provide you with several sections to divide.
To begin, fill a large container or sink with lukewarm water to gently soften the soil. This makes it easier to separate the plant’s roots without causing them significant damage. Next, carefully remove the plant from its pot and gently rock it back and forth to loosen the roots.
Identify the nodes where the stems meet the roots, as these are ideal locations for separation. Use a sharp, sterile tool or your fingers to gently pry the sections apart, making sure each section has at least one node and some roots. Trim any damaged or circling roots with clean scissors or pruning shears. Once divided, plant the new sections in well-draining potting mix, firming the soil gently around them.
Water thoroughly after planting, and keep the soil consistently moist during the first few weeks as the new plants establish themselves.
Aftercare and Maintenance of New Plants
Now that you’ve successfully propagated your new nerve plant, it’s essential to provide the right care for them to thrive. This means paying attention to their watering, lighting, and fertilization needs.
Ideal Conditions for New Plants
When you first introduce new nerve plant propagations to their environment, it’s essential to provide them with ideal conditions that will help them establish a strong root system and adapt quickly. The temperature range for new nerve plants is between 65°F to 75°F (18°C to 24°C), which is slightly cooler than the preferred temperature of mature nerve plants.
In terms of humidity, keep the environment around your new nerve plant propagation consistently moist but not waterlogged. A humidifier can be a great investment if you live in a dry climate or plan on propagating during the drier months. As for light exposure, provide bright, indirect light, but avoid direct sunlight as it may cause scorching and hinder healthy growth.
A good rule of thumb is to place your new nerve plant propagation near an east- or west-facing window, where they can receive gentle morning or afternoon sun without becoming scorched. By replicating the conditions found in their natural habitat, you’ll be giving your new nerve plants a solid foundation for successful establishment and long-term growth.
Common Challenges Faced During Propagation
One of the most frustrating aspects of propagating nerve plants is dealing with common challenges that can arise during this delicate process. As you work to multiply your prized specimens, it’s not uncommon to encounter setbacks that hinder your success. One of the most significant issues faced by nerve plant enthusiasts is rotting cuttings.
Rotting cuttings occur when the propagation medium becomes too damp or waterlogged, causing the cutting to succumb to root rot. To prevent this, ensure your propagation medium is well-draining and not overwatered. Monitor your cuttings closely for signs of rot and adjust your watering schedule accordingly.
Another common challenge is slow rooting times. Nerve plants are notorious for taking their time to develop roots. Be patient and allow the cutting sufficient time (typically 2-3 weeks) to establish a robust root system before transplanting it into individual pots.
Lastly, some growers struggle with low success rates due to factors such as contaminated equipment or inadequate sterilization of propagation tools. Practice proper hygiene by using clean scissors, pruning tools, and propagation mediums to minimize the risk of contamination. Regularly disinfect your equipment between uses to prevent spreading diseases that can decimate your nerve plant collection.
To overcome these challenges, remember to provide your cuttings with optimal conditions for growth: bright indirect light, stable temperatures (65-75°F), and sufficient humidity (50-60%). Avoid overwatering, as this is the primary cause of rotting cuttings.
Tips and Tricks for Experienced Gardeners
As you’ve gained experience propagating nerve plants, it’s time to take your skills to the next level – here are expert tips to refine your technique. Master these nuances and watch your plant collections thrive.
Advanced Techniques for Nerve Plant Propagation
For experienced gardeners looking to take their nerve plant propagation skills to the next level, there are several advanced techniques worth exploring. One approach is using growth regulators to stimulate root development and increase the chances of successful propagation.
Growth regulators such as rooting hormones or cytokinins can be applied directly to the cut stem or leaves of a nerve plant cutting, promoting cell division and root formation. By using these chemicals, you can significantly improve your propagation rates, especially when working with difficult-to-root species like some varieties of Nephthytis.
Another advanced technique is grafting, which involves joining a piece of stem from one nerve plant to the root system of another. This method allows you to leverage the strengths of multiple plants and create hybrids with desirable traits such as disease resistance or unique foliage patterns.
When attempting grafting, it’s essential to match compatible species and use a sterile grafting medium to prevent infection. With practice and patience, successful grafting can result in rapid propagation and the creation of new, dynamic plant varieties.
Optimizing Your Propagation Station
As an experienced gardener, you’re likely well-versed in creating optimal growing conditions for your plants. However, when it comes to propagating nerve plant, a few tweaks can make all the difference in ensuring healthy and successful results. Let’s dive into optimizing your propagation station.
First, consider the space where you’ll be working on your nerve plant propagation. A dedicated area with good ventilation is essential, as the process of rooting cuttings can release ethylene gas, which may affect other nearby plants. If possible, position your propagation station near a window or use a grow light to provide adequate lighting.
In terms of equipment, you’ll need a clean and sterile workspace, including a propagation tray or container filled with a well-draining medium, such as perlite or vermiculite. A small spray bottle for watering and a rooting hormone powder or liquid will also come in handy.
Conclusion: Mastering the Art of Nerve Plant Propagation
As you’ve made it through this comprehensive guide on propagating nerve plant, you’re now equipped with the knowledge and skills necessary to master this art. Remember, propagation is an ongoing process that requires patience, dedication, and a willingness to learn from your mistakes. By following the techniques outlined in this guide, you’ll be able to successfully propagate your nerve plants and enjoy a constant supply of new plants for years to come.
Don’t be discouraged if not every attempt at propagation yields results – it’s all part of the process! With time and practice, you’ll refine your technique and develop a keen eye for spotting the telltale signs of healthy growth. And as you continue to propagate and care for your nerve plants, you’ll become increasingly attuned to their unique needs and characteristics, ultimately becoming a true master of this delicate art.
Frequently Asked Questions
How do I know if my nerve plant is ready for propagation?
Concisely check for a few key signs: the mother plant has reached maturity, new growth appears around the edges of the pot, and roots have developed sufficiently to support new growth. This usually happens when your nerve plant has been actively growing for 6-8 weeks.
What’s the ideal time frame for propagating nerve plants?
Propagate during spring or summer when nerve plants are most active, as this reduces the risk of disease and promotes healthy growth in newly propagated plants. Avoid propagating during fall or winter months when plants are dormant.
How often should I water my newly propagated nerve plant?
Water your new baby plant sparingly at first, allowing the soil to dry slightly between waterings. As it grows, gradually increase watering frequency to keep the soil consistently moist but not waterlogged. Monitor for signs of overwatering or underwatering and adjust accordingly.
Can I propagate nerve plants year-round using different methods?
Yes! While some propagation methods are more suitable during certain seasons (e.g., leaf cuttings in spring), you can experiment with multiple techniques throughout the year to find what works best for your specific climate, plant conditions, and needs. Be prepared to adapt and adjust as needed.
How long does it take for a newly propagated nerve plant to establish itself?
Nerve plants typically take 2-3 months to become established after propagation. During this time, provide optimal growing conditions (adequate light, moderate temperatures, consistent watering) and monitor their development closely. As they grow stronger, you can gradually move them to larger pots or share with friends once mature enough.