Are you ready to enjoy a delicious harvest of juicy tomatoes right from your own outdoor space? If so, you’re probably already thinking about choosing the perfect patio tomato planter. But have you ever wondered how to make sure it thrives in small spaces like patios or balconies? Choosing the right planter and creating optimal growing conditions are just the beginning – knowing how to troubleshoot common issues can be the difference between a bountiful harvest and a disappointing one.
In this article, we’ll cover everything you need to know to grow delicious tomatoes on your patio. We’ll discuss how to select the ideal tomato variety for small spaces, prepare perfect growing conditions, and tackle common problems like pests and diseases. By following these simple tips and tricks, you’ll be enjoying homegrown tomatoes in no time!
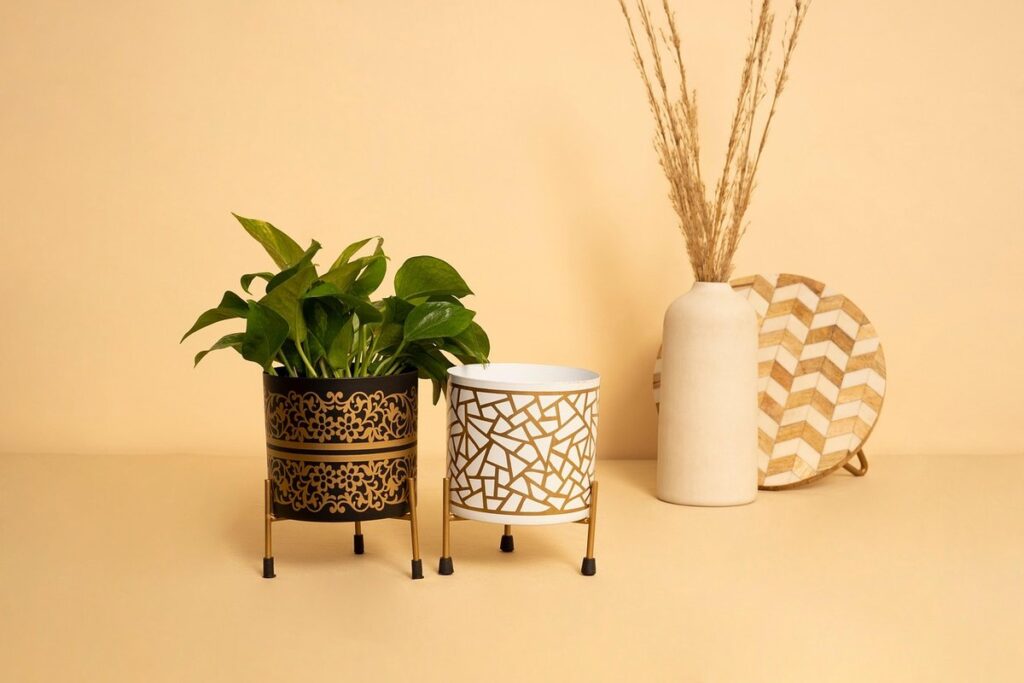
Choosing the Right Patio Tomato Planter
When selecting a patio tomato planter, it’s essential to consider factors such as size, material, and drainage to ensure optimal growth for your tomatoes. Let’s dive into these key considerations together.
Types of Patio Tomato Planters
When it comes to choosing the right patio tomato planter, one of the most important decisions you’ll make is selecting a type that suits your needs and space constraints. There are several types of patio tomato planters available, each with its own set of benefits and drawbacks.
Self-watering planters are perfect for busy gardeners or those who tend to forget to water their plants regularly. These planters have a built-in water reservoir that allows the soil to draw water as needed, ensuring your tomatoes receive consistent moisture levels. However, they do require more space due to their larger size and may be heavier when filled with soil.
Hanging baskets are ideal for small spaces or balconies, allowing you to grow multiple tomato plants in a compact area. They also provide excellent air circulation around the plants, reducing the risk of fungal diseases. Nevertheless, they can dry out quickly if not monitored closely, requiring more frequent watering.
Tiered planters offer multiple levels of planting space, perfect for growing a variety of herbs or other companion plants alongside your tomatoes. They often feature built-in irrigation systems, making it easier to manage water distribution among the different tiers.
Material Options for Patio Tomato Planters
When it comes to choosing a patio tomato planter, selecting the right material is crucial for a successful harvest. Different materials offer varying levels of durability, weight capacity, and resistance to weather conditions.
Plastic planters are lightweight, affordable, and easy to clean, making them an excellent choice for beginners. However, they may not be as durable as other options and can become brittle in extreme temperatures. Ceramic planters, on the other hand, are more robust and resistant to heat and cold. They also add a decorative touch to your patio, but can be heavy and prone to cracking.
Wooden planters bring a natural charm to outdoor spaces but require regular maintenance to prevent rot and insect damage. Metal planters are durable and long-lasting but may rust if not properly coated or maintained.
Ultimately, the best material for you will depend on your specific needs and preferences. Consider factors like weight capacity, weather resistance, and ease of cleaning when making your decision.
Space-Saving Design Considerations
When it comes to growing tomatoes on a patio or balcony with limited space, choosing the right design for your planter is crucial. Compact growth patterns and clever design features can make all the difference in maximizing yields.
Consider a vertical trellis system that allows your tomato plant to grow upwards rather than outwards. This not only saves space but also encourages fruiting and improves air circulation. For example, you could use a self-watering planter with built-in supports for the stem as it grows. Alternatively, look for planters with integrated trellising systems or clips that can be easily attached to a nearby wall or railing.
Pruning is another key factor in optimizing space and promoting healthy growth. Regularly remove lower leaves and any weak stems to encourage the plant’s energy to focus on fruit production rather than leaf growth. By combining compact designs, vertical support, and pruning techniques, you’ll be amazed at how much more productive your patio tomato planter can be, even in the smallest of spaces.
Preparing the Perfect Growing Conditions
To grow juicy tomatoes from your patio planter, you’ll need to create a warm and sunny environment that’s perfect for your plants’ needs. Let’s dive into preparing the essential growing conditions.
Soil Requirements for Patio Tomatoes
When it comes to growing patio tomatoes, the right soil mix is crucial for their health and productivity. The ideal pH level for tomatoes is between 6.0 and 7.0, but they can tolerate a slightly acidic to neutral range. However, if you’re using a pre-mixed potting soil, check its pH level before planting.
A well-balanced soil mix should contain a combination of organic matter, nutrients, and good drainage properties. Aim for a mix with at least 20-30% compost or worm castings to provide essential nutrients and improve soil structure. You can also add a balanced fertilizer (10-10-10) according to the manufacturer’s instructions.
To create your own growing medium, combine equal parts of topsoil, perlite or vermiculite, and peat moss or coconut coir. This mix will provide good drainage, retain moisture, and support healthy root development. If you’re using a container with poor drainage, consider adding more perlite or vermiculite to improve water flow.
Remember, it’s also essential to repot your patio tomatoes every 2-3 months as they grow to maintain optimal soil conditions and prevent nutrient deficiencies.
Companion Planting Strategies
When it comes to growing juicy tomatoes outdoors on your patio tomato planter, companion planting is an excellent strategy to consider. By selecting the right plants to grow alongside your tomatoes, you can improve growth habits, enhance flavor profiles, and even control pests naturally.
For example, basil and mint are popular companion plants for tomatoes as they repel pests like whiteflies and aphids. In fact, a study by the University of California found that basil reduced aphid populations on tomato plants by 75%. Other complementary plants like marigold, nasturtiums, and chives also have natural pest-repelling properties.
When choosing companion plants for your patio tomato planter, make sure to select varieties that thrive in similar conditions. For instance, if your tomatoes prefer full sun and well-drained soil, choose companion plants with the same requirements. Consider a 3:1 or 4:1 ratio of tomato plants to companion plants to ensure optimal growth and benefits. By implementing companion planting strategies, you can create a thriving and balanced ecosystem on your patio, leading to healthier and more productive tomatoes.
Temperature and Sunlight Considerations
When it comes to growing delicious tomatoes on your patio, understanding the optimal temperature and sunlight requirements is crucial for success. Patio tomatoes thrive in temperatures between 65-70°F (18-21°C), making them perfect for spring or fall gardens when daytime temperatures are mild. However, be aware that extreme heat can cause blossoms to drop, reducing fruit set.
To ensure your patio tomatoes receive the right amount of sunlight, aim for at least six hours of direct sunlight per day. If your patio receives partial shade, consider supplementing with grow lights to provide the necessary light for fruit production. To protect your planters from extreme temperatures, invest in a high-quality planter material that can withstand temperature fluctuations. You can also use reflective mulch or white paint on the sides of the planter to reflect heat and keep the soil cooler.
If you’re growing in an area with intense sunlight, consider using UV-resistant window film on your patio windows to filter out excessive light. This will help prevent scorching and ensure your tomatoes receive the right amount of light for optimal growth. By understanding and accommodating these temperature and sunlight requirements, you’ll be well on your way to growing juicy and delicious tomatoes in your patio planter.
Planting and Caring for Patio Tomatoes
To grow juicy patio tomatoes, you’ll need to know how to plant them properly and provide ongoing care, including pruning and watering. Let’s dive into the nitty-gritty of making your tomatoes thrive.
Seed Selection and Starting
When it comes to growing patio tomatoes, selecting the right variety is crucial for success. You’ll want to choose compact and bushy plants that thrive in containers and receive plenty of sunlight. Some popular options include cherry tomatoes like ‘Red Robin’ or ‘Sungold’, which produce an abundance of bite-sized fruit perfect for snacking.
For those who prefer a more traditional tomato experience, ‘Patio’ or ‘Tiny Tim’ are great choices. These varieties are bred specifically for container growing and will produce smaller yet flavorful fruits. If you’re looking to grow larger tomatoes in your patio planter, consider the compact Roma variety ‘Roma Violette’. This heirloom produces elongated fruit that’s perfect for sauces and salads.
When it comes to sowing seeds, you can either start them indoors 6-8 weeks before the last frost date or directly seed into the planter. If indoor sowing, use a well-draining potting mix and keep the soil consistently moist. Once seedlings have 2-3 sets of leaves, transplant them into the patio planter. Alternatively, sow seeds directly in the planter after the last frost date, following the same spacing guidelines for mature plants.
Watering and Irrigation Tips
When it comes to growing patio tomatoes, watering and irrigation are crucial factors that can make or break your harvest. Consistent water supply is essential to prevent stress and disease, which can lead to reduced yields and even plant death. Here’s what you need to know:
Watering frequency depends on the weather conditions in your area. If it’s hot and dry, you’ll need to water more frequently, ideally every 2-3 days. On the other hand, if it’s cool and rainy, you can space out watering to once a week. Check the soil moisture by sticking your finger into the soil up to the knuckle; if the soil feels dry, it’s time to water.
When choosing an irrigation system for your patio planter, look for one specifically designed for containers. These systems usually have built-in timers and drippers that deliver water directly to the roots, reducing evaporation and runoff. Aim for about 1-2 gallons of water per week per plant, depending on its size and growth stage. By following these tips, you’ll be able to provide your patio tomatoes with a consistent and reliable supply of water, ensuring they thrive and produce plenty of juicy fruits.
Fertilization and Pruning Strategies
When it comes to fertilizing your patio tomatoes, you have a variety of options available. Organic choices like compost tea and fish emulsion are excellent alternatives to synthetic fertilizers. Compost tea is made by steeping compost in water, which releases beneficial microbes that promote healthy root growth and nutrient uptake. Fish emulsion, on the other hand, is a liquid fertilizer derived from fermented fish bones.
To make the most of these organic options, use them as a foliar spray or add them to the soil according to the manufacturer’s instructions. A general rule of thumb is to fertilize your patio tomatoes every 2-3 weeks during the growing season. Pruning techniques are also crucial for promoting healthy growth and increasing yields.
To prune your patio tomato plants effectively, remove lower leaves that may be prone to fungal diseases and trim back long stems to encourage bushy growth. Remove any weak or spindly branches, and cut off any suckers (shoots that grow between the main stem and a branch). This will help direct the plant’s energy towards producing more fruit. Regular pruning also reduces the risk of disease spread, as it allows for better air circulation around the plants.
Troubleshooting Common Issues
Don’t worry if things don’t go as planned right away, we’ve got you covered with common issues and their solutions to get your patio tomatoes thriving in no time.
Common Pests and Diseases
When growing patio tomatoes outdoors, it’s essential to be aware of common pests and diseases that can affect their health. One of the most notorious pests is the hornworm, a large green caterpillar that can devour an entire plant in a short period. To control hornworms, hand-pick them at night when they’re most active, or use Bt (Bacillus thuringiensis) spray to kill them.
Aphids are another common pest, feeding on sap and spreading disease. Use neem oil or insecticidal soap to control aphid infestations. Regularly inspect your plants for signs of pests like white powdery patches (fungal infections), black spots (blight), or curled leaves (aphid damage). To prevent these issues, maintain good air circulation around the plant, water wisely to avoid overhydration, and remove weeds that can harbor pests.
Some common diseases affecting patio tomatoes include fungal infections like septoria leaf spot and bacterial spotting. Treat these with copper-based fungicides or streptomycin powder. Regularly inspect your plants for signs of disease and take prompt action to prevent its spread.
Dealing with Weather Extremes
As you enjoy the fruits of your labor – literally – it’s essential to be prepared for extreme weather conditions that can impact your patio tomato planter. Heatwaves, frost, and heavy rainfall can cause damage to the planters or disrupt optimal growing temperatures.
When dealing with intense heatwaves, make sure to provide shade for your plants during peak sun hours (usually between 11 am and 3 pm). You can use a breathable shade cloth or create a makeshift canopy using a gazebo or umbrella. Additionally, increase water intake by about 50% to prevent scorching and promote healthy growth.
To protect against frost, bring the planters under cover or move them to a protected area at night. If you can’t do that, apply a layer of mulch around the plants to insulate the soil and keep it warm. In case of heavy rainfall, ensure proper drainage by checking the planter’s drainage holes are not clogged.
Regularly inspect your planters for signs of waterlogging, which can be detrimental to tomato growth. If you notice water accumulation in the pot or surrounding area, repot the plant in a larger container with better drainage holes or adjust its watering schedule accordingly.
Harvesting and Enjoying Your Patio Tomatoes
Now that you’ve successfully harvested your patio tomatoes, it’s time to enjoy the fruits of your labor and savor their delicious flavor in various dishes. We’ll share some tips on how to make the most of your fresh crop.
Expected Yields and Timing
When it comes to harvesting your patio tomatoes, timing is everything. On average, you can expect to get around 10-20 pounds of fruit per season from a well-maintained patio tomato planter. However, this yield can vary depending on factors like the variety, weather conditions, and how much care you provide.
In terms of when to expect fruit maturity, it usually takes about 60-90 days from sowing seeds or transplanting seedlings for cherry tomatoes, while larger varieties may take up to 120 days. To maximize your harvest period, consider pruning your plants regularly. Remove any weak growth and encourage bushy growth by pinching off the top set of leaves. You can also try training your plants to a trellis or a cage to save space and promote air circulation.
By following these tips, you can prolong the harvest period and enjoy a steady supply of fresh tomatoes throughout the growing season.
Tips for Perfectly Ripe Fruit
When you’ve finally harvested those luscious patio tomatoes, it’s essential to check if they’re perfectly ripe for consumption. One of the most common mistakes gardeners make is picking tomatoes too early or too late, resulting in subpar flavor and texture. To avoid this, look for color changes – a ripe tomato will typically be a deep red or yellow, depending on the variety. However, some patio tomatoes may retain their green hue until they’re fully mature.
Check the skin for any soft spots or bruises; a ripe tomato should have a slight give when pressed gently. Another crucial aspect is texture: a ripe tomato will yield to pressure but still feel firm. If it’s too soft or mushy, it’s overripe and might be better suited for cooking.
Pay attention to scent development as well – a ripe tomato typically emits a sweet, earthy aroma. Once you’ve confirmed your tomatoes are ripe, store them in a cool, dry place away from direct sunlight. For longer storage, wrap the tomatoes individually in paper towels or cloth and keep them refrigerated at around 50°F (10°C). This will slow down the ripening process and help maintain their freshness for up to five days.
Bonus: Patio Tomato Planter Maintenance
To ensure your patio tomato planter thrives, let’s dive into some essential maintenance tips to keep your tomatoes healthy and productive all season long. We’ll cover common issues and solutions to address them promptly.
Seasonal Cleaning and Maintenance
Regular cleaning and maintenance are essential for ensuring your patio tomato planter remains healthy and productive throughout the growing season. To keep your planters in top condition, create a schedule that includes regular tasks such as emptying the planters, scrubbing containers, and checking for damage or wear.
Start by emptying the planters every 1-2 weeks to prevent root bound conditions and promote healthy growth. Use a gentle soap solution to scrub away any debris, dirt, or algae buildup on the container walls. This will help maintain air circulation and prevent fungal diseases from taking hold.
Check your planters for damage or wear at least once a month. Look out for cracks, holes, or signs of rust, which can compromise the structural integrity of the planter. Replace any damaged containers to avoid contaminating the soil with chemicals from worn-out materials.
Remember, prevention is key when it comes to maintaining your patio tomato planter. Regular cleaning and maintenance will help prevent pest infestations, root rot, and other issues that can devastate your tomato crop. By staying on top of these tasks, you’ll be able to enjoy a bountiful harvest of juicy tomatoes all season long.
Upgrading or Replacing Planters
As you continue to grow and harvest tomatoes from your patio planter, it’s inevitable that you’ll need to upgrade or replace it eventually. The lifespan of a patio tomato planter can vary greatly depending on factors such as the material used, how well it’s maintained, and how much use it gets. On average, a high-quality patio planter can last for 2-3 years before showing signs of wear and tear.
One key indicator that your planter needs an upgrade is when you notice a decline in plant growth or reduced fruit production. This could be due to the planter’s inability to provide sufficient drainage or air circulation. If this happens, it may be time to consider replacing your planter with a newer model that offers improved features and better performance.
Before disposing of your old planter, consider repurposing or donating it. You can give it a fresh coat of paint and reuse it for herbs or succulents in a different area of your garden. Alternatively, you can donate it to local gardening communities or online forums where it may find new life as a starter kit for beginners.
Frequently Asked Questions
How often should I water my patio tomato plants during hot summer months?
Regular watering is crucial for healthy growth, but be cautious not to overwater. Check the soil daily, and water when the top inch feels dry to the touch. Aim for about 1-2 gallons per week, depending on temperature and humidity.
What are some common pests that target patio tomato plants, and how can I control them?
Pests like hornworms, aphids, and whiteflies can damage your crop. Monitor your plants regularly and use organic controls like neem oil or insecticidal soap to manage infestations. Keep in mind that companion planting with basil or marigold can also help deter pests.
Can I grow patio tomatoes in containers without drainage holes?
While it’s technically possible, it’s not recommended. Tomatoes need good air circulation and healthy roots to thrive, which can be compromised if water sits in the planter. Consider adding a layer of small rocks or broken pottery for improved drainage or using self-watering planters with built-in moisture management.
How do I know when my patio tomatoes are ripe and ready for harvest?
Check for ripeness by gently tugging on the fruit – a ripe tomato will come off easily. Also, look for color changes (most varieties turn from green to yellow, red, or orange) and inspect the skin for slight softening.
Can I use regular garden soil in my patio tomato planter, or do I need specialized potting mix?
Regular garden soil can compact and prevent proper drainage, whereas potting mixes are designed specifically for containers. Opt for a well-draining potting mix to ensure your tomatoes receive the right balance of nutrients and moisture.