Are you tired of buying new fittonia plants every time you want to add some fresh greenery to your space? Propagating fittonia can be a game-changer, not only for your wallet but also for the environment. With a few simple techniques, you can multiply these stunning plants and share them with friends or enjoy having multiple pots around the house.
In this article, we’ll guide you through the process of growing more fittonia plants using stem cuttings and leaf division. We’ll cover essential tips on soil mixes, lighting conditions, and common issues to avoid for a successful propagation experience. By following our comprehensive guide, you’ll be able to multiply your favorite fittonia plants with ease and enjoy their beautiful leaves all year round.
Understanding Fittonia and Its Importance
To successfully propagate Fittonia, it’s essential to first understand its unique characteristics and importance as a houseplant. Let’s dive into what makes Fittonia special.
What is Fittonia?
So, what is Fittonia? You may have come across this beautiful and delicate houseplant while browsing through nurseries or online plant stores. Fittonia, also known as the “mosaic plant,” is a popular species of flowering plants that belongs to the Acanthaceae family. Native to the tropical regions of Central and South America, it’s an ideal choice for indoor gardening due to its adaptability and low-maintenance requirements.
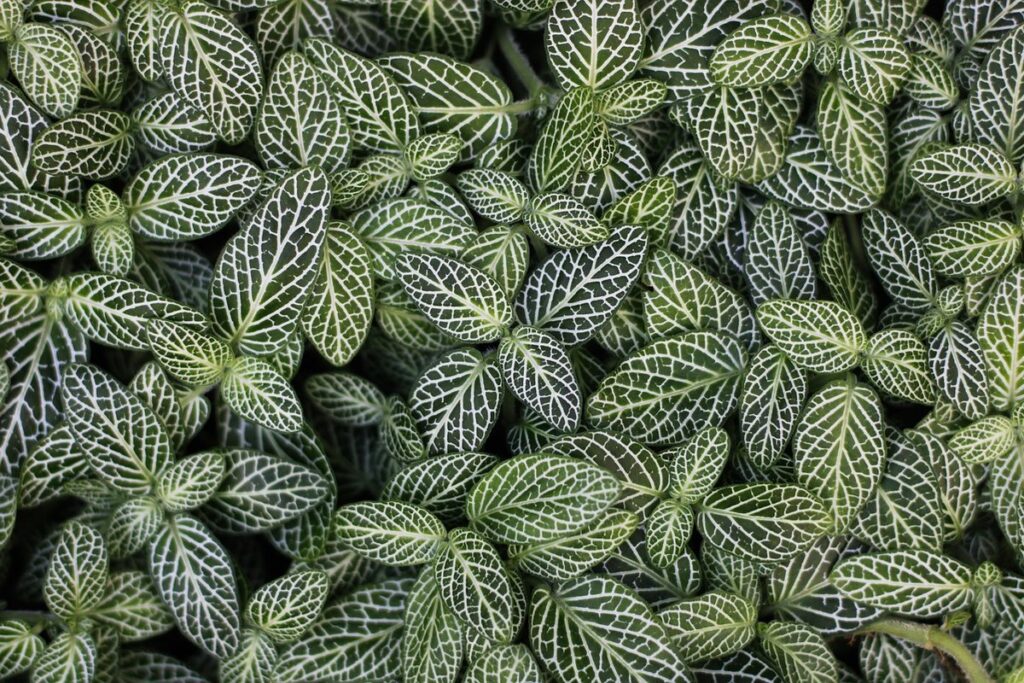
One of the standout characteristics of Fittonia is its striking leaf patterns. The leaves come in a variety of colors and combinations, including white, green, red, and purple, with intricate veining that resembles mosaics – hence its common name. This unique appearance makes it a favorite among plant enthusiasts and interior designers.
Fittonia plants are relatively small, growing up to 12 inches tall and wide, making them perfect for compact spaces or indoor containers. They prefer well-draining soil and moderate watering, which is why they’re an excellent choice for busy people who may forget to water their plants from time to time. With proper care, Fittonia can thrive in a variety of lighting conditions, including low-light areas.
Benefits and Uses of Fittonia
Growing fittonia is not only a great way to propagate new plants, but it also offers numerous benefits that make it an ideal choice for indoor gardening. One of the most significant advantages of fittonia is its ability to purify the air. Studies have shown that this plant can remove toxins and pollutants from the air, improving the overall quality of the air we breathe. This makes it a fantastic addition to any home or office space.
Another benefit of growing fittonia is its low maintenance requirements. Unlike some other plants, fittonia doesn’t demand regular pruning or repotting. It’s relatively easy to care for and can thrive in a variety of conditions, making it perfect for busy individuals or those new to gardening. Its versatility also makes it an excellent choice for decorating indoor spaces – from modern apartments to traditional homes.
In terms of decor, fittonia is incredibly adaptable. You can use its compact growth habit to create a lush, green carpet effect in small spaces or train the stems to cascade down walls and shelves. With proper care, one pot of fittonia can produce multiple offsets that can be easily propagated, providing you with an endless supply of these beautiful plants.
Preparing for Propagation: Choosing Healthy Plants
To grow healthy Fittonia, you’ll need to choose plants with robust roots and vibrant leaves, making the process of propagation more successful. Let’s take a closer look at how to select your plants carefully.
Selecting Fittonia for Propagation
When selecting fittonia plants for propagation, it’s essential to choose healthy specimens with ideal conditions for successful rooting. Start by looking for plants that are between 2-6 inches tall and have a well-developed root system. This age range provides the best balance between being robust enough to thrive after propagation and not too mature, which can make them more challenging to work with.
Inspect the leaves carefully, as they should be a vibrant green color, firm in texture, and free of any yellowing or browning. Avoid plants with damaged or torn leaves, as this can indicate underlying health issues that may affect their ability to propagate successfully.
For optimal results, select fittonia plants with plenty of leaf growth, but not so many that they’re top-heavy or prone to breaking off. A balanced, bushy shape is ideal for propagation, as it allows the plant to focus its energy on producing new roots rather than supporting excessive foliage.
Understanding Root Systems and Health
When it comes to successfully propagating fittonia plants, having a healthy root system is essential. Unfortunately, many plant enthusiasts overlook this crucial aspect, only to be left with disappointing results. A robust and balanced root system allows the new plant to quickly establish itself and thrive.
Signs of an unhealthy or failing root system in fittonia include leaves turning yellow or dropping prematurely, stunted growth, and an overall decline in vigor. These symptoms often result from factors such as underwatering, overwatering, nutrient deficiencies, or exposure to extreme temperatures.
To ensure the success of your propagation efforts, it’s essential to examine the roots before taking cuttings. Look for any signs of disease, rot, or physical damage. Inspect the roots carefully and trim away any dead or diseased tissue with a clean pair of scissors. This will help prevent the spread of disease and encourage healthy root growth in the new plant.
Regular repotting and gentle pruning can also promote healthy root development in your fittonia plants. By maintaining optimal growing conditions, providing adequate nutrients, and regularly inspecting the roots, you’ll be well on your way to successfully propagating this beautiful and delicate species.
Methods of Propagation: Stem Cuttings and Leaf Division
When it comes to propagating Fittonia, two popular methods are stem cuttings and leaf division, each with its own unique benefits and techniques. Let’s dive into the details of these methods.
Stem Cutting Propagation Techniques
When it comes to stem cutting propagation of Fittonia, preparation is key. Begin by selecting healthy mother plants with plenty of nodes and a well-established root system. Cut 3-4 inch stem sections just above a node, making sure each cutting has at least two leaves.
For rooting medium, you can use a mix specifically designed for propagation or create your own blend using a combination of peat moss, perlite, and vermiculite. Moisten the medium but ensure it’s not waterlogged, as this can lead to root rot. Fittonia prefers bright, indirect light, so place the cuttings in a spot with filtered sunlight.
Rooting hormone can be applied to enhance success rates, but it’s not necessary for experienced propagators. Keep the soil consistently moist but not waterlogged during the first few weeks after propagation. Monitor temperature between 65-75°F (18-24°C), as temperatures outside this range can affect rooting and growth.
By following these steps and providing optimal conditions, you should start to see roots develop within 1-2 weeks.
Leaf Division vs. Stem Cuttings: Pros and Cons
When it comes to propagating Fittonia, you have two primary methods at your disposal: leaf division and stem cuttings. Both techniques have their advantages and disadvantages, which we’ll delve into below.
Leaf division is generally the quicker of the two methods, allowing you to produce new plants in as little as 2-3 weeks. This makes it an excellent choice for growers looking to quickly expand their Fittonia collections or fill gaps in their gardens. However, success rates can vary depending on factors such as plant health and handling techniques.
In contrast, stem cuttings tend to be more reliable, with a higher success rate (around 80-90%). This method involves rooting individual stems in water or a propagation medium before transferring them to soil. The drawback is that it takes longer – typically 4-6 weeks – for the new plantlets to develop.
It’s worth noting that stem cuttings can sometimes produce plants with slightly altered morphology, such as variegated patterns or leaf sizes. This might be desirable for some growers seeking to introduce unique characteristics into their collections. Ultimately, the choice between leaf division and stem cuttings comes down to your personal preferences and propagation goals.
Rooting Mediums and Environmental Factors
When it comes to propagating fittonia, understanding the right rooting mediums and environmental factors is crucial for success. We’ll break down the best materials and conditions for healthy growth.
Soil Mixes for Fittonia Propagation
When it comes to propagating Fittonia, choosing the right soil mix is crucial for success. A well-balanced soil composition will provide the necessary aeration, water retention, and nutrient supply for your young plants to thrive.
For optimal results, look for a potting mix that contains a combination of peat moss, perlite, or vermiculite, and sphagnum moss. This blend will help maintain moisture levels while preventing waterlogged soil. A 50:50 ratio of peat moss to perlite or vermiculite is an excellent starting point.
You can also create your own custom mix using a base of coconut coir or peat moss with added perlite, vermiculite, and a pinch of dolomitic limestone for extra calcium and magnesium. This will ensure your Fittonia seedlings receive the necessary nutrients to develop strong roots.
Remember to avoid over-fertilizing, as this can cause more harm than good during the propagation phase. A balanced fertilizer application once the seedlings are established is recommended. By selecting a suitable soil mix and following these guidelines, you’ll be well on your way to successfully propagating Fittonia plants.
Optimizing Lighting and Temperature Conditions
When it comes to growing fittonia plants, optimizing lighting and temperature conditions is crucial for successful propagation. Fittonias thrive in bright, indirect light but can tolerate low-light conditions, making them a great choice for indoor spaces.
To achieve optimal growth, aim for 12-14 hours of artificial lighting per day. You can use LED grow lights or fluorescent lamps to provide the necessary illumination. Natural light is also an excellent option; place your fittonia plants near an east- or west-facing window for gentle morning or afternoon sunlight.
In terms of temperature, keep the room at a consistent 65°F (18°C) to 75°F (24°C). Avoid placing your fittonias near heating vents or drafty areas, as sudden changes in temperature can cause stress. Some growers also use humidifiers to maintain a humidity level between 50% and 60%. This helps prevent the soil from drying out too quickly and keeps the plant’s leaves healthy.
For optimal growth, keep an eye on your plants’ response to lighting conditions. If you notice any discoloration or weak growth, adjust the light levels accordingly. By fine-tuning the lighting and temperature conditions, you’ll be well on your way to successfully propagating fittonia plants that thrive in their new environment.
Troubleshooting Common Issues in Fittonia Propagation
Don’t worry, even the most experienced growers face setbacks when propagating fittonia. In this next part of our guide, we’ll tackle common problems and solutions to get you back on track.
Identifying and Addressing Fungal Diseases
When it comes to fittonia propagation, one of the most common challenges you may encounter is fungal diseases. These can be devastating to your plants, causing yellowing leaves, black spots, and even root rot. Some of the most prevalent fungal diseases affecting fittonia include leaf spot, root rot, and powdery mildew.
To prevent these issues from arising in the first place, it’s essential to maintain good hygiene practices when handling your plants. This includes sterilizing your pruning tools between cuts and ensuring that your soil is well-draining. You should also avoid overwatering, as this creates an ideal environment for fungal growth.
If you do notice signs of a fungal infection, treatment methods can include removing affected areas, improving air circulation around the plant, and applying fungicides specifically designed to target fittonia diseases. Regular monitoring of your plants’ health and prompt action in case of any issues will go a long way in preventing these diseases from taking hold.
Some common symptoms to look out for include white or gray powdery patches on leaves, black spots or patches, and soft or mushy stems. By being aware of these signs and taking preventative measures, you can reduce the risk of fungal infections and keep your fittonia plants healthy and thriving.
Overcoming Root Rot and Bacterial Infections
When propagating Fittonia plants, one of the most common issues you’ll encounter is root rot and bacterial infections. These problems can arise from a combination of factors, including overwatering, poor air circulation, and contaminated soil or water.
To prevent root rot, make sure to repot your Fittonia cuttings in well-draining potting mix, and avoid getting water on the leaves or crown of the plant. Instead, focus on watering at the base of the stems, allowing excess moisture to escape through the drainage holes. Also, ensure that your propagation station has good air circulation to prevent moisture buildup.
If you do notice signs of root rot, such as soft, mushy roots or yellowing leaves, act quickly to correct the issue. Remove any affected areas and repot the plant in fresh, sterile soil. To address bacterial infections, treat the plant with a fungicide specifically designed for indoor plants, following the product’s instructions carefully.
Monitor your propagated Fittonia closely, watching for any signs of disease or pest infestation. With proper care and attention, you can overcome these common issues and enjoy healthy, thriving plants.
Advanced Techniques for Fittonia Propagation
Now that you’ve mastered basic fittonia propagation methods, it’s time to take your skills to the next level and learn advanced techniques for successful plant multiplication.
Air Layering and Budding
Air layering and budding are two advanced techniques that can be used for Fittonia propagation. These methods allow you to grow new plants without taking cuttings or divisions from the mother plant. Air layering involves making a wound on the stem of the parent plant, about 6-8 inches above the soil level, where the node is located. This creates a rooting zone that can develop roots without disturbing the rest of the plant.
Once you have made the incision, apply a rooting hormone to stimulate root growth and cover with moist sphagnum moss or peat moss. The moss will help retain moisture and provide a humid environment for root development. Roots should start developing within 2-6 weeks.
On the other hand, budding involves grafting a bud from one plant onto another. This method is often used in commercial nurseries to produce disease-resistant plants or those with desirable traits. For Fittonia, you can use the nodal cuttings method for budding. However, it’s worth noting that budding requires more expertise and equipment than air layering, making it less suitable for beginners.
Both methods require careful attention to detail, including maintaining high humidity levels, providing optimal light conditions, and ensuring proper temperature regulation. Despite these challenges, successful propagation using these techniques can lead to faster results compared to traditional methods like stem cutting or division. With practice and patience, you can master air layering and budding for Fittonia propagation.
Using Growth Regulators and Pruning Methods
When it comes to controlling the size and shape of your fittonia plants, growth regulators can be a valuable tool. These chemical treatments can slow down cell division and expansion, helping to keep your plants compact and manageable. Popular options for fittonia include plant growth retardants like paclobutrazol or uniconazole. However, it’s essential to use these products judiciously, as over-application can lead to stunted growth and other negative effects.
In addition to regulating growth, pruning is a crucial aspect of fittonia care. Regular pruning encourages bushy growth, promotes healthy root development, and increases yields. To prune effectively, remove any dead or damaged leaves, then cut back stems by about one-third to encourage branching. Cut just above a node (where a leaf meets the stem) to promote new growth from that point.
For best results, prune your fittonia plants when they’re actively growing, typically during the spring and summer months. This will help them recover quickly and continue producing new leaves and stems. By combining growth regulators with regular pruning, you can maintain healthy, well-shaped fittonia plants that thrive in a variety of conditions.
Frequently Asked Questions
Can I propagate Fittonia during any time of the year, or are there certain seasons that work better?
While you can propagate Fittonia at any time, spring and summer months are ideal for optimal growth and rooting. This is because these seasons provide warmer temperatures and higher humidity, which promote healthy root development.
How often should I water my newly propagated Fittonia plants to prevent root rot and bacterial infections?
Water your propagated Fittonia plants sparingly but thoroughly until they establish a robust root system. Watering once a week is usually sufficient, as overwatering can lead to root decay. Make sure the soil has dried slightly between waterings.
Can I use regular potting soil for propagating Fittonia, or do I need a specialized mix?
While regular potting soil works in a pinch, using a well-draining mix specifically designed for tropical plants like Fittonia is recommended. This type of mix helps prevent waterlogged soil and promotes healthy root growth.
What’s the best way to handle fungal diseases that may arise during the propagation process?
To address fungal diseases, remove any affected plant parts, improve air circulation around your propagated plants, and treat with a fungicide specifically designed for houseplants. Ensure you follow the product instructions carefully to avoid harming your Fittonia plants.
Can I propagate multiple stems from one mature plant at once, or should I focus on individual stem cuttings?
It’s generally best to focus on individual stem cuttings to prevent over-feeding the mother plant and ensure each cutting receives sufficient nutrients for optimal growth. However, if you have a particularly robust Fittonia plant, you can try propagating multiple stems simultaneously.