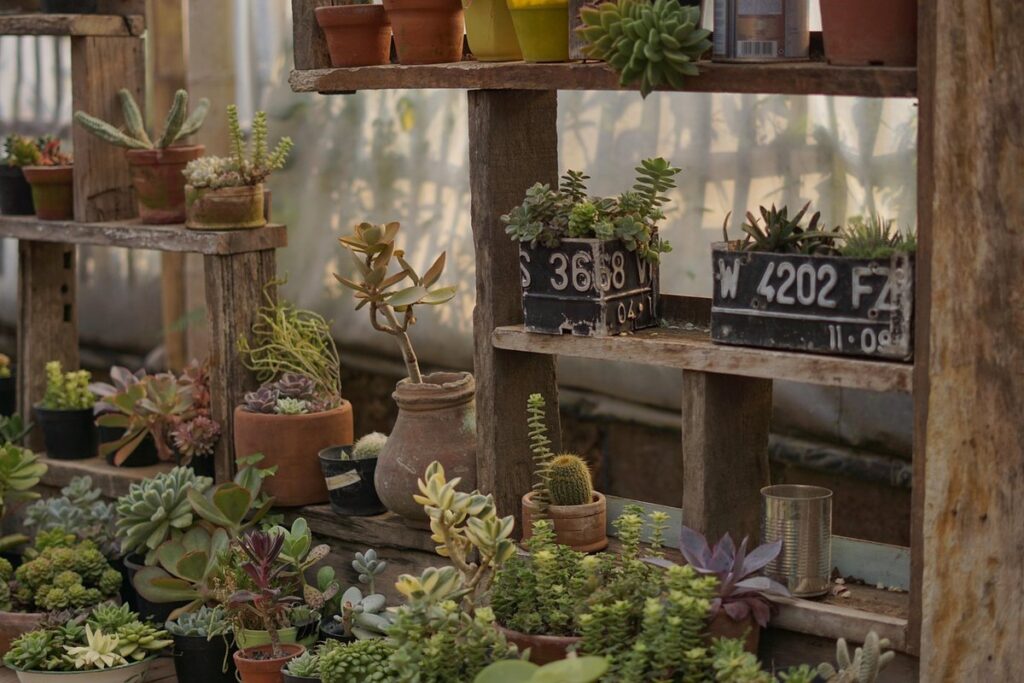
Are you tired of limited growing seasons or struggling to keep your plants thriving indoors? A DIY indoor greenhouse can be just what you need. Not only do they provide a year-round growing space, but they also offer protection from harsh weather conditions and pests. With a well-designed and maintained indoor greenhouse, you can grow your favorite plants all year round, regardless of the season or climate outside.
This guide will walk you through the process of creating a thriving indoor greenhouse in the comfort of your own home. From selecting the perfect location to choosing the right materials, we’ll cover it all. We’ll also delve into essential climate control and maintenance tips to ensure your plants stay healthy and happy. By following this comprehensive guide, you’ll be able to create a lush oasis indoors, no matter what time of year it is outside.
Choosing the Right Location and Size
When it comes to creating a DIY indoor greenhouse, selecting the perfect location and size is crucial for optimal growth and maintenance. Consider the space where your greenhouse will live carefully.
Understanding Lighting Requirements
When it comes to creating a thriving indoor greenhouse, one of the most critical factors to consider is natural light. Most plants require direct sunlight for at least 4-6 hours a day, while others can tolerate partial shade or even artificial lighting. To assess a space’s lighting conditions, start by observing the room during different times of the day. Note the direction of windows and doors, as well as any obstructions like trees or neighboring buildings.
You’ll also want to consider the type of plants you plan to grow in your indoor greenhouse. Some popular options for low-light spaces include Chinese Evergreen, Pothos, and Snake Plant. If you’re set on growing more light-intensive plants, such as tomatoes or herbs, you may need to supplement with artificial lighting.
To determine the optimal location for your indoor greenhouse, take note of any natural light sources in the space. A south-facing window is ideal, but east- or west-facing windows can also work well. If possible, place your greenhouse near a skylight or use mirrors to reflect sunlight into the space. By carefully evaluating and adapting to your space’s lighting conditions, you’ll be able to create a thriving indoor garden that meets the needs of your plants.
Measuring Your Space and Planning the Layout
Measuring your indoor space is crucial to ensure that your DIY indoor greenhouse fits comfortably and provides enough room for your plants to grow. Start by measuring the length, width, and height of the area where you plan to place your greenhouse. Consider the doorways, windows, and any other architectural features that may impact the layout.
Next, think about the size and shape of your greenhouse. A rectangular shape is ideal for most DIY projects, but a square or even circular design can be beneficial if you have limited space. Keep in mind that a larger greenhouse will require more materials and may be heavier to assemble.
To plan a layout that accommodates different plant varieties, consider grouping plants by their growing requirements. For example, place plants that require high humidity near the roof or in a shaded area, while those that prefer dry conditions can be placed near the floor or against a wall. Make sure to leave enough space between each plant for proper air circulation and easy access for maintenance.
Materials and Tools Needed for Building an Indoor Greenhouse
To build a thriving indoor greenhouse, you’ll need the right materials and tools at your disposal. Below are some essential items to gather before starting your project.
Frame Options: Wooden, Metal, or Recycled Materials
When it comes to building an indoor greenhouse, the frame is one of the most critical components. You have three primary options: wooden, metal, and recycled materials. Each has its advantages and disadvantages, which are essential to consider before making a decision.
Wooden frames offer a natural, aesthetically pleasing look and can be more budget-friendly compared to other options. However, they may not be as durable or resistant to rot and insect damage. Cedar wood is a popular choice for greenhouse frames due to its natural resistance to rot and insects.
Metal frames are sturdy, lightweight, and easy to assemble. They also provide better insulation than wooden frames. However, they can be more expensive upfront, and some types of metal may not be suitable for indoor use due to rust concerns. Aluminum is a popular choice for greenhouse frames as it’s durable and resistant to corrosion.
Recycled materials offer an eco-friendly alternative, but their availability and cost can vary widely depending on your location. You may need to get creative in sourcing materials, such as repurposing old pallets or scavenging for reclaimed wood.
Glazing Options: Glass, Acrylic, or Polycarbonate
When it comes to building an indoor greenhouse, choosing the right glazing material is crucial for optimal light transmission and protection from external elements. There are three popular options: glass, acrylic, and polycarbonate.
Glass is a premium choice due to its excellent light transmission (up to 90%) and durability. However, it’s heavy, expensive, and requires regular maintenance to prevent etching and mineral deposits. If budget isn’t a concern, glass can be a great option for large-scale greenhouse projects.
Acrylic glazing offers a more affordable alternative with decent light transmission (around 80-90%). It’s also lightweight and shatter-resistant, making it a popular choice for DIY enthusiasts. However, acrylic is prone to scratches and may degrade over time due to UV exposure.
Polycarbonate sheets are another cost-effective option with good light transmission (around 80-90%) and flexibility. They’re often used in commercial greenhouse projects but can also be suitable for indoor greenhouses. Consider factors like size, weight, and installation ease when selecting glazing materials.
Building Your Indoor Greenhouse Step-by-Step
Now that you have a basic understanding of indoor greenhouses, let’s dive into the hands-on process of building one in your own home. We’ll break it down step by step to ensure success.
Constructing the Frame and Base
To construct the frame and base of your indoor greenhouse, you’ll need to start with the foundation. This is typically a wooden platform that will support the entire structure. Begin by measuring out the area where your greenhouse will sit and marking it with chalk. Next, lay down a layer of gravel or sand to provide drainage and prevent water from accumulating around the base.
Cut four pieces of wood to the correct length for the frame’s vertical posts, and two more for the horizontal beams that will connect them. Assemble the frame by attaching the horizontal beams to the vertical posts using screws or nails. Make sure it’s square and sturdy before moving on. For the base, you can use a pre-made platform or build one from scratch using pressure-treated lumber.
To secure the components together, use wood glue in addition to your chosen fastening method. This will ensure that everything stays in place even under heavy loads. Finally, double-check that all corners are securely locked and the frame is level before proceeding with the rest of the greenhouse construction. With a solid foundation in place, you’ll be well on your way to creating a thriving indoor oasis.
Installing Glazing and Insulation
When installing glazing and insulation in your indoor greenhouse, it’s essential to ensure airtight seals and moisture control. Start by selecting the right materials for your climate and budget. For glazing, you can choose from glass, acrylic, or polycarbonate panels. Consider factors like UV resistance, transparency, and durability when making your decision.
For insulation, prioritize materials with high thermal resistance ratings. Fiberglass batts, spray foam, or reflective barriers are good options. Ensure a snug fit by trimming excess material around edges and corners. Seal any gaps with caulk or weatherstripping to maintain airtight conditions.
Moisture control is crucial in an indoor greenhouse. Use a vapor barrier between the insulation and glazing to prevent condensation buildup. Install a dehumidifier or ventilation system to regulate humidity levels, especially during humid months. Regularly inspect your glazing and seals for signs of wear or damage, addressing issues promptly to maintain optimal conditions. By following these steps, you can create an energy-efficient and climate-controlled indoor greenhouse that thrives year-round.
Climate Control and Temperature Regulation
To create a thriving indoor greenhouse, you’ll need to master climate control and temperature regulation – crucial elements for plant health and growth. We’ll walk you through the essentials of maintaining optimal conditions.
Understanding Temperature Extremes and Plant Tolerance
When building an indoor greenhouse, it’s essential to understand that not all plants thrive in the same temperature conditions. Different species have optimal temperature ranges, and exceeding these limits can lead to stress, reduced growth, or even plant death.
For example, orchids prefer temperatures between 65°F to 75°F (18°C to 24°C), while tropical plants like bromeliads tolerate temperatures up to 90°F (32°C). Some plants, such as cacti and succulents, are more tolerant of temperature fluctuations but still require a minimum temperature threshold.
To monitor temperature fluctuations in your indoor greenhouse, you can use a thermometer or hygrometer. These devices can be placed near the plants or integrated into a central monitoring system. By keeping an eye on temperature readings, you’ll be able to adjust ventilation, heating, and cooling systems to maintain optimal temperatures for each plant species.
As a general rule of thumb, it’s best to aim for daytime temperatures 10-15°F (5-8°C) higher than nighttime temperatures. This allows plants to undergo photosynthesis during the day while avoiding overheating at night. Be sure to research specific temperature requirements for your plants and adjust your greenhouse accordingly to ensure optimal growing conditions.
Humidity Control: Ventilation, Fans, and Dehumidifiers
Maintaining optimal humidity levels is crucial for a thriving indoor greenhouse. Excess moisture can lead to fungal diseases and pest infestations, while inadequate humidity can cause plant stress and reduced growth rates.
To regulate humidity effectively, consider implementing a combination of ventilation techniques. Open windows or use vents to allow fresh air to circulate and stale air to escape. You can also install fans to enhance air circulation within the greenhouse. Position fans near plants to promote healthy growth by providing a gentle breeze that prevents fungal diseases from taking hold.
In addition to mechanical solutions, dehumidifiers are another effective way to manage humidity levels. These devices extract excess moisture from the air, creating a healthier environment for your plants. When choosing a dehumidifier, select one with a high extraction rate suitable for your greenhouse’s size and climate.
Consider using a hygrometer to monitor humidity levels, allowing you to make adjustments as needed. By combining these methods, you’ll be able to create an optimal indoor environment that fosters plant growth and minimizes the risk of disease or pests.
Watering and Irrigation Systems for Your Indoor Greenhouse
When it comes to creating a lush and thriving indoor greenhouse, effective watering and irrigation systems are crucial to your plants’ success. Let’s dive into some essential tips for setting up a reliable system.
Designing a Watering Schedule and Frequency
Creating an effective watering schedule for your indoor greenhouse is crucial to ensure that your plants receive the right amount of moisture. The frequency and timing of watering depend on various factors such as plant species, climate, and environmental conditions.
Start by identifying the specific needs of each plant in your greenhouse. Different plants have varying water requirements; some need frequent watering while others can survive with less water. Research the optimal watering schedule for each type of plant you’re growing.
Consider the climate and location of your indoor greenhouse. If it’s a humid region, you may need to adjust the watering frequency accordingly. Additionally, take into account the temperature fluctuations in your greenhouse, as this will impact evaporation rates and affect how often plants need water.
To create a practical schedule, monitor your plants’ response to watering and make adjustments as needed. Use the “soak and dry” method, where you water thoroughly until the top 1-2 inches of soil feels moist, then allow the soil to dry slightly between waterings. This will help prevent overwatering and ensure that roots grow strong and healthy.
Installing Drip Irrigation or Other Efficient Methods
When it comes to watering and irrigation systems for your indoor greenhouse, efficiency is key. One of the most effective methods is drip irrigation, which delivers water directly to the roots of the plants, minimizing evaporation and runoff. This system consists of a network of tubes and drippers that are placed around each plant, providing just the right amount of moisture.
Another option is self-watering containers, which have built-in water reservoirs that allow plants to draw water as needed. These containers are perfect for indoor greenhouses with limited space or for plants that require consistent moisture levels. You can also consider using a combination of both systems for optimal results.
When choosing an irrigation system for your indoor greenhouse, consider the specific needs of your plants and the climate of your area. For example, if you live in a dry region, a self-watering container may be more suitable than a drip irrigation system. Additionally, make sure to install a timer or moisture sensor to ensure that your plants receive the right amount of water at the right time.
Maintaining Your Indoor Greenhouse: Tips and Best Practices
Now that your DIY indoor greenhouse is up and running, it’s time to focus on keeping it thriving year-round. Here are some essential tips for maintenance and upkeep.
Monitoring and Adjusting Environmental Conditions
Monitoring and adjusting environmental conditions is crucial for optimizing plant growth and health within your DIY indoor greenhouse. You can’t just set it up and forget about it – plants are sensitive to their surroundings and require precise conditions to thrive.
Start by monitoring temperature, humidity, and light levels. Install a thermometer to track the temperature fluctuations in your greenhouse, aiming for a range of 65-75°F (18-24°C) during the day and around 55-60°F (13-15°C) at night. Maintain relative humidity between 40-60% by using a humidifier or dehumidifier as needed.
Lighting is another critical factor; most houseplants require 12-14 hours of indirect light per day. If your greenhouse doesn’t receive sufficient natural light, consider investing in grow lights. Check on the pH level of your soil and adjust it accordingly – most plants prefer a slightly acidic to neutral range (around 6.0-7.0).
Regularly inspect your plants for signs of stress or disease, and make adjustments as necessary. Keep an eye out for pests like spider mites, mealybugs, and scale, and take prompt action if you spot any issues.
Pest Control and Disease Management Strategies
When it comes to maintaining your indoor greenhouse, pest control and disease management are crucial aspects that often get overlooked. As a DIY enthusiast, it’s essential to be aware of common pests and diseases that can affect your plants and learn effective strategies to manage them.
Some common pests found in indoor greenhouses include spider mites, mealybugs, and aphids. These tiny insects can quickly multiply and cause significant damage to your plants if left unchecked. Organic control methods include introducing beneficial insects like ladybugs or lacewings that feed on these pests, using neem oil or insecticidal soap as a pesticide, and ensuring good air circulation within the greenhouse.
Common diseases affecting indoor greenhouses include root rot, leaf spot, and powdery mildew. These conditions can be caused by overwatering, poor ventilation, or excessive humidity. To manage disease effectively, ensure you’re not overwatering your plants, maintain proper temperature and humidity levels, and use fungicides as a last resort.
For example, if you notice white powdery patches on your plant leaves, it could be powdery mildew. In this case, remove the affected leaves, improve air circulation, and treat with a fungicide specifically designed for indoor greenhouses. By being proactive in monitoring your plants and taking swift action when necessary, you can prevent pest and disease outbreaks from occurring.
Frequently Asked Questions
Can I use an existing structure or container as my indoor greenhouse?
You can repurpose a variety of containers, such as old greenhouses, sheds, or even a large tub or aquarium, to create your indoor greenhouse. However, ensure the chosen material is durable and suitable for indoor conditions. Consider factors like insulation, ventilation, and lighting requirements when adapting an existing structure.
How do I maintain humidity levels in my indoor greenhouse during extreme temperatures?
Yes, maintaining optimal humidity levels is crucial, especially during temperature fluctuations. Use a dehumidifier or humidistat to regulate the air moisture level. Regularly inspect your plants for signs of overwatering or underwatering and adjust your watering schedule accordingly.
Can I grow tropical plants in an indoor greenhouse with limited natural light?
Yes, you can still cultivate tropical plants indoors, but it will require more artificial lighting. Choose plants that are tolerant of low light conditions or use LED grow lights specifically designed for this purpose. Make sure to provide adequate air circulation and humidity levels to promote healthy growth.
What is the ideal temperature range for most indoor greenhouse crops?
The ideal temperature range varies depending on the type of plant. Generally, most houseplants thrive in temperatures between 65°F (18°C) and 75°F (24°C). However, some plants like orchids or tropical species may require warmer temperatures up to 80°F (27°C). Always research specific temperature requirements for your chosen crops.
How often should I inspect my indoor greenhouse for pests and diseases?
Regularly inspect your plants every 7-10 days for signs of pests, such as aphids, whiteflies, or spider mites. Also, monitor for fungal diseases like powdery mildew or root rot by examining the plant’s leaves, stems, and roots. Implement integrated pest management strategies to minimize damage and maintain a healthy indoor environment.