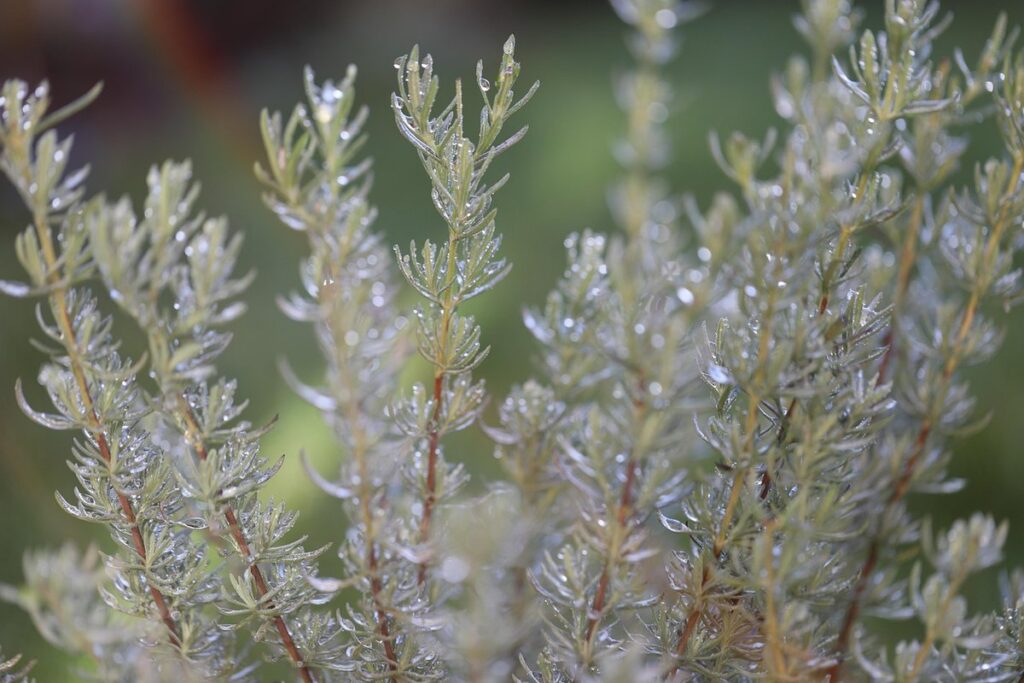
Planting rosemary from seeds can be a rewarding experience, but it requires some finesse. If you’re new to gardening or want to expand your herb collection, successfully germinating rosemary seeds is essential for a bountiful harvest. Not only do rosemary plants repel pests and add flavor to your cooking, but they also thrive in well-draining soil and full sun conditions.
In this article, we’ll walk you through the process of planting rosemary seeds, from preparing the perfect environment to caring for your new seedlings. You’ll learn expert tips on achieving high germination rates, common pests to watch out for, and pruning techniques to promote healthy growth. Whether you’re a seasoned gardener or just starting out, our step-by-step guide will help you grow robust and fragrant rosemary plants that bring joy to your kitchen and garden.
Preparing the Soil and Environment
Before we dive into planting those delicate seeds, let’s ensure your soil and environment are perfect for rosemary to thrive in its new home. This is where preparation meets success.
Choosing the Right Location
When it comes to planting rosemary seeds, choosing the right location is crucial for their successful germination and growth. Rosemary loves sunlight, warmth, and well-drained soil, so select a spot that receives at least 4-6 hours of direct sunlight per day.
Consider the temperature in your area as well – rosemary thrives in temperatures between 65°F to 75°F (18°C to 24°C). If you live in an area with frost, choose a location that provides some protection from harsh winter winds. When selecting soil, make sure it’s loose and well-draining, with a pH level between 6.0 and 7.0.
To identify a suitable location, observe the spot where your rosemary seeds will be planted. Make sure there’s no standing water nearby to prevent root rot. Also, consider planting in a raised bed or container if you have heavy clay soil or poor drainage in your garden. This will give your rosemary roots room to breathe and promote healthy growth.
Testing and Amending Your Soil
Before planting rosemary seeds, it’s essential to test and amend your soil to ensure optimal conditions for growth. Rosemary thrives in well-draining alkaline soils with a pH range of 6.0-7.0. To determine your soil’s pH level, you can purchase a DIY soil testing kit or send a sample to a laboratory for analysis.
If your soil test reveals an acidic or alkaline pH that falls outside the ideal range, it’s time to make some adjustments. One way to amend your soil is by adding organic matter such as compost or well-rotted manure. These additions not only improve drainage but also enrich the soil with nutrients and beneficial microorganisms.
You can also consider using a balanced fertilizer specifically designed for herbs like rosemary. Follow the instructions on the package carefully, and avoid over-fertilizing, which can harm your plants. If you’re unsure about the best amendments for your soil or need personalized advice, consult with a local nursery expert or gardening professional. With proper soil preparation, you’ll be well on your way to nurturing healthy rosemary seedlings that will thrive in their new environment.
Sourcing High-Quality Rosemary Seeds
To ensure you get the best results, it’s essential to source high-quality rosemary seeds that are fresh, healthy, and suitable for your climate. This section will guide you through selecting top-notch seeds.
Selecting the Right Variety
When it comes to planting rosemary seeds, selecting the right variety is crucial for optimal growth and performance. With numerous types of rosemary seeds available, choosing one that suits your climate and preferences can be a daunting task.
Start by considering the hardiness zone you live in. For example, if you reside in a cooler region with mild winters (USDA Hardiness Zones 5-7), look for varieties like ‘Miss Jessop’s Upright’ or ‘Prostrate’, which are bred to tolerate cooler temperatures and have a more compact growth habit. On the other hand, if you live in a warmer climate (USDA Hardiness Zones 8-10), choose varieties like ‘Tuscan Blue’ or ‘Arp’, which thrive in hot conditions.
Consider your intended use for rosemary as well. Some popular varieties include:
• ‘Miss Jessop’s Upright’: ideal for containers and compact spaces
• ‘Prostrate’: suitable for groundcover and erosion control
• ‘Tuscan Blue’: great for fresh or dried culinary use
Look for seed packets that specify the variety, growth habit, and mature height to ensure you’re getting a rosemary strain that will perform well in your specific climate and conditions.
Storing and Handling Seeds
Storing seeds properly is essential to maintain their viability. When it comes to rosemary seeds, you want to ensure they remain healthy and ready for planting. Store the seeds in an airtight container, such as a glass jar or envelope, at room temperature (around 70-80°F). Avoid exposure to direct sunlight, moisture, and extreme temperatures.
To handle seeds gently, use a soft-bristled brush or tweezers to avoid damaging them. When transferring seeds from the container to your planting area, be careful not to drop or jostle them excessively. To check for seed viability, try the “float test”: place seeds in a glass of water and observe if they float or sink. This will help you determine which seeds are viable.
In addition to proper storage and handling, it’s also important to inspect your seeds regularly for signs of damage or decay. Check for visible cracks, discoloration, or mold growth. By taking these simple steps, you can ensure that your rosemary seeds remain healthy and ready for planting.
Starting Rosemary Seeds Indoors or Outdoors
When it comes to planting rosemary seeds, you have two main options: starting them indoors where it’s warm and cozy, or outdoors when the weather permits. We’ll explore both methods in this section.
Indoor Seed Starting
Starting rosemary seeds indoors can be a game-changer for gardeners. Not only does it provide a head start on the growing season, but it also gives you a chance to protect your young seedlings from pests and diseases that might affect them outdoors.
To start rosemary seeds indoors, you’ll need some basic materials: seed starting mix, small pots or cell trays, water, and a warm location with indirect light. Fill the pots or cell trays with the seed starting mix, moisten it with water, and then sow one to two seeds per pot about 1/8 inch deep.
Place the pots in a warm spot, ideally around 70-80°F (21-27°C), and keep them consistently moist but not waterlogged. This is where indoor seed starting really shines: by providing a controlled environment, you can speed up germination rates significantly, often within 7-14 days compared to outdoor sowing.
Make sure the pots have good air circulation to prevent fungal diseases from taking hold. You can also use a clear plastic bag or cloche to create a mini-greenhouse effect and maintain humidity around the seedlings.
Direct Sowing in the Garden
Direct sowing rosemary seeds outdoors can be an efficient and cost-effective method for establishing a robust herb garden. By skipping the indoor germination process, you’ll save time and energy while still giving your rosemary seedlings the best chance to thrive.
To start direct sowing, choose a location with full sun (at least 6 hours of direct sunlight) and well-draining soil. Rosemary is native to Mediterranean climates, so it prefers dry spells between waterings. Test your soil’s pH level and adjust it if necessary – rosemary grows optimally in slightly acidic to neutral conditions.
Prepare the soil by loosening it to a depth of about 12-18 inches. Mix in organic matter like compost or well-rotted manure to improve drainage and fertility. Sow rosemary seeds directly into the garden bed, about 1/8 inch deep and 12-18 inches apart. Water gently but thoroughly after sowing, then maintain consistent moisture during the first few weeks as seedlings establish themselves. With proper care, direct-sown rosemary seeds can germinate in 14 to 21 days, depending on weather conditions.
Transplanting Rosemary Seedlings
Once you have successfully germinated your rosemary seeds, it’s time to transplant them into larger pots, where they’ll thrive and grow into robust plants. Follow these steps for a smooth transition.
Timing and Preparation
When transplanting rosemary seedlings, timing is crucial to ensure their survival and success. Typically, it’s best to wait until the seedlings have 2-3 sets of leaves and are around 1-2 inches tall. This usually takes around 7-10 days after germination.
Before transplanting, check the weather forecast to avoid transplanting during extreme temperatures or rain. Rosemary is a Mediterranean herb that thrives in well-drained soil and full sun, so choose a spot with similar conditions. Prepare the new container by filling it with a mix of potting soil and perlite to ensure good drainage.
To transplant, gently remove the seedlings from their original containers, taking care not to disturb the roots. Place them in the prepared container, firming the soil around the roots. Water thoroughly after transplanting and keep the soil consistently moist during the first few weeks. Avoid overwatering, which can lead to root rot.
By following these steps and considering the factors mentioned above, you’ll be well on your way to successfully transplanting your rosemary seedlings and giving them the best chance to thrive.
Handling Seedlings with Care
When transplanting rosemary seedlings, it’s essential to handle them with care to minimize shock and promote healthy root development. Seedlings can be delicate, so gentle handling is crucial to prevent damage.
To reduce shock, water the seedling thoroughly before transplanting. This ensures the soil isn’t too dry or too wet, making it easier for the roots to adjust to their new environment. When gently removing the seedling from its container, avoid touching the roots with your fingers, as this can cause damage.
Once in the new pot, firm the soil around the roots to prevent air pockets and ensure good contact between the roots and the growing medium. Water sparingly until the seedling has settled in, then gradually increase watering as needed. By following these steps, you’ll be giving your rosemary seedlings the best chance of thriving in their new home.
Some key considerations for handling seedlings include:
* Avoid sudden changes in temperature or humidity
* Minimize root disturbance during transplanting
* Provide sufficient light and nutrients to promote healthy growth
By being mindful of these factors, you can help your rosemary seedlings establish a strong foundation for long-term success.
Caring for Rosemary Plants After Planting
Now that you’ve successfully planted your rosemary seeds, it’s essential to learn how to care for them properly to ensure they thrive and grow strong roots. We’ll walk you through the key steps to maintain your newly planted rosemary plants.
Watering and Mulching
Proper watering and mulching are crucial for rosemary plants to thrive. Watering is often misunderstood as simply giving the plant a good soak. However, overwatering can be detrimental to the plant’s health. It’s essential to maintain optimal soil moisture levels by checking the soil regularly.
To do this, insert your finger into the soil up to the first knuckle, and if it feels dry, it’s time for watering. Water thoroughly but avoid getting water on the leaves or crown of the plant to prevent fungal diseases. Mulching also plays a vital role in maintaining moisture levels and suppressing weeds.
Use organic mulch like bark chips or straw around your rosemary plants to retain moisture and regulate soil temperature. Apply 2-3 inches of mulch, keeping it an inch away from the plant’s stem to allow air circulation. Regularly check and replenish the mulch as needed, ideally during the dry months when rosemary requires more moisture.
Pruning and Training
Pruning and training are essential aspects of rosemary plant care that promote bushy growth, prevent pests, and maintain a healthy shape. Regular pruning encourages the plant to focus its energy on producing new shoots and leaves, rather than becoming leggy or woody.
To prune your rosemary plant, simply pinch off the tips of the stems with your fingers or use sharp scissors to cut them back by about one-third. This will encourage branching and help control the plant’s height. You can also remove any dead or damaged leaves or stems, making sure not to damage the surrounding foliage.
Training involves supporting the plant as it grows to prevent it from becoming top-heavy and potentially falling over. You can use stakes or trellises to keep the plant upright, or prune it back to encourage a more compact shape. Regular training also helps maintain air circulation around the leaves, reducing the risk of fungal diseases.
By incorporating regular pruning and training into your rosemary care routine, you’ll be rewarded with a lush, bushy plant that’s less susceptible to pests and diseases.
Common Challenges and Troubleshooting
If you’re encountering issues with your rosemary seedlings, don’t worry – we’ve got you covered with solutions to common problems and troubleshooting tips.
Dealing with Poor Germination Rates
Dealing with Poor Germination Rates can be frustrating, especially when you’re eager to start harvesting your rosemary crop. If you’re experiencing low germination rates, there are several common causes to consider.
Firstly, ensure that the soil conditions are optimal for rosemary seeds. This herb prefers well-draining soil and full sun to partial shade. If your seed starting mix is too dense or waterlogged, it may hinder germination. To adjust this, try adding some perlite or vermiculite to improve drainage.
Another reason for poor germination could be the temperature. Rosemary seeds typically require a warm environment, between 65°F to 75°F (18°C to 24°C), to germinate. If your seed starting area is too cold, consider moving it to a warmer location or using a heating mat.
Alternatively, you can try using alternative seed starting methods like direct sowing in pots or even in the ground, where the soil conditions are more favorable for rosemary growth.
Managing Pests and Diseases
When it comes to rosemary plants, pests and diseases can be a major concern. As you care for your newly planted rosemary seeds, it’s essential to keep an eye out for common issues that might affect their growth.
One of the most common pests affecting rosemary is spider mites. These tiny insects feed on plant sap, causing yellowing leaves and a sticky substance on the stems. To control them, use neem oil or insecticidal soap according to the product’s instructions. Make sure to inspect your plants regularly and catch infestations early.
Diseases like powdery mildew and root rot can also affect rosemary. Powdery mildew appears as a white powder on leaves, while root rot causes blackened stems and roots. To prevent these issues, ensure good air circulation around your plants and avoid overwatering. Water at the base of the plant instead of getting water on the leaves.
Regularly inspect your plants for signs of pests or diseases and take action promptly to prevent infestations from spreading. Keep your rosemary healthy by providing a balanced fertilizer, pruning regularly, and protecting it from extreme temperatures.
Frequently Asked Questions
Can I plant rosemary seeds directly into the garden, even if it’s not their typical growing season?
Yes, you can still try direct sowing, but keep in mind that germination rates may be lower than starting indoors during the optimal season. Make sure to choose a location with well-draining soil and full sun conditions to help your rosemary seeds get off to a good start.
What if my rosemary seedlings develop pests like aphids or whiteflies? How can I manage these issues?
To prevent pest infestations, ensure your rosemary plants receive adequate air circulation and avoid overwatering. Regularly inspect your seedlings for signs of pests, and treat them promptly with neem oil or insecticidal soap if necessary. Consider using physical barriers like fine mesh to prevent aphids from reaching the plants.
How do I know when it’s time to transplant my rosemary seedlings into larger pots or directly into the garden?
Wait until your seedlings have at least two sets of leaves and are about 2-3 inches tall before transplanting. Harden off your seedlings by gradually exposing them to outdoor conditions over a period of 7-10 days, then transfer them to their final location in well-draining soil.
Are there any specific rosemary varieties that thrive in containers or have unique growing requirements?
Yes, some popular container-friendly rosemary varieties include ‘Miss Jessop’s Upright’, ‘Hill Hardy Blue’, and ‘Arp’. These plants are more compact and adaptable to smaller spaces, but still require good air circulation and regular pruning to maintain their shape.
Can I propagate new rosemary plants from cuttings or divisions if I don’t have access to fresh seeds?
Yes, you can propagate rosemary through stem cuttings in the spring or summer, taking 2-3 inch long sections with at least two nodes. Alternatively, divide established rosemary clumps in the fall or early spring when new growth begins, making sure each section has some roots attached for best results.