If you’re like many plant enthusiasts, you’ve fallen in love with the beauty and versatility of begonias. But did you know that propagating begonias is easier than you think? With the right techniques and care, you can multiply your favorite varieties and share them with friends or expand your own collection. In this article, we’ll take a closer look at the different methods for propagating begonias – from stem cuttings to grafting – and provide expert tips on preparing plant material and post-care for healthy plants. We’ll cover everything you need to know to successfully propagate begonias and get them thriving in no time. Whether you’re a seasoned gardener or just starting out, this article will give you the confidence and knowledge to grow more begonias than ever before.
Choosing the Right Begonia Species
With so many beautiful begonia species to choose from, selecting the right one for your needs can be a daunting task. Let’s break down the key factors to consider when making this important decision.
Understanding Begonia Types
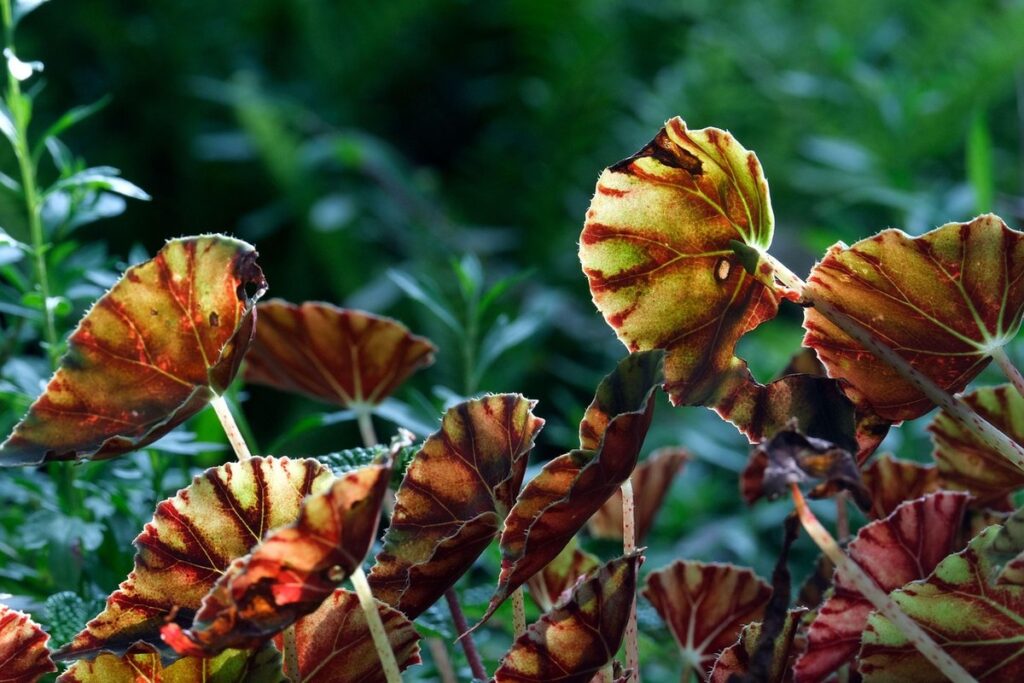
Begonias are a diverse group of plants, with over 1,800 species to choose from. When it comes to propagation, understanding the different types is crucial for success. Some begonias, like Begonia x hybrida, produce tubers that can be easily divided and replanted. These tuberous begonias are ideal for beginners, as they’re relatively low-maintenance and can thrive in a variety of conditions.
Other species, such as Begonia rhizomatosa, spread through underground rhizomes. These plants prefer moist soil and high humidity, making them perfect for terrariums or shaded areas. When propagating from rhizomes, it’s essential to cut the sections carefully to avoid damaging the delicate roots.
For stem-cutting begonias like Begonia semperflorens, you’ll want to take 2-3 inch segments with at least two nodes. Remove lower leaves and dip the cut end in rooting hormone before placing it in a propagation tray filled with moistened perlite or vermiculite. Keep the soil consistently moist but not waterlogged, and roots should develop within 1-2 weeks.
Remember that each begonia species has unique needs, so research specific requirements for your plant to ensure successful propagation.
Identifying Suitable Conditions for Propagation
When it comes to propagating begonias, understanding their specific needs is crucial for success. Different species have varying requirements when it comes to temperature, humidity, light, and soil. For instance, Begonia x hybrida prefers warmer temperatures between 65-75°F (18-24°C) with high humidity above 50%. In contrast, Begonia semperflorens can thrive in cooler temperatures around 55-60°F (13-15°C) but requires lower humidity.
To identify suitable conditions for propagation, research the specific needs of your begonia species. Lighting is also a key factor; some species, like Begonia x corallina, prefer bright indirect light, while others, such as Begonia maculata, can tolerate low light conditions. Soil-wise, use a well-draining potting mix specifically designed for tropical plants like begonias.
When propagating, ensure you’re replicating the species’ natural environment as closely as possible. If in doubt, start with a few test cuttings to gauge how your specific begonia responds to different conditions. By matching your propagation setup to your begonia’s requirements, you’ll increase the chances of successful root development and healthy growth.
Preparing the Plant Material
Before we dive into the propagation process, it’s essential to prepare your begonia plant material correctly. This includes choosing healthy leaves and stems for cutting.
Collecting Begonia Stem Cuttings
When collecting begonia stem cuttings, it’s essential to choose healthy and mature plants with plenty of growth. Look for stems with at least two sets of leaves, as this will increase the chances of successful propagation.
To take a cutting, select a section about 4-6 inches long, just below a node (where a leaf meets the stem). Cut the stem at an angle using a clean and sharp knife or pruning tool. This angled cut helps the cutting absorb water better, reducing the risk of rotting.
Timing is crucial when taking stem cuttings. The ideal time to collect cuttings is in the spring or summer months when begonias are actively growing. Avoid taking cuttings during periods of stress or drought, as this can weaken the plant and reduce its ability to propagate successfully.
When selecting nodes, choose those with a small amount of wood just below them. This will give you more flexibility when preparing the cutting for rooting. Be sure to make clean cuts and remove any lower leaves that might come into contact with water to prevent rotting and promote healthy growth.
Grafting or Budding Begonias
Grafting and budding are specialized techniques used to propagate begonias with desirable traits. These methods involve joining a stem or leaf from one plant to the root system of another, allowing you to combine the benefits of both plants.
For example, you can graft a Begonia x hybrida variety onto a robust B. semperflorens rootstock to create a more resilient and vigorous hybrid. This technique is particularly useful when propagating begonias with unique characteristics, such as variegated leaves or striking blooms.
To graft begonias, select healthy stem sections from the donor plant, cutting them at an angle to promote healing. Then, match these sections with corresponding rootstocks, ensuring compatibility between the scion and stock. Use a rooting hormone to facilitate the union and secure the join with tape or a specialized grafting clip.
Some popular budding techniques for begonias include shield-budding and tongue-budding. These methods require precision and patience but can yield excellent results when done correctly.
Propagation Methods
Now that you know the basics of begonia care, it’s time to learn how to multiply your favorite varieties using various propagation methods. This is where the magic happens!
Stem Cutting Propagation
When it comes to propagating begonias using stem cuttings, you’ll want to focus on creating an optimal environment for root development. To start, prepare a rooting medium such as a mixture of peat moss and perlite. This will help retain moisture while allowing excess water to drain.
Next, choose a healthy stem section with at least two nodes – the joint where a leaf meets the stem. Remove any lower leaves that would be submerged in the potting mix to prevent rot. Make clean cuts using a sharp, sterile tool just above a node. This will increase the chances of successful rooting.
Place the cuttings in the prepared rooting medium, making sure the node is buried and the cutting is secure. Water gently but thoroughly, then provide bright, indirect light and maintain high humidity – around 80-90%. Check on your cuttings regularly to ensure they don’t dry out. Successful propagation can take anywhere from 2-6 weeks depending on conditions.
In ideal circumstances, you may start seeing roots within a month, at which point the cutting should be potted up into individual containers to continue its growth.
Leaf and Tissue Culture
Propagating begonias through leaf and tissue culture methods can be a bit more challenging than stem cuttings, but with the right materials and techniques, you can achieve success. To start, gather healthy leaves from mature begonia plants, as these will serve as the source material for your propagation project.
For leaf culture, you’ll need to select a suitable medium that provides adequate nutrients and moisture retention. A balanced, water-soluble fertilizer at half the recommended strength is an excellent choice. Fill small pots or containers with the chosen medium, leaving about 1-2 cm of space at the top for watering.
In a clean environment, gently remove lower leaflets from the selected leaves, taking care not to damage the petiole (stem). Place the prepared leaves on the surface of the medium, ensuring good contact between the leaves and the medium. Keep the setup in a warm location with high humidity, such as a propagation tray or a clear plastic bag.
For tissue culture, you’ll need sterile equipment and materials. Start by preparing the leaf material as described above. Use a sterile scalpel to cut 2-3 cm sections from the petiole, taking care not to damage any tissues. Place these sections into test tubes filled with a sterile medium, such as agar or Murashige & Skoog (MS) medium. Seal the test tubes and incubate in a warm location under low light conditions.
The key to success lies in maintaining high humidity and providing adequate light for photosynthesis during the initial stages of growth. Roots typically develop within 4-6 weeks, after which you can transfer the rooted cuttings into pots filled with well-draining potting mix.
Post-Propagation Care
Now that you’ve successfully propagated your begonia, it’s essential to provide the right conditions for new roots to establish themselves and grow into a healthy plant. Here’s what to focus on next.
Providing Optimal Conditions After Propagation
After propagating begonias, it’s essential to provide optimal conditions for their healthy establishment. Let’s dive into the specifics.
Temperature plays a crucial role in this phase. Most begonia species thrive between 65°F (18°C) and 75°F (24°C). Avoid placing them near drafts or extreme temperatures, as this can lead to shock or even kill the delicate new roots. For example, if you live in an area with hot summers, it’s best to keep your newly propagated begonias away from windows that receive direct sunlight.
Humidity is another critical factor for successful establishment. Begonias love humid environments, typically above 50%. To achieve this, you can place the pot on a tray filled with water and pebbles or use a humidifier nearby. Keep in mind that most homes have relatively low humidity levels, so some effort is required to create an optimal microclimate.
Lighting needs vary depending on the begonia variety. Some species prefer bright, indirect light, while others do best in shaded conditions. Research your specific plant type and adjust accordingly. For watering, aim for moist but not waterlogged soil. Overwatering can cause root rot, a common issue among newly propagated plants. Monitor your plants’ response to these conditions and make adjustments as necessary.
Transplanting and Repotting
When it’s time to transplant or repot begonias after propagation, you’ll want to choose a well-draining potting mix specifically designed for tropical plants like begonias. This will help prevent waterlogged soil and root rot. Look for mixes that contain ingredients like perlite, vermiculite, or sand to ensure good drainage.
As for the size of the pot, start with one that’s only slightly larger than the original propagation container. Begonias prefer to be slightly root-bound, so a pot that’s too large can lead to waterlogged soil and weak roots. As your begonia grows, you can gradually move it to a larger pot.
When transplanting, gently remove the begonia from its original container and inspect its roots for any sign of circling or tangling. If necessary, tease out the roots with your fingers to encourage new growth. Plant the begonia at the same depth as before, making sure not to compact the soil around the roots. Water thoroughly after transplanting and keep the soil consistently moist but not waterlogged.
Troubleshooting Common Issues
If you’re encountering problems while propagating begonias, don’t worry – we’ve got you covered. This section will walk you through some common issues and their easy-to-fix solutions.
Recognizing Signs of Stress or Disease
When propagating begonias, it’s not uncommon to encounter some common issues that can impact the success of your project. As a beginner, it’s essential to recognize the signs of stress or disease early on to prevent further damage and ensure healthy growth.
One of the most common problems is root rot, which often occurs when the cutting is overwatered or has poor drainage. You may notice soft, mushy roots or a foul odor emanating from the pot. To avoid this issue, make sure your cuttings are planted in well-draining soil and water sparingly.
Another common problem is leaf drop, which can be caused by inadequate light, extreme temperatures, or pests like mealybugs. If you notice leaves falling off or becoming discolored, inspect your plant for any signs of pests or diseases and adjust its environment accordingly.
Inadequate rooting is another issue that can plague begonia propagation. Check if the cutting has developed new growth or if it’s still firm to the touch. If it’s not developing roots, consider adjusting your rooting medium or providing more humidity. Keep an eye out for these common issues and take corrective action promptly to ensure healthy growth.
Correcting Propagation Mistakes
Don’t worry if things haven’t gone as planned during the propagation process. Correcting mistakes made during begonia propagation is often easier than you think, and we’re here to help.
Firstly, let’s talk about adjusting environmental conditions. If cuttings aren’t producing roots or aren’t developing well, check that they’re not too crowded or competing for resources. Ensure there’s enough space between each cutting and consider repotting them into a separate container if necessary. Temperature and humidity levels also play a crucial role. Begonias prefer temperatures between 65°F to 75°F (18°C to 24°C) and high humidity, typically above 50%. If your environment isn’t meeting these conditions, try adjusting the temperature or using a humidifier nearby.
If you’ve followed all the right steps but are still experiencing issues, it might be time to re-propagate problematic cuttings. This means starting over with fresh cuttings from healthy begonia plants. Take a few moments to inspect your original cutting material and identify any potential flaws that may have contributed to the problem in the first place.
Advanced Propagation Techniques
Now that you’ve mastered the basics of begonia propagation, it’s time to take your skills to the next level. This section will delve into advanced techniques for propagating these beautiful plants.
Micropropagation and Meristem Culture
Micropropagation and meristem culture are advanced techniques that allow for rapid multiplication of begonia plants. These methods involve growing plant tissues in a controlled environment, using nutrient-rich media to promote cell division and differentiation.
In micropropagation, small pieces of tissue, such as leaves or stems, are excised from mature plants and placed into sterile vessels filled with an agar-based medium. The resulting cultures are then subjected to a series of conditions that mimic the natural environment, including temperature fluctuations, light exposure, and hormone application. This process can accelerate growth rates by several orders of magnitude compared to traditional propagation methods.
Meristem culture is another cutting-edge technique used in begonia propagation. Meristems are the growing tips of roots or stems, which contain actively dividing cells responsible for plant elongation. By isolating these meristematic tissues and culturing them on a suitable medium, growers can rapidly multiply plants while maintaining desirable traits such as leaf shape, color, and size.
One key advantage of micropropagation and meristem culture is their ability to preserve genetic diversity within begonia populations. These techniques allow for the rapid production of genetically identical clones, reducing reliance on traditional seed propagation methods that often result in variable outcomes.
Successful implementation of these advanced techniques requires careful attention to detail, including proper sterilization procedures, optimal medium formulation, and controlled environmental conditions. However, with practice and patience, growers can achieve remarkable results, making micropropagation and meristem culture invaluable tools for commercial and hobbyist begonia enthusiasts alike.
Frequently Asked Questions
Can I propagate begonias year-round, or is there a best time to do so?
Yes, begonias can be propagated at any time of the year when they are actively growing. However, for species that typically go dormant during winter months (like Begonia x hybrida), it’s best to propagate in spring or early summer when new growth begins.
How do I know if a begonia has successfully rooted after propagation?
Check for signs of root development by gently tugging on the cutting. If resistance is met, roots have formed and it’s time to transplant into individual pots. Be cautious not to damage newly formed roots during handling.
Can I propagate begonias from leaves, or do I need to use stem cuttings?
While leaf cuttings can be used for propagation, they are more challenging and less reliable than stem cuttings. Begonia species with fleshy leaves (like Begonia semperflorens) may produce roots when rooted in a moist environment, but this method is not recommended for most varieties.
How often should I water newly propagated begonias to prevent root rot?
Watering newly propagated begonias requires a delicate balance. Keep the soil consistently moist during the first few weeks after propagation, then gradually reduce watering as new growth emerges and the plants become more established.
Can I propagate multiple types of begonias together in the same pot, or should they be separated?
While it’s technically possible to propagate multiple types of begonias together, this can lead to competition for resources and increased risk of disease transmission. For best results, separate each variety into its own pot after propagation.