Are you tired of spending money on new plants every season? Do you want to share your favorite succulents or herbs with friends and family without breaking the bank? Cloning plants is a game-changer for any plant enthusiast. Not only can it save you money, but it’s also a fun and rewarding process that allows you to reproduce your favorite varieties. But where do you start? Choosing the right plant, preparing the mother plant, and providing optimal growing conditions are all crucial steps in successful cloning. In this article, we’ll walk you through our step-by-step guide on how to clone plants like pros. Whether you’re a seasoned gardener or just starting out, our tips and tricks will have you propagating like a pro in no time!
Understanding Plant Cloning
Plant cloning can seem intimidating, but breaking it down will help you grasp the basics and get started on your own projects. In this next part, we’ll explore the fundamental concepts of plant cloning.
What is Plant Cloning?
Plant cloning is the process of producing genetically identical plants from a single parent plant. It’s a game-changer for plant enthusiasts and professionals alike, allowing us to reproduce plants that would be difficult or expensive to propagate through seeds. Take, for example, orchids – these delicate flowers are notoriously finicky to cultivate from seed, but cloning makes it possible to produce exact replicas of prized specimens.
Cloning also enables the reproduction of rare or endangered plant species, helping to preserve their genetic integrity and protect them from extinction. Additionally, cloned plants can be engineered to have desirable traits such as disease resistance or drought tolerance, making them ideal for commercial growers looking to optimize crop yields.
The benefits of plant cloning are numerous, but perhaps its most significant advantage is the ability to reproduce plants that would otherwise be lost due to environmental factors, pests, or diseases. By cloning these plants, we can safeguard their genetic material and ensure their continued existence for generations to come.
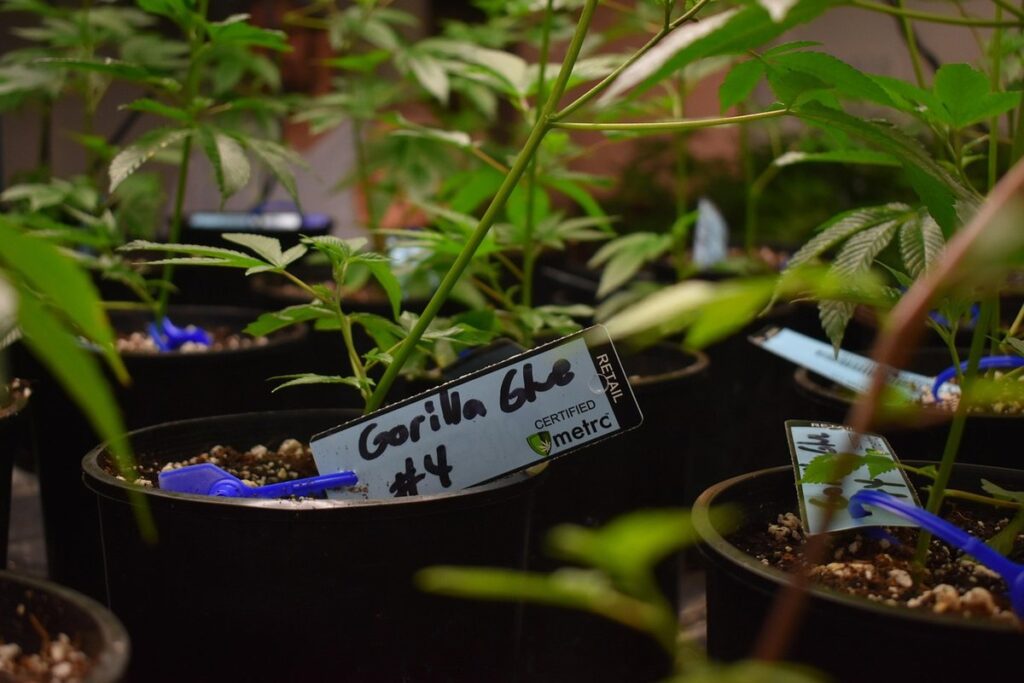
Choosing the Right Plant for Cloning
When it comes to cloning plants, some species are more cooperative than others. Succulents and cacti, for example, are excellent candidates for cloning due to their low-maintenance nature and ability to thrive in a variety of environments.
Herbs are another popular choice for plant cloning. Many herbs can be easily propagated through stem cuttings or leaf divisions, allowing you to reproduce exact copies of your favorite varieties. Basil and mint are two examples of herbs that clone well, as they produce new roots quickly and can be harvested within weeks.
In contrast, plants with complex root systems or delicate tissue may not be the best candidates for cloning. These include species like orchids and ferns, which require more precise conditions to thrive. Additionally, plants with a strong genetic predisposition towards hybrid vigor (the tendency of offspring to exhibit superior traits) can be challenging to clone successfully.
When selecting a plant for cloning, consider its ease of propagation and your own level of expertise in providing optimal growing conditions.
Preparing the Mother Plant
Before you can start taking cuttings, you need to prepare your mother plant by selecting a healthy stem and allowing it to develop a robust root system. This is crucial for successful cloning.
Selecting a Healthy Mother Plant
When selecting a mother plant for cloning, it’s essential to choose one that’s healthy and has good genetics. This will ensure that your clones are strong and resilient from the start. Look for a plant with lush, vibrant foliage and a robust root system.
A mature plant is ideal because it’s already developed its full potential, making it more likely to produce high-quality clones. A mature plant typically reaches its optimal size and has finished producing new growth, usually within 6-12 months of germination, depending on the species.
Proper light, water, and nutrient conditions are also crucial for a healthy mother plant. Make sure it’s receiving the right amount of indirect light and isn’t overwatered or underwatered. Fertilize it regularly with a balanced, water-soluble fertilizer to provide essential nutrients.
When inspecting your potential mother plant, check for any signs of pests, diseases, or nutrient deficiencies. A healthy plant will have no visible pests, and its leaves should be free from any yellowing or spotting.
Taking Cuttings from the Mother Plant
When it’s time to take cuttings from your mother plant, you’ll want to choose healthy stems with at least two sets of leaves. For most plants, stem cuttings are the best option, but some species can be propagated using leaf or root cuttings.
To prepare a stem cutting, select a section about 4-6 inches long, just above a node (where a leaf meets the stem). Cut the stem at an angle, using clean, sharp scissors to prevent crushing the tissue. Make sure each cutting has at least two sets of leaves to provide enough energy for rooting.
For leaf cuttings, choose healthy leaves with a good balance between foliage and stem length. Leaf cuttings can be a bit trickier, as they require a higher level of humidity and temperature control to root successfully.
Root cuttings are typically taken from woody plants like succulents or cacti. Cut a section of the plant’s roots, making sure each piece has at least two growth nodes. Allow the cut ends to dry for 24-48 hours before placing them in water or soil for rooting.
Regardless of the type of cutting you’re taking, it’s essential to keep them moist but not waterlogged to prevent rot and promote healthy root development. This can be achieved by submerging the cut end in a propagation tray filled with water or covering the soil with a clear plastic bag to maintain humidity.
The Cloning Process
Now that we’ve covered the basics of plant cloning, it’s time to dive into the actual process. In this section, you’ll learn how to successfully clone your favorite plants using a few simple steps and the right materials.
Creating a Rooting Medium
When it comes to creating a rooting medium for cloning plants, you have several options to choose from. One popular method is using water, which provides an ideal environment for plant roots to grow. To prepare the water, make sure to use a clean glass or container and add a rooting hormone powder or liquid to stimulate root growth.
Another option is using soil, specifically a well-draining potting mix designed for propagation. This type of soil helps prevent root rot and promotes healthy root development. When preparing the soil, sterilize it by baking it in the oven at 300°F (150°C) for an hour to kill any bacteria or fungi.
Coco coir is also a great alternative to traditional soil. It’s a sustainable option that retains moisture well while preventing waterlogged roots. To prepare coco coir, rinse it thoroughly and then soak it in water before using it as the rooting medium.
Using sterile equipment is crucial throughout the cloning process. Use clean scissors or a razor blade to take cuttings from the mother plant, and make sure to disinfect your workspace with 70% alcohol solution to prevent contamination.
Planting the Cuttings
Planting the cuttings in the rooting medium is a crucial step in the cloning process. To do this correctly, start by preparing your rooting medium, which can be a potting mix or a specialized cloning gel. Gently remove the leaves from the lower half of the cutting to prevent moisture loss and promote root growth.
Next, make a small incision on the bottom of the stem, about 1-2 inches below the node (the joint where the leaf meets the stem). This will help the roots develop more easily. Then, insert the cutting into the rooting medium, making sure not to compact the mix around it. The node should be buried at a depth of about 1-2 inches, depending on the type of plant.
It’s essential to provide the right conditions for root development. Make sure the area is bright, but not in direct sunlight, which can cause overheating. A temperature range between 65-75°F (18-24°C) is ideal for most plants. Water the cutting gently but thoroughly after planting, and maintain a consistent moisture level until roots develop.
Post-Cloning Care
Now that you’ve successfully cloned your plant, it’s time to learn how to care for your new offspring and ensure its survival. This section will cover essential tips on post-cloning care.
Providing Optimal Growing Conditions
When it comes to providing optimal growing conditions for cloned plants, attention to detail is crucial. Cloned plants are typically more sensitive than seed-grown plants and can be easily stressed by environmental fluctuations.
First and foremost, light is a critical component of post-cloning care. Cloned plants often prefer bright, indirect light but can quickly become scorched in direct sunlight. To prevent this, place your cloned plant near an east- or west-facing window, or use grow lights to supplement natural light. As the plant grows, you may need to adjust its position to ensure it’s receiving sufficient light without burning.
Watering is another key factor to consider. Cloned plants typically require more frequent watering than seed-grown plants due to their increased water needs. Check the soil daily by sticking your finger into it about an inch deep; if the soil feels dry, it’s time for a drink. Be cautious not to overwater, as this can lead to root rot and other issues.
Temperature is also essential, with most cloned plants thriving in temperatures between 65°F and 75°F (18°C and 24°C). Avoid placing your plant near heating or cooling vents, fireplaces, or drafty windows, which can cause temperature fluctuations. Finally, maintain a humid environment by misting the leaves regularly – this will help prevent water stress and promote healthy growth.
Monitoring for Pests and Diseases
Monitoring for Pests and Diseases is crucial to ensure the health and success of your cloned plant. As a clone, it’s more susceptible to pests and diseases that can be carried over from the parent plant or introduced during the propagation process.
Common pests like spider mites, mealybugs, and scale insects can infest cloned plants, causing damage to leaves and stems. Fungal diseases such as root rot and leaf spot can also occur due to overwatering, poor air circulation, or contaminated growing medium. Bacterial diseases like bacterial leaf spot and crown gall are also possible, often resulting from open wounds or dirty equipment.
To prevent these issues, regularly inspect your plant for signs of pests or diseases, checking the undersides of leaves, stems, and roots. Keep a clean environment by disinfecting tools and repotting as needed. Proper watering habits, adequate light, and good air circulation can also help prevent disease occurrence. For example, ensuring the growing medium is not too moist can significantly reduce the risk of root rot.
Monitor your plant’s overall health and address any issues promptly to prevent further damage.
Advanced Cloning Techniques
Now that you’ve mastered the basics, it’s time to take your cloning skills to the next level with advanced techniques for achieving even higher success rates and greater control over the process.
Using Plant Growth Regulators
When it comes to cloning plants, using plant growth regulators (PGRs) can be a game-changer. These chemical compounds help control and manipulate the growth of plants, promoting root development and increasing yields.
One of the primary ways PGRs aid in cloning is by stimulating root growth. This is especially important during the rooting phase, when the cutting’s roots are developing. By using a PGR like indole-3-butyric acid (IBA), you can encourage more extensive root growth, leading to healthier and more robust plants.
However, be aware that excessive use of PGRs can have negative consequences. Overdosing on these chemicals can lead to stunted growth, deformed roots, or even plant death. It’s essential to follow the recommended application rates carefully and monitor your plants closely for any signs of stress or adverse reactions.
To get the most out of PGRs in cloning, start with small concentrations and gradually increase as needed. This approach will help you fine-tune the effects while minimizing potential risks. Always consult a trusted resource or experienced grower before experimenting with new PGR products.
Tissue Culture Cloning
Tissue culture cloning is an advanced method for cloning plants that involves taking small pieces of plant tissue and growing them into new, genetically identical individuals. This technique offers several benefits over traditional seed-based propagation methods. For one, it allows for increased genetic uniformity among cloned plants, reducing the risk of variable growth habits or characteristics.
Another advantage of tissue culture cloning is its faster propagation rates. By using a sterile laboratory environment to promote healthy cell division and multiplication, you can produce new plantlets in as little as 2-4 weeks, compared to several months with traditional methods.
To get started with tissue culture cloning, you’ll need access to a sterile growth medium and a laminar flow hood or equivalent workspace. Choose a tissue type suitable for your species – commonly used tissues include nodal cuttings, leaf pieces, or even isolated individual cells. By following proper protocol and maintaining strict aseptic conditions, you can successfully induce rooting and accelerate the development of new plantlets. This method is particularly useful when working with plants that are difficult to propagate through conventional means, such as rare species or sensitive varieties.
Tips and Tricks for Successful Plant Cloning
Now that you’ve mastered the basics of plant cloning, it’s time to dive into some expert tips and tricks that’ll take your skills to the next level. From cutting propagation to rooting techniques, we’ll cover them all here.
Avoiding Common Mistakes
Plant cloning can be a bit tricky, and it’s easy to make mistakes that can ruin the entire process. One of the most common mistakes is over-watering the cutting, which can lead to root rot and kill the plant before it even has a chance to grow. To avoid this, make sure the soil is only moistened and not waterlogged.
Another mistake is not providing enough light for the cutting, which can cause it to stretch out and become weak. Most plant cuttings need at least 12 hours of bright indirect light per day to develop well.
Patience and persistence are key when it comes to plant cloning. It’s normal for some cuttings to take longer than others to root, so don’t get discouraged if you see no signs of growth after a week or two. Keep the cutting in a warm spot with high humidity, and check on it regularly to ensure it’s not developing any problems.
Remember that every plant is different, and what works for one species may not work for another. Be prepared to try different techniques and adjust your approach as needed. With practice and patience, you’ll become more skilled at cloning plants and will be able to successfully propagate even the most finicky varieties.
Troubleshooting Common Issues
If you’re experiencing issues with your cloned plant, it’s essential to troubleshoot the problem as soon as possible. One common issue is failed root development. This can be caused by a lack of humidity, inadequate light, or incorrect water temperatures. To address this, ensure that your propagation station is maintained at 75-80°F (24-27°C) with high humidity levels.
Pests and diseases can also affect cloned plants, particularly if the mother plant is infested. Inspect the cutting for any signs of pests like spider mites or mealybugs, and treat accordingly using insecticidal soap or neem oil. Regularly monitor your plants for diseases like root rot, leaf spot, or powdery mildew.
If you notice roots are developing but not reaching the desired length, it may be due to overwatering. Check the water table in your propagation station, and ensure that the substrate is not too wet. Conversely, if roots are slow to develop, it might be because of underwatering. Be mindful of the moisture levels and adjust accordingly.
To prevent pest infestations, regularly clean your propagation equipment and maintain good hygiene practices when handling plants. Keep an eye out for early warning signs, such as curled leaves or sticky sap, which can indicate a problem before it’s too late.
Conclusion
As you’ve successfully cloned your plant, it’s essential to remember that patience is key. Cloning can be a trial-and-error process, and not every cutting will take root or produce healthy growth. However, with time and practice, you’ll develop the skills to improve your success rate. To ensure the health of your cloned plants, provide them with optimal growing conditions, including sufficient light, water, and nutrients.
Now that you’ve completed the cloning process, it’s crucial to monitor their progress closely. Keep an eye out for signs of disease or pests, and take prompt action if necessary. Regular pruning will also help maintain the plant’s shape and promote healthy growth. By following these simple steps and being attentive to your cloned plants’ needs, you’ll be rewarded with a thriving, genetically identical duplicate of your original plant.
Frequently Asked Questions
How often should I water my cloned plant after planting?
Yes, proper watering is crucial for the success of your cloned plant. Start by watering sparingly, allowing the soil to dry slightly between waterings. Monitor the plant’s response and adjust your watering schedule accordingly. As a general rule, aim to water when the top 1-2 inches of soil feel dry to the touch.
Can I clone plants that are naturally propagated through seeds?
While cloning can reproduce plants that are difficult or expensive to propagate through seeds (like orchids), it’s not always necessary for plants that already produce viable offspring. However, if you want to ensure genetic consistency and preserve specific traits, cloning can still be a valuable option.
How long does the rooting process typically take for most plant species?
The length of time it takes for cuttings to develop roots varies depending on factors like temperature, humidity, and light exposure. Generally, you can expect roots to emerge within 1-3 weeks for most plant species. Monitor your cuttings’ progress closely, as some may root faster or slower than expected.
Can I clone plants in the winter months?
While cloning is possible year-round, it’s essential to consider the specific needs of your mother plant during different seasons. Some plants may be more susceptible to disease or stress during the winter months, which can negatively impact the cloning process. Choose a healthy mother plant and provide optimal growing conditions to ensure success.
What are some common mistakes to avoid when taking cuttings from the mother plant?
No matter how experienced you become with cloning, it’s essential to remember that improper cutting technique can severely hinder your chances of success. Avoid taking too much stem tissue or not enough leaf material, as this can cause the cutting to become desiccated or struggle to root properly.