If you’re like many gardeners, you’ve fallen in love with the vibrant beauty of tulips. But their stunning blooms come with a price: requiring careful attention to ensure they thrive and return year after year. That’s where we come in – to guide you through the essential steps for planted tulip care. With so many varieties to choose from, it can be overwhelming to know where to start. In this comprehensive guide, we’ll cover everything you need to know about caring for your planted tulips, from selecting the perfect variety to preparing their soil and providing optimal watering and fertilizing techniques. By following our tips and tricks, you’ll be able to enjoy these gorgeous flowers in all their glory – year after year – and even replant them with confidence. Let’s dive in and explore how to bring out the best in your planted tulips!
Choosing the Right Tulip Variety
With hundreds of tulip varieties to choose from, selecting the right one for your garden can be overwhelming. Let’s break down some key factors to consider when choosing a tulip variety that suits your needs.
Understanding Tulip Classification
When it comes to choosing the right tulip variety for your garden, understanding the different types of tulips is essential. There are several main categories of tulip varieties, each with its unique characteristics and growing requirements.
One popular type is the Darwin Hybrids, which are known for their vibrant colors and large blooms. They tend to be more disease-resistant than other varieties and are often less prone to pest issues. If you’re looking for a low-maintenance option, Darwin Hybrids might be an excellent choice.
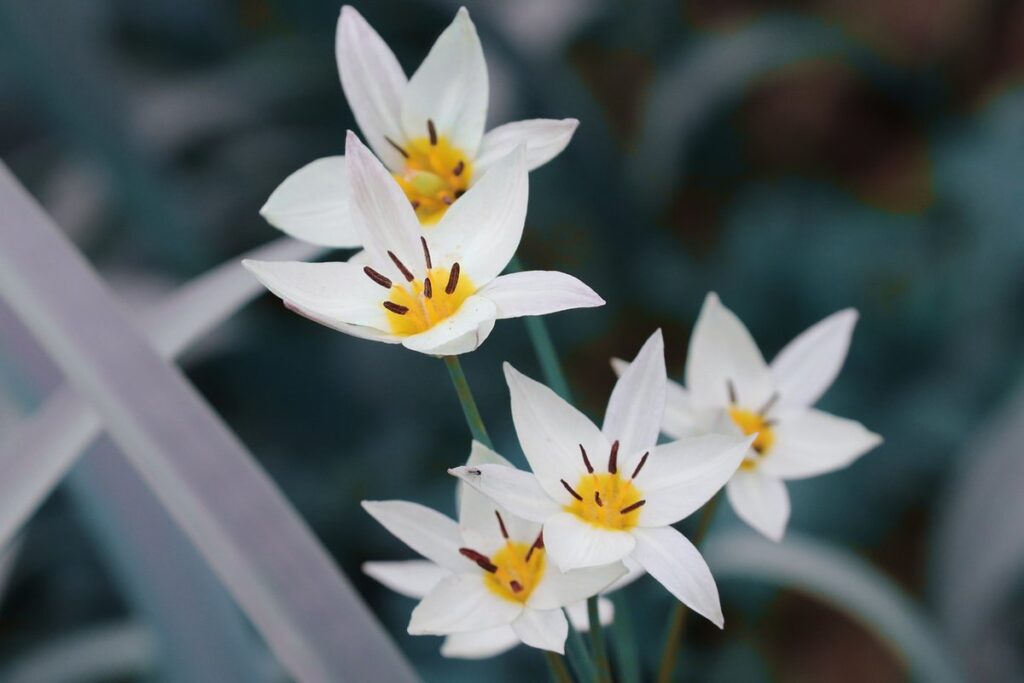
Another type is the Fosteriana tulips, which are prized for their stunning, trumpet-shaped blooms. These tulips typically bloom in late spring and prefer well-drained soil and full sun. They can grow quite tall, so it’s essential to provide them with support to prevent them from toppling over.
Finally, there are Greigii tulips, which are known for their unique, striped or multicolored blooms. These tulips tend to be more compact than other varieties and prefer well-drained soil and partial shade. They’re an excellent choice if you want a low-maintenance option that still packs a lot of visual punch.
When selecting tulip varieties, consider factors like bloom time, flower size, and growth habits to ensure they’ll thrive in your garden conditions. By choosing the right variety for your needs, you can enjoy a stunning display of colorful blooms come springtime.
Considering Climate and Hardiness Zone
When selecting tulip varieties for your garden, it’s essential to consider the climate and hardiness zone of your area. Tulips are generally hardy perennials, but they still require some protection from extreme temperatures and weather conditions.
First, determine your hardiness zone by checking a plant hardiness map or consulting with local nurseries. This will help you narrow down tulip varieties that are suitable for your region. For example, if you live in USDA Zone 5, look for tulips that have a minimum winter hardiness rating of 3-4.
Some popular tulip varieties that perform well in different climates include ‘Fosteriana’ and ‘Greigii’, which thrive in warmer zones (6-8), while ‘Darwin Hybrids’ and ‘Species Tulips’ do better in cooler zones (3-5). When shopping for tulip bulbs, check the label or consult with a nursery to ensure you’re purchasing varieties suitable for your local climate.
By selecting tulip varieties that match your region’s specific conditions, you’ll enjoy healthier, more vibrant blooms all season long.
Planting Tulips in the Right Conditions
To ensure your tulips thrive, it’s essential to plant them in conditions that mimic their natural habitat, so let’s dive into the perfect soil and climate requirements.
Soil Preparation and Selection
When planting tulips, soil preparation and selection are crucial steps that often get overlooked. However, this neglect can lead to poor bulb growth, reduced flower quality, and increased susceptibility to diseases. To ensure healthy tulip blooms, it’s essential to choose a well-draining soil mix.
Tulips hate waterlogged soils, which can cause the bulbs to rot. This is because their bulb tissue is prone to fungal infections when exposed to excessive moisture. Instead, opt for a mix that contains perlite or vermiculite, which will help excess water drain away from the roots. A general-purpose potting soil with good drainage properties would be an ideal choice.
For in-ground planting, test your native soil to determine its pH level and adjust it accordingly. Most tulip varieties prefer slightly acidic to neutral soils (pH 6.0-7.0). If you have heavy clay or sandy soil, amend it with compost or organic matter to improve structure and fertility. This will give your bulbs the best chance of establishing a robust root system and producing vibrant blooms come spring.
Planting Depth and Spacing
When planting tulip bulbs, it’s essential to get the depth and spacing just right. This will ensure that your tulips grow strong and healthy, producing vibrant blooms come springtime.
To determine the correct planting depth, follow these guidelines: plant the bulb 3-4 times deeper than its height. For example, if you’re using a tulip bulb that’s about 2 inches tall, you’ll want to bury it around 6-8 inches deep. This allows for root growth and prevents the bulb from rotting.
As for spacing, a good rule of thumb is to plant tulips 3-4 inches apart. This gives each bulb enough room to grow without overcrowding. However, if you’re planting in a crowded bed or container, you can get away with slightly closer spacing – just be sure not to pack them too tightly.
Remember, the soil should be firm and settled around the bulbs after planting. Avoid compacting the soil too much, as this can prevent proper drainage and lead to rot. By following these guidelines, you’ll set your tulips up for success and enjoy a stunning display of blooms in the spring.
Watering and Fertilizing Planted Tulips
Proper watering and fertilization are crucial for your planted tulips to thrive, which is why we’re sharing our top tips on how to give them just what they need.
Understanding Water Requirements
Proper watering is essential for planted tulips to thrive. Adequate water supply helps to prevent bulbs from drying out and promotes healthy growth. When it comes to frequency, it’s crucial to strike a balance between keeping the soil consistently moist and avoiding overwatering.
A good rule of thumb is to check the soil daily by inserting your finger into the soil up to the first knuckle. If the soil feels dry, it’s time to water. On average, planted tulips require about 1-2 inches of water per week. You can achieve this through rainfall or irrigation, depending on the weather conditions in your area.
During hot spells or when bulbs are actively growing, you may need to water more frequently – every 2-3 days. Conversely, during periods of cooler temperatures or drought, you can reduce watering to once a week. To ensure optimal hydration, focus on providing shallow but frequent waterings rather than infrequent deep waterings, which can lead to root rot and other problems.
Fertilization Strategies
When it comes to fertilizing planted tulips, timing is everything. As a general rule, you’ll want to feed your tulips during the growing season, which typically begins when they start emerging from dormancy in late winter or early spring. However, it’s essential to avoid over-fertilizing, as this can lead to weak and leggy growth.
For organic options, consider using compost tea or a balanced, slow-release fertilizer like fish emulsion or bone meal. These will provide your tulips with the necessary nutrients without burning their roots. You can also side-dress with alfalfa meal or kelp meal for an extra boost of nitrogen and micronutrients.
Synthetic fertilizers can be effective too, but use them sparingly and follow the recommended application rates to avoid damaging your bulbs. Look for products containing a balanced N-P-K ratio (e.g., 10-10-10) and apply them according to the manufacturer’s instructions. Keep in mind that synthetic fertilizers will need to be reapplied more frequently than organic alternatives.
Aim to fertilize your planted tulips every 4-6 weeks during the growing season, taking care not to overdo it. Remember, the goal is to provide a gentle nudge of nutrients, not to force excessive growth.
Pest and Disease Management for Planted Tulips
To keep your tulip blooms vibrant and healthy, it’s essential to know how to prevent common pests and diseases that can damage them. This includes strategies for protecting against aphids, slugs, and fungal infections.
Common Pests Affecting Tulips
As you nurture your planted tulips, it’s essential to be aware of common pests that can harm these beautiful flowers. One of the most notorious culprits is the aphid. These tiny, soft-bodied insects feed on plant sap, causing curled or distorted leaves and stunted growth. If left unchecked, aphids can spread diseases like tulip breaking virus.
Another pest that can wreak havoc on your tulips is the slug. Slugs are nocturnal, so they’re most active at night when you may not even notice them. They feed on leaves and flowers, leaving behind a trail of slime that can attract more pests. To control slugs, use copper tape around planters or apply iron phosphate baits.
Other common pests affecting tulips include caterpillars, particularly the tulip bulb fly, which lays eggs in soil near bulbs. Remove weeds and debris to discourage egg-laying. If you notice infestations, treat with insecticidal soap or neem oil according to product instructions.
Regularly inspect your plants for signs of pest damage and take action promptly to prevent further harm.
Managing Fungal Diseases
Fungal diseases can be devastating to planted tulips, and early detection is key to effective management. One of the most common fungal diseases affecting tulips is tulip fire, caused by the fungus Scytalidium dimidiatum. It appears as a reddish-brown ring or patch on the leaves and flowers, often starting at the base of the plant. To prevent tulip fire, ensure good air circulation around your plants and avoid overhead watering, which can create a humid environment that fosters fungal growth.
If you do notice signs of tulip fire, treat your plants with a fungicide containing ingredients such as chlorothalonil or copper octanoate. For more severe infections, consider removing infected leaves or flowers to prevent the spread of the disease.
Another common issue is tulip blight, caused by the fungus Nectria galligena. It appears as a blackened area on the flower stalks and can lead to the death of the entire plant. To manage tulip blight, ensure your plants are receiving adequate sunlight and water carefully, avoiding overwatering which can exacerbate the problem.
By being vigilant about fungal diseases and taking prompt action when necessary, you can help prevent their spread and keep your planted tulips healthy throughout the growing season.
Pruning and Deadheading Planted Tulips
To keep your planted tulips looking their best, pruning and deadheading are crucial tasks to learn. Let’s dive into the details on how to do it correctly.
Timing and Techniques for Pruning
When to Prune Planted Tulips
The timing of pruning is crucial when it comes to maintaining healthy and thriving planted tulips. The ideal time for pruning depends on the specific type of tulip, but generally, it’s best to prune them immediately after blooming or once the foliage has died back naturally.
Pruning at this stage helps prevent disease from spreading through the bulb, promotes air circulation, and encourages new growth. If you notice any dead or damaged leaves, remove them promptly as they can be a breeding ground for pests and diseases.
To maintain shape and promote healthy growth, prune your planted tulips to about one-third of their original height. Use sharp, clean pruning shears to cut the stems just above a leaf node. This technique encourages new blooms to form and helps redirect energy towards the bulb.
For varieties like ‘Darwin Hybrids’ or ‘Species Tulips’, which bloom in late spring, prune them as soon as the foliage starts to yellow. For varieties that bloom earlier in the season, such as ‘Fosteriana’ or ‘Greigii’, it’s best to wait until after they’ve finished blooming.
By pruning at the right time and using the correct techniques, you’ll be able to enjoy healthy, thriving planted tulips year after year.
Benefits of Deadheading
Deadheading is an essential practice when it comes to maintaining planted tulips. Not only does it enhance their visual appeal, but it also encourages repeat flowering and prevents seed production. By removing spent blooms, you’re signaling the plant that there’s no need to focus on producing seeds, allowing it to redirect its energy towards producing more flowers.
Regular deadheading can result in multiple blooming periods throughout the growing season. This is especially beneficial for planted tulips, which often produce a single, long-lasting bloom but may not repeat flower without proper care. By encouraging repeat flowering, you’ll enjoy an extended display of colorful blooms and maximize your plant’s potential.
To make the most of deadheading, it’s essential to remove spent blooms as soon as they start to fade. Cut off the flower stem about 1-2 inches above the foliage using clean pruning shears or scissors. This will not only encourage repeat flowering but also prevent seed production, which can weaken the plant and reduce its blooming performance in subsequent years. By adopting a regular deadheading routine, you’ll be rewarded with a more vibrant and productive display of planted tulips.
Troubleshooting Common Issues with Planted Tulips
Don’t worry if your planted tulips aren’t thriving – we’ve got you covered. This section tackles common problems and offers practical solutions to get your bulbs back on track.
Identifying and Addressing Common Problems
As you nurture your planted tulips, it’s inevitable that you’ll encounter some common issues. Identifying these problems promptly and implementing corrective measures is crucial to prevent further damage and promote healthy growth. Let’s examine a few of the most frequent problems encountered with planted tulips.
One of the most noticeable signs of stress or nutrient deficiency in planted tulips is yellowing leaves. This issue can be caused by overwatering, extreme temperatures, or lack of essential nutrients. To address this problem, inspect your soil moisture levels and adjust your watering schedule accordingly. Additionally, consider fertilizing your tulips with a balanced fertilizer to replenish the necessary nutrients.
Another common concern is reduced flower size or bulb failure. This issue can be attributed to poor growing conditions, inadequate sunlight, or pest infestations. To mitigate this problem, ensure that your planted tulips receive adequate sunlight (at least 6 hours of direct sunlight) and maintain a consistent soil temperature between 35°F and 60°F.
Pests like aphids, slugs, and snails can also cause significant damage to your tulip bulbs and flowers. Regularly inspect your plants for signs of infestation and employ natural deterrents such as neem oil or insecticidal soap to control pest populations.
By being aware of these common issues and taking proactive measures to address them, you’ll be better equipped to provide optimal care for your planted tulips and enjoy a vibrant display of blooms.
Seeking Expert Advice When Needed
When you’re faced with issues that continue to plague your planted tulips, it’s essential to know when to seek expert advice. Don’t be too proud to ask for help – it’s a sign of a dedicated gardener who wants the best for their plants. If you’ve tried the troubleshooting steps outlined earlier and still can’t seem to resolve the problem, it’s time to reach out to someone with more expertise.
Visit your local garden center or nursery and speak with one of their knowledgeable staff members. They’ll be able to assess the issue and provide guidance on the best course of action. You can also seek advice online from reputable sources such as gardening forums, blogs, or social media groups. Some popular websites offer expert advice through live chats or email consultations.
When seeking advice, be prepared to provide details about your plant’s condition, including any symptoms you’ve observed and the care it has received so far. This will help the expert provide a more accurate diagnosis and solution. Remember, there’s no need to struggle with problems that seem insurmountable – a little outside expertise can go a long way in saving your tulips.
Frequently Asked Questions
Can I replant tulip bulbs year after year if they don’t bloom or have poor growth?
Yes, this is not uncommon, especially if the bulbs haven’t been exposed to sufficient chill hours or have been planted too deeply. Replant them at a slightly shallower depth and make sure the soil has adequate drainage. This should help promote healthier growth in future seasons.
How do I know when it’s time to prune my tulips after blooming?
Prune your tulip foliage as soon as the flowers have faded, but allow the leaves to remain for several weeks to allow the bulb to recharge. Remove any dead or damaged stems and leaves by cutting them off at ground level with a sharp knife or pruning tool.
Can I plant tulips in containers or do they need direct soil?
Tulips can thrive in containers if provided with well-draining potting mix and adequate space for root growth. Choose a container that is at least 6-8 inches deep to accommodate the bulb’s depth requirements. Be sure to water carefully, as overwatering can be detrimental.
What are some common pests that target tulip bulbs and how do I manage them?
Aphids, slugs, and snails often feed on tulip leaves and bulbs. Use neem oil or insecticidal soap to control aphid infestations. Hand-picking or using copper tape barriers can help deter slugs and snails.
Can I fertilize my tulips with regular garden fertilizer or is something specific needed?
While you can use a balanced, water-soluble fertilizer (20-20-20) during the growing season, it’s best to supplement with a low-nitrogen, high-potassium fertilizer in the fall to promote bulb storage and next year’s bloom.