When working with seeds, whether in agriculture or conservation efforts, knowing their viability is crucial. A reliable seed viability test can make all the difference between successful germination and wasted resources. But have you ever wondered how to conduct a thorough seed viability test? Understanding the importance of this process will help you identify viable seeds from non-viable ones, saving time and money in the long run. In this article, we’ll walk you through the basics of conducting a seed viability test, covering its significance in agriculture and conservation, and sharing best practices for achieving reliable results. By the end of it, you’ll be equipped with the knowledge to confidently determine seed viability and make informed decisions in your projects.
What is a Seed Viability Test?
So, you’ve got seeds that need testing, but what exactly does that entail? Let’s break down the fundamental concept behind seed viability testing.
Importance of Seed Viability Testing
When it comes to seed banks, nurseries, and farmers, having viable seeds for planting is crucial. A single mistake in seed selection can lead to crop failure, significant financial losses, and wasted resources. This is where seed viability testing comes into play. By conducting regular seed viability tests, you can ensure that your seeds are capable of germinating and growing into healthy plants.
Seed viability testing is essential for agriculture and conservation efforts. For instance, a study by the International Seed Testing Association found that up to 30% of commercial seeds may be non-viable. This highlights the importance of verifying seed quality before planting. In addition, seed banks rely on accurate viability testing to conserve rare and endangered species. By doing so, they can prevent the loss of genetic material and ensure the long-term survival of these species.
Regular seed viability tests also help farmers optimize their crop yields and reduce waste.
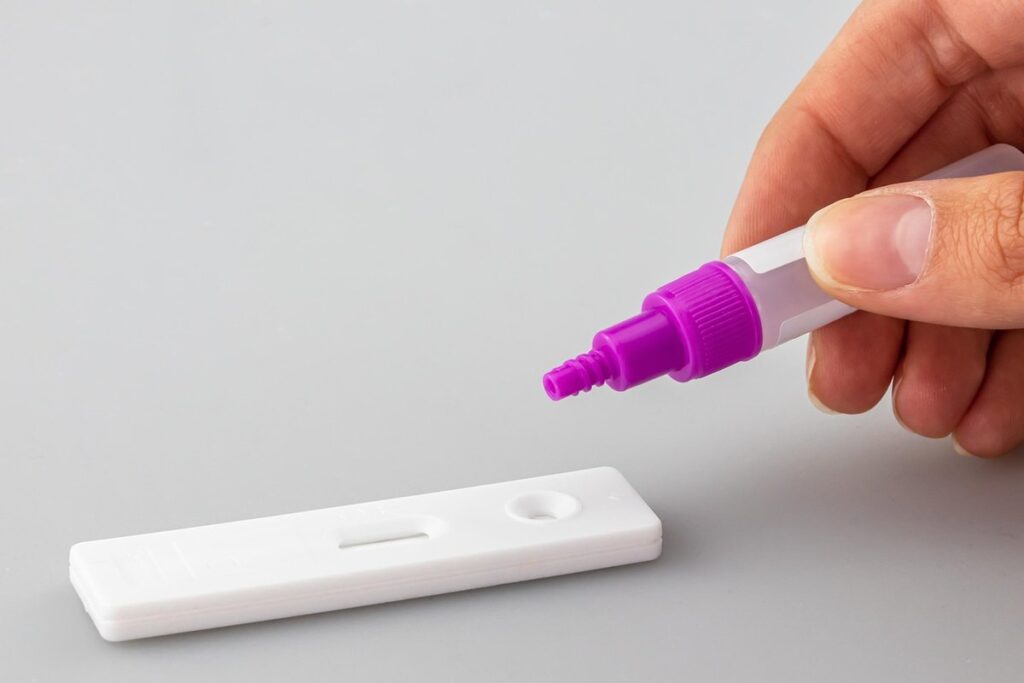
Types of Seed Viability Tests
When it comes to seed viability testing, different methods are used depending on the type of plant and the desired outcome. One common method is the germination test, which involves placing seeds in a controlled environment to see if they will sprout. This test is relatively simple and cost-effective, making it a popular choice for many farmers and researchers.
Another method used to assess seed viability is the electrolyte leakage test. In this test, seeds are submerged in an electrolyte solution, and the amount of ions released from the cells is measured. This method provides a more detailed understanding of the seed’s physiological condition and can be used to detect stress or damage that may not be apparent through germination tests.
The tetrazolium test, also known as the TTC (2,3-bis(2-methoxy-4-nitro-5-sulfophenyl)-2H-tetrazolium) test, is another method used to assess seed viability. This test involves staining seeds with a tetrazolium salt and observing the level of staining under a microscope. The tetrazolium test is particularly useful for detecting viable seeds in samples where germination may be difficult or impossible.
In addition to these methods, other techniques such as scanning electron microscopy (SEM) and histological analysis are also used to assess seed viability. Each method has its own advantages and disadvantages, and the choice of method will depend on the specific needs and goals of the research or application.
Factors Affecting Seed Viability
When conducting a seed viability test, it’s essential to understand that external factors can significantly impact seed quality. Environmental conditions such as temperature and moisture can either preserve or compromise the integrity of seeds.
Temperature, for instance, plays a crucial role in seed viability. Seeds stored at temperatures between 0°C and 10°C tend to retain their viability longer than those exposed to extreme heat or cold. In contrast, high temperatures above 25°C can accelerate deterioration, while low temperatures below -20°C can render seeds unusable.
Moisture levels also affect seed viability. Seeds exposed to excessive moisture may develop mold, leading to a decrease in germination rates. Conversely, seeds stored in dry conditions can remain viable for extended periods but may not retain their potency indefinitely.
To ensure accurate results from your seed viability test, it’s vital to store seeds under optimal conditions. A controlled environment with consistent temperature and humidity levels is ideal for preserving seed quality. Proper storage can significantly extend the shelf life of seeds, making them suitable for planting or further testing.
Preparing for a Seed Viability Test
Before you begin testing, let’s walk through the essential steps to prepare your seeds and equipment for a reliable seed viability test result. This ensures accurate results from the start.
Selecting Seeds for Testing
When it comes to selecting seeds for testing, it’s essential to choose those that accurately represent the population. This may seem straightforward, but it can be a common pitfall if not done correctly. The goal is to select a sample of seeds that are representative of the entire batch or lot.
To do this, consider the following:
- Take multiple samples from different parts of the storage container, as moisture and temperature fluctuations can affect seed viability.
- Select seeds of various ages, shapes, and sizes to account for potential variations within the population.
- Avoid selecting seeds that appear damaged, moldy, or show signs of insect infestation, as these will skew your results.
When sampling, it’s also crucial to record details about each seed, such as its position in the container and any notable features. This documentation will help you track and analyze the results more effectively.
Equipment and Materials Needed
To conduct a reliable seed viability test, you’ll need to have the right equipment and materials on hand. Start by gathering petri dishes, which are sterile containers used to hold the seeds during the testing process. You’ll also require an incubator or growth chamber that maintains a consistent temperature between 20-25°C (68-77°F) with high humidity.
Other necessary materials include agar or water for germination media, a laminar flow hood or clean workspace for preparing samples, and a microscope or magnifying glass for observing seed development. You may also want to have a timer, thermometer, and pH meter on hand to monitor the incubation conditions.
When selecting equipment and materials, consider factors such as sterility, consistency, and precision. For example, use sterile petri dishes and agar that is specifically designed for plant tissue culture. This will help minimize contamination and ensure accurate results. It’s also essential to calibrate your equipment regularly to maintain optimal performance.
Establishing a Testing Protocol
Developing a standardized testing protocol is essential for obtaining reliable results from seed viability tests. To create a comprehensive plan, start by identifying the specific objectives of the test and the type of seeds being evaluated. Consider factors such as the desired level of precision, the number of samples to be tested, and the resources available for equipment and personnel.
When establishing a testing protocol, it’s crucial to document every step involved in the process, including seed preparation, equipment calibration, and data collection. This documentation will serve as a reference point for future tests, ensuring consistency and minimizing human error.
Consider implementing a tiered testing approach, where samples are divided into smaller batches for analysis. This can help identify potential issues with individual seeds or batches, allowing for targeted interventions to improve overall viability. By taking the time to establish a well-planned protocol, you’ll be able to accurately determine seed viability and make informed decisions about future crop development.
Conducting the Seed Viability Test
Now that you have a seed viability testing kit, it’s time to learn how to conduct the test itself, which involves some simple yet crucial steps. This section guides you through each step of the process.
Setting Up the Germination Test
Setting up a germination test is a straightforward process that requires attention to detail. Begin by selecting healthy seeds with no visible signs of damage or mold. Choose a suitable container for the test, such as a petri dish or a glass jar, and fill it with a sterile medium like agar or water.
For agar-based tests, prepare the agar according to the manufacturer’s instructions and pour it into the container. Allow the agar to solidify before adding seeds. For water-based tests, use distilled or deionized water that is free of contaminants. Fill the container to a depth of about 1-2 cm, leaving enough space for seed germination.
Make sure to handle seeds gently to avoid damage, and add them in a single layer at a consistent density. The ideal temperature for germination varies depending on the plant species, but typically ranges between 20-30°C (68-86°F). Maintain this temperature using an incubator or by placing the container in a warm location.
It’s essential to use a sterile environment and equipment to prevent contamination during the test. Use aseptic techniques when handling seeds and media to ensure accurate results.
Incubating the Seeds
To successfully incubate seeds for the seed viability test, you must provide optimal conditions that mimic their natural environment. The ideal temperature range for most seeds is between 20°C to 30°C (68°F to 86°F). However, some species have specific requirements, so it’s crucial to research the optimal temperature for your particular seed type.
Maintaining high humidity levels is also vital during incubation. Covering the container with a damp cloth or plastic wrap can help maintain a humid microclimate. You can also place the container in a sealed plastic bag to create a more controlled environment. Aim for a relative humidity of 80-90% to ensure the seeds remain moist but not waterlogged.
Light exposure during incubation should be minimal, as it can inhibit germination or cause damage to sensitive seedlings. Place the container away from direct sunlight and avoid using fluorescent lights, which can promote uneven growth. A dark environment will help simulate natural conditions and encourage healthy seed development. By carefully controlling temperature, humidity, and light, you’ll create an optimal incubation environment for your seeds.
Recording and Interpreting Results
When analyzing the results of your seed viability test, accuracy is crucial to ensure reliable conclusions. To record and interpret data correctly, use a spreadsheet or table to keep track of each sample’s variables, including temperature, water content, and germination rate. Be meticulous when noting down observations, as even small discrepancies can significantly impact outcomes.
For instance, if you’re testing seeds at different temperatures (e.g., 20°C, 25°C, and 30°C), create separate columns for each variable to facilitate easy comparison. Similarly, if you’ve conducted multiple experiments under the same conditions but with varying seed types or batches, use distinct rows to differentiate between these groups.
Upon completion of the test, calculate germination rates by dividing the number of germinated seeds by the total number tested. This percentage value will give you an indication of a sample’s overall viability. Consider repeating tests for consistency and accuracy; variations in temperature, humidity, or other factors can lead to inconsistent results.
Understanding Seed Viability Test Results
Now that you have obtained seed viability test results, it’s time to understand what they mean for your seeds’ chances of germinating successfully. Let’s break down how to interpret this crucial data.
What Do the Results Mean?
When you receive the results of a seed viability test, it’s essential to understand what they mean for your specific situation. A high percentage of viable seeds indicates that the lot is suitable for planting, while low percentages suggest contamination or poor storage conditions.
In general, seed viability tests can produce one of three main outcomes:
• High viability (>80%): This result typically means you have a healthy and reliable seed stock. You can confidently proceed with sowing these seeds in your fields or nurseries.
• Low viability (<20%): Conversely, this outcome indicates potential issues with the seed lot, such as contamination by fungi or insects, poor storage conditions, or genetic abnormalities.
• Intermediate viability (20-80%): This range may indicate minor issues, but further investigation is necessary to determine the exact cause. It’s crucial not to immediately discard seeds showing intermediate viability, as they might still be viable with proper treatment and handling.
In conservation efforts, these results can be especially critical in evaluating seed banks and determining their effectiveness. Understanding what your seed viability test results mean will help you make informed decisions about seed selection, storage, and usage, ultimately impacting crop yields and biodiversity preservation.
Factors Affecting Test Results
When conducting seed viability tests, it’s essential to be aware of external factors that can influence test results. These variables can affect the accuracy and reliability of your data, ultimately impacting your decision-making process. One critical aspect is equipment calibration. Ensuring that your testing equipment is calibrated correctly will significantly impact the precision of your results.
For instance, using an uncalibrated incubator or germination chamber can lead to inconsistent temperatures, affecting seed germination rates. Similarly, a poorly maintained balance or scale can skew results due to inaccurate weight measurements. To minimize these effects, regularly calibrate and maintain your equipment according to manufacturer instructions.
Environmental conditions also play a significant role in test results. Temperature, humidity, and light exposure can all impact seed viability. For example, seeds exposed to high temperatures may exhibit premature germination or reduced vigor, while inadequate moisture levels can hinder germination altogether. Consider conducting tests in a controlled environment with precise temperature and humidity control to mitigate these effects.
Using Seed Viability Test Data
Using seed viability test data is crucial for informed decision-making in agriculture and conservation. By analyzing the results, you can determine the optimal sowing time, choose the best crop varieties, and plan for future seed production.
One key application of seed viability test data is in selecting high-quality seeds for planting. For instance, if your test reveals a low germination rate in a particular seed batch, it’s best to discard those seeds and opt for fresher ones instead. This simple yet crucial decision can significantly impact crop yields and reduce losses due to poor germination.
Seed viability test data also helps in predicting seasonal fluctuations in plant growth and productivity. By analyzing historical data on temperature, rainfall, and other environmental factors alongside seed viability results, you can anticipate potential challenges and plan accordingly.
When interpreting seed viability test data, consider the following practical tips:
* Compare your results to industry benchmarks or established standards
* Analyze trends over time to identify seasonal patterns or correlations with environmental factors
* Use statistical models or data visualization tools to extract meaningful insights from your results
Implementing a Reliable Seed Viability Testing Program
Now that you have a clear understanding of seed viability testing, let’s dive into implementing a reliable program for your specific needs and operations. This includes selecting suitable testing methods, equipment, and techniques.
Establishing Quality Control Measures
Establishing quality control measures is crucial for ensuring that your seed viability testing program produces reliable results. This involves putting in place protocols to prevent human error, equipment malfunctions, and other factors that can compromise the accuracy of your tests.
To begin with, you should develop a standard operating procedure (SOP) for conducting seed viability tests. This document should outline every step involved in the process, from preparing the test samples to analyzing the results. Having a clear SOP will help ensure that all personnel performing the tests follow the same protocol, reducing the likelihood of inconsistencies.
Another essential aspect of quality control is maintaining accurate records. This includes logging details about the seed samples, the testing method used, and any variations in the process. Regularly reviewing these records will enable you to identify areas for improvement and make adjustments as needed.
Additionally, it’s vital to regularly calibrate and maintain your equipment to prevent malfunctions that can affect test results. Set a schedule for checking and calibrating instruments, and keep a record of these activities. By implementing these quality control measures, you’ll be able to rely on the accuracy of your seed viability testing results, making informed decisions about seed inventory management and future crop yields.
Training Personnel on Seed Viability Testing
Proper training of personnel is essential for accurate seed viability testing. It’s not just about following procedures; it’s about understanding the underlying science and techniques involved. Without proper training, personnel may misinterpret results, leading to incorrect conclusions and potentially devastating consequences for crops.
When conducting seed viability tests, personnel must be familiar with factors that can affect test outcomes, such as temperature, humidity, and equipment calibration. They should also understand how to properly handle and store seeds to prevent damage or contamination.
To ensure accurate testing, provide ongoing training opportunities, including workshops, seminars, and hands-on practice sessions. This will not only enhance personnel’s understanding of seed viability testing but also build their confidence in executing the tests correctly.
Additionally, consider establishing a standard operating procedure (SOP) for seed viability testing. This SOP should outline specific steps, responsibilities, and quality control measures to ensure consistency across all test results.
Integrating Seed Viability Testing into Operations
Once you’ve selected a reliable seed viability testing method, it’s essential to integrate this process into your daily operations seamlessly. This can be achieved by allocating specific personnel for seed handling and viability testing tasks, ensuring that these individuals undergo proper training on the procedure.
Developing standard operating procedures (SOPs) is also vital in maintaining consistency across all test results. These guidelines should outline each step involved in seed collection, preparation, and testing, as well as record-keeping protocols.
To further streamline operations, consider investing in specialized equipment designed to facilitate efficient seed viability testing. This can include automated systems for seed germination or machines capable of processing large quantities of seeds quickly.
Lastly, make sure that your team is aware of the critical role they play in maintaining the reliability and integrity of your seed viability testing program. Encourage them to report any issues or anomalies promptly, allowing prompt corrective action to be taken as needed.
Common Challenges in Seed Viability Testing
As you work to perfect your seed viability test method, it’s essential to be aware of common challenges that can lead to inaccurate results and inconsistent outcomes. These obstacles are more prevalent than you might think.
Equipment-Related Issues
Equipment-related issues can significantly impact the accuracy of seed viability tests. Faulty incubators, for example, can cause inconsistent temperature fluctuations, leading to unreliable results. It’s essential to regularly inspect and maintain your equipment to prevent such problems.
Incorrect calibration is another common issue that can skew test outcomes. Calibration involves setting the equipment to precise standards, ensuring it measures accurately. If your equipment is not calibrated correctly, you may end up with skewed results, which can lead to incorrect conclusions about seed viability. To troubleshoot this issue, check your user manual for specific guidelines on calibration procedures.
Another common problem is temperature control issues. Incubators should maintain a consistent temperature within a narrow range (usually 25-30°C) during the test period. If the temperature deviates significantly from this range, it may affect seed germination rates and viability. Regularly monitoring your equipment’s performance can help you identify potential issues before they impact test results.
By addressing these common equipment-related issues, you can ensure more accurate and reliable seed viability tests.
Environmental Factors Affecting Test Results
Environmental factors can significantly impact seed viability test results. Temperature fluctuations, for instance, can cause seeds to become dormant or even germinate prematurely, leading to incorrect assessments of their viability. To minimize the effects of temperature, it’s essential to control the testing environment. This can be achieved by maintaining a consistent temperature between 20-25°C (68-77°F), with minimal variations.
Another environmental factor to consider is light exposure. Seeds exposed to direct sunlight or artificial lighting can experience photoinhibition, leading to reduced germination rates. To avoid this, test seeds in a dark or dimly lit environment. Humidity levels also play a crucial role, as high humidity can cause mold growth and reduce seed viability.
To ensure accurate results, it’s recommended to perform the test in a controlled laboratory setting with precise temperature and light controls. By mitigating environmental factors, you’ll increase the reliability of your seed viability tests and obtain more accurate results. This will enable you to make informed decisions about seed storage and handling, ultimately leading to improved crop yields and reduced waste.
Future Directions in Seed Viability Testing
As we’ve explored the importance of seed viability testing, let’s now look ahead to emerging trends and innovations that will shape the future of this critical process. This involves integrating cutting-edge technologies to enhance accuracy and efficiency.
Emerging Technologies and Methods
The pace of innovation in seed viability testing is accelerating rapidly, with new technologies and methods emerging that can enhance the accuracy and efficiency of this critical process. One such advancement is the use of machine learning algorithms to analyze data from seed germination tests. These algorithms can identify patterns and trends that would be difficult for human analysts to discern, leading to more informed decisions about seed quality.
Another exciting development is the integration of digital imaging technologies into seed viability testing. By using high-resolution cameras and specialized software, researchers can monitor seed germination in real-time, allowing for early detection of any issues or anomalies. This not only saves time but also reduces the need for physical handling of seeds, which can be prone to contamination.
These emerging technologies have the potential to revolutionize seed viability testing by providing more precise and actionable insights. As you consider implementing a reliable method, keep an eye out for these innovations and explore how they can be adapted to your specific needs. By staying up-to-date with the latest advancements, you can ensure that your seed viability testing process remains at the forefront of best practices.
Best Practices for Seed Viability Testing
To ensure reliable results from seed viability testing, adhering to established best practices is crucial. One essential practice is maintaining accurate and detailed records throughout the testing process. This involves documenting every step, from sample preparation to data analysis, allowing for easy tracking of results and enabling effective comparison between different batches.
Standardized protocols are also vital for ensuring consistency in test outcomes. This can be achieved by following established guidelines or regulations, such as those outlined by international organizations like the Association of Official Seed Analysts (AOSA). Standardizing equipment and materials used in testing can further minimize variations and ensure comparability across different labs.
Consistency is key when it comes to seed viability testing. Testing personnel should be trained to follow established procedures meticulously. Additionally, laboratories should regularly calibrate and maintain their equipment to guarantee precise results.
Maintaining accurate records, adhering to standardized protocols, and ensuring consistency in testing are fundamental best practices for obtaining reliable seed viability test results.
Conclusion
In conclusion, understanding the importance of seed viability testing can make all the difference between a successful harvest and a disappointing outcome. By following the steps outlined in this post, you’ll be well-equipped to conduct reliable seed viability tests that will give you accurate results. Remember, it’s not just about throwing seeds into water or sand – there’s a specific method to follow for each type of test. Don’t underestimate the impact of proper testing on your crop yields; a single faulty seed can lead to an entire field being affected.
Take away one key takeaway from this post: always prioritize accuracy when conducting seed viability tests.
Frequently Asked Questions
Can I conduct a seed viability test with seeds from any age or source?
When it comes to conducting seed viability tests, the age of the seeds is an essential factor to consider. Generally, seeds that are less than 2 years old will yield more accurate results. However, if you need to test older seeds, ensure they have been properly stored in a cool, dry place to maintain their integrity.
What are some common mistakes to avoid when conducting a seed viability test?
During the testing process, it’s easy to make mistakes that can lead to inaccurate results. Some common errors include improper handling of seeds, incorrect temperature control during incubation, and inadequate documentation of results. To ensure reliable results, always follow established protocols and maintain detailed records.
Can I use a combination of methods for seed viability testing, or is there one preferred approach?
While different testing methods have their strengths, some scenarios may require combining approaches to achieve accurate results. For instance, using both the direct germination test and the tetrazolium test can help identify seeds with varying levels of viability. However, it’s essential to choose a method that aligns with your specific needs and resources.
How often should I conduct seed viability tests in my operation?
Regular seed viability testing is crucial for maintaining high-quality seed stocks. Depending on factors such as storage conditions and handling practices, you may need to test seeds more frequently. As a general rule of thumb, consider conducting tests every 6-12 months for seeds stored under optimal conditions.
What are some tips for integrating seed viability testing into existing operations?
Implementing seed viability testing in your organization requires careful planning to ensure seamless integration. Start by identifying key stakeholders and establishing clear communication channels. Also, consider automating certain tasks using software or tools to streamline the testing process and reduce manual errors.