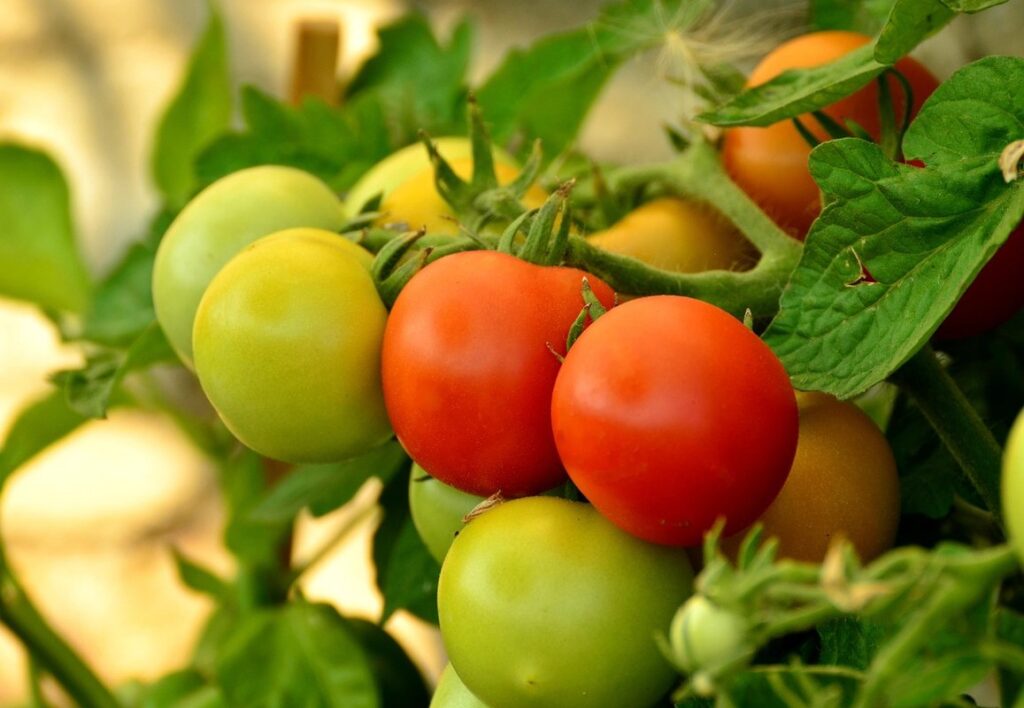
Fertilizing tomatoes in pots can be a daunting task, especially for beginner gardeners. You want to ensure your plants receive the right nutrients to produce an abundance of juicy fruit, but it’s easy to get confused by the numerous potting mixes and fertilizers available on the market. In this article, we’ll break down the essential steps to fertilize tomatoes in pots, covering everything from selecting the perfect potting mix to identifying common mistakes that can harm your plants. You’ll learn how to meet your tomatoes’ unique nutrient needs, which will result in healthier and more productive plants. By following our comprehensive guide, you’ll be able to enjoy a bountiful harvest of delicious homegrown tomatoes all season long.
Choosing the Right Potting Mix
When selecting a potting mix for your tomato plants, it’s essential to choose one that provides optimal drainage and nutrient retention. This will help prevent root rot and ensure healthy growth.
Understanding the Importance of pH Levels
When it comes to growing tomatoes in pots, understanding the importance of pH levels is crucial. Tomatoes are acidic-loving plants that thrive in a slightly acidic to neutral soil environment. If the potting mix has a pH level that’s too high or too low, it can hinder nutrient absorption and lead to poor plant growth.
A pH range of 6.0-7.0 is ideal for tomatoes, as this allows them to absorb essential nutrients like nitrogen, phosphorus, and potassium. However, if your potting mix has a high pH level (above 7.5), it can cause iron deficiency, stunted growth, and reduced yields. On the other hand, if the pH is too low (below 6.0), it may lead to over-absorption of nitrogen, causing excessive vegetative growth and reducing fruiting.
To choose the right potting mix for your tomato plants, look for mixes that have a balanced pH range. Some potting mixes are specifically designed for acidic-loving plants like tomatoes, so be sure to check the label for these features. You can also test the pH level of your potting mix using a soil testing kit or send it to a lab for analysis.
Selecting a Balanced Potting Mix
When selecting a balanced potting mix for your potted tomatoes, there are several key factors to consider. Firstly, you’ll want to look at the nutrient content of the mix. A well-balanced mix should contain a blend of essential nutrients such as nitrogen (N), phosphorus (P), and potassium (K). These macronutrients play a crucial role in promoting healthy growth and fruiting in your tomatoes.
In addition to nutrient content, drainage is also a critical consideration. Tomatoes in pots can be prone to waterlogging, which can lead to root rot and other problems. Look for a potting mix that contains ingredients such as perlite or vermiculite, which will help to improve drainage and prevent water from accumulating around the roots.
A good rule of thumb is to choose a potting mix with a pH between 6.0 and 7.0, which is suitable for most tomato varieties. You can also consider adding organic matter such as compost or well-rotted manure to your potting mix to provide additional nutrients and improve soil structure. By selecting a balanced potting mix, you’ll be giving your potted tomatoes the best chance of success.
DIY Potting Mix Recipe
Creating a custom potting mix for your tomato plants is easier than you think. With just a few simple ingredients, you can create a well-balanced blend that provides optimal nutrients and structure for healthy root growth. Here’s a basic DIY potting mix recipe to get you started:
You’ll need the following:
* 2 parts peat moss or coconut coir
* 1 part perlite or vermiculite
* 1 part compost or worm castings
To make, combine these ingredients in a large bucket and mix until well blended. You can adjust the ratios to suit your specific needs – for example, if you live in an area with high rainfall, you may want to add more perlite to improve drainage.
Some benefits of using this recipe include improved water retention, reduced risk of over-watering, and increased aeration around roots. This custom mix will also allow you to control the amount of fertilizer your plants receive, which is especially important for container gardening where nutrients can quickly become depleted.
Remember to re-mix or refresh your potting blend periodically to ensure optimal performance. By creating your own custom potting mix, you’ll be taking a proactive approach to supporting healthy tomato growth and maximizing your harvest yield.
Understanding Tomato Nutrient Needs
To grow healthy tomatoes in pots, it’s essential to understand their nutrient needs, which can be met through a balanced and targeted fertilization approach. Let’s break down the key elements.
Macronutrients: Nitrogen, Phosphorus, and Potassium
Nitrogen is an essential macronutrient for tomato plants as it promotes leaf growth and development. A lack of nitrogen can lead to yellowing leaves and reduced fruit production. For potted tomatoes, a balanced fertilizer with 20-20-20 N-P-K ratio (nitrogen-phosphorus-potassium) will suffice, but if you’re unsure about the specific needs of your plant, consider getting a soil test done.
Phosphorus plays a crucial role in root development and fruiting. It helps in transferring nutrients to different parts of the plant, which is vital for healthy fruit growth. A phosphorus deficiency can result in weak stems and reduced yields. If you notice that your tomato plants are struggling to produce flowers or fruits, consider increasing the phosphorus content in their fertilizer.
Potassium aids in overall plant health by regulating water balance and protecting against diseases. It also enhances fruit quality and ripening. Potted tomatoes require regular potassium applications, especially during periods of high temperature and humidity when they’re more susceptible to disease.
A well-balanced fertilizer will provide your tomato plants with the necessary macronutrients for optimal growth.
Micronutrients: Calcium, Magnesium, and Sulfur
Micronutrients play a crucial role in promoting healthy tomato plant growth. While macronutrients like nitrogen, phosphorus, and potassium are often the focus of fertilization efforts, micronutrients such as calcium, magnesium, and sulfur are equally important.
Calcium is essential for cell wall development and helps prevent blossom end rot (BER), a common issue in tomatoes grown in containers. To ensure adequate calcium levels, you can add dolomitic limestone or crushed eggshells to the potting mix. Magnesium is involved in photosynthesis and enzyme function, while sulfur supports plant defense mechanisms and aids in nutrient uptake.
When choosing a fertilizer for your potted tomatoes, look for products that contain these micronutrients. You can also use individual supplements like Epsom salt (rich in magnesium) or gypsum (high in calcium). Keep in mind that over-fertilization can be detrimental to plant health, so start with small amounts and monitor your plants’ responses.
It’s also worth noting that the potting mix itself can affect micronutrient availability. Using a well-balanced mix specifically designed for container gardens will provide a solid foundation for nutrient uptake.
Fertilizing Tomato Plants in Pots
When growing tomatoes in pots, fertilization is crucial for optimal production and flavor. This essential guide walks you through how to properly feed your container-grown tomato plants.
Frequency and Amount of Fertilization
When it comes to fertilizing tomato plants in pots, getting the frequency and amount of fertilizer just right is crucial for optimal growth. Over-fertilization can be detrimental to your plant’s health, while under-fertilization may not provide the necessary nutrients for a bountiful harvest.
A general rule of thumb is to fertilize your tomato plants when they are about 6-8 inches tall and have at least two sets of true leaves. You can use a balanced fertilizer (10-10-10 NPK) during this time, following the instructions on the package for the correct amount to apply. A good starting point is to mix 1-2 teaspoons of fertilizer into 1 gallon of water, and then dilute it further if needed.
For container-grown tomatoes, a common fertilization schedule is to feed them once a month with a balanced fertilizer during the growing season (spring-fall). However, this can be adjusted based on your plant’s specific needs. For example, if you notice your tomato plants are struggling to produce fruit or showing signs of nutrient deficiency, you may need to increase the frequency of fertilization. Conversely, if your plants seem to be thriving, you can reduce the amount and frequency of fertilizer application.
Organic vs. Synthetic Fertilizers
When it comes to fertilizing tomato plants in pots, one of the most important decisions you’ll make is whether to use organic or synthetic fertilizers. Both types have their pros and cons, which are essential to understand before making a choice.
Organic fertilizers are derived from natural sources such as compost, manure, and bone meal. They release nutrients slowly, promoting healthy plant growth without burning the roots. For example, using worm castings can provide tomatoes with a boost of nitrogen, phosphorus, and potassium while also improving soil structure. However, organic fertilizers may be more expensive and require longer preparation times.
Synthetic fertilizers, on the other hand, are made from chemical compounds that quickly release nutrients to plants. They’re often cheaper and faster-acting than their organic counterparts, but they can also harm the environment if not used carefully. Overuse of synthetic fertilizers can lead to soil degradation, water pollution, and even plant toxicity.
When deciding between organic and synthetic fertilizers for your potted tomatoes, consider the long-term health of your plants and the surrounding ecosystem. If you’re new to gardening or want a more sustainable approach, start with organic options.
Composting for Tomatoes
Composting for tomatoes is an excellent way to provide essential nutrients that promote healthy growth and fruiting. When done correctly, compost can become a rich source of nitrogen, phosphorus, potassium, and other micronutrients necessary for optimal tomato production.
To create a nutrient-rich compost specifically tailored for your potted tomatoes, start by collecting food waste such as fruit peels, vegetable scraps, and eggshells in a designated area. Add aged manure or finished compost to the mix to balance out the carbon-to-nitrogen ratio. Avoid overloading the compost pile with high nitrogen materials like meat and dairy products, which can attract pests.
As your compost matures, it will break down into a dark, crumbly material that can be incorporated into the potting soil at a rate of 10-20% per month. This approach allows you to replenish depleted nutrients and support beneficial microbial activity in the soil. Simply blend the mature compost with existing potting mix, taking care not to compact the soil around the tomato roots.
Some gardeners also use worm castings – a type of vermicompost created by worms breaking down organic matter – which is particularly rich in micronutrients like iron and zinc that are beneficial for tomatoes. However, ensure you source your worm castings from reputable suppliers or create them yourself using proper worm composting techniques to avoid contamination risks.
Monitoring Soil pH and Nutrient Levels
To grow healthy tomatoes, you need to know if your potting mix is too acidic or nutrient-deficient, which can be a challenge when working in small spaces. Let’s discuss how to monitor soil pH and nutrient levels.
Using pH Test Kits
When fertilizing tomatoes in pots, monitoring the soil pH level is crucial for optimal growth and nutrient uptake. However, testing the soil’s acidity or alkalinity can be a challenge, especially for gardeners new to container gardening. That’s where pH test kits come into play.
A pH test kit will help you determine if your potting mix has a suitable pH range for tomato plants, which typically thrive in slightly acidic to neutral soils with a pH between 6.0 and 7.0. You can use a digital or analog pH meter, depending on personal preference and the level of accuracy required.
To get accurate readings, make sure to calibrate your pH test kit according to the manufacturer’s instructions. Follow the testing procedure by taking a small soil sample from the potting mix and mixing it with the provided solution. Compare the resulting color change or digital reading against the pH scale on the kit’s chart. Adjust the potting mix accordingly if the pH level is outside the desired range, which may involve adding lime to raise the pH or peat moss to lower it.
Regularly monitoring soil pH levels will help you identify potential nutrient deficiencies and make informed fertilization decisions for your tomato plants in pots.
Interpreting Fertilizer Label Instructions
When it comes to fertilizing tomatoes in pots, deciphering fertilizer label instructions can be overwhelming. However, understanding the application rates and timing is crucial for optimal plant growth.
Start by carefully reading the label on your chosen fertilizer. Look for key information such as the nitrogen-phosphorus-potassium (N-P-K) ratio, which indicates the proportion of each nutrient in the formula. For example, a 10-10-10 N-P-K ratio means the fertilizer contains equal parts of nitrogen, phosphorus, and potassium.
Don’t be fooled by high numbers; they often refer to the percentage of the total weight of the fertilizer, not the actual amount you need to apply. Instead, focus on the recommended application rate, usually expressed in pounds or grams per square foot. Be sure to adjust this according to your pot size and tomato plant growth.
Timing is also essential. Fertilizers typically have specific guidelines for when to apply them relative to planting or pruning. Follow these instructions carefully, as over-fertilization can damage your plants.
Common Fertilizing Mistakes to Avoid
When fertilizing tomatoes in pots, it’s easy to make mistakes that can harm your plants. In the next few paragraphs, we’ll explore some common errors to steer clear of.
Overfertilization: A Recipe for Disaster
Overfertilizing your tomato plants can have severe consequences on their health and productivity. When you overfeed your plants with excessive amounts of nutrients, it can lead to an imbalanced diet that ultimately harms them. One of the most common issues is root burn, which occurs when the roots absorb more nutrients than they can handle, causing damage to the delicate root hairs.
This imbalance can also cause tomato plants to grow weak and leggy, rather than producing a healthy, bushy structure. Furthermore, overfertilization can lead to an increased risk of pests and diseases, as the plant becomes stressed and more susceptible to attack.
To avoid this disaster, it’s essential to follow the recommended fertilizer application guidelines for your specific potting mix. A general rule of thumb is to start with a balanced fertilizer at half the recommended strength, and gradually increase as needed. Regular soil tests can also help you determine if your plants are receiving too much or too little nutrients.
Underfertilization: Missing Key Nutrients
Underfertilization can have a significant impact on tomato plant growth and yield. When tomatoes don’t receive essential nutrients, they may struggle to produce fruit or experience stunted growth. Nitrogen, phosphorus, and potassium are the primary macronutrients required by tomato plants.
A lack of nitrogen can cause leaves to turn yellow and become less dense, while a deficiency in phosphorus can hinder root development and fruit set. Potassium is essential for overall plant health and resistance to disease. Without sufficient potassium, tomatoes may be more susceptible to pests and diseases.
To avoid underfertilization, it’s crucial to understand the specific nutrient requirements of your tomato plants. A balanced fertilizer containing N-P-K (nitrogen-phosphorus-potassium) should be applied regularly throughout the growing season. However, some fertilizers may provide additional micronutrients like iron or magnesium that are also essential for optimal growth.
When selecting a fertilizer, consider the type and size of pot your tomatoes are growing in. A general-purpose fertilizer can work well for smaller pots (less than 5 gallons), while larger containers may require more specialized or high-phosphorus fertilizers to promote fruiting.
Additional Tips for Fertilizing Tomatoes in Pots
To take your potted tomato fertilization to the next level, here are some essential additional tips to consider when feeding your plants. This includes handling over-fertilization and using fertilizers specifically designed for container gardens.
Companion Planting for Better Growth
When it comes to fertilizing tomatoes in pots, many gardeners focus on providing their plants with the right nutrients. However, companion planting is another essential technique that can significantly enhance tomato plant growth and reduce pests.
Companion planting involves growing certain plants alongside each other to create a mutually beneficial environment. Some popular companion plants for tomatoes include basil, oregano, parsley, and marjoram. These herbs not only add flavor to your dishes but also help repel pests like whiteflies, aphids, and hornworms. For example, basil is known to repel pests that target tomato plants, making it an excellent choice for companion planting.
Other beneficial companions include nasturtiums, which attract aphid-eating ladybugs, and chives, which repel aphids and other pests. When selecting companion plants, consider their growth habits and space requirements to ensure they won’t compete with your tomatoes for resources. By incorporating companion planting into your potting strategy, you can create a healthier, more balanced environment for your tomato plants to thrive.
Mulching to Retain Moisture and Reduce Fertilizer Needs
Mulching plays a crucial role in maintaining optimal growing conditions for tomatoes in pots. One of the primary benefits of mulching is its ability to retain moisture in the soil. This means that your tomato plants receive consistent hydration, reducing the need for frequent watering. As a result, you’ll save time and energy spent on manual watering. Additionally, mulch helps regulate soil temperature, preventing extreme heat or cold fluctuations that can harm plant growth.
To further reduce fertilizer needs, use organic mulch like straw, bark chips, or leaves. These materials not only retain moisture but also provide essential nutrients to the soil as they break down. For example, a 2-inch layer of straw can hold up to 10 times its weight in water. This natural process minimizes the need for synthetic fertilizers and ensures a balanced nutrient supply for your tomato plants.
When applying mulch around your potted tomatoes, keep it at least 3-4 inches away from the stem to prevent rot and other issues.
Frequently Asked Questions
Can I mix different potting mixes to achieve the perfect blend for my tomatoes?
You can, but be cautious not to overdo it. Mixing different potting mixes can lead to inconsistent nutrient levels and pH imbalances. Instead, consider making a single batch of your own DIY potting mix using ingredients like peat moss, vermiculite, and perlite.
How often should I check the pH level of my tomato plants’ soil?
It’s recommended to monitor the pH level every 1-2 weeks during the growing season. Use a reliable pH test kit to take accurate readings. Make adjustments to your fertilization plan based on the results to ensure optimal growth and nutrient absorption.
Can I use regular compost as fertilizer for my tomatoes, or is it too strong?
Compost can be used as fertilizer for tomatoes, but it’s essential to balance its strength with frequency of application. Start by mixing 10-20% compost into your potting mix, then gradually increase the ratio as your plants become more mature.
What’s the best way to repurpose leftover fertilizers or plant nutrients?
Repurpose them responsibly! Consider donating excess fertilizer to local gardening communities, sharing it among friends and family members who grow their own food, or repackaging it in smaller quantities for resale. Avoid pouring leftover fertilizer down storm drains or gutters.
How do I handle common fertilizing mistakes like overfertilization or underfertilization?
Be aware of your plants’ signs of nutrient deficiencies or excesses, such as yellowing leaves, poor growth, or excessive leaf drop. Adjust your fertilization plan promptly to prevent long-term damage and ensure optimal growth.