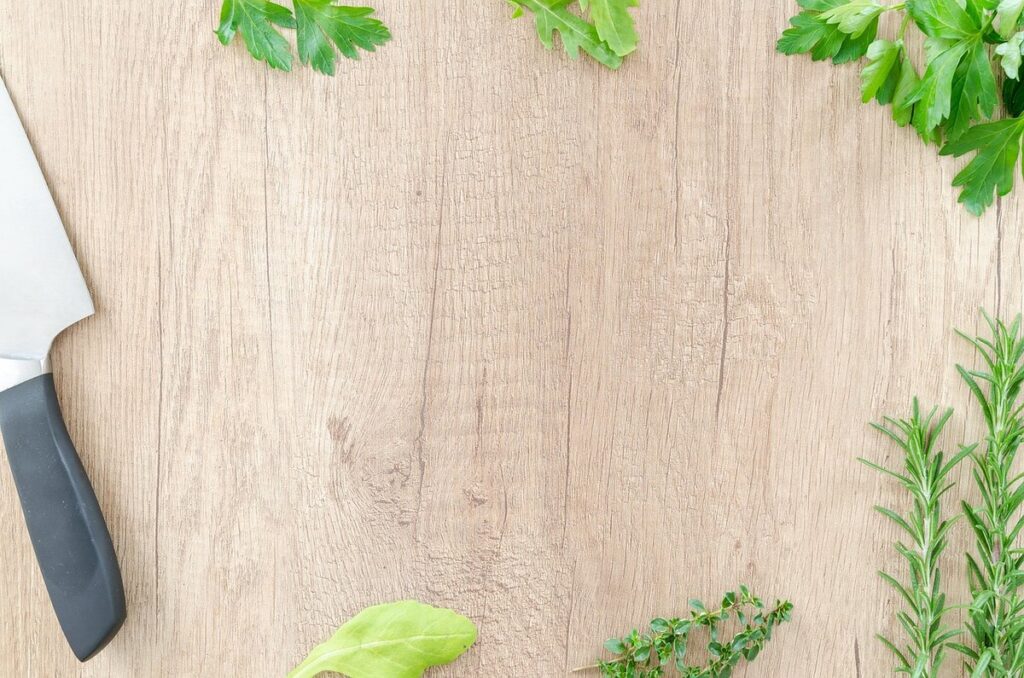
Are you tired of buying expensive herb plants every week, only to have them wilt away in no time? Do you want to learn how to grow your favorite herbs like basil, mint, and rosemary from scratch? Propagating herbs using cuttings is a game-changer for any home cook or gardener. Not only will it save you money, but it’s also a fun and rewarding way to get involved in gardening.
In this article, we’ll show you the best techniques for successfully rooting herb cuttings at home. We’ll cover the basics of herb propagation, including how to prepare your cuttings, create the right environment for root growth, and care for your new plants as they mature. By the end of this guide, you’ll have all the knowledge you need to grow a lush and thriving garden full of fresh herbs.
Understanding the Basics of Herb Propagation
To grow herbs from cuttings successfully, it’s essential to understand the basics of propagation, including how different herb species root and require care. Let’s dive into the fundamentals!
Why Grow Herbs from Cuttings?
Growing herbs from cuttings is an attractive option for many gardeners due to its numerous benefits and advantages. One of the most significant advantages is cost-effectiveness. Purchasing herb plants from a nursery can be expensive, especially if you’re looking to grow multiple varieties. In contrast, growing herbs from cuttings requires only a small initial investment in propagating tools and materials.
Another benefit of growing herbs from cuttings is speed. Cuttings typically root within 1-3 weeks, depending on the herb type and environmental conditions. This rapid growth allows you to enjoy fresh herbs sooner than if you had purchased seedlings. Furthermore, cuttings enable you to create new varieties by selecting stems with desirable traits such as flavor, texture, or fragrance.
You can also propagate your favorite herb varieties from cuttings to share with friends or use in breeding programs. To make the most of this method, choose healthy stem segments, remove lower leaves, and plant them in a well-draining potting mix. With proper care, you’ll be harvesting fresh herbs within weeks, all while enjoying the satisfaction of nurturing new plants from scratch.
Choosing the Right Herb Varieties for Cuttings
When it comes to choosing the right herb varieties for propagation via cuttings, you have a wide range of options to consider. Some popular choices are basil, mint, rosemary, and thyme, but there are many other varieties that can be successfully propagated using this method.
Basil is one of the most commonly used herbs for propagation via cuttings due to its high success rate and versatility in cooking. Mint, on the other hand, can be quite invasive, so it’s essential to keep a close eye on it as it spreads quickly. Rosemary and thyme are also popular choices, but they tend to require more patience and specialized care.
Less common options like oregano, sage, and lemongrass can also be propagated via cuttings, offering unique flavors and fragrances for your garden. When selecting herb varieties for propagation, consider factors such as climate, soil type, and personal preference. Some herbs are better suited to certain environments or uses, so it’s crucial to research the specific needs of each variety before attempting to propagate.
When choosing an herb for cuttings, look for stems with at least two sets of leaves to ensure they have a good chance of rooting successfully.
Preparing the Environment for Successful Propagation
Before you can start rooting your herb cuttings, it’s essential to create a suitable environment that will help them thrive. This involves preparing a propagation tray or potting mix specifically designed for cuttings.
Selecting the Best Cutting Material
When selecting cutting material for propagation, it’s essential to choose healthy stems that will give you the best chance of success. To identify these, look for sturdy stems with a well-developed root system and sufficient leaf growth. Avoid taking cuttings from weak or leggy plants, as they may struggle to adapt to their new environment.
Timing is also crucial when harvesting cuttings. Take them during the morning after the plant has had time to absorb water through its roots but before it gets too hot in the sun. This allows you to get the best possible material without shocking the plant with sudden changes in temperature or humidity.
When selecting cuttings, consider factors such as the plant’s maturity and vigor. For most herbs, choose stems that are about 4-6 inches long and have at least two sets of leaves. Cutting just above a node (where a leaf meets the stem) will encourage root development and increase the chances of successful propagation.
Avoid cutting into woody areas or taking too much of the stem, as this can cause stress to the plant and reduce its ability to thrive in your new environment. By choosing the right cutting material, you’ll be giving yourself the best possible start for a healthy and productive herb garden.
Watering, Temperature, and Humidity Requirements
When it comes to successfully growing herbs from cuttings, providing them with the right environmental conditions is crucial. Watering, temperature, and humidity are all interrelated factors that can make or break your herb propagation efforts.
Start by watering your herb cuttings properly – this means keeping the soil consistently moist but not waterlogged. Check the moisture level daily by sticking your finger into the soil up to the first knuckle; if it feels dry, it’s time for a drink. Aim for about 2-3 times a week during the germination period (7-10 days), reducing frequency as the plants develop roots.
Most herbs prefer daytime temperatures between 65-75°F (18-24°C) and nighttime temperatures around 55-65°F (13-18°C). Some sensitive herbs like basil and mint can tolerate warmer conditions, but it’s best to err on the side of caution. Maintain a humid microclimate around your cuttings by covering the pot with a clear plastic bag or cloche.
Monitor temperature and humidity levels closely during this period, adjusting as necessary. Keep in mind that herb varieties have different requirements; do some research to understand the specific needs of the herbs you’re propagating.
Taking Cuttings: Techniques and Timing
Now that you’ve learned how to prepare your herb cuttings, it’s time to learn the techniques and timing for successful propagation. We’ll walk you through everything you need to know.
Stem Cuttings
When taking stem cuttings from herb plants, it’s essential to get the process right. This involves selecting the right cutting length, making clean cuts, and preparing the cut ends.
To start, select a healthy stem with at least two sets of leaves. Cut just below a node, which is the point where a leaf meets the stem. Make sure your pruning tool is clean and sharp to avoid crushing or tearing the stem. A good starting point for cutting length is around 2-3 inches (5-7.5 cm). Longer cuttings can be more difficult to root.
Once you’ve made your cut, remove any lower leaves that will be submerged in water or soil. This helps prevent rot and ensures the cutting has a better chance of rooting successfully. Trim the top set of leaves back by about half to minimize transpiration. Now, it’s time to prepare the cut ends by dipping them into a rooting hormone powder or liquid to stimulate root growth.
Keep your stem cuttings in a propagation tray filled with water or a well-draining potting mix until roots develop and new growth appears.
Leaf and Tip Cuttings
Taking healthy leaf or tip cuttings is an effective way to propagate herbs and create new plants. To start, select leaves or tips from mature herb plants that are free of pests and diseases. Choose stems with at least two sets of leaves, as this will increase the chances of successful rooting.
When snipping off the cutting, use a clean pair of scissors or pruning shears to prevent the spread of disease. Cut just above a node (the point where a leaf meets the stem), making sure each cutting has a small amount of stem attached. Remove lower leaves from the cutting, leaving only two or three sets at the top.
This process helps reduce water loss and prevents rotting. Prepare the cuttings by gently dusting off any excess powder or debris with a soft brush or cloth. This will prevent clogging the rooting medium when planted. Now your leaf or tip cuttings are ready to be potted in a well-draining rooting mix, where they can begin their journey to becoming healthy new herb plants.
Rooting and Developing the New Plant
Now that you have successfully rooted your cuttings, it’s time to focus on developing a healthy new plant. This process is crucial for establishing a robust root system.
Basic Rooting Techniques
When it comes to promoting root growth in herb cuttings, several techniques can be employed. Using rooting hormones is a popular method as they stimulate cell division and increase the likelihood of successful rooting. Dip the cutting into a rooting hormone powder or liquid according to the product’s instructions for best results.
A suitable growing medium should also be chosen to provide optimal conditions for root development. Peat-based mediums, like a mix specifically designed for cuttings, retain moisture while preventing waterlogging, which can hinder root growth. Alternatively, a well-draining potting mix with added perlite or vermiculite can provide the necessary structure and drainage.
Misting systems are another effective way to promote rooting by maintaining a humid environment around the cutting. This can be done using a fine spray bottle or a more advanced misting system designed for propagation trays. Regularly misting the cutting will help prevent dryness, which can lead to root failure.
Monitoring Progress and Transferring Cuttings to Soil
Monitoring progress is crucial when rooting herb cuttings. Observe your cutting regularly for signs of healthy root development, such as a white or light-colored root growing longer each day. This typically takes 1-3 weeks, depending on the herb and growing conditions. As roots develop, you may notice slight movement in the cutting when it’s gently tugged.
Once you’ve confirmed healthy root growth, it’s time to transfer your cutting from water or a rooting medium to soil. Choose a well-draining potting mix and a container slightly larger than the original one. Gently remove the cutting from its current environment, taking care not to disturb the developing roots. Trim any weak or damaged roots before planting.
Plant the cutting in the new container, ensuring the node (where the leaf meets the stem) is above the soil surface. Water thoroughly and maintain a consistent level of moisture until the herb is established. Keep an eye out for signs of stress, such as yellowing leaves or droopy stems, which may require adjustments to your care routine.
When transferring cuttings, avoid exposing them to direct sunlight, which can cause shock. Place the new plant in a spot with bright, indirect light and maintain temperatures between 65-75°F (18-24°C).
Caring for Your New Herb Plant
Once you’ve successfully rooted your herb cutting, it’s essential to provide it with proper care to ensure it thrives and adapts well to its new environment. In this next step, we’ll cover everything you need to know about caring for your new herb plant.
Light Requirements and Placement
Proper lighting is essential for the healthy growth of newly propagated herb plants. When growing herbs from cuttings, it’s crucial to provide sufficient light to promote photosynthesis and prevent etiolation (leggy growth). Most herbs require bright, indirect light to thrive, but some can tolerate direct sunlight.
Choose a location that receives at least 4-6 hours of direct sunlight per day or use grow lights to supplement natural light. For example, basil and mint love full sun, while parsley and cilantro prefer partial shade. If you’re growing herbs indoors, place them near an east- or west-facing window for gentle, indirect light.
Adjust the lighting conditions based on the time of year and your location’s climate. In regions with intense sunlight, provide filtered shade to prevent scorching. Conversely, in areas with limited natural light, use grow lights to ensure your herbs receive sufficient illumination. Monitor your plants’ response to their environment and adjust the lighting as needed to promote healthy growth and maximize yields.
Watering and Fertilizing Young Plants
Watering and fertilizing young herb plants is crucial during their initial growth stages. Over-watering can be detrimental to these delicate seedlings, causing root rot and stunted growth. To avoid this, it’s essential to establish a consistent watering schedule.
Start by watering your herb cuttings once a week for the first few weeks after propagation. Increase the frequency as the plant grows, but ensure the soil isn’t too wet or dry. A well-draining potting mix can help prevent waterlogged soil and root rot.
Fertilization is also vital for young herbs. Begin with a balanced, water-soluble fertilizer (20-20-20) at half the recommended strength to avoid burning the roots. You can fertilize your herb plants once a week after they’ve developed their first set of leaves. As they mature, switch to a more diluted fertilizer or use compost tea for an organic boost.
Keep an eye out for common issues such as yellowing leaves or slow growth, which may indicate over-fertilization or underwatering. Adjust your watering and fertilizing routine accordingly to ensure your young herb plants receive the right amount of care to thrive.
Tips and Variations for Advanced Herb Growers
As you become more comfortable with growing herbs from cuttings, it’s time to experiment with new techniques to take your skills to the next level. This is where tips and variations come in, allowing for endless creativity.
Experimenting with Different Propagation Methods
As you continue to experiment with growing herbs from cuttings, you may find that certain methods work better for specific species or growth conditions. This is where alternative propagation methods come into play. Division, layering, and grafting are three techniques worth exploring.
Division involves splitting established herb plants into smaller sections, each with its own roots. This method is ideal for herbs like mint and lemongrass, which tend to produce multiple shoots from a single root system. To divide your herbs, carefully separate the roots, making sure each section has at least one node (the joint where leaves meet the stem). Plant the divisions in well-draining soil and keep them consistently moist.
Layering is another technique that can be used for herbs like rosemary and thyme. This involves bending a long branch down to the ground and covering it with soil, allowing roots to form before cutting the plant below the node. Grafting, on the other hand, involves joining a piece of stem (called a scion) from one herb plant onto the root system of another (the rootstock). This method is useful for herbs like basil and oregano, which can be propagated more easily using this technique.
These alternative methods require some practice to master, but they offer exciting opportunities for experimenting with different propagation techniques. With patience and persistence, you’ll discover which methods work best for your favorite herb species.
Troubleshooting Common Issues in Herb Cuttings
As an advanced herb grower, you’re likely to encounter common issues that can hinder the success of your propagation process. One of the most frustrating problems is root rot, which occurs when the cutting’s base becomes waterlogged and starts to decay. To prevent this, ensure your rooting medium is well-draining and avoid overwatering. Monitor your cuttings closely for signs of fungal infections, such as white cottony growths or a soft, mushy texture.
Another common issue is poor rooting success rates, which can be caused by factors like incorrect cutting types, inadequate light, or insufficient temperature control. To improve root development, make sure to use fresh and healthy cuttings with at least two sets of leaves. Provide sufficient light (around 12-14 hours a day) and maintain temperatures between 65-75°F (18-24°C). Regularly inspect your cuttings for signs of stress or disease, and adjust your care accordingly.
When dealing with these issues, remember that prevention is key. Implementing good hygiene practices, like disinfecting tools and work surfaces, can go a long way in reducing the risk of infection. By staying vigilant and making necessary adjustments to your propagation process, you can overcome common problems and achieve successful herb growth from cuttings.
Frequently Asked Questions
Can I Propagate Herbs from Cuttings Year-Round?
Yes, most herb species can be propagated from cuttings throughout the year, but some may have specific requirements or restrictions depending on their growing season and hardiness zone. Make sure to research the optimal time for propagation of your chosen herbs based on their needs.
What’s the Best Time to Take Cuttings from Herb Plants?
The best time to take cuttings depends on the herb species and its growth stage. Generally, it’s ideal to take cuttings in the morning after the plant has had a chance to absorb water but before the heat of the day sets in. This allows for optimal rooting and reduces the risk of fungal infections.
How Do I Know If My Herb Cuttings Are Rooting Successfully?
Monitoring progress is crucial when growing herbs from cuttings. Look for signs of new growth, such as leaf buds or tiny roots emerging from the cutting. You can also gently tug on the cutting to check if it’s developing a strong root system. Be patient and allow 1-3 weeks for roots to develop.
Can I Use Any Type of Water for Propagation?
Yes, but using distilled or rainwater is recommended as tap water may contain minerals that inhibit rooting. Avoid using softened water as well, which can be too alkaline for some herb species. Using a propagation tray with a built-in reservoir or a humidity dome can also help maintain optimal moisture levels.
What Happens If My Herb Cuttings Develop Leafy Growth but No Roots?
If your cuttings are developing leafy growth but no roots, it may indicate that the cutting has become too leggy or is lacking sufficient light. Prune back the leaves to encourage bushy growth and provide more intense lighting conditions for better root development. Make sure to maintain a humid environment to support healthy rooting.
Can I Propagate Herbs from Cuttings in Indoor Conditions?
Yes, herbs can be successfully propagated indoors using a propagation tray or a pot with a clear plastic cover. This setup helps maintain optimal humidity levels and provides the necessary light for healthy growth. Be cautious of overheating and ensure proper air circulation to prevent fungal diseases.
How Do I Overwinter My Propagated Herb Plants?
To overwinter your propagated herb plants, reduce watering and fertilizing as the days shorten and temperatures drop. Move the plants to a cooler location with indirect light and protect them from frost. Some herbs can be brought indoors or moved to a greenhouse for continued growth during winter months.
Can I Share Herb Cuttings with Friends and Family?
Yes, sharing herb cuttings is a great way to spread knowledge and enthusiasm about home gardening! Just make sure to collect clean and healthy cutting material, provide clear instructions on propagation techniques, and encourage your friends to experiment with different herbs and varieties.