Growing your own sweet potatoes can be a rewarding experience, especially when you get to enjoy the fruits of your labor (or should I say, roots!). Sweet potatoes are not only a delicious and nutritious addition to any meal, but they’re also relatively easy to cultivate, making them a great choice for gardeners of all skill levels. However, knowing where to start can be overwhelming. With so many varieties to choose from and factors to consider, it’s easy to get lost in the process. But don’t worry, we’ve got you covered. In this comprehensive guide, we’ll walk you through every step of growing sweet potatoes, from selecting the perfect variety to harvesting and storing your crop. By the end of this article, you’ll be well on your way to enjoying a bountiful harvest of homegrown sweet potatoes.
Choosing the Right Variety
When it comes to growing sweet potatoes, selecting the right variety is crucial, as different types thrive better in specific climates and conditions. Let’s explore your options and find the perfect fit for your garden.
Factors to Consider When Selecting a Sweet Potato Type
When selecting a sweet potato variety, it’s essential to consider several factors to ensure you choose one that thrives in your specific climate and meets your needs. Disease resistance is crucial, as sweet potatoes are susceptible to various diseases like powdery scab and fusarium wilt. Look for varieties with built-in resistance or tolerance to these diseases.
Yield potential is another critical consideration. Some sweet potato varieties produce high yields, while others may be more suited for small-scale production. If you’re planning a large harvest, choose a variety known for its productivity. Climate suitability is also vital. Different sweet potato varieties are adapted to various temperature and moisture conditions.
For instance, ‘Beauregard’ is a popular variety that excels in warm climates with high humidity. On the other hand, ‘Jewel’ is more suited for cooler temperatures and drier conditions. Research the specific needs of your chosen variety and ensure it aligns with your growing environment. This will help you avoid potential issues and maximize your harvest. Consider factors like maturity days, space requirements, and growth habits when making your selection.
Popular Sweet Potato Varieties for Home Growers
When selecting sweet potato varieties for home growing, it’s essential to consider factors such as climate, soil type, and desired use. For most regions, the following popular varieties are suitable and relatively easy to grow.
‘Jewel’ is a popular choice among gardeners due to its compact size and high yields of small to medium-sized tubers. It thrives in temperatures above 60°F (15°C) and can tolerate partial shade. ‘Beauregard’ is another reliable option, producing large, sweet tubers with good disease resistance.
For warmer climates or areas with long growing seasons, consider varieties like ‘Covington’ or ‘O’Henry’. These produce larger tubers with higher sugar content and are less sensitive to heat stress. In cooler regions, opt for ‘Georgia Jet’ or ‘Velda’s’, which mature faster and can tolerate light frosts.
When selecting a variety, make sure it is compatible with your growing conditions and desired harvest size. Consider factors such as space constraints, maturity dates, and pest/disease susceptibility when choosing the best sweet potato variety for your home garden.
Preparing the Soil and Climate
Before you start planting, it’s essential to prepare your soil and climate for sweet potato growth by selecting the right conditions and giving your soil a good head start. This will set your plants up for success from day one.
Understanding Sweet Potato Soil Requirements
When it comes to growing sweet potatoes, understanding the ideal soil conditions is crucial for a bountiful harvest. Sweet potatoes prefer well-draining, loose soils that are rich in organic matter. A pH level between 5.5 and 6.5 is considered optimal, as this allows for efficient nutrient uptake.
In terms of nutrients, sweet potatoes require a balanced diet of nitrogen, phosphorus, and potassium (NPK). However, they are particularly responsive to high levels of potassium, which helps promote root growth and development. A soil test can help determine the specific nutrient requirements of your soil.
To ensure proper drainage, incorporate 2-3 inches of compost or well-rotted manure into the top 6-8 inches of soil before planting. This will not only improve water retention but also support beneficial microbial activity. Avoid heavy clay soils, as these can be prone to waterlogging and root rot. By creating a conducive environment with the right pH and nutrient balance, you’ll set your sweet potatoes up for success and enjoy a healthy, disease-free crop.
Optimizing Climate Conditions for Sweet Potato Growth
When it comes to growing sweet potatoes, understanding and optimizing climate conditions is crucial for optimal growth. Sweet potatoes require a warm and humid climate to thrive, making them ideal for regions with mild winters and long growing seasons.
Temperature plays a significant role in sweet potato cultivation. Optimal temperatures range from 65°F to 85°F (18°C to 30°C), with daytime temperatures above 70°F (21°C) promoting healthy growth. Avoid planting in areas where the temperature consistently drops below 55°F (13°C), as this can lead to root damage and reduced yields.
Sunlight is also essential for sweet potato growth, requiring at least six hours of direct sunlight per day. Moisture levels should be maintained between 60-80% relative humidity to prevent fungal diseases and promote healthy tuber formation.
To optimize climate conditions, consider using row covers or cold frames to extend the growing season in cooler climates. In regions with high temperatures, provide shade for your plants during peak sun hours to prevent scorching. By understanding and adapting to local climate conditions, you can create an optimal environment for sweet potato growth and maximize yields.
Planting and Spacing
When it comes to growing sweet potatoes, proper planting and spacing are crucial for a bountiful harvest. We’ll walk you through the ideal techniques to get your sweet potato patch off to a great start.
Seed Selection and Germination
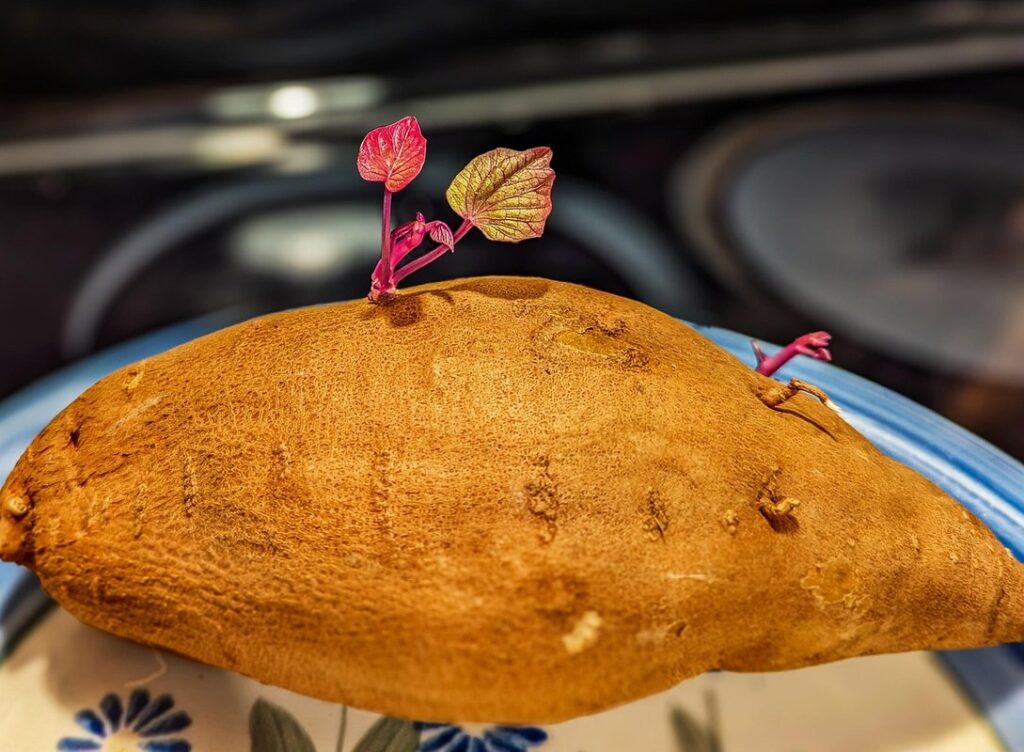
When it comes to growing sweet potatoes, selecting the right seeds and understanding proper germination techniques are crucial steps that can make all the difference in your harvest. To begin, you’ll need to choose a sweet potato variety that suits your climate and desired maturity date.
Opt for certified disease-free seed tubers or slips from a reputable supplier, as these will have a higher success rate than home-grown seeds. For small-scale growers, purchasing certified slips can be a more convenient option, while larger operations may prefer to propagate their own slips using healthy mother tubers.
Proper storage and handling of your selected seeds are also vital. Store seed tubers in a cool, dark place with adequate ventilation until planting time. Avoid exposing them to direct sunlight or high temperatures, which can cause decay and reduce germination rates.
When it comes to sowing, plant the seed tuber or slip about 1-2 inches deep and 3-4 feet apart. Water gently but thoroughly after planting, then maintain consistent moisture levels until germination occurs.
Planting Depth and Spacing Recommendations
When planting sweet potato slips, it’s essential to get the depth and spacing just right. Research has shown that planting too deep can lead to rot and other diseases, while too shallow can cause stress to the roots.
As a general rule of thumb, plant sweet potato slips 2-4 inches deep, making sure the “crown” (where the leaves meet the stem) is above the soil surface. This allows for optimal root development and minimizes the risk of rot. Make sure to firm the soil gently around each slip to prevent air pockets from forming.
In terms of spacing, plant slips 12-18 inches apart in rows that are 3-4 feet apart. This will give them enough room to spread out their roots and grow without becoming overcrowded. For larger varieties, you may need to plant them even farther apart to accommodate their mature size.
Remember, the optimal planting depth and spacing can vary depending on your specific climate and region. Be sure to consult with local gardening experts or check with your extension office for more specific advice tailored to your area.
Watering and Fertilization
Now that we’ve got our sweet potato vines established, let’s talk about keeping them happy and healthy through regular watering and fertilization practices. Proper care will ensure a bountiful harvest!
Irrigation Strategies for Sweet Potatoes
When it comes to growing sweet potatoes, irrigation is crucial for optimal production. Sweet potatoes require consistent moisture, especially during the first few weeks after transplanting and when tubers begin to form. However, overwatering can lead to rot, reduced yields, and even plant death.
To strike a balance, establish a watering schedule that takes into account your climate and soil type. For most regions, it’s recommended to water sweet potatoes every 7-10 days during the first month after transplanting. As the crop matures, reduce watering frequency to about once a week. A good rule of thumb is to provide 1-2 inches of water per week, either through rainfall or irrigation.
Monitor soil moisture by inserting your finger into the soil up to the knuckle. If the soil feels dry, it’s time to water. Keep in mind that sweet potatoes prefer well-draining soil and can be susceptible to root rot if the soil is too wet. Avoid overhead watering, which can lead to fungal diseases. Instead, use drip irrigation or soaker hoses to deliver water directly to the roots.
Nutrient-Rich Fertilizers for Optimal Growth
When it comes to growing sweet potatoes, fertilizers play a vital role in promoting optimal growth and development. Fertilizers provide essential nutrients that help the plants thrive, leading to healthier roots and more abundant yields.
There are two primary types of fertilizers: organic and chemical. Organic fertilizers, derived from natural sources like animal waste or compost, release nutrients slowly as they break down in the soil. These options are ideal for sweet potatoes, as they promote healthy microbial activity and improve soil structure. Some examples of organic fertilizers include fish emulsion, bone meal, and alfalfa meal.
Chemical fertilizers, on the other hand, provide a quick burst of nutrients but can be detrimental to the environment if overused. They often contain nitrogen, phosphorus, and potassium (NPK) in varying concentrations, which can lead to imbalanced soil chemistry if not applied carefully.
For optimal growth, apply fertilizers at the right time: once when transplanting seedlings into individual pots, and again 2-3 weeks after they’re transplanted into the main growing area. Be sure to follow the recommended application rates on the label to avoid over-fertilizing, which can harm your sweet potatoes.
Start by applying a balanced fertilizer (such as 10-10-10 NPK) at planting time. This will provide a foundation for growth and development. Later, switch to a high-phosphorus fertilizer (e.g., 15-30-15 NPK) to promote root development and flowering.
Pest and Disease Management
Managing pests and diseases is crucial when growing sweet potatoes, so let’s take a closer look at how to prevent and treat common issues that can affect your crop.
Common Sweet Potato Pests and Their Control Methods
When it comes to growing sweet potatoes, one of the most significant challenges you’ll face is dealing with pests. These unwanted visitors can cause damage to your plants, reducing yields and affecting flavor. Let’s take a closer look at some common sweet potato pests and how to control them.
Aphids are small, soft-bodied insects that feed on plant sap, causing curled or distorted leaves. To manage aphid infestations, use neem oil or insecticidal soap to kill the adults, and spray water mixed with mild dish soap to wash away eggs and nymphs. Whiteflies, on the other hand, are tiny flying insects that spread diseases like sweet potato virus X. Use yellow sticky traps or fine mesh row covers to capture these pests before they reach your plants.
Slugs and snails are also notorious sweet potato pests, causing damage at night by eating leaves and stems. To protect your plants from these slimy critters, use copper tape around the plant’s stem, which repels them due to its electrical properties. Additionally, set traps using beer or yeast mixture in shallow containers near affected areas.
Regularly inspecting your sweet potato patch will help you catch pest issues early on, making it easier to implement control measures before they get out of hand. By taking proactive steps and staying vigilant, you can minimize the impact of these pests and enjoy a healthy, thriving sweet potato crop.
Disease Prevention and Treatment in Sweet Potatoes
When it comes to growing sweet potatoes, disease prevention and treatment are crucial steps to ensure a healthy harvest. Sweet potatoes are susceptible to several common diseases, including root rot, powdery mildew, and leaf spot.
Root rot is one of the most significant threats to sweet potato crops. It’s caused by excessive moisture and can be prevented by ensuring good drainage in your soil. To avoid this issue, make sure your sweet potato beds have at least 6-8 inches of mulch on top to retain moisture while preventing waterlogged soil.
Powdery mildew is another common disease that affects sweet potatoes. It appears as a white powdery coating on the leaves and can be treated with fungicides or neem oil. To prevent this issue, keep your plants well-spaced and provide adequate air circulation around them.
Leaf spot diseases are caused by fungal infections that thrive in moist environments. They appear as small brown spots on the leaves and can spread quickly if left untreated. To manage leaf spot, remove any infected leaves immediately and treat the remaining foliage with a fungicide.
Preventing disease is always easier than treating it, so make sure to use clean tools when handling your sweet potatoes, avoid overwatering, and rotate your crop regularly to reduce the risk of disease buildup in your soil.
Harvesting and Storage
Now that your sweet potatoes are ripe, it’s time to carefully dig them up and store them properly to enjoy their delicious flavor for months to come. This next step is crucial for preserving their quality.
Determining Sweet Potato Maturity
When it comes to determining sweet potato maturity, timing is everything. You’ll want to harvest your crop at the right moment to ensure optimal flavor and texture. One of the most reliable ways to check for maturity is through visual cues.
Check for a deep orange or yellow color on the sweet potatoes, as this indicates they are ripe. Avoid pulling up the roots if they still have green skin, as this can be a sign that they’re not yet mature. Gently dig around the base of the plant with your fingers to check for size and shape. Sweet potatoes should be firm and heavy for their size.
Performing a taste test can also help you determine maturity. Take a small sample from one of the roots and gently bite into it. If it’s too starchy or bland, it may not be ripe yet. However, if it has a sweet, earthy flavor, it’s likely ready to harvest.
In terms of yield expectations, most sweet potato varieties will produce multiple roots per plant. For optimal results, plan on harvesting when the plants start to yellow and die back. This is usually around 100-120 days after planting, depending on your specific climate and variety.
Proper Storing and Handling Techniques for Sweet Potatoes
To maintain the quality and longevity of your sweet potatoes, proper storage and handling techniques are crucial. Start by allowing the sweet potatoes to cure for 10-14 days after harvest, which helps to heal any wounds and harden the skin. This process also improves their storage life.
When storing sweet potatoes, keep them in a cool, dry place with good ventilation. A temperature range of 50-60°F (10-15°C) is ideal. Avoid storing them near heat sources or in humid environments. Store them in a single layer, not stacked on top of each other, to prevent damage.
It’s also essential to handle sweet potatoes gently to avoid bruising or puncturing the skin, which can lead to decay. When transporting or storing them, wrap them individually in paper bags or newspaper to protect their skin from moisture and light. This will help maintain their quality and keep them fresh for a longer period. Regularly check on your stored sweet potatoes to remove any that are rotting, which can prevent the spread of disease and spoilage.
Frequently Asked Questions
What if I’m new to gardening? Can I still grow sweet potatoes?
Don’t worry if you’re a beginner! Sweet potatoes are relatively easy to cultivate, making them an excellent choice for gardeners of all skill levels. Start by selecting a variety that’s disease-resistant and suitable for your climate. Follow the guidelines in this article for preparing the soil, planting, and caring for your sweet potatoes.
How do I know if my sweet potato crop is susceptible to pests or diseases?
Regular monitoring and inspections are key. Keep an eye out for signs of powdery scab, fusarium wilt, and other common issues. Use integrated pest management (IPM) techniques, such as removing weeds, rotating crops, and applying organic pesticides as needed.
Can I grow sweet potatoes in containers or do they require a large garden bed?
Sweet potatoes can thrive in containers, provided you give them enough space to spread out (at least 12 inches deep). Choose a variety that’s compact or dwarf, and make sure the container has good drainage. Follow the same planting and care guidelines as for in-ground gardens.
How long will it take from seed selection to harvesting my sweet potatoes?
The journey from seed selection to harvest can take around 100-150 days, depending on the specific variety and climate conditions. Plan accordingly and factor in time for seed germination (7-10 days), transplanting (if necessary), and growth periods.
What’s the best way to store harvested sweet potatoes to keep them fresh?
To maintain optimal freshness, harvest sweet potatoes when mature but not overripe. Cure them in a warm, dry place with good air circulation for 2-5 days before storing in a cool, dark location (around 50°F). Avoid direct sunlight and moisture to prevent spoilage.