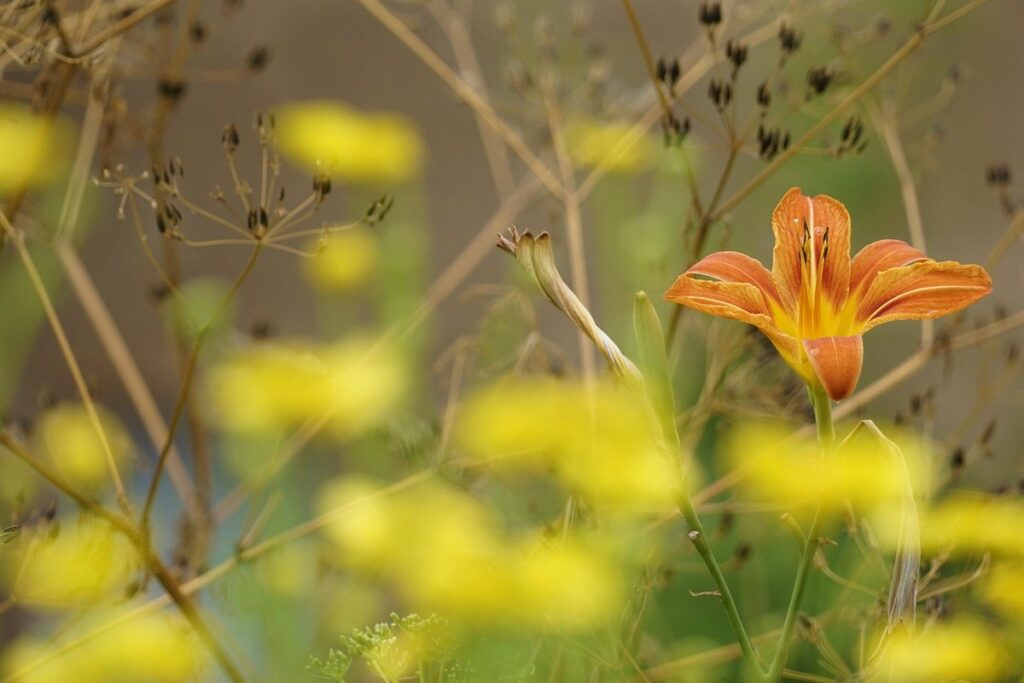
Daylilies are one of the most versatile and low-maintenance perennials you can grow in your garden. But, like all plants, they eventually need to be divided to maintain their health and vigor. If you’re new to gardening or struggling with your existing daylily patch, learning how to divide and care for these beautiful flowers is a game-changer. In this article, we’ll walk you through the process of preparing your soil, dividing your daylilies, and providing top-notch aftercare to ensure they thrive. We’ll also cover some common challenges to watch out for and tips on how to keep your plants looking their best all season long. With our expert guide, you’ll be well on your way to having a stunning collection of healthy, blooming daylilies in no time.
Benefits of Dividing Daylilies
Dividing daylilies is a straightforward process that offers numerous benefits for both your plants and your gardening schedule. When done correctly, it can lead to healthier, more vibrant blooms.
When to Divide Daylilies
When to divide daylilies is crucial for maintaining their health, vigor, and overall performance. As a general rule, it’s best to divide daylilies every 3-4 years, but this can vary depending on factors like the plant’s growth rate and soil conditions.
In spring, typically around late March or early April, daylilies are at their most dormant state. This makes it an ideal time for division, as you can easily dig up the entire clump without damaging the roots. Look for signs of overcrowding, such as thin stems, fewer blooms, or a general decline in plant health. If you notice any of these symptoms, it’s likely time to divide.
Summer is another viable option, but be cautious not to divide during the hottest part of the day when the soil can be compacted and difficult to work with. Keep an eye on your plants’ growth patterns and divide them every 3-4 years to maintain their health and encourage new blooms.
Preparing the Soil for Division
Before you start dividing those beautiful daylilies, it’s essential to prepare the soil for their new home. This step is often overlooked, but trust me, it makes all the difference. A well-prepared soil can help your newly divided daylilies establish a strong root system and thrive.
When preparing the soil, one of the first things you need to consider is its pH level. Daylilies prefer slightly acidic to neutral soil, with a pH between 6.0 and 7.0. If your soil is too alkaline or acidic, it can affect nutrient availability and microbial activity. To adjust the pH, add elemental sulfur to lower the pH or lime to raise it. Don’t forget to mix it well into the top 8-10 inches of soil.
In addition to adjusting the pH, it’s also crucial to add nutrients to the soil. Daylilies are heavy feeders and require a balanced diet of nitrogen, phosphorus, and potassium. You can use a slow-release fertilizer specifically designed for perennials or add compost tea to provide beneficial microbes and organic matter.
The Process of Dividing Daylilies
Dividing daylilies is a crucial step in their care, and understanding the process will help you grow strong, healthy plants that will thrive for years to come. In this section, we’ll walk you through how to divide your daylilies successfully.
Tools and Materials Needed
To divide daylilies successfully, you’ll need to have the right tools and materials at hand. Start by donning a pair of durable gardening gloves to protect your hands from thorny stems and dirt. A good-quality shovel is essential for digging around the daylily clump without causing damage to its roots. Look for one with a sturdy handle and a sharp blade that can cut through the soil easily.
In addition to a shovel, you’ll also need a garden fork to gently pry apart the dividing sections of the daylily. This tool is particularly useful when dealing with more mature or fibrous clumps. A hose or watering can will come in handy for keeping the soil moist throughout the process, reducing the risk of breakage and root damage.
Other materials you may find helpful include a bucket or tarp to collect the divided sections, and some garden twine or ties to secure the new divisions in place until they establish themselves.
Step-by-Step Division Instructions
When dividing daylilies, it’s essential to follow a step-by-step process to ensure healthy growth and blooming. Begin by carefully digging around the plant with a fork, taking care not to damage the roots. Gently lift the clump out of the ground, and brush away any excess soil.
Next, separate the crown from the foliage by gently prying apart the divisions using a blunt instrument like a screwdriver or chopstick. Be cautious not to tear the roots or disturb the growing points. Identify the fan-shaped leaves that grow from the center of the plant; these are the growth points and should be left intact.
Separate the divisions into sections, making sure each section has at least one growth point. Trim any dead or damaged foliage to encourage new growth. Replant the divisions in a well-draining location with plenty of sunlight, spacing them about 18-24 inches apart. Water thoroughly after planting and keep the soil consistently moist during the first growing season. With proper care, your newly divided daylilies should thrive and bloom beautifully within a year or two.
Aftercare and Planting Tips
Now that you’ve successfully divided your daylilies, it’s time to ensure they thrive in their new home. Learn essential aftercare tips and discover how to properly plant these beautiful perennials.
Watering and Mulching
After dividing and planting daylily divisions, it’s essential to focus on providing them with the right amount of water and mulch. Proper watering techniques will help establish a strong root system, while adequate mulching will retain moisture and suppress weeds.
When it comes to watering, the key is to strike the perfect balance between too little and too much. Water your newly planted daylilies thoroughly after planting, then keep the soil consistently moist during the first growing season. However, be careful not to overwater, as this can lead to rot and other problems. Aim for about 1 inch of water per week, either from rainfall or irrigation.
Mulching is another crucial aspect of aftercare. A layer of organic mulch, such as wood chips or bark, will help retain moisture in the soil and suppress weeds that might compete with your daylilies for resources. Apply a 2-3 inch layer of mulch around each plant, keeping it a few inches away from the crown to prevent rot.
Keep an eye on the weather and adjust your watering schedule accordingly. In hot or dry spells, water more frequently to ensure your daylilies receive enough moisture to thrive.
Fertilizing Daylilies
When it comes to daylily care, fertilizing is an essential step that can make all the difference in their health and blooming performance. Fertilizers provide necessary nutrients for growth, including nitrogen, phosphorus, and potassium, which help promote root development, flowering, and overall plant vitality.
To choose the right fertilizer for your daylilies, look for a balanced formula (10-10-10 NPK) or a high-phosphorus option (15-30-15 NPK), as these tend to promote blooming. You can also consider using organic fertilizers like fish emulsion or bone meal, which release nutrients slowly and are gentler on the soil.
Application methods vary depending on your preference and schedule. For an instant boost, you can dig a small amount of fertilizer into the soil around each plant in early spring, about 2-3 weeks before new growth begins. Alternatively, you can side-dress with a slow-release fertilizer or apply compost tea to provide ongoing nourishment.
Common Challenges and Solutions
As you continue on your daylily care journey, don’t worry if things don’t go as planned – we’ve got a rundown of common challenges and solutions to get you back on track. Common issues like overcrowding and pests can be frustrating, but there are easy fixes.
Pests and Diseases
When it comes to daylily care, one of the most frustrating challenges is dealing with pests and diseases. These can quickly spread and damage your plants, leaving you feeling helpless. However, there are several common culprits to look out for.
Aphids are small, soft-bodied insects that feed on plant sap, causing curled or distorted leaves. To get rid of them, spray the affected area with a strong jet of water or use an insecticidal soap. Slugs and snails can also be problematic, feeding on tender shoots and flowers at night. Use copper tape around the plant collar to deter them, or set traps using beer or yeast.
Powdery mildew is another common issue, characterized by a white powdery coating on leaves. Improve air circulation, remove infected areas, and apply a fungicide as needed. Regularly inspect your plants for signs of pests or diseases and take action promptly to prevent further damage. Keep in mind that prevention is key – maintain good hygiene, avoid overwatering, and provide optimal growing conditions to minimize the risk of these issues occurring in the first place.
Nutrient Deficiencies
As a daylily enthusiast, you’re likely aware that proper nutrient management is crucial for the health and vibrancy of these beautiful plants. However, nutrient deficiencies can manifest in various ways, making it essential to know how to identify them.
A telltale sign of nutrient deficiency in daylilies is a lack of vigor or stunted growth. If your daylily’s leaves are pale, wilted, or discolored, it may be an indication that the soil lacks essential nutrients like nitrogen, phosphorus, or potassium. On the other hand, if your plant is showing signs of excessive growth but not producing flowers, it could indicate a deficiency in micronutrients such as boron, copper, or manganese.
To address nutrient deficiencies, start by conducting a soil test to determine the pH level and nutrient content. Based on the results, you can amend the soil with organic fertilizers like compost or manure tea. For specific nutrient deficiencies, you may need to apply targeted supplements, such as potassium sulfate for potassium deficiency. Regularly monitoring your daylily’s health and adjusting its nutrient intake accordingly will help ensure it thrives under your care.
Keep in mind that over-fertilization can be detrimental to your daylily’s health, so it’s crucial to strike the right balance. A general rule of thumb is to fertilize lightly in the spring and again after blooming, rather than applying a large amount of fertilizer at once.
Daylily Care and Maintenance
To ensure your daylilies continue to thrive, proper care and maintenance are essential, which is why we’re diving into the details of how to keep them happy and healthy. This includes watering, fertilizing, and more.
Deadheading and Pruning
Deadheading and pruning are essential tasks to keep your daylilies healthy and thriving. After blooming, remove spent flowers (called deadheading) as soon as possible to encourage the plant to focus its energy on producing new growth rather than seed production. Cut off the flower stem just above a leaf node using clean scissors or pruning shears.
As for pruning, it’s usually necessary after the foliage has died back in fall or early winter. Use loppers or pruning saws to cut back dead canes to about 3-4 inches from the ground. This will help control disease and pests that may overwinter on dead plant material. Remove any weak or damaged growth throughout the year, cutting it back to a leaf node.
Proper pruning techniques promote air circulation around the plants, reducing the risk of fungal diseases. Be sure to disinfect your tools between cuts to prevent the spread of diseases. Regular deadheading and pruning will also improve the overall appearance of your daylilies, making them look healthier and more vibrant.
Dividing vs. Propagation Methods
When it comes to propagating daylilies, you have several methods at your disposal. Dividing is one of the most popular and effective ways to multiply these lovely plants, but it’s not the only option available. In this section, we’ll delve into the world of division-free multiplication and seed starting, comparing them to traditional dividing techniques.
Division-free multiplication involves separating individual plantlets that grow on the mother plant’s rhizome. This method is particularly useful for daylilies with a habit of producing offsets. For instance, some popular varieties like ‘Stella de Oro’ or ‘Happy Returns’ are known to produce numerous offsetting scapes, making division-free multiplication a convenient option.
On the other hand, seed starting is another viable method for propagating daylilies. This involves collecting seeds from mature flowers and sowing them in a nursery bed or pot. While seed starting can be more time-consuming and requires careful attention to temperature and moisture levels, it offers an exciting opportunity to create new hybrids and cultivars.
When choosing between dividing and division-free multiplication or seed starting, consider the parent plant’s characteristics, your personal preference for the end result, and your level of comfort with each method.
Conclusion: Caring for Your Daylilies
Now that you’ve successfully divided and cared for your daylilies, it’s time to keep them thriving year-round. Here are some essential tips on ongoing care to ensure their continued health and beauty.
Recap of Key Takeaways
In reviewing the key takeaways from this article on daylily division and care, it’s essential to remember that proper division is a crucial aspect of maintaining healthy, thriving plants. This involves identifying when to divide daylilies – typically every 3-4 years or when clumps become congested – and preparing the soil with organic matter like compost.
To successfully divide your daylily clump, follow these steps: gently separate the crowns using a fork or knife, then replant them in well-draining soil, taking care to maintain good air circulation around each plant. By following this process, you’ll be able to enjoy more blooms from your daylilies and prevent overcrowding.
Common challenges when caring for daylilies include inadequate water supply, poor soil quality, and pest or disease issues. To address these problems, it’s essential to establish a regular watering routine and fertilize your plants annually with balanced fertilizer. Monitor your plants regularly for signs of pests or diseases – such as aphids, spider mites, or powdery mildew – and take prompt action if you notice any issues.
In addition to these practical tips, consider the importance of deadheading your daylilies after blooming to promote continued growth. Remove spent flowers by cutting them off at ground level using a sharp pair of scissors or pruning shears, which will encourage your plants to focus energy on developing new blooms rather than seed production.
Frequently Asked Questions
Can I divide daylilies during other seasons besides spring?
Yes, you can divide daylilies during the fall season, about 6-8 weeks before the first frost. However, this method is more challenging due to the plant’s slower growth rate and increased risk of root damage. It’s essential to prepare the soil properly and handle the roots gently to ensure successful division.
How do I prevent nutrient deficiencies in my daylilies?
Daylilies require a balanced diet of nitrogen, phosphorus, and potassium (NPK) to thrive. Fertilize your daylilies during the growing season with a water-soluble fertilizer that contains these essential nutrients. You can also add compost or well-rotted manure to improve soil fertility. Regularly inspect your plants for signs of nutrient deficiencies and adjust your fertilization schedule accordingly.
Can I divide and replant daylilies in the same area, or do I need to move them?
It’s possible to divide and replant daylilies in the same area, but this can lead to overcrowding and reduced blooming performance. Consider dividing and relocating your daylilies to a new spot with well-draining soil and full sun to sunlight requirements. This will give your plants room to grow and improve their overall health.
How often should I water my newly divided daylilies?
Water your newly divided daylilies regularly during the first growing season, keeping the soil consistently moist but not waterlogged. As the plants establish themselves, you can gradually reduce watering frequency. Avoid overwatering, which can lead to root rot and other issues.
Can I propagate daylilies through division or should I use a different method?
While dividing is an excellent way to propagate daylilies, it’s essential to note that this method may not produce true-to-type offspring. If you want to maintain the plant’s unique characteristics and growing habits, consider using division in combination with other propagation methods like seed division or tissue culture.