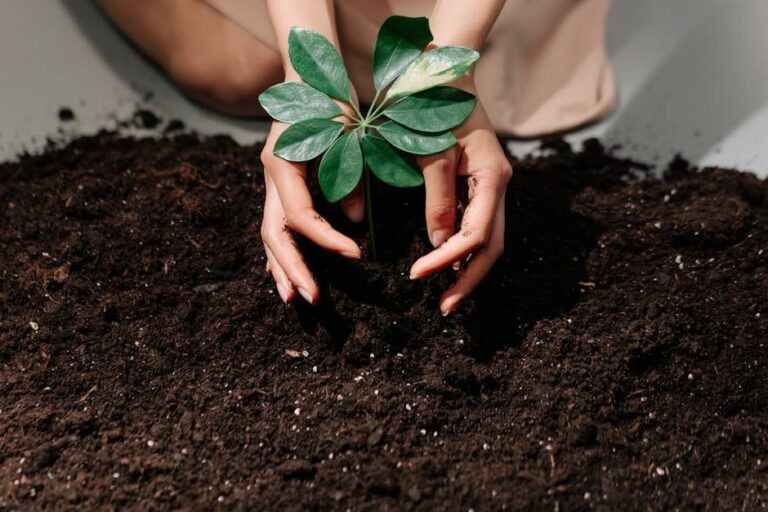
Saving seeds from your garden plants is one of the most rewarding aspects of gardening. Not only does it allow you to preserve the genetic diversity of your favorite varieties, but it also enables you to share them with friends and family or even propagate new plants for future generations. However, saving seeds can be a bit tricky, especially when it comes to understanding which types of plants produce viable seeds and how to properly harvest, process, and store them.
In this comprehensive guide, we’ll walk you through the entire seed-saving process, covering everything from selecting heirloom and hybrid plants to harvesting, processing, and long-term storage. Whether you’re a seasoned gardener or just starting out, our step-by-step instructions will empower you to save seeds with confidence, ensuring that your favorite garden treasures continue to thrive for years to come.
Understanding Seed Saving Basics
Let’s start by understanding the basics of seed saving, which involves learning how to identify and harvest seeds from your garden plants for replanting. This process can be a fun and rewarding way to preserve plant varieties.
What are Heirloom and Hybrid Plants?
When it comes to saving seeds from garden plants, understanding the difference between heirloom and hybrid varieties is crucial. Heirloom plants are open-pollinated, meaning they can be pollinated by natural means such as bees or wind, resulting in seeds that are true-to-type and will grow into identical plants when saved. They have been around for generations and have developed unique characteristics through selective breeding.
On the other hand, hybrid plants are bred specifically for their desirable traits, such as disease resistance or high yield. However, because they require cross-pollination to produce viable seeds, saving seeds from hybrid plants will not guarantee identical results when replanted. In fact, most commercial seed companies sell hybrid seeds that cannot be saved and reused.
If you’re interested in saving seeds from your garden, it’s essential to grow heirloom varieties. Not only will the seeds save you money in the long run, but they also preserve genetic diversity and allow you to experiment with new and exciting plant combinations.
Why Save Your Own Seeds?
Saving your own seeds can be a game-changer for gardeners who want to save money and get better results from their plants. By saving seeds from your favorite varieties, you’ll no longer need to rely on expensive seed packets or online retailers. This can lead to significant cost savings over time, especially if you’re growing multiple varieties of plants.
Another benefit of saving seeds is that they become adapted to your local climate conditions. Seeds saved from plants grown in your specific area will be more resilient and better suited to handle the unique challenges of your region’s weather patterns. For example, seeds saved from a plant that has thrived in your garden despite scorching summers or harsh winters will be more likely to produce healthy offspring under similar conditions.
By saving seeds, you’re also contributing to the preservation of plant diversity. Many heirloom varieties are at risk of being lost forever due to commercial seed companies prioritizing hybrid and GMO options. By collecting and sharing seeds from these unique varieties, you’ll be helping to safeguard the genetic heritage of your garden and ensuring that future generations can enjoy the same diversity of plants.
In addition, saving seeds allows you to maintain control over the quality and characteristics of the seeds used in your garden. This means you can reproduce the specific traits and performance you’ve come to expect from a particular variety, rather than relying on the unpredictability of commercial seed packets.
Seed Saving 101: Getting Started
When you’re ready to start saving seeds, it can be overwhelming with where to begin. But don’t worry, seed saving is a straightforward process that requires some basic knowledge and attention to detail. To get started, let’s break down the essential steps involved.
First and foremost, you’ll need to select plants that are suitable for seed saving. This typically includes annuals like tomatoes, peppers, and cucumbers, as well as perennials like coneflowers and black-eyed susans. Avoid selecting hybrid varieties, as they often don’t come true from seed, meaning the offspring may not retain the desired traits.
Timing is also crucial when it comes to harvesting seeds. For most plants, this typically occurs after the flowers have bloomed and faded. Be sure to check your plant’s specific needs, as some may require an additional step like drying or curing before storing the seeds.
To store seeds properly, you’ll need a dry, cool place with minimal light exposure. Airtight containers, paper envelopes, or even glass jars can work well for seed storage. Make sure to label each container clearly so that you know what’s inside and when they were saved. This simple process will have you saving seeds like a pro in no time!
Choosing Plants for Seed Saving
When it comes to seed saving, not all plants are created equal. In this section, we’ll explore how to select the best varieties for saving seeds and ensure a successful harvest.
Selecting Vegetables Suitable for Seed Saving
When it comes to seed saving, some vegetables are better suited than others due to their characteristics and growth habits. Tomatoes, peppers, and squash are popular choices for seed saving, but other vegetables like beans, peas, and cucumbers can also be saved successfully.
When selecting vegetables for seed saving, consider the following criteria: ease of pollination, seed production per plant, and ease of extraction. Tomatoes, for example, produce a large number of seeds per fruit, making them an ideal choice for seed saving. Peppers and squash also produce many seeds per fruit, but their seed extraction process can be more labor-intensive.
It’s also essential to choose varieties that are specifically bred for their seed production rather than their flavor or texture. Heirloom and open-pollinated varieties tend to perform better in this regard. Additionally, ensure you’re saving seeds from disease-free plants to avoid passing on any diseases to your future crops.
When selecting specific varieties, consider the maturity days of each plant. Choose varieties with a relatively short maturation period to save time and increase seed production.
Fruit Trees and Shrubs: A Different Approach to Seed Saving
When it comes to seed saving, fruit trees and shrubs present a unique set of challenges. Unlike annuals and perennials, which often self-seed easily, these woody plants require more consideration when collecting seeds.
Timing is crucial for seed collection from fruit trees and shrubs. Most deciduous fruit trees, such as apple and cherry, produce flowers in the spring that eventually turn into fruit. The ideal time to collect seeds from these trees is usually after the fruit has fully ripened, but before it falls off the tree. This can be a challenging process, especially for larger trees.
Storage considerations are also vital. Seeds from fruit trees and shrubs typically require stratification – a period of cold temperatures to break dormancy. They should be stored in airtight containers in the refrigerator at around 40°F (4°C). Some plants, like citrus, have seeds that don’t require stratification but still need protection from heat.
To overcome these challenges, consider purchasing fruit trees and shrubs specifically bred for home gardeners or choosing varieties with known seed saving traits. This can make the process much more manageable.
Harvesting Seeds at the Right Time
When saving seeds from your garden, harvesting them at the right time is crucial to ensure their viability and quality. Here’s what you need to know about timing your seed harvest.
Identifying Mature Pods and Fruits
When it comes to saving seeds from garden plants, timing is everything. One of the most critical steps is identifying mature pods and fruits, which contain the seeds you want to save. So, how do you know when they’re ready?
Start by observing the color change of the pods or fruits. Many varieties will turn a deep brown, tan, or even purple color as they ripen. For example, okra pods will often turn from green to a light brown or beige color. Similarly, beans will typically dry and turn from green to a range of colors depending on the variety.
Another visual cue is the texture. Mature pods will be brittle and easy to snap in half. Fruits like squash and melons will have a hard rind and be heavy for their size. You can also check by gently squeezing the pod or fruit – if it’s soft, it’s not yet ready. If you’re still unsure, wait a few more days, as some varieties take longer to mature than others.
Techniques for Collecting Seeds
When it comes to collecting seeds from your garden plants, you have several techniques at your disposal. One of the most straightforward methods is hand-picking, which involves gently plucking mature seed pods and placing them in a paper bag or envelope for storage.
Another approach is using a small brush to carefully sweep seeds into a container. This method is particularly useful for delicate flowers like violas and pansies, where the seeds are easily dislodged from their capsules. Simply wet the brush with water, gently sweep it over the seed head, and collect the seeds that fall onto the brim of the brush or a nearby surface.
Some plants, such as coneflowers and cosmos, naturally shed their seeds when mature. To take advantage of this process, simply place a sheet or tray under the plant to catch the falling seeds. This technique is not only low-maintenance but also allows you to collect seeds in bulk, making it an ideal approach for larger seed-producing plants.
Processing and Storing Seeds
Now that you’ve collected your seeds, let’s dive into how to properly process and store them so they remain viable for next year’s garden. This includes steps like drying, cleaning, and packaging.
Cleaning and Drying Seeds
Cleaning and drying seeds properly is crucial to prevent mold and spoilage. If not done correctly, it can lead to poor germination rates and even render the seeds unusable.
To start, you’ll want to remove any excess debris or plant material from the seed pods or hulls. Use a soft brush or a small, dry paintbrush to gently sweep away loose particles. This will help prevent moisture from getting trapped during the drying process.
For air-drying, spread out the seeds in a single layer on a paper bag or a piece of cloth. Place them in a warm, dry location with good airflow, such as a pantry or cupboard. Keep an eye on them and stir occasionally to ensure even drying. It’s essential to be patient, as this process can take anywhere from 7-14 days.
Alternatively, you can use desiccants like silica gel or uncooked rice to speed up the process. Simply place the seeds in an airtight container with the desiccant and seal it tightly. The desiccant will absorb moisture from the seeds, helping them dry faster – usually within 3-5 days. Be sure to check on the seeds regularly to prevent over-drying.
Remember to store your cleaned and dried seeds in an airtight container, away from direct sunlight and moisture. This will help preserve their viability for future planting.
Packaging and Labeling Seeds for Storage
When it comes to storing seeds for long-term viability, proper packaging and labeling are crucial. To ensure your seeds remain healthy and usable, you’ll want to choose containers that maintain a consistent level of moisture. Airtight glass or plastic containers with tight-fitting lids work well, while paper envelopes or fabric bags can also be effective. However, avoid using plastic ziplock bags as they tend to trap moisture.
Label each container clearly with the seed type, date harvested, and storage conditions. This information will help you keep track of your seeds and ensure you use the oldest ones first. For added protection against pests like insects or rodents, store containers in a secure location away from direct sunlight and heat sources. Consider using desiccants to control moisture levels, especially for seeds that are sensitive to humidity.
When labeling your seeds, include essential details such as:
* Seed type (e.g., tomato, lettuce, etc.)
* Date harvested
* Storage conditions (e.g., temperature, humidity)
* Number of seeds stored
This information will help you manage your seed collection effectively and ensure you have a steady supply for future gardening seasons.
Tips for Successful Seed Saving
Now that you have collected your seeds, it’s time to learn how to save them successfully and keep their quality intact. With these simple tips, you’ll be a pro at seed saving in no time.
Overcoming Common Challenges
Saving seeds can be a rewarding experience, but it’s not without its challenges. One of the most common issues faced by seed savers is low germination rates. This can happen for a variety of reasons, including contamination from other plant species or pests.
To prevent low germination rates, make sure to isolate your seed plants from any other vegetation and keep an eye out for signs of pests or diseases. You should also ensure that the seeds are harvested at the right time, as this will affect their viability.
Another challenge is contamination from other plant species. This can be a particular problem if you’re growing multiple crops in close proximity to each other. To avoid this, consider using physical barriers like row covers to separate your plants or planting different varieties at opposite ends of your garden bed.
By taking these precautions and being mindful of the factors that can affect seed quality, you’ll be well on your way to successful seed saving. Keep an eye on the specific needs of each plant variety, and don’t hesitate to research any issues you encounter.
Encouraging Biodiversity through Seed Exchange
Seed exchange programs are an essential component of maintaining genetic diversity and promoting sustainable gardening practices. By participating in these programs, gardeners can access a wide range of plant varieties that may be hard to find elsewhere.
To participate in seed exchanges, you can join online communities or local seed libraries where members swap seeds in exchange for others they want. This method not only ensures the preservation of rare and heirloom varieties but also encourages gardeners to try new and diverse plants in their gardens.
When participating in a seed exchange program, consider the following: Look for programs that prioritize plant diversity, ask questions about the origin and history of the seeds being shared, and make sure to share your own seeds with others. This way, you can contribute to the preservation of genetic diversity while also discovering new and interesting varieties to grow.
By incorporating seed exchanges into your gardening routine, you’ll be supporting a more sustainable and resilient food system.
Preserving Seeds for Future Generations
Preserving seeds from garden plants is a thoughtful way to ensure their continued availability, but storing them correctly is crucial to maintaining viability. Let’s explore the best methods for preserving seeds long-term.
Long-Term Storage Options
When it comes to preserving seeds for future generations, long-term storage options are essential. You’ve harvested and cleaned your seeds, but now you need a way to keep them viable for years to come. Three popular methods for long-term seed storage are freeze-drying, vacuum-sealing, and cryogenic freezing.
Freeze-drying, also known as lyophilization, involves removing the water content from seeds using a vacuum pump and a low temperature. This process helps prevent seed degradation and can store seeds for up to 20 years. The pros of freeze-drying include high preservation rates and easy rehydration. However, it requires specialized equipment and can be expensive.
Vacuum-sealing involves storing seeds in airtight containers or bags with a vacuum pump. This method is more cost-effective than freeze-drying but still provides excellent results. Seeds stored this way can last for up to 10 years. The cons of vacuum-sealing include the potential for mold growth and limited shelf life.
Cryogenic freezing involves storing seeds in liquid nitrogen at -196°C. This method offers the longest storage period, typically lasting between 20-30 years or more. However, it requires specialized equipment and facilities, making it inaccessible to many gardeners.
Community Seed Banks and Preservation Efforts
Community seed banks and preservation efforts play a vital role in safeguarding plant diversity for future generations. These networks of volunteer-led initiatives collect, conserve, and distribute seeds from heirloom varieties, open-pollinated crops, and wild species. By doing so, they help ensure that the genetic material necessary to maintain crop resilience, adaptability, and nutritional value is preserved.
One such example is the Seed Savers Exchange, a US-based organization that has been saving and sharing seeds for over 40 years. They collect over 20,000 varieties of seeds annually from gardeners and farmers, making them available to members and other conservation efforts. Community seed banks like this one not only provide access to unique and heirloom varieties but also serve as a safeguard against crop failure due to disease or pests.
To support community seed banks, you can start by saving your own seeds from garden plants and contributing to local initiatives. This can be done by donating excess seeds to nearby organizations or participating in seed swaps with fellow gardeners. By working together, we can preserve the genetic diversity of our crops and ensure a sustainable food future for generations to come.
Frequently Asked Questions
What are the best vegetables to start with for seed saving?
When just beginning your seed-saving journey, it’s essential to choose easy-to-save varieties that produce a high yield of seeds. Consider starting with popular vegetables like tomatoes, peppers, cucumbers, and squash, as they’re relatively simple to harvest and process.
Can I save seeds from hybrid plants?
While some hybrid plants can be saved, the resulting seeds may not produce identical offspring. If you want to save seeds from hybrid varieties, look for those labeled “open-pollinated” or “OP,” which are more likely to retain their desirable traits when replanted.
How do I handle common challenges like seed rot or mold?
To minimize issues with seed rot or mold, ensure proper drying and storage. Store seeds in a cool, dry place away from direct sunlight, and consider using desiccants or silica gel to maintain optimal humidity levels. Regularly check on your stored seeds for signs of spoilage.
What’s the best way to label and organize my saved seeds?
Effective labeling and organization are crucial when storing multiple seed varieties. Use clear labels that include the plant name, variety, date saved, and any relevant notes about germination or growth characteristics. Consider using color-coded systems or storage containers to keep your collection tidy.
Can I save seeds from trees or shrubs?
Yes! Fruit trees and shrubs can be excellent choices for seed saving. However, their seed-saving process often differs significantly from that of annual vegetables. Research specific techniques and requirements for the plant you’re interested in, such as stratification, scarification, or specialized storage conditions.