Growing your own herbs can be one of the most rewarding experiences in gardening, but few plants are as finicky as thyme. If you’re new to growing thyme or have struggled with it before, don’t worry – we’ve got a comprehensive guide to help you succeed. Thyme is a popular herb used in many recipes, from soups and stews to marinades and sauces. But its delicate flavor and fragrance require careful attention to variety selection, soil preparation, pruning, and harvesting techniques.
Our thyme growing guide will walk you through the entire process, from choosing the right type of thyme for your climate and cooking needs to preparing the perfect soil conditions for optimal growth. We’ll also share expert tips on how to prune and harvest your thyme plants to get the most out of their flavor and fragrance. Whether you’re a seasoned gardener or just starting out, our guide will give you the confidence to grow thyme successfully at home.
Choosing the Right Thyme Variety
With over 350 varieties of thyme, choosing the right one for your garden can be overwhelming. Let’s narrow down your options and explore some popular thyme varieties to consider.
Understanding Thyme Types
Thyme comes in a variety of forms, each with its own distinct characteristics and growing requirements. One of the most common types is English thyme (Thymus vulgaris), which is a popular choice for cooking due to its mild flavor and versatility in various dishes. Its compact growth habit makes it an excellent option for container gardens or small spaces.
Another popular variety is Lemon thyme (Thymus x citriodorus), known for its distinctive citrus scent and flavor. This type of thyme requires slightly more moisture than English thyme, but its lemony aroma can add a unique twist to various recipes.
Variegated thyme (Thymus x lanuginosus) is another attractive option with its variegated leaves in shades of green and white. It’s an excellent choice for adding visual interest to herb gardens or containers. This type of thyme requires full sun to partial shade and well-draining soil, making it a great option for areas with low humidity.
When choosing the right thyme variety, consider factors such as growth habits, flavor profiles, and maintenance requirements to ensure you select one that suits your needs.
Considering Climate and Hardiness Zones
When choosing a thyme variety, it’s essential to consider your local climate and hardiness zone. This will ensure that your thyme plants thrive and produce a bountiful harvest. Thyme is a Mediterranean native, so it typically prefers well-drained soil and full sun.
In terms of temperature, most thyme varieties prefer daytime temperatures between 65-75°F (18-24°C) and nighttime temperatures around 55-65°F (13-18°C). Some species, like ‘Narrow-leaf Thyme’ and ‘Creeping Thyme’, are more tolerant of cooler temperatures and can thrive in areas with frost. However, others, such as ‘English Lavender Thyme’, prefer warmer temperatures and may not do well in colder climates.
To determine the ideal thyme variety for your area, consult a hardiness zone map. This will give you an idea of the average temperature range and frost dates for your region. Based on this information, choose a thyme variety that is suitable for your climate. For example, if you live in a USDA Hardiness Zone 5 or lower, opt for a cold-hardy thyme like ‘Narrow-leaf Thyme’. This will ensure your plants survive the winter and come back strong in the spring.
Preparing the Soil for Thyme Growth
Before you start planting thyme, it’s essential to prepare the soil properly by loosening and aerating it to ensure healthy root growth. This simple step can make all the difference in your harvest.
Soil pH and Nutrient Requirements
When it comes to growing thyme, understanding your soil’s pH levels and nutrient requirements is crucial for optimal growth. Thyme prefers well-draining soil with a slightly acidic to neutral pH range, between 6.0 and 7.0. If your soil tests too alkaline or too acidic, it can lead to nutrient deficiencies and affect the plant’s overall health.
To test your soil’s pH levels, you can purchase a DIY testing kit or send a sample to a laboratory for analysis. Based on the results, you may need to amend your soil with lime to raise the pH or sulfur to lower it. In terms of nutrients, thyme requires adequate nitrogen, phosphorus, and potassium (NPK) levels.
A general rule of thumb is to provide 10-20-10 NPK levels for optimal growth. However, be cautious not to over-fertilize, as this can damage the plant’s roots and lead to weak growth. Instead, focus on adding compost or well-rotted manure to enrich your soil with beneficial microorganisms and nutrients.
Removing Debris and Loosening Soil
When it comes to preparing the soil for thyme growth, one of the most crucial steps is removing debris and loosening the soil. This not only allows thyme’s delicate roots to spread out comfortably but also ensures that water and nutrients can reach them effectively.
Begin by clearing away any visible debris such as twigs, leaves, or rocks from the planting area. Use a garden fork or spade for this task, working your way through the entire area until you’ve removed everything that could potentially harm your thyme plants.
Next, dig in about 12-18 inches deep to loosen the soil. Thyme prefers well-draining soil and can thrive in poor conditions, but loosening it will help water penetrate more easily. Use a fork to gently break up any clods or compacted areas, working in a gentle sawing motion.
Remember that thyme has a small root system, so avoid digging too deeply. Also, be mindful not to damage the soil’s structure while loosening it, as this can affect its ability to hold moisture and nutrients. By taking these simple steps, you’ll create an ideal environment for your thyme plants to grow and flourish.
Planting Thyme: Seeds or Cuttings?
When it comes to planting thyme, you’ll want to decide whether to start from seeds or use cuttings. We’ll walk you through the pros and cons of each method.
Sowing Thyme Seeds
Sowing thyme seeds is an exciting step in growing this versatile herb. Whether you’re starting indoors or directly in the garden, proper seed spacing and soil preparation are crucial for optimal growth.
To begin, choose a container that’s at least 6-8 inches deep to accommodate the thyme’s taproot. Fill it with a well-draining potting mix, and gently press 1/4 inch of seeds onto the surface. You can sow multiple seeds per container, but thin them out to 2-3 inches apart once they’ve germinated. If sowing directly in the garden, space seeds 12-18 inches apart to prevent overcrowding.
Soil preparation is equally important. Thyme prefers slightly acidic soil with a pH between 6.0 and 7.0. You can add a balanced fertilizer at planting time to give your thyme seedlings a boost. Keep the soil consistently moist during the first few weeks after sowing, but avoid overwatering, which can lead to root rot.
Maintaining optimal moisture levels is key to successful thyme germination and growth. Water seeds gently but thoroughly when the top inch of soil feels dry to the touch.
Propagating Thyme from Cuttings
Propagating thyme from cuttings is a popular method for multiplying this versatile herb. To get started, you’ll need to select a healthy mother plant with plenty of stems. Choose a stem with at least two sets of leaves and trim the bottom set just above a node – this will give your cutting its best chance of rooting.
Next, prepare your cuttings by trimming any weak or damaged growth, then dust off any dirt that may have accumulated on the stems. Use scissors or pruning shears to take 2-3 inch stem sections from the mother plant, making sure each section has at least two nodes. Remove lower leaves and dip the cut end into a rooting hormone powder to enhance root development.
Plant the cuttings in a propagation tray or small pots filled with a well-draining seed starting mix. Firm the soil gently around the cutting, then water thoroughly. Place the tray or pots in a warm location with bright, indirect light – ideally at temperatures between 65-75°F (18-24°C). Roots should begin to develop within 1-2 weeks and new growth will follow shortly after.
Caring for Established Thyme Plants
Once you’ve established a thriving thyme plant, it’s essential to provide the right conditions to keep it healthy and productive. Here, we’ll walk through the simple steps for maintaining your mature thyme plants.
Watering and Mulching Techniques
Watering established thyme plants requires a delicate balance between providing enough moisture and preventing waterlogged soil. Overwatering is a common mistake that can lead to root rot, while underwatering can cause the plant to become stressed. To avoid these issues, it’s essential to water your thyme plants deeply but infrequently. Water them when the top inch of soil feels dry to the touch, usually every 7-10 days during hot summer months.
Mulching is another crucial aspect of caring for established thyme plants. Organic mulch like wood chips or bark helps retain moisture in the soil, suppress weeds, and regulate soil temperature. Apply a 2-inch layer of mulch around your thyme plants, keeping it a few inches away from the crown to prevent rot. As the mulch breaks down, it will also add nutrients to the soil.
Regularly inspect the soil moisture by inserting your finger into the soil up to the first knuckle. If the soil feels dry, it’s time to water. Avoid getting water on the leaves or stems to minimize the risk of fungal diseases. By following these watering and mulching techniques, you’ll be able to provide your established thyme plants with the right conditions for optimal growth and a lush harvest.
Pruning and Training Thyme
Regular pruning and training are crucial steps to maintain the health and appearance of established thyme plants. As thyme grows, it tends to spread outwards, developing long stems that can become leggy if not managed properly. This is where regular pruning comes into play. Prune your thyme plants every 6-8 weeks to encourage bushy growth and prevent them from becoming too leggy.
To prune, simply pinch off the top sets of leaves on each stem using a pair of sharp scissors or pruning shears. This will stimulate new growth and encourage the plant to produce more foliage. For added support, you can also gently bend the stems downwards and secure with twine or stakes to promote a bushy shape.
Another benefit of regular pruning is that it promotes air circulation within the plant, reducing the risk of disease and pests. Additionally, pruning helps control the plant’s height, making it easier to harvest the leaves and flowers. By incorporating regular pruning into your thyme care routine, you’ll enjoy a lush, healthy, and well-shaped plant that continues to thrive throughout the growing season.
Common Thyme Growing Problems and Solutions
We’ve all been there: your thyme plants suddenly turn yellow, or pests start munching on their leaves. Let’s tackle some common growing issues together.
Identifying Pests and Diseases
Thyme is susceptible to various pests and diseases that can significantly impact its growth and yield. One of the most common pests affecting thyme plants are spider mites, mealybugs, and aphids. These tiny insects feed on the sap of the plant, causing yellowing or bronzing of leaves and stunted growth.
To identify these pests, look for fine webbing on the undersides of leaves or a sticky substance known as honeydew on the soil or nearby surfaces. Mealybugs appear as white, cottony masses on stems and branches, while aphids are small, soft-bodied insects that feed in colonies.
Diseases such as powdery mildew and leaf spot can also affect thyme plants. Powdery mildew appears as a white, powdery coating on leaves, while leaf spot causes circular, sunken spots with a yellow margin. Fungal diseases like root rot often result from overwatering or poor drainage.
To control these issues organically, use neem oil to repel pests and prevent fungal growth. Copper-based fungicides can also be used to treat powdery mildew and leaf spot. Ensure good air circulation around plants and water wisely to prevent disease development. Regular monitoring of your thyme plant’s health is essential for early detection and treatment of these common problems.
Troubleshooting Nutrient Deficiencies
Thyme is a hardy herb that can tolerate some nutrient deficiencies, but prolonged exposure to poor soil conditions will still impact its growth and flavor. To identify nutrient deficiencies, inspect the leaves and stems for signs of stress. Yellowing or pale leaves may indicate a lack of nitrogen, while yellowing leaves with green veins might be due to iron deficiency.
If you suspect a nutrient deficiency, test your soil pH and nutrient levels. Thyme prefers slightly acidic to neutral soil (pH 6.0-7.0) with adequate nutrients. For nitrogen-deficient plants, apply a balanced fertilizer (10-10-10 NPK) or a high-nitrogen fertilizer like ammonium nitrate. For iron deficiency, add a chelated iron supplement or sulfur-based products to lower the pH and increase nutrient availability.
To avoid deficiencies in the first place, maintain good soil health through regular composting, mulching, and avoiding over-watering. Thyme also benefits from micronutrients like potassium and magnesium, which promote overall plant growth and disease resistance.
Harvesting and Preserving Thyme
Now that you’ve harvested your thyme, let’s dive into the fun part: preserving it for future use, whether through drying, freezing, or making herbal remedies. We’ll cover the best methods to keep thyme fresh all year round.
When to Harvest Thyme Leaves
When it comes to harvesting thyme leaves, timing is everything. You want to pluck them at their peak flavor and fragrance to ensure a delicious crop for cooking and preservation. The ideal time to harvest thyme leaves depends on the season and the specific variety of thyme you’re growing.
For most thyme varieties, the best time to harvest is in the morning, after the dew has evaporated but before the heat of the day sets in. This is usually around 9-11 am, depending on your location and climate. Harvesting at this time allows for optimal oil content in the leaves, which enhances their flavor and aroma.
When it comes to harvesting individual leaves or sprigs, simply pinch or snip them off with scissors, making sure not to damage the stems or leaves further down the plant. For larger harvests, you can use pruning shears to cut back the top growth of the thyme plant by about one-third. This will encourage bushy growth and promote new leaf production.
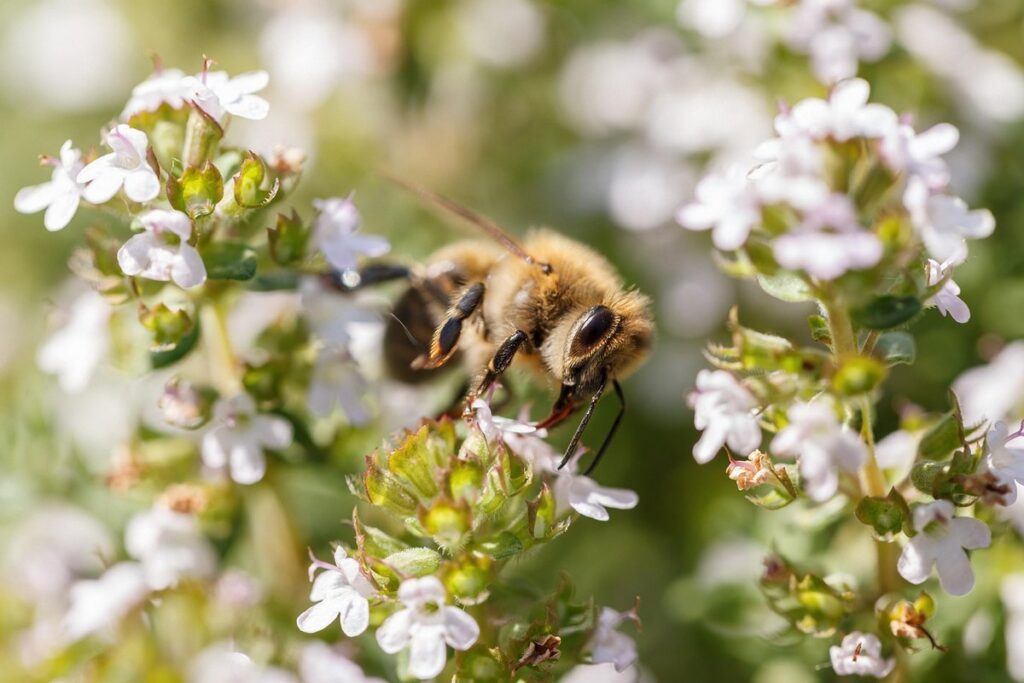
It’s also worth noting that some thyme varieties produce beautiful flowers in late spring or early summer. These flowers are not only a delight to look at but also contain valuable oils that can be used for cooking and medicinal purposes.
Drying and Storing Thyme
Proper drying and storage of thyme leaves and stems are crucial to preserving their flavor and fragrance. When dried correctly, thyme can retain its pungency for up to 6 months, allowing you to enjoy the herb throughout the year.
To dry thyme, tie the stems together in small bunches and hang them upside down in a warm, dry, dark place with good air circulation. You can also use a food dehydrator or spread the leaves on paper towels in a single layer. It’s essential to keep the temperature below 100°F (38°C) to prevent browning and loss of flavor.
For long-term storage, store dried thyme in airtight containers like glass jars or paper bags. Keep them away from light, moisture, and heat sources. When storing fresh thyme, wrap the stems in damp paper towels and place them in plastic bags. Store these bags in the refrigerator to maintain their freshness for up to 2 weeks.
When using dried thyme, rehydrate it by placing a tablespoon of dried leaves in a bowl and pouring hot water over them. Let it sit for a few minutes before using it in recipes. Proper drying and storage techniques ensure that your thyme retains its unique flavor and aroma, making it perfect for cooking and preserving.
Advanced Thyme Growing Techniques
Take your thyme growing to the next level by learning expert techniques for pruning, grafting, and propagating this fragrant herb, perfect for a lush harvest. We’ll dive into these advanced methods in more detail below.
Companion Planting with Thyme
Companion planting with thyme is a simple yet effective way to boost its growth and keep pests at bay. By strategically pairing thyme with other plants, you can create a harmonious garden ecosystem that promotes healthy growth and minimizes the need for pesticides. One of the primary benefits of companion planting with thyme is pest control. For instance, marigolds repel nematodes, which can be detrimental to thyme’s roots, while basil deters aphids and other pests that target thyme.
When it comes to choosing companion plants for thyme, consider pairing it with plants that have complementary growth habits or require similar growing conditions. Nasturtiums and calendula make excellent companions as they attract beneficial insects that prey on thyme’s natural enemies. Additionally, plant lavender near thyme to improve its resistance to fungal diseases. By incorporating these companion planting techniques into your garden, you’ll be well on your way to a lush and thriving thyme harvest.
Creating a Perpetual Thyme Bed
Creating a perpetual thyme bed is an innovative way to cultivate this versatile herb year-round. By dividing established plants regularly, you can encourage new growth and maintain a lush harvest throughout the seasons. This technique allows for continuous harvesting without depleting the plant’s energy.
To design a successful perennial thyme bed, choose a location with well-draining soil and full sun. Dig a shallow trench, separating established thyme clumps into smaller sections, each containing at least three stems. Replant these divisions about 6-8 inches apart, making sure the soil is consistently moist during the first few weeks after transplanting.
Regular division, typically every 12-18 months, will promote healthy growth and prevent the bed from becoming overcrowded. Prune spent flowers to encourage new stem production and trim back wayward stems to maintain an even shape. With proper care, your perpetual thyme bed will thrive, providing a steady supply of fragrant leaves for cooking and medicinal purposes. By incorporating this technique into your gardening routine, you can enjoy a bountiful harvest of fresh thyme all year round.
Frequently Asked Questions
Can I Grow Thyme Indoors Year-Round?
Yes, with proper care and conditions, you can grow thyme indoors year-round. This is ideal for those living in areas with harsh winters or limited outdoor growing seasons. Ensure a south-facing window with moderate temperatures between 60-70°F (15-21°C) and maintain high humidity to replicate outdoor conditions.
How Do I Prevent Thyme from Becoming Leggy?
To prevent thyme from becoming leggy, prune it regularly by pinching off flower buds as they form. This encourages bushy growth and prevents the plant from putting energy into seed production. Additionally, ensure sufficient light and fertilization to promote healthy root development.
Can I Use Regular Potting Mix for Thyme?
No, regular potting mix may not provide the optimal growing conditions for thyme. Thyme requires well-draining soil with a pH between 6.0-7.0. Consider mixing in some compost or perlite to improve drainage and fertility. This will help prevent root rot and ensure healthy growth.
How Often Should I Water My Established Thyme Plants?
Water your established thyme plants when the top inch of soil feels dry to the touch. Avoid overwatering, as this can lead to root rot and other issues. During hot or dry weather, you may need to water more frequently – but be cautious not to create an environment conducive to pests and diseases.
Can I Harvest Thyme Leaves at Any Time?
Yes, thyme leaves are ready for harvest when the plant is around 6-8 inches tall. However, it’s essential to harvest them regularly to encourage new growth and prevent the plant from flowering. Pinch off individual stems or cut back the entire plant by one-third to one-half to promote bushy growth and prevent legginess.