Growing your own chickpeas can be a rewarding experience for gardeners and food enthusiasts alike. With their nutty flavor and versatility in cooking, it’s no wonder many people are eager to learn how to successfully grow these nutritious legumes. However, chickpea cultivation can be tricky, requiring specific knowledge of variety selection, soil preparation, and watering techniques.
In this comprehensive guide, we’ll walk you through the essential steps for growing chickpeas, from choosing the right variety to harvesting your crop. We’ll cover pest management strategies and provide tips on how to achieve optimal growth. Whether you’re a seasoned gardener or just starting out, our expert advice will help you overcome common challenges and enjoy a bountiful harvest of delicious homegrown chickpeas.
Choosing the Right Variety
When it comes to growing chickpeas, selecting the right variety for your climate and needs is crucial. There are many different types of chickpeas to choose from, each with its own unique characteristics.
Understanding Chickpea Types
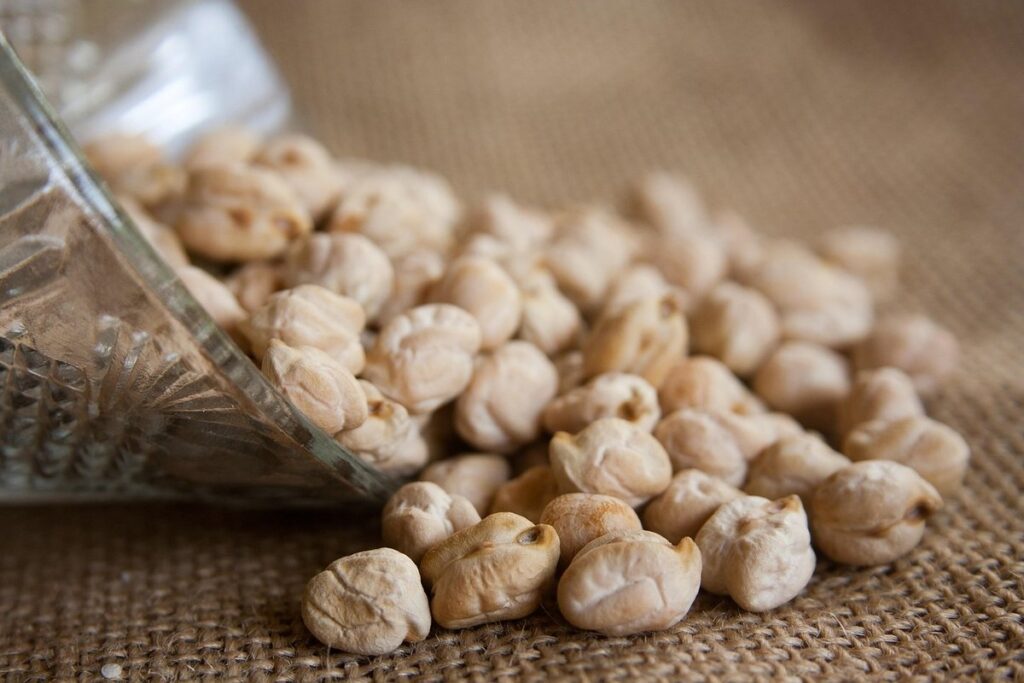
When it comes to growing chickpeas, understanding the different types is crucial for optimal results. There are two primary categories: Kabuli and Desi. Kabuli chickpeas are larger, with a creamy texture and mild flavor. They originated from Afghanistan and are often used in Mediterranean cuisine. These varieties tend to grow taller (up to 30 inches) and have a more sprawling habit.
Desi chickpeas, on the other hand, are smaller, darker, and more robust. They were traditionally cultivated in India and are prized for their rich, nutty flavor. Desi varieties tend to be shorter (around 20-25 inches), bushy, and more compact. If you have limited space or plan to harvest by machine, Desi might be the better choice.
When selecting a variety, consider factors like climate, soil type, and available space. Kabuli types are generally more tolerant of cooler temperatures but require more support as they grow taller. Desi varieties can thrive in warmer conditions but may benefit from additional water during dry spells. Research specific growing requirements for your chosen variety to ensure the best outcome.
Selecting Varieties for Your Climate
When selecting chickpea varieties for your garden, it’s essential to consider your local climate, region, and soil type. Chickpeas are a cool-season crop, meaning they thrive in temperatures between 40°F and 80°F (4°C and 27°C). If you live in an area with hot summers or cold winters, choose a variety that’s specifically bred for your climate zone.
For example, the ‘Kabuli’ variety is well-suited for cooler climates, while ‘Desi’ types are more tolerant of heat. Research the specific growing conditions required by each variety and choose one that matches your local environment. Soil type also plays a significant role in chickpea growth. Chickpeas prefer well-drained soil with a pH between 6.0 and 7.0.
In regions with short growing seasons, look for varieties like ‘Sonora’ or ‘Peru’, which mature quickly (around 90-100 days). In areas with longer growing seasons, you can opt for varieties like ‘CDC Greenball’ or ‘ICC 1575’, which take around 120-130 days to mature. By selecting the right variety for your climate and soil type, you’ll set yourself up for success in growing delicious and nutritious chickpeas.
Preparing the Soil
Before you can even think about sowing those chickpea seeds, it’s essential to prepare your soil for a bountiful harvest. Let’s get started with selecting and preparing the perfect spot for your chickpeas.
Assessing Soil pH and Nutrient Levels
Soil testing is an essential step in growing healthy and productive chickpea plants. The ideal pH range for chickpeas is between 6.0 and 7.0, but it can tolerate a slightly wider range of 5.5 to 8.0. However, if your soil pH falls outside this range, it may affect nutrient availability and plant growth.
To assess soil pH, you can use a DIY kit or send a sample to a laboratory for analysis. Once you have the results, you can take corrective action by adding lime to raise the pH or sulfur to lower it. For example, if your soil pH is too low (acidic), you can mix 1 cup of agricultural lime with 10 gallons of water and apply it to the soil.
In addition to testing for pH, it’s also crucial to assess nutrient levels in your soil. Chickpeas require a balanced diet of nitrogen, phosphorus, potassium, and other micronutrients. A soil test will reveal if you need to add any nutrients or fertilizers. Based on the results, you can apply organic or synthetic fertilizers according to the recommended rates to provide the necessary nutrients for optimal growth.
Keep in mind that over-fertilization can harm the plants and the environment, so it’s essential to use the right amount of fertilizer based on your soil test results. Always follow the label instructions and consider consulting with a local nursery or extension office for guidance on soil testing and fertilization.
Removing Weeds and Debris
Before planting chickpeas, it’s essential to prepare the soil by removing weeds, debris, and any other obstructions. Weeds can compete with your chickpea plants for water, nutrients, and light, hindering their growth and yield. Start by physically removing weeds from the area using a tool like a hoe or hand weeder. Be thorough in your removal to prevent regrowth.
Remove any debris such as rocks, twigs, and old plant material that can damage roots or make it difficult for seeds to germinate. Till the soil to a depth of 8-10 inches to loosen compacted soil and aerate it. This will help improve drainage, reduce soil-borne diseases, and promote healthy root growth.
If you have a large area to cover, consider using a rotary hoe or cultivator attachment on your tractor. These tools can make quick work of removing weeds and debris while tilling the soil. Always remove any crop residues from previous plantings as they can harbor pests and diseases that can affect chickpea plants.
Sowing Chickpea Seeds
To get started with growing chickpeas, you’ll first need to sow your seeds into well-draining soil at the right depth for optimal germination. Follow these crucial steps to ensure success.
Timing and Spacing
When sowing chickpea seeds, timing and spacing are crucial factors for proper growth. In most regions, spring is the ideal time to sow chickpeas, as the soil has warmed up sufficiently for germination. However, this may vary depending on your location and climate. It’s essential to check the average frost dates in your area and avoid sowing seeds too early or late.
As a general rule of thumb, space chickpea plants 12-18 inches apart in rows that are 3 feet apart. This allows for adequate air circulation, reduces the risk of disease, and promotes even growth. If you’re growing dwarf or semi-dwarf varieties, you can space them closer together – around 6-8 inches.
When sowing seeds directly into the ground, be sure to plant at a depth of about 1-2 inches, with the seedcoat facing upwards. This ensures that the seeds receive sufficient moisture and light for germination. By paying attention to timing and spacing, you can set your chickpea plants up for success and enjoy a bountiful harvest. Keep in mind that these guidelines may need to be adjusted based on specific weather conditions or soil types.
Planting Depth and Techniques
When planting chickpea seeds, it’s essential to get the depth just right. Chickpeas need adequate soil cover to establish a strong root system and prevent drying out, but too much depth can lead to poor germination or even rot. As a general rule of thumb, sow chickpea seeds 2-3 inches deep, depending on the variety.
To plant correctly, dig a shallow trench about 1 inch deeper than the seed’s width. Place one seed at the bottom of the trench and cover it with soil. Compact the soil gently to prevent air pockets from forming around the seed. If you’re sowing multiple seeds in the same spot, space them about 3-4 inches apart.
Keep in mind that chickpeas are sensitive to temperature fluctuations, so it’s crucial to maintain a consistent moisture level during the germination period. Avoid sowing seeds too deeply or too shallowly, as this can cause uneven growth and reduced yields. By following these guidelines, you’ll be well on your way to successfully planting your chickpea seeds.
Watering and Irrigation
When it comes to growing chickpeas, proper watering and irrigation are crucial for optimal yield. In this section, we’ll guide you through the best practices for keeping your plants hydrated throughout their growth cycle.
Understanding Chickpea Water Requirements
Chickpea plants have specific water requirements to thrive. Adequate moisture is crucial for healthy root development and overall plant growth. But how do you know if your chickpeas are getting enough water?
To determine the water needs of your chickpeas, observe their leaves. Wilting or droopy leaves can be a sign of underwatering, while yellowing or softening leaves may indicate overwatering. Check the soil moisture by inserting your finger into the soil up to the knuckle; if it feels dry, it’s time for watering.
Water your chickpeas deeply but infrequently to encourage deep root growth. Aim to provide about 1-2 inches of water per week, either through rainfall or irrigation. Avoid frequent shallow watering, which can lead to weak and susceptible plants.
Monitor the weather forecast and adjust your watering schedule accordingly. For example, if you’re experiencing a dry spell, be sure to water your chickpeas more frequently. Conversely, during periods of heavy rain, reduce watering to prevent overwatering. By paying attention to these signs and adjusting your watering schedule, you’ll be well on your way to growing healthy, thriving chickpea plants.
Implementing Drip or Sprinkler Systems
When installing a drip irrigation system or sprinklers for efficient watering of your chickpea crop, there are several factors to consider. Chickpeas require consistent moisture levels, especially during the germination and flowering stages. A well-designed irrigation system can help you conserve water while ensuring optimal growth.
For small-scale growers, a drip irrigation system is an ideal choice. This type of system delivers water directly to the roots, reducing evaporation and runoff. You’ll need to lay out the tubes in rows, spacing them about 6-8 inches apart. Make sure to bury the tubes at least 4-6 inches deep to prevent damage from foot traffic or mowing.
When choosing a sprinkler system, consider a soaker hose that releases water slowly over a wide area. This type of hose is perfect for larger plots and can be set up on a timer for automated watering. Regardless of the system you choose, ensure it’s designed specifically for your climate and soil type to get the most out of your irrigation setup.
Remember to monitor the system regularly and adjust as needed to prevent overwatering or underwatering, which can affect chickpea yields.
Pest and Disease Management
To successfully grow healthy chickpeas, it’s essential to understand how to manage common pests and diseases that can damage your crop. This section will cover effective strategies for prevention and treatment.
Identifying Common Pests
When growing chickpeas, it’s essential to be aware of common pests that can cause significant damage to your crop. Some of the most common pests that target chickpeas include aphids, whiteflies, and spider mites. These tiny insects feed on plant sap, weakening the plant and reducing its ability to produce healthy yields.
Aphids are small, soft-bodied insects that can be found in clusters on stems and leaves. They secrete a sticky substance called honeydew, which can attract other pests like ants and wasps. Whiteflies, on the other hand, are tiny winged insects that feed on plant sap, causing curled or distorted leaves.
Spider mites are tiny, eight-legged arachnids that spin fine webs on plants. They cause yellowing of leaves and can weaken the plant significantly if left untreated. To control these pests, monitor your plants regularly for signs of infestation and use organic methods like neem oil or insecticidal soap to control outbreaks. Regularly inspect your plants under a magnifying glass to catch infestations early on.
Strategies for Controlling Diseases
Controlling diseases is one of the most crucial aspects of growing healthy and productive chickpea crops. Chickpeas are prone to several diseases such as powdery mildew, root rot, and leaf spot, which can significantly reduce yields if not managed properly.
To prevent these diseases, it’s essential to maintain good crop rotation practices. This means rotating your chickpea fields with other non-legume crops to break the disease cycle. For example, if you had a chickpea crop in a particular field last season, consider planting a crop like wheat or barley this season.
Another critical step is to ensure proper irrigation and drainage. Excessive moisture can exacerbate root rot, so make sure your soil has adequate drainage. Avoid overwatering, especially during periods of high humidity.
Regular monitoring of your crops is also vital. Inspect your plants regularly for signs of disease and take prompt action if you notice any issues. Remove affected plants to prevent the spread of disease.
Harvesting Chickpeas
Now that your chickpea plants are maturing, it’s time to learn how to harvest them for a bountiful yield and delicious results. We’ll walk you through the process step by step.
Timing the Harvest
When harvesting chickpeas, timing is everything. To determine if they’re ready to be picked, you’ll need to inspect their color, size, and moisture content.
Start by examining the pods for their color. Chickpea pods typically turn from green to a light brown or tan color as they mature. However, this isn’t always a reliable indicator, as some varieties may remain green even when fully ripe. To be sure, check the pods regularly and start checking for readiness about 100 days after sowing.
Next, inspect the size of the chickpeas within the pod. They should be plump and nearly full-grown. The seeds should also rattle inside the pod, which is a sign that they’re mature and ready to harvest. If you’ve left them in the ground for too long, the pods may split open or the chickpeas may become overripe.
Check the moisture content by gently squeezing a chickpea between your fingers. If it’s still soft and moist, it’s not yet ripe. Fully ripened chickpeas should be dry and hard to the touch.
Techniques for Hand or Machine Harvesting
When it’s time to harvest your chickpea crop, you’ll want to choose a method that ensures efficient and effective collection. Both hand-picking methods and machine harvesting techniques are viable options.
Hand-picking involves manually collecting the mature pods from the plant. This technique is best suited for small-scale farmers or those with limited equipment. To hand-pick effectively, remove large quantities of weeds around the plants to prevent competition for water and nutrients. Use a pair of pruning shears or scissors to snip off the pods at their base, being careful not to damage the stem.
Alternatively, you can use a machine harvester, which is ideal for larger commercial farms. These machines are designed specifically for harvesting legumes like chickpeas. They work by cutting the plant near the base and collecting the remaining crop in a single pass. This method can be more efficient than hand-picking, but it requires careful calibration to avoid damaging the plants or losing valuable pods.
It’s worth noting that machine harvesting may not be suitable for every farm due to soil type, terrain, or equipment availability. Consider consulting with a local agricultural expert to determine the best harvesting approach for your specific operation.
Frequently Asked Questions
What’s the ideal temperature for sowing chickpea seeds?
Chickpeas prefer temperatures between 60°F (15°C) and 70°F (21°C) for optimal germination. Sow seeds when the soil has reached this temperature range to promote healthy growth. Be aware that direct sowing is challenging in cooler climates, so consider starting seedlings indoors before transplanting.
Can I grow chickpeas in containers or do they require a lot of space?
Chickpeas can be grown in containers as small as 6-8 inches deep and wide, but they’ll require more frequent watering. Choose compact varieties like ‘California White’ or ‘Sonoran Gold’ for container growing. Ensure the container is at least 5-7 gallons to accommodate the plant’s root system.
How do I manage pests that target chickpeas, such as aphids and spider mites?
Monitor your plants regularly for signs of infestation. Use neem oil or insecticidal soap to control aphid populations. For spider mites, introduce beneficial insects like ladybugs or lacewings, which feed on these pests. Remove any infested leaves to prevent the issue from spreading.
Can I save my own chickpea seeds for next year’s crop?
Yes, but ensure you’ve selected a variety that’s suitable for saving seeds. Not all varieties are open-pollinated, so research the specific characteristics of your chosen variety before attempting to save seeds. Properly dry and store saved seeds in an airtight container to maintain their viability.
How can I ensure my chickpeas receive consistent moisture levels during hot summer months?
Implement a drip irrigation system or soaker hose to deliver water directly to the roots, reducing evaporation and runoff. Water in the early morning or evening to minimize transpiration losses due to high temperatures. Monitor soil moisture regularly by inserting your finger into the soil up to the knuckle; if it feels dry, it’s time to water again.