Lavender is one of those plants that’s as lovely as it is tricky to grow, especially when it comes to getting more of it. If you’re like many gardeners and herb enthusiasts, you’ve probably got a lavender plant or two that’s stolen your heart, but now you want to share its beauty with others – or maybe just get some more for yourself! Propagating lavender from cuttings is a simple yet effective way to multiply this fragrant flowering shrub. In this article, we’ll walk you through the process of choosing healthy plants, taking stem and leaf cuttings, rooting them successfully, and providing aftercare tips to ensure your new lavender babies thrive. With these easy-to-follow steps, you’ll be well on your way to growing more beautiful, fragrant lavender in no time!
Choosing Healthy Lavender Plants
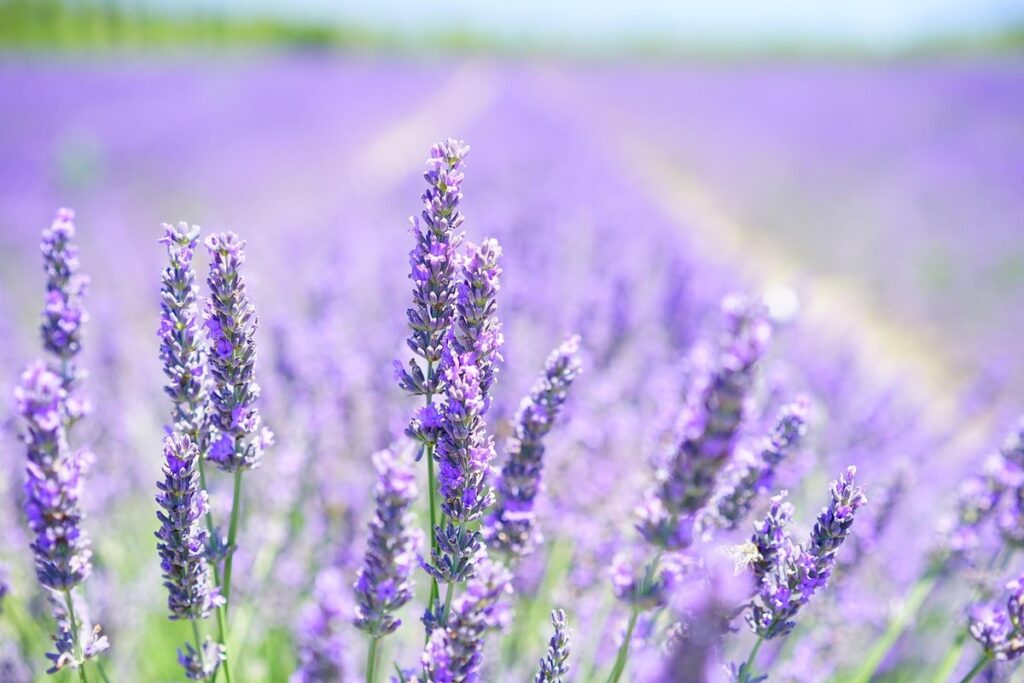
Before you start taking cuttings, make sure to choose healthy lavender plants with sturdy stems and vibrant blooms that will give your new plant a strong foundation. Select specimens with well-developed roots for optimal success.
Selecting a Variety
When selecting a healthy lavender plant for propagation from cuttings, it’s essential to consider the different types of lavender available. English lavender (Lavandula angustifolia), French lavender (Lavandula stoechas), and Spanish lavender (Lavandula stoechas subsp. pedunculata) are popular varieties, each with its unique characteristics.
English lavender is a compact, drought-tolerant option that’s ideal for smaller spaces. Its foliage is typically narrow and upright, while French lavender has broader leaves and produces vibrant purple flowers. Spanish lavender, on the other hand, has distinctive grey-green foliage and spikes of pale blue or white flowers.
To choose a healthy plant with good growing conditions, look for one with:
• Firm, green stems
• Dark green, thick foliage (avoid wilted or discolored leaves)
• No signs of pests or diseases
• Adequate root system development
When selecting your lavender variety, consider the climate and soil conditions in your area. For example, if you live in a dry region, English lavender might be a better choice than French or Spanish varieties that prefer more moisture.
Remember to inspect the plant thoroughly before making a purchase, ensuring it’s free of any damage or defects. This will give your propagated cuttings the best chance to thrive and flourish.
Preparing the Plant for Propagation
Before you take cuttings from your parent lavender plant, it’s essential to prepare it for propagation. This involves pruning, watering, and fertilizing the plant to encourage healthy growth and maximize the chances of successful rooting.
Start by pruning your lavender plant about 1-2 weeks before taking cuttings. Remove any dead or damaged stems, and trim back long branches to about half their length. This will help the plant focus its energy on producing new growth, which is ideal for cutting propagation. Water the plant thoroughly a day or two after pruning to give it enough moisture to heal the wounds.
Next, check your soil pH levels and adjust them if necessary. Lavender prefers slightly acidic to neutral soil with a pH between 6.0-7.0. Fertilize your lavender plant with a balanced fertilizer (10-10-10 NPK) during the growing season (spring-fall). This will provide the necessary nutrients for healthy growth and development.
As for when to take cuttings, wait until new growth appears after pruning. Take 3-4 inch stem sections from the current year’s growth, making sure each cutting has at least two nodes (jointed areas where leaves meet the stem).
Taking Cuttings
Now that you have some healthy lavender cuttings, it’s time to learn how to root them and start new plants. This is where taking cuttings comes in – a crucial step in propagating lavender successfully.
Stem Cuttings
Taking stem cuttings from lavender plants is an art that requires patience and precision. To do it successfully, you need to identify the right time for cutting, which is usually during the spring or early summer when new growth appears. This is a crucial period as it ensures the cuttings have enough energy to form roots.
When selecting stems, choose those with at least two sets of leaves and ideally take them from the top third of the plant. Using sharp, clean pruning tools will prevent crushing the stem, which can lead to infection or rotting.
Cut just above a node (where a leaf meets the stem), using an angle cut that allows water to run off easily. This helps the cutting dry out slightly, reducing the risk of fungal growth. Make sure your hands and tools are clean before handling the stems to prevent contamination. For best results, prepare multiple cuttings and plant them in a well-draining medium, keeping the soil consistently moist until roots develop.
Leaf Cuttings
Taking leaf cuttings is an alternative method to propagate lavender from cuttings, but it’s less common compared to stem cuttings. This is because leaf cuttings require more time and patience to root successfully. However, with the right preparation and techniques, you can still achieve high success rates.
To take leaf cuttings from your lavender plant, start by selecting healthy leaves with no signs of disease or pests. Cut the leaves from the parent plant using a pair of sharp, sterile scissors or pruning shears. Make the cut just above a node, where a leaf meets the stem. This will increase the chances of successful rooting.
Next, prepare the cutting by removing lower leaves and trimming the stem to about 2-3 inches long. Dip the cut end into a rooting hormone powder or liquid to promote root growth. Plant the cutting in a well-draining potting mix, firming the soil gently around it. Water thoroughly and provide a warm, humid environment for the cutting to develop roots.
Keep in mind that leaf cuttings may take longer to root compared to stem cuttings, typically taking 4-6 weeks to produce new growth. However, with proper care, you can still successfully propagate lavender from leaf cuttings.
Rooting the Cuttings
Now that you’ve prepared your cuttings, it’s time to give them a new home and encourage them to root. In this next step, we’ll guide you through the rooting process.
Using a Propagation Tray or Potting Mix
When preparing propagation trays or pots with potting mix, it’s essential to create an environment that promotes successful root development. Start by filling the trays or pots with a high-quality potting mix specifically designed for cuttings. A good potting mix should retain moisture but drain excess water quickly, preventing waterlogged soil.
Moisten the potting mix gently but thoroughly before adding your lavender cuttings. This helps to prevent shock and encourages the roots to grow. To maintain humidity levels, cover the propagation trays or pots with a clear plastic bag or cloche. Make sure to remove any excess air from the bag to prevent condensation buildup. Check on the cuttings daily to ensure adequate water supply, but avoid overwatering.
Aim for a consistent level of moisture in the potting mix by watering when the top inch of soil feels dry to the touch. This will help your lavender cutting develop a strong root system, increasing its chances of successful propagation. With proper care and attention, you should start seeing roots emerge within 1-3 weeks, followed by new growth and eventually a mature plant.
Providing Optimal Conditions
To provide optimal conditions for rooting lavender cuttings, it’s essential to create an environment that promotes healthy growth and development. The ideal temperature range for rooting lavender is between 65°F to 75°F (18°C to 24°C). Avoid placing the cuttings near heating vents or drafty windows, as extreme temperatures can impede the rooting process.
Lighting conditions also play a crucial role in successful propagation. Lavender cuttings prefer bright, indirect light but avoid direct sunlight, which can cause scorching and inhibit growth. Place them near an east- or west-facing window, or use grow lights to supplement natural light.
Watering is another critical aspect of providing optimal conditions. Water the soil gently but thoroughly after taking the cuttings, making sure the medium is consistently moist but not waterlogged. Check the moisture level daily by sticking your finger into the soil up to the first knuckle; if it feels dry, it’s time for a drink.
Monitor your cuttings’ progress closely, adjusting conditions as needed. Keep an eye out for signs of root growth, such as increased weight or slight resistance when gently tugging on the cutting.
Aftercare and Transplanting
Now that you’ve successfully propagated your lavender cuttings, it’s time to focus on aftercare and transplanting them into their forever home. This crucial step ensures they thrive and establish a strong root system.
Hardening Off
As you’ve successfully rooted your lavender cuttings, it’s time to harden them off and prepare them for life outdoors. This process is crucial to help your newly established plants adapt to full sun, wind, and temperature fluctuations. Start by moving the potted lavender plants to a shaded area outside, such as a north-facing wall or under a tree, for 7-10 days.
During this period, gradually increase their exposure to sunlight over the course of 3-5 days. Begin with morning sun, then move them to afternoon sun, and finally, full-day sun. This will help prevent shock and scorching of leaves. Next, introduce your plants to wind by placing them in a location where they’ll receive gentle breezes.
Monitor temperature fluctuations as well. For the first week, keep the soil consistently moist but not waterlogged. Avoid exposing your plants to extreme temperatures (above 85°F or below 55°F). As you progress with hardening off, ensure your plants are receiving at least 4-6 hours of direct sunlight per day and maintain adequate moisture levels in the soil. With proper care, your lavender cuttings will soon be thriving outdoors!
Planting Outdoors
When transplanting your propagated lavender cuttings into individual pots or directly into garden beds, timing is everything. Ideally, you should transplant them outdoors when the danger of frost has passed and the soil has warmed up to at least 60°F (15°C). This usually occurs in late spring or early summer, depending on your location.
Before planting, prepare the soil by loosening it to a depth of about 8-10 inches. Choose a well-draining potting mix specifically designed for herbs or Mediterranean plants like lavender. Avoid using regular garden soil as it may retain too much water and cause root rot. Fertilize with a balanced, water-soluble fertilizer at half the recommended strength to avoid burning the young roots.
If you’re planting directly into garden beds, space the seedlings 12-18 inches apart to allow for good air circulation and prevent overcrowding. Water thoroughly after planting and keep the soil consistently moist during the first few weeks.
Troubleshooting Common Issues
Don’t worry if things don’t go as planned – we’ll cover common issues that may arise when propagating lavender from cuttings and how to overcome them.
Fungal Diseases
When propagating lavender from cuttings, one of the most common issues you may encounter is fungal diseases. These can be devastating to your plants and are often caused by overwatering or high humidity. Root rot and leaf spot are two of the most prevalent fungal diseases that affect lavender.
Root rot occurs when the roots become waterlogged and start to decay. This can be prevented by ensuring good air circulation around the cuttings, using a well-draining potting mix, and avoiding overwatering. If you do notice signs of root rot, such as soft or mushy stems, remove the affected plant from its container and treat with a fungicide.
Leaf spot is another fungal disease that affects lavender. It causes small, dark spots to form on the leaves, which can eventually lead to defoliation if left untreated. To prevent leaf spot, make sure your cuttings are not too crowded and provide good air circulation. If you do notice signs of leaf spot, treat with a fungicide and remove any affected leaves.
Prevention is key when it comes to fungal diseases. Always use sterile tools and equipment when handling cuttings, and make sure the potting mix is free from contamination. By taking these precautions, you can minimize the risk of your lavender plants becoming infected with fungal diseases.
Pests and Insect Damage
When propagating lavender from cuttings, it’s essential to be aware of potential pests and insects that can damage these delicate plants. Aphids, whiteflies, and spider mites are common culprits that can infest propagated lavender.
To identify an infestation, inspect the undersides of leaves, stems, and soil closely for signs of eggs, larvae, or adult pests. White powdery mildew on leaves may indicate a fungal infection, which is often caused by aphid feeding. If you notice any of these issues, take immediate action to prevent further damage.
To control infestations, start by isolating the affected plant to prevent the spread of pests to other plants. Use neem oil or insecticidal soap to gently wash off the leaves and stems, being careful not to harm the tender cuttings. If the infestation is severe, consider using systemic pesticides as a last resort.
Regular monitoring and preventative measures can also go a long way in keeping your propagated lavender pest-free. Ensure good air circulation around the plants, water them carefully, and avoid over-fertilizing.
Tips for Success and Variations on the Method
Now that you’ve mastered the basic steps of propagating lavender from cuttings, let’s talk about some valuable variations to try and expert tips to ensure success.
Experimenting with Different Techniques
Once you’ve mastered the art of propagating lavender from cuttings using the traditional method, it’s time to experiment with different techniques. This is where things can get really exciting – after all, who doesn’t love discovering new ways to coax life out of a seemingly dead piece of stem?
Consider layering as an alternative technique. To do this, you’ll want to take a healthy lavender stem and bend it down towards the soil. Secure it in place with a U-shaped wire or a rock, making sure the node (where the leaf meets the stem) is buried beneath the surface. Keep the soil consistently moist but not waterlogged – after all, you’re trying to encourage roots to form without drowning the poor thing.
Another approach worth exploring is division, especially if you have an established lavender plant with multiple stems. To divide your lavender, gently dig it up and separate the individual crowns (the thick, fleshy base of the stem). Replant each crown in a new pot or location, watering well to settle the soil.
Common Variations in Lavender Propagation
When it comes to propagating lavender from cuttings, there are several common variations that you can try to increase your chances of success. One popular method is using rooting hormone on your cuttings before planting them. Rooting hormone helps stimulate root growth and can significantly improve the chances of successful propagation.
However, some gardeners swear by not using rooting hormone at all, claiming that it’s not necessary for lavender propagation. While this approach may work for some, using rooting hormone has been shown to increase success rates in several studies. In one trial, cuttings treated with rooting hormone had a 90% success rate compared to just 30% for those without.
Another variation is combining multiple cuttings together and planting them as a single unit. This method is known as “grouping” or “clustering.” By grouping your cuttings, you can reduce the overall cost of propagation materials and make the process more efficient. However, it’s essential to space the individual cuttings far enough apart to allow for proper growth and development.
Some gardeners also like to use a combination of rooting hormone and grouping methods. They’ll apply a small amount of rooting hormone to each cutting before combining them together and planting as a single unit. This approach can be effective, but it’s crucial to monitor the soil moisture levels carefully to prevent overwatering.
In addition to these variations, some gardeners also experiment with using different types of containers or growing mediums for propagation. For example, you might use a mixture of perlite and vermiculite as a rooting medium instead of traditional potting soil. Experimenting with different materials can help you find what works best for your specific climate and lavender variety.
While it’s essential to try different variations to find what works best for you, keep in mind that some methods may be more effective than others depending on the specific conditions of your garden.
Frequently Asked Questions
How soon can I expect new growth after propagating lavender cuttings?
New growth may be visible within 2-3 weeks after rooting the cuttings, but it’s essential to provide optimal conditions for root development and establishment before expecting new foliage. Keep the soil consistently moist during this period.
Can I propagate lavender from leaves, or do stem cuttings work better?
While both methods can be successful, stem cuttings tend to have a higher success rate due to their greater cell mass and stored nutrients. However, leaf cuttings are still viable and may produce roots in around 6-8 weeks. Be patient with the rooting process.
How many cuttings can I take from one lavender plant without harming it?
It’s generally safe to remove 3-4 stem cuttings or 5-6 leaf cuttings per month, depending on the plant’s vigor and health. Avoid over-pruning, as this may stress the parent plant and impact its productivity.
What if my propagated lavender cutting develops fungal diseases or pests?
To prevent disease, ensure good air circulation around your propagation tray or pot, maintain high humidity, but not excessive watering. Regularly inspect your plants for signs of pests, such as aphids or spider mites, and use organic pest control methods whenever possible.
Can I propagate lavender in a cold frame or outdoor greenhouse?
Yes, you can root cuttings in a cold frame or outdoor greenhouse during the spring or fall when temperatures are mild. However, ensure the propagation area is protected from extreme temperature fluctuations and maintain high humidity levels to facilitate healthy rooting.