Are you ready to unlock the secret to growing your very own avocado tree? It all starts with planting an avocado seed, which may seem daunting at first, but trust us, it’s easier than you think! Many people are unaware that they can grow their own avocado trees from seeds, and this process is not only cost-effective but also incredibly rewarding. With a little patience and care, you’ll be enjoying fresh homegrown avocados in no time. In this comprehensive guide, we’ll walk you through the steps of preparing your seed, planting it, and providing the necessary care for it to thrive. From preparation to harvest, we’ve got you covered with expert tips and advice on how to grow a healthy avocado tree from seed. Get ready to join the ranks of proud avocado growers!
Understanding Avocado Seeds
Avocado seeds have been a long-standing mystery for many, and it’s time we break down what makes them tick. Let’s dive into understanding their unique characteristics.
The Anatomy of an Avocado Seed
An avocado seed is a remarkable object that has captured the imagination of many gardeners and plant enthusiasts. When you hold one in your hand, you’ll notice its unique shape, size, and color. The typical avocado seed measures around 1-2 inches (2.5-5 cm) in length and about 0.5-1 inch (1.3-2.5 cm) in width.
The shape of the seed is not symmetrical, with one end being slightly pointed while the other end is more rounded. This irregular shape helps the seed to sit snugly inside the avocado’s pit, protecting it from damage during transportation and storage. The color of the seed can range from a deep brown or black to a lighter beige or tan, depending on the variety of the avocado.
When you split an avocado in half, you’ll notice that the seed is connected to the fruit by a small stalk-like structure called the funiculus. This connection provides nutrients and water to the seed as it grows inside the fruit. The seed’s unique features are adapted to support its survival and eventual germination when conditions are right.
A healthy avocado seed should have a smooth, glossy surface with no visible cracks or soft spots. Avoid selecting seeds that appear damaged or discolored, as these may not germinate properly. By choosing high-quality seeds and following proper care instructions, you’ll be well on your way to successfully growing an avocado tree from seed.
Importance of Selecting Healthy Seeds
When it comes to growing an avocado tree from seed, one crucial step is often overlooked: selecting healthy seeds. A good quality seed is essential for successful germination and the overall health of the tree. But what makes a seed “good” or “bad”? Let’s take a closer look.
A healthy seed should have a smooth, even texture with no visible cracks or soft spots. Avoid seeds that are shriveled up, discolored, or have mold on them. When you hold the seed between your fingers, it should feel firm and rounded in shape. On the other hand, if it’s too light or feels hollow inside, it’s likely to be infertile.
It’s also worth noting that some avocado varieties are more prone to producing viable seeds than others. Hass and Fuerte are popular choices for seed starting because they tend to produce high-quality seeds. When selecting a seed, choose one from a ripe avocado with a good germination rate (usually around 80-90%). Remember, using healthy seeds is the first step in growing a strong and thriving avocado tree. By taking your time and selecting the right seed, you’ll be setting yourself up for success from the very beginning.
Preparing the Seed for Germination
Before you can start germinating your avocado seed, make sure it’s properly cleaned and prepared. This involves gently scrubbing away any remaining fruit pulp from the seed itself.
Removing the Pit from the Avocado Fruit
Removing the pit from an avocado fruit requires finesse, especially when dealing with the delicate flesh surrounding it. To safely remove the pit, start by cutting the avocado in half lengthwise around the seed. Gently twist the two halves in opposite directions to release the pit, taking care not to press too hard and damage the surrounding flesh.
Once you’ve successfully removed one half of the avocado from the pit, use a spoon to carefully scoop out the remaining pulp from the other half. This will give you access to the seed without causing any further damage. For particularly stubborn pits, try placing the avocado in the refrigerator for 30 minutes to firm up before attempting removal.
To avoid bruising the delicate skin around the pit, it’s essential to handle the avocado with care. Use a gentle touch when cutting and twisting the fruit, and avoid applying too much pressure, which can cause damage to the surrounding flesh. Remember, the goal is to remove the pit while preserving as much of the fruit as possible for planting later.
Soaking and Scarification Methods
To increase the chances of successful germination, it’s essential to properly soak and scarify your avocado seeds. One common method involves soaking the seed in water for 24-48 hours before planting. This helps to soften the outer layer, allowing moisture to penetrate more easily.
Another approach is to use a scarification tool or sandpaper to gently scrape away a small portion of the seed’s surface. This method can be applied to both ripe and unripe seeds, but it’s crucial not to over-scarify, as this can damage the delicate inner tissues. For example, if you’re using an unripe seed, a light scratch on one end should suffice.
When choosing between these methods, consider your seed’s age and condition. If the seed is particularly stubborn or old, scarification might be more effective. However, for younger seeds with a softer outer layer, soaking may yield better results. Regardless of which method you choose, be sure to plant the seed as soon as possible after soaking or scarifying, when it’s most receptive to germination.
Planting the Avocado Seed
Now that you’ve successfully extracted your avocado seed, it’s time to plant it in a well-draining potting mix and give it the best chance at germination. Plant the seed about 1-2 inches deep.
Choosing the Right Soil Mix
Choosing the right soil mix is crucial for the healthy development of your avocado seedling. When starting with a seed, you want to provide it with a foundation that will support its growth and help it thrive. A well-draining, nutrient-rich soil mix specifically designed for seedlings is essential.
Opt for a mix that contains perlite or vermiculite to prevent waterlogged soil and root rot. Avoid regular potting soil as it can be too dense for young roots. Instead, look for mixes with a balanced pH level between 6.0 and 7.0. This will ensure your seedling receives the right amount of nutrients without being overwhelmed.
Some great options include Miracle-Gro Seed Starting Mix or Pro-Mix Indoor & Outdoor Potting Mix. These mixes are designed to promote healthy root growth, prevent overwatering, and provide essential nutrients for young plants. When preparing the mix, be sure to follow the instructions on the packaging and adjust as needed based on your seedling’s specific needs.
Planting Depth and Position
When planting the avocado seed, it’s essential to get the depth and position just right. If the seed is too deep, it may rot before it has a chance to sprout, while if it’s too shallow, it may dry out quickly. As a general rule of thumb, plant the seed about 1/4 inch (6-8 mm) deep in well-draining soil.
The position of the seed is also crucial. Place the pointed end of the seed upwards, making sure that the root end is buried about 1/4 inch (6-8 mm) below the surface. This will allow for optimal growth and help the seedling develop strong roots. Avoid planting the seed too close to the soil’s surface, as this can cause it to dry out quickly.
When placing the seed in the soil, make sure it’s not crowded or touching any other objects that could interfere with its growth. A good starting point is to plant several seeds in a small pot or tray, allowing about 1-2 inches (2.5-5 cm) of space between each one. This will give them room to grow and develop without competing for resources.
Germination and Seedling Care
Now that you have successfully germinated your avocado seed, it’s time to provide the perfect conditions for its seedling to thrive. This is where attention to detail really matters.
Stages of Avocado Seed Germination
Germinating an avocado seed is a fascinating process that requires patience and attention to detail. After placing the seed in water or soil, you’ll start to notice changes within 3-12 days, depending on factors like temperature, humidity, and seed quality.
Initially, you may observe a slight swelling of the seed’s lower half due to water absorption. This is a sign that the embryo inside the seed is beginning to activate. Over time, you’ll see a small white root called the radicle emerge from the lower end of the seed. The radicle will grow downward into the soil or water, anchoring the seed and preparing it for further growth.
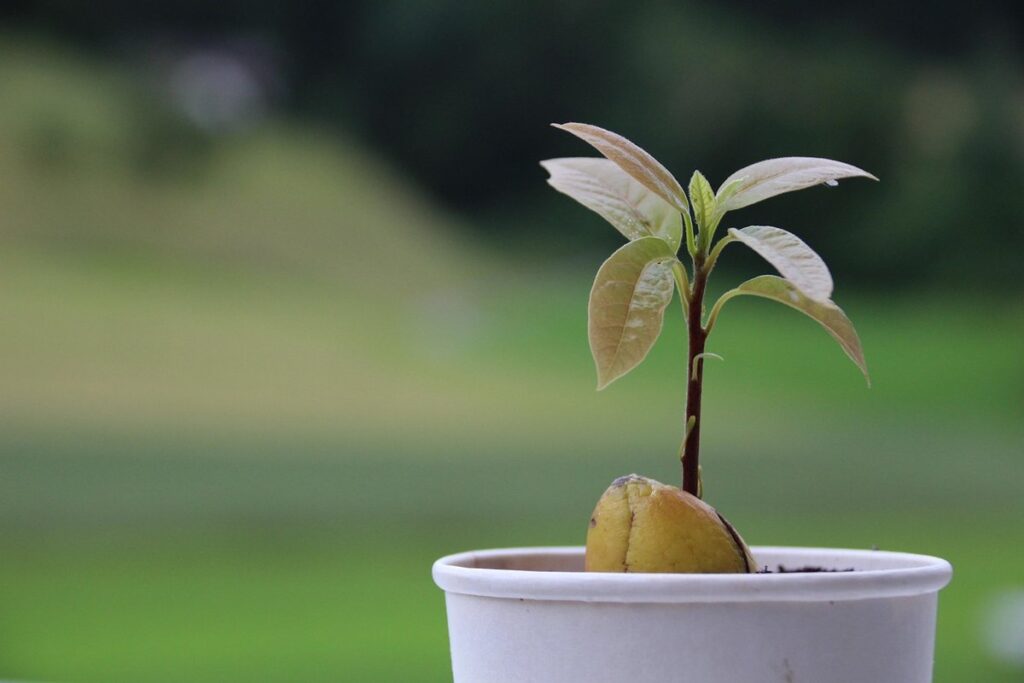
As the radicle develops, a green stem called the hypocotyl will start to push its way out from the top of the seed. This is an exciting moment, as it indicates that the seed has successfully germinated. The hypocotyl will eventually grow into the leaves and roots of your avocado tree. Keep in mind that during this stage, the seedling requires consistent moisture and a warm environment to thrive.
It’s essential to provide adequate light for your germinating seed, but avoid direct sunlight, which can cause scorching. A well-lit area with indirect light will promote healthy growth and encourage the development of a strong root system.
Seedling Development and Pruning
As your avocado seedling grows, it’s essential to identify signs of healthy development and take proactive steps to promote optimal growth. Healthy seedlings typically exhibit bright green leaves, a sturdy stem, and robust root development. Be on the lookout for these key indicators: a balanced root-to-leaf ratio, leaf spacing around 2-3 inches apart, and new growth emerging from the node (where the stem meets the roots).
To encourage healthy growth, pruning becomes crucial. Prune your avocado seedling when it reaches about 6-8 inches tall, focusing on maintaining an upright shape. Remove any weak or spindly growth, as well as any leaves showing signs of disease or damage. When pruning, use clean, sharp tools to prevent spreading diseases and promote healing.
Pruning also helps control the tree’s overall size and encourages fruiting when it reaches maturity. By selectively removing certain branches, you can direct your avocado tree’s energy towards developing a strong root system and promoting healthy growth patterns.
Transplanting and Fertilization
Now that your seedling is established, it’s time to transplant it into a larger pot and introduce some essential nutrients through fertilization to promote healthy growth. We’ll walk you through these crucial next steps together.
Conditions for Successful Transplantation
When transplanting your avocado seedling, it’s essential to provide the right conditions for successful growth. The ideal temperature range for transplanting is between 65°F and 75°F (18°C and 24°C). This allows the seedling to establish a strong root system without being stressed by extreme temperatures.
Humidity is also crucial during this stage. Avocado seedlings prefer a humid environment, with an average relative humidity of 50-60%. To achieve this, you can place the pot on a tray filled with water and pebbles or cover it with a clear plastic bag to maintain moisture levels.
Light requirements are another critical factor for avocado seedlings. They need bright, indirect light but not direct sunlight, which can cause scorching. East- or west-facing windows are ideal locations for your seedling. If you’re using grow lights, ensure they’re placed at least 12 inches away from the plant to prevent overheating.
By providing these optimal conditions, you’ll give your avocado seedling a solid foundation for continued growth and development. Remember to monitor temperature, humidity, and light levels closely to make adjustments as needed.
Fertilizing Your Avocado Tree
As you’ve successfully transplanted your avocado seedling into its new home, it’s time to focus on providing the necessary nutrients for healthy growth. Avocado trees are heavy feeders and require a balanced fertilizer diet to produce fruit. However, young trees have different nutrient requirements than mature ones.
To create an effective fertilization schedule, start by understanding the essential nutrients your avocado tree needs: nitrogen (N), phosphorus (P), potassium (K), and micronutrients like zinc and magnesium. Young avocado trees require more nitrogen for leaf growth and development, while phosphorus promotes root development and fruiting. Potassium helps with overall plant health.
A general rule of thumb is to fertilize your young avocado tree every 2-3 months during the growing season (spring-fall). You can use a balanced, water-soluble fertilizer like 10-10-10 NPK or an organic option like fish emulsion. Be sure to follow the manufacturer’s instructions and start with a light application, gradually increasing the frequency and amount as your tree grows. Keep in mind that avocado trees prefer slightly acidic soil (pH 6.0-7.0), so adjust your fertilizer accordingly if necessary. Monitor your tree’s response and adjust your fertilization schedule accordingly to ensure optimal growth.
Common Challenges and Solutions
As you embark on growing your avocado from seed, you’ll likely encounter a few setbacks. This section tackles some of the most common obstacles and provides practical solutions to get your tree back on track.
Identifying and Addressing Issues
One of the most frustrating aspects of growing avocados from seed is dealing with common problems that can arise during germination and early growth. Unfortunately, it’s not uncommon for new growers to encounter issues such as fungal infections, pests, or nutrient deficiencies.
Fungal infections are a major concern when growing avocado seeds indoors. This is often caused by excess moisture in the soil, which creates an ideal breeding ground for fungi. To prevent this, ensure that your seedling has good air circulation and avoid overwatering. If you notice any signs of fungal growth, such as white patches or black spots on the leaves, treat the affected area with a fungicide specifically designed for houseplants.
Another common issue is pests like spider mites, mealybugs, or aphids. These tiny critters can quickly spread disease and weaken your seedling. To prevent infestations, regularly inspect your plants for any signs of pests and use neem oil or insecticidal soap to control outbreaks.
Nutrient deficiencies are also a concern when growing avocado seeds. Avocado trees require a balanced diet of nutrients to thrive, so ensure you’re using a high-quality potting mix specifically designed for citrus trees. If you notice any yellowing leaves or stunted growth, consider repotting your seedling with fresh soil and adjusting your fertilization schedule.
Be vigilant and monitor your seedlings regularly to catch any issues early on. Remember, prevention is key! By taking proactive steps to maintain a healthy environment and detect potential problems, you’ll be well on your way to growing strong and thriving avocado trees from seed.
Strategies for Overcoming Obstacles
Growing an avocado tree from seed can be a rewarding experience, but it’s not without its challenges. One of the most common obstacles you may face is root rot, which can occur if the soil is too wet or if the seedling is exposed to high humidity. To avoid this issue, make sure to sow the seed about 1/4 inch deep in well-draining potting mix and water it sparingly until germination.
Another challenge you might encounter is pest infestation, particularly fungal diseases that can spread quickly through a damp environment. To combat this problem, maintain good air circulation around your seedling by keeping it at least 6-8 inches away from any walls or other plants. You should also inspect your tree regularly for signs of pests and treat promptly if you notice any issues.
If your avocado tree is not producing fruit after several years of growth, it may be due to insufficient light or inadequate fertilization. To address this problem, ensure that your tree receives at least 6 hours of direct sunlight per day and consider using a balanced fertilizer during the growing season.
Frequently Asked Questions
How Long Does it Take to See Germination?
Yes, you can expect to see germination within 3-12 weeks after planting the avocado seed, depending on factors like soil quality, temperature, and humidity. Keep the soil consistently moist but not waterlogged during this period.
Can I Grow Avocado Trees in a Container Indoors?
Yes, it’s absolutely possible to grow an avocado tree in a container indoors as long as you provide sufficient light (at least 6 hours of direct sunlight) and maintain a consistent temperature between 65-75°F (18-24°C). Make sure the container is at least 14 inches deep to accommodate the tree’s root system.
What Happens if My Avocado Seed Doesn’t Germinate?
Don’t worry! It’s not uncommon for seeds to have varying success rates. If your seed doesn’t germinate, try soaking it in a cup of water for 24 hours before planting or using a different soaking method like the “nick and soak” technique.
Can I Transplant My Avocado Seedling Outside Immediately?
No, it’s essential to give your seedling sufficient time (at least 6-8 weeks) to develop its root system and grow more robust leaves. Transplanting too early can cause shock, leading to reduced chances of survival.
How Often Should I Water My Growing Avocado Tree?
Water your avocado tree when the top 1-2 inches of soil feel dry to the touch. This is usually every 7-10 days during spring and summer but may vary depending on weather conditions and your specific climate.