If you’re a hosta enthusiast, chances are you’ve noticed your beloved plants start to decline in health over time. This can be due to various factors such as overcrowding, disease, or pests taking advantage of their weakened state. Regularly dividing and replanting your hostas is an essential practice that will boost their growth, improve blooming performance, and maintain the overall health of your garden.
By learning how to divide and replant hostas, you’ll be able to enjoy vibrant, thriving plants year after year. In this article, we’ll delve into the benefits of regular division, discuss the necessary tools for a successful transplant, and provide expert tips on post-care techniques that ensure the newly planted hostas settle in quickly and flourish. Whether you’re a seasoned gardener or just starting out, this guide will give you the knowledge to create stunning hosta gardens that bring joy and beauty to your outdoor space.
Understanding Why Division is Necessary
Before we dive into the process of dividing your hostas, it’s essential to understand why division is necessary for their health and growth. Without regular division, hostas can become congested and stop producing offsets.
When to Divide Hostas
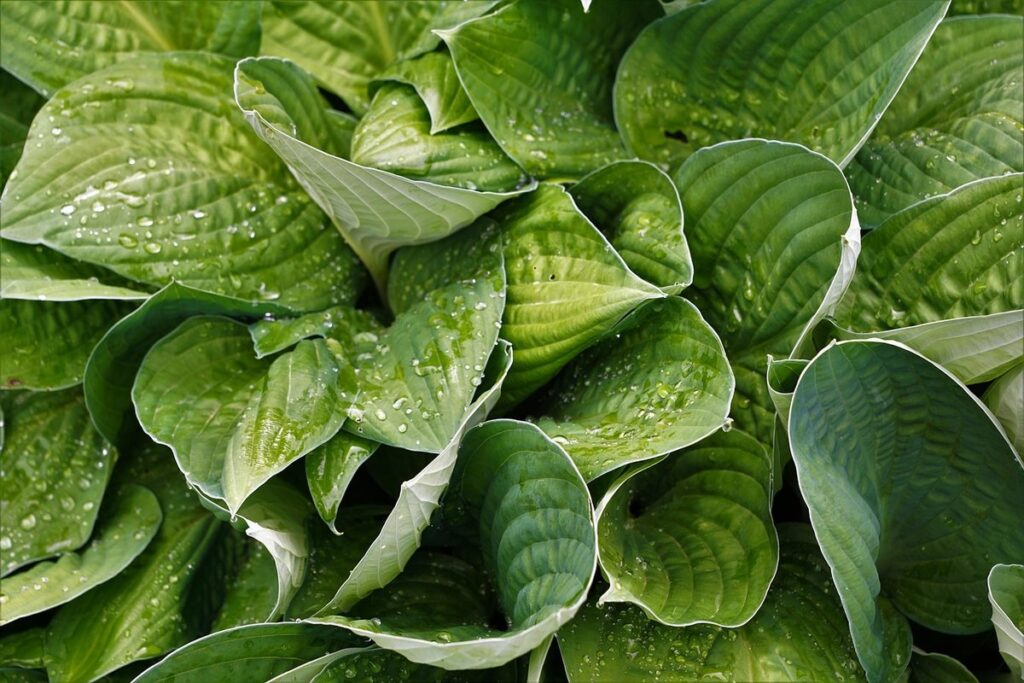
Hostas are notorious for their ability to spread quickly and become overgrown. But did you know that this same characteristic is also a warning sign that they need to be divided? As hosta plants continue to grow, they can become crowded, which can lead to a decline in plant health.
One of the most obvious signs of overcrowding is when the leaves begin to turn yellow and wilt. This can happen because the roots of the hostas are struggling to access enough water and nutrients due to the dense foliage above ground. If left unaddressed, this can cause the entire plant to become weak and vulnerable to disease.
When a hosta division is done correctly, it not only helps maintain plant vigor but also encourages healthy growth. By separating the rhizomes and replanting them in a well-draining area with plenty of sunlight, you’re giving your hostas the best chance to thrive. It’s essential to divide your hostas every 3-4 years to keep them looking their best and prevent overcrowding from taking over.
Benefits of Regular Division
Regular division is essential for promoting healthy growth in hostas. When left to their own devices, hostas can become congested and start to decline in health. This congestion can lead to disease susceptibility, reduced blooming performance, and an overall decrease in plant vigor. By dividing your hostas every 3-4 years, you’ll be giving them the chance to rebalance their root system, encouraging healthy growth, and revitalizing their appearance.
Regular division also plays a crucial role in preventing disease. Congested plants are more vulnerable to pests and diseases that target hosta leaves. Regular division helps remove any affected areas, reducing the risk of disease spread within your garden. By doing so, you’ll be safeguarding not only your hostas but also other nearby plants from potential infections.
As an added benefit, regular division increases blooming performance. When divided, hostas are stimulated to produce new growth and blooms. This boost in flowering can lead to a more vibrant display of color in your garden during the summer months.
Preparation for Dividing Hostas
Before you start dividing your hostas, make sure to prepare the right tools and a suitable location for the process. This will save time and reduce stress on the day of the division.
Choosing the Right Time
When it comes to dividing hostas, timing is everything. You want to choose a period when the plant is dormant, and the climate is favorable for growth. In most regions, the best time to divide hostas is in the spring or fall, avoiding the harsh summer heat.
In temperate climates with moderate temperatures (40°F-70°F), spring is an ideal time for division. The soil has thawed, and new growth begins around late April or early May. This allows you to assess the plant’s condition, remove dead leaves, and divide it without disturbing its roots.
Alternatively, fall division (September to November) is suitable when temperatures start dropping. Hostas have finished their growing season, and their foliage typically turns yellow before dying back. This period offers a gentle transition for new growth and reduces the risk of shock during transplantation.
Tools and Equipment Needed
To divide hostas successfully, you’ll need the right tools and equipment. Start by gathering the essentials: a pair of high-quality pruning shears for cutting back the foliage to about half its height, a garden fork for gently loosening the soil around the roots, and a trowel or small shovel for digging up the entire root system.
You should also consider wearing a pair of gardening gloves to protect your hands from thorns and dirt. These will help prevent injuries and make the process more manageable. If you’re working with particularly large or established hostas, you may also want to invest in a long-handled garden fork for added leverage and control.
Additionally, have a bucket or wheelbarrow nearby to collect the separated rhizomes and roots. This will keep your workspace tidy and make it easier to transplant them once divided. Finally, don’t forget to have some gloves handy – trust us, you’ll appreciate the extra protection when handling sharp plant material.
Dividing Large Hosta Plants
When your hostas have outgrown their space, it’s time to divide them. This process helps prevent overcrowding and promotes healthy growth by giving each plant room to thrive.
Removing Old Rhizomes
When dividing large hosta plants, it’s essential to carefully remove old rhizomes from the center of the plant. Over time, these rhizomes can become congested and start to rot, leading to a decrease in plant health and productivity. By removing them, you’ll promote new growth and prevent overcrowding.
To do this, gently dig around the central rhizome with a fork or spade, taking care not to damage any nearby foliage. Once exposed, use a sharp knife or pruning saw to carefully cut through the old rhizomes, cutting just above a leaf node. Be sure to remove as much of the old material as possible, but avoid damaging the surrounding roots.
As you’re removing the old rhizomes, take note of their quality and condition. Discard any that are soft, mushy, or show signs of rotting. This will help ensure your new hosta divisions get off to a healthy start and prevent the spread of disease throughout the plant. By doing so, you’ll be giving your newly divided hostas the best chance at thriving in their new home.
Sectioning Off New Growth
When sectioning off new growth from the mother plant, it’s essential to leave a small portion of stem intact for each division. This not only helps the plant recover but also ensures it continues to thrive. To do this, carefully examine the hosta plant and identify areas where new shoots are emerging. These new shoots should have at least one or two sets of leaves.
Gently tease apart the new growth from the mother plant, working your way around the crown in a circular motion. Be cautious not to damage any of the roots or new shoots. For each division, aim to leave about an inch (2.5 cm) of stem attached to the base of the leaf node. This will provide enough connection for the new section to establish itself.
By leaving some stem intact, you’ll be giving your newly divided hosta a better chance at survival and promoting healthy regrowth.
Dividing Small Hosta Plants
When it comes to dividing small hostas, timing is everything: the best time to divide these plants depends on their growth patterns and your climate.
Separating Young Rhizomes
When separating young rhizomes, it’s essential to handle them with care to avoid damaging tender shoots or roots. Begin by gently digging around the mature hosta plant with a fork, loosening the soil without disturbing the delicate network of underground stems and roots.
Carefully lift the plant out of the ground, taking note of the individual rhizomes connected to the parent plant. For young rhizomes, you may need to use your fingers or a blunt instrument like a chopstick to gently tease them apart from one another. Be cautious not to apply too much pressure, which can cause damage to the tender shoots and roots.
To minimize risk of harm, try separating rhizomes when they are slightly dry, making them easier to handle. Keep an eye on the rhizome’s size; if it’s particularly large or complex, consider dividing it further into even smaller sections to promote healthy growth once replanted.
Remember, patience is key when handling young rhizomes. It may take a few minutes to carefully separate each one, but doing so will ensure a smooth transition for your hostas as they adjust to their new environment.
Creating Healthy Transplants
When creating healthy transplants from divided hosta plants, it’s essential to give them a head start on establishing themselves in their new environment. Start by trimming off the old leaves that were attached to the parent plant, as they can be prone to disease and pests. This will also help prevent any potential issues with transplant shock.
Next, repot your divided hostas in fresh, well-draining soil specifically designed for outdoor plants. Make sure the pot is only slightly larger than the root system, as this will encourage new growth rather than encouraging the roots to spread too far. Water thoroughly after planting and keep the soil consistently moist but not waterlogged.
To promote healthy growth, place your transplanted hostas in a location with bright, indirect light and maintain temperatures between 65-75°F (18-24°C). Avoid exposing them to direct sunlight, which can cause scorching. With proper care and attention, your newly divided hostas will establish themselves quickly and thrive for years to come.
Post-Division Care for Hostas
Now that you’ve successfully divided your hosta, it’s time to focus on providing the right care to help them establish themselves in their new surroundings. This includes watering, fertilizing, and mulching techniques.
Watering and Fertilization
Proper watering and fertilization are crucial for newly divided hostas to establish a strong root system and promote healthy growth. When it comes to watering, the key is to provide consistent moisture without overwatering. Check the soil daily by inserting your finger into the soil up to the knuckle; if it feels dry, it’s time to water. Water thoroughly until you see water coming out of the drainage holes.
For fertilization, use a balanced, water-soluble fertilizer (20-20-20) during the growing season (spring and summer). Dilute the fertilizer according to the manufacturer’s instructions, as overfertilizing can harm your hostas. You can also add a slow-release fertilizer in the spring, following the product’s application guidelines.
Aim to fertilize every 2-3 weeks throughout the growing season. As for repotting, it’s best to wait until the fall or early spring when hostas are dormant. This allows them to establish themselves in their new environment before another growing season begins. By following these watering and fertilization tips, you’ll be well on your way to nurturing healthy, thriving hostas.
Providing Adequate Sunlight and Shelter
When replanting hosta divisions, it’s essential to provide them with adequate sunlight, shelter, and air circulation to help them establish a strong root system and thrive. Newly divided hostas require bright, indirect light to photosynthesize and grow new leaves. Aim for at least four hours of direct sunlight per day or dappled shade, depending on your region’s climate.
To protect your hostas from extreme weather conditions, provide shelter from harsh winds, intense heat, or freezing temperatures. A location with some wind protection will help prevent damage to the leaves and promote healthy growth. Additionally, ensure that the planting area has good air circulation to prevent fungal diseases like crown rot.
If you’re replanting in a shaded area, consider thinning out nearby plants to allow more sunlight to reach your hostas. This will also help prevent overwatering, which can be detrimental to hostas. Water them regularly, but avoid getting water on the leaves to prevent leaf spot disease. By providing optimal growing conditions, you’ll set your newly divided hostas up for success and encourage healthy growth in their first year of replanting.
Common Mistakes to Avoid When Dividing Hostas
When dividing hostas, it’s easy to make mistakes that can harm your plants, so let’s cover some common errors to steer clear of in this process.
Over-Harvesting Rhizomes
When dividing hostas, it’s essential to avoid over-harvesting rhizomes. While it can be tempting to take as many offsets as possible, doing so can have unintended consequences on the plant’s health.
One of the primary concerns with excessive rhizome removal is a decrease in plant vigor. When too many rhizomes are taken, the parent plant may not have enough energy reserves to produce new growth, leading to a weakened and less resilient hosta. This vulnerability can make the plant more susceptible to disease and pests.
To avoid over-harvesting rhizomes, it’s crucial to only take what is necessary for replanting or propagating. A general rule of thumb is to leave at least two to three rhizome divisions per parent plant. This allows the hosta to maintain its energy reserves while still providing enough offsets for propagation.
By being mindful of this balance, you can ensure your divided hostas continue to thrive and remain healthy in their new environments. Remember to handle the rhizomes gently during division to prevent damage, and make sure each replanted section has a decent-sized leaf to support photosynthesis.
Failing to Provide Proper Care
When dividing hostas, it’s easy to focus solely on the process itself and overlook the importance of providing proper care after replanting. However, this oversight can lead to a range of problems, including poor growth, pests, and diseases. To ensure your newly divided hostas thrive, make regular watering a priority.
Hostas need consistent moisture, especially during their first growing season. Aim to provide about 1 inch of water per week, either through rainfall or irrigation. Be cautious not to overwater, as this can lead to root rot and other issues. You should also fertilize your hostas regularly to promote healthy growth and blooming.
Pruning is another crucial aspect of post-division care. Remove any dead or dying leaves to prevent the spread of disease and encourage new growth. Cut back tall stalks to about 3 inches from the ground, allowing the plant to focus its energy on developing new roots. By providing these basic necessities – water, food, and pruning – you’ll be well on your way to enjoying a lush, thriving hosta garden for years to come.
Frequently Asked Questions
How often should I divide my hostas for optimal growth?
Divide your hostas every 3-4 years to maintain their health and vigor. This will prevent overcrowding, reduce the risk of disease and pests, and encourage new growth.
What are the signs that a hosta needs division?
Look for signs such as congested foliage, reduced blooming, or the appearance of yellowing leaves. These indicators suggest that your hostas have become overcrowded and need to be divided to restore their health.
Can I divide hostas in the summer months, or is it best to do it in spring or fall?
Yes, you can divide hostas during the summer months, but make sure to water them thoroughly before and after division. Spring or fall are still ideal times for dividing, as the weather is generally milder.
How do I handle weak or dying rhizomes when dividing hostas?
Remove any weak or diseased rhizomes immediately, as they can spread disease to the rest of the plant. Cut them off at the base and discard them. This will help prevent further decline in your hosta’s health.
Should I separate newly divided hostas right away, or give them some time to establish themselves?
Give your newly divided hostas 2-3 weeks to settle before separating them further. This allows them to develop a robust root system and reduces transplant shock.