Are you a Monstera lover who wants to multiply your favorite plant without breaking the bank? Propagating Monstera nodes is a game-changer for any plant enthusiast, and with the right techniques, you can easily grow new plants from cuttings. But before you start propagating, it’s essential to choose the right node – not all stem segments are created equal! In this article, we’ll guide you through the process of successfully propagating Monstera nodes using two popular methods: stem cuttings and air-layering. We’ll cover everything from selecting the perfect node to post-propagation care, so you can enjoy a lush, green forest of Monstera plants in no time. Whether you’re a seasoned plant parent or just starting out, this article will provide you with the expert advice you need to propagate like a pro!
Choosing the Right Monstera Node for Propagation
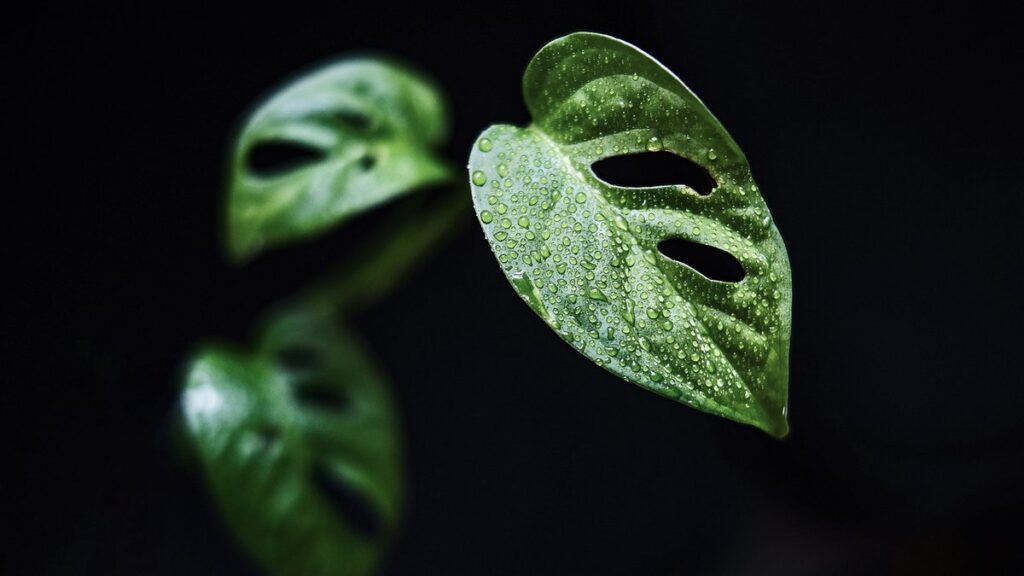
When it comes to propagating Monstera nodes, selecting the right material is crucial for success. Choose a node with at least two sets of leaves and a decent amount of stem.
Selecting Healthy Mother Plant Nodes
When selecting healthy mother plant nodes for propagation, it’s essential to inspect each node carefully. Start by looking at the stem color – a vibrant green stem indicates good health and energy flow. Avoid nodes with soft, mushy stems or those that appear wilted. These signs can be indicative of pests or diseases.
The location of the node on the mother plant is also crucial. Opt for nodes positioned near the base of the stem, as these tend to produce more vigorous shoots during propagation. Nodes closer to the top of the stem might produce weaker growth, making them less suitable for successful propagation.
Leaf size can also provide clues about a node’s potential. Choose nodes with robust leaves that are free from damage or discoloration. A strong and healthy leaf will be more likely to produce a robust cutting during propagation. By carefully selecting your mother plant nodes based on these factors, you’ll increase the chances of successful propagation and set your Monstera up for continued growth and health.
Understanding Node Types: Stem Cuttings vs. Air-Layering
When it comes to propagating monstera nodes, you’ll come across two popular methods: stem cuttings and air-layering. Both techniques have their advantages and disadvantages, which we’ll explore below.
Stem cuttings involve cutting a section of the mother plant’s stem, typically around 4-6 inches long, and allowing it to develop roots in water or soil. This method is great for propagating monsteras with longer stems, as it allows you to create multiple nodes at once. However, stem cuttings can be sensitive to overwatering, which may lead to rot and reduced success rates. On average, rooting time for stem cuttings can take anywhere from 2-6 weeks.
Air-layering, on the other hand, involves making a small incision in the stem of the mother plant, just above a node, and wrapping it with moist sphagnum moss or a similar material. This method encourages roots to develop in the node while still attached to the mother plant. Air-layering is ideal for monsteras with shorter stems, as it allows you to control the growth of new roots more accurately. Success rates are generally higher with air-layering, but rooting time can be longer, typically taking 6-12 weeks.
When deciding between stem cuttings and air-layering, consider the specific characteristics of your monstera node. If you have a long-stemmed variety, stem cuttings might be the way to go. However, if you prefer more control over root development or have a shorter-stemmed variety, air-layering could be the better choice.
Preparing the Monstera Node for Propagation
To successfully propagate your Monstera, it’s essential that you prepare the node correctly, and we’ll walk you through the steps to do just that. This process will ensure optimal rooting results for your new plants.
Cleaning and Sterilizing Tools
When it comes to propagating monstera nodes, using clean and sterilized tools is crucial for success. This may seem like a minor detail, but dirty or contaminated equipment can lead to the spread of diseases, fungal infections, and pests that can harm your plant. To avoid this, make sure to regularly clean and disinfect all pruning shears, knives, and other equipment.
To properly clean your tools, start by washing them with soap and warm water. Scrub away any dirt or debris using a soft-bristled brush. Rinse thoroughly to remove any remaining soap residue. For more thorough cleaning, mix 1 part bleach with 9 parts water in a spray bottle and apply it to the tool surfaces. Allow the solution to sit for 5-10 minutes before rinsing off with clean water.
Some additional tips include:
* Always disinfect your tools between each use
* Change the blades of your pruning shears regularly to prevent rust and bacterial growth
* Use separate equipment for different plants to avoid cross-contamination
* Clean your tools in a well-ventilated area, as bleach fumes can be hazardous to your health. By following these simple steps, you’ll be able to keep your equipment clean and sterilized, reducing the risk of disease and pests and ensuring successful propagation of your monstera nodes.
Removing Lower Leaves and Cutting Stems
When it’s time to prepare the node for propagation, one of the crucial steps is removing lower leaves and cutting stems. This process might seem daunting at first, but with the right techniques and tools, you’ll be well on your way to successful propagation.
To remove lower leaves, start by identifying the healthy, stem section you want to propagate. Gently twist or cut off any weak or damaged leaves near the base of the node, making sure not to damage the delicate tissue beneath. This will help prevent bacterial and fungal growth that can hinder root development.
Next, take a sharp, clean knife or pruning tool and cut the stem section about 1-2 inches above a node (the joint where a leaf meets the stem). Make clean cuts at an angle, cutting just above a node to encourage new growth. Remove any excess stem tissue from the cut area, as this will help promote healthy root growth.
By following these steps and making clean cuts, you’ll be able to successfully remove lower leaves and cut stems from your mother plant node, setting it up for optimal propagation.
Propagation Methods: Stem Cuttings
When taking stem cuttings from your Monstera, it’s essential to choose healthy sections of growth and follow a few simple steps to increase your chances of success. This section will walk you through that process step-by-step.
Water Rooting vs. Soil Rooting
When it comes to propagating monstera nodes through stem cuttings, you’ll often come across two popular methods: water rooting and soil rooting. Both techniques have their advantages and disadvantages that are worth considering.
Water rooting involves placing the cutting directly into a glass of water or a propagation tray filled with water. This method allows for faster root development, typically within 7-14 days, depending on the node’s health and the water quality. However, it can be more challenging to transfer the rooted cutting to soil without causing damage.
On the other hand, soil rooting involves placing the cutting directly into a pot filled with well-draining soil. This method has a slightly lower success rate compared to water rooting but allows for easier transition from propagation to mature plant care. Soil-rooted cuttings usually take around 2-4 weeks to develop roots. When choosing between these methods, consider your specific situation: if you’re short on time or want faster results, water rooting might be the way to go.
Creating a Suitable Environment for Water Rooting
To successfully propagate monstera nodes through water rooting, you’ll want to create an environment that mimics the plant’s natural habitat. This means maintaining a temperature between 65-75°F (18-24°C), as this range promotes healthy root development.
Humidity is also crucial in this process. Monstera plants thrive in humid environments, typically above 50%. To achieve this, you can place the propagation station near a humidifier or cover it with a clear plastic bag to create a mini-greenhouse effect.
In terms of light conditions, keep the propagation area out of direct sunlight, as this can cause the water to become too warm and promote algae growth. Bright, indirect light is ideal for water rooting, so consider placing the station near an east- or west-facing window.
To create a suitable rooting medium, fill a glass or container with distilled water, leaving about an inch at the top. You can also use a propagation tray with a built-in reservoir to collect excess water and prevent overwatering.
Propagation Methods: Air-Layering
Air-layering is a fascinating and effective method for propagating Monstera nodes, allowing you to create new plants from a mature stem. It’s surprisingly easy to do at home.
Understanding the Process of Air-Layering
Air-layering is a popular propagation method for monstera nodes, and it’s relatively easy to do once you understand the process. To begin with, identify suitable nodes on your mother plant. These are typically located near the base of the stems or where a leaf meets the stem. Choose nodes that have at least two visible roots developing around them – this is a good indication that they’re ready for separation.
Once you’ve selected your nodes, it’s time to make incisions in the stem above each node using a clean and sharp tool. This will encourage root growth by exposing the cambium layer beneath the bark. Cut about 1-2 inches above the node at an angle, making sure not to cut too deeply into the stem.
Next, wrap the exposed area of the stem with moss or another medium like sphagnum peat or coconut coir. This will provide a humid environment for root growth and prevent drying out. Secure the wrapping material gently but firmly with a twist tie or wire, leaving enough room for expansion as new roots develop.
Creating a Suitable Environment for Air-Layering
To successfully air-layer monstera nodes, it’s essential to create an environment that mimics their natural habitat. Monstera plants thrive in warm and humid conditions, with ideal temperatures ranging from 65°F to 75°F (18°C to 24°C). A temperature above 80°F (27°C) can lead to root rot and other issues.
To maintain the right humidity levels, you’ll need to create a humid microclimate around your air-layered nodes. One effective way to do this is by using a propagation tray or cloche. Fill the tray with water and place it under the cloche, creating a mini-greenhouse effect. This will help retain moisture and maintain a relative humidity of 50-60%. You can also cover the tray with a damp cloth or plastic wrap to achieve similar results.
Monitor your setup closely, as overwatering can be detrimental to your air-layered nodes. Make sure to check on them daily, ensuring that the soil is moist but not waterlogged.
Post-Propagation Care
Now that you’ve successfully propagated your Monstera nodes, it’s time to provide them with the right care to help them thrive and grow into healthy plants. This is where post-propagation care comes in!
Monitoring Root Growth and Transferring Plants
Monitoring root growth is crucial after propagating Monstera nodes. Keep an eye out for roots growing 1-2 inches long and visible through the propagation medium. This indicates it’s time to transfer the plant into a separate pot with well-draining soil. Before transferring, gently remove the node from its initial rooting medium, taking care not to damage any new roots.
When transferring, choose a container that is slightly larger than the one used for propagation, and provide sufficient light (at least 12-14 hours of indirect light per day). Water thoroughly after potting to settle the soil. Fertilize with a balanced, water-soluble fertilizer at half the recommended strength to prevent burning the roots.
Provide enough space between plants for air circulation, and avoid overwatering. Check the moisture level regularly by gently sticking your finger into the soil up to the first knuckle. If it feels dry, give the plant a good soaking until excess water drains from the pot’s bottom.
Common Challenges and Solutions
When propagating monstera nodes, you may encounter some common challenges that can affect the health and success of your propagated plants. One of the most significant issues is root rot, which can be caused by overwatering or waterlogged soil. To prevent this, ensure you’re not watering your propagated cuttings too frequently. Instead, allow the top inch of soil to dry out between waterings.
Inadequate humidity is another common challenge that can lead to weakened plants. Monstera nodes prefer a humid environment, typically above 50%. To maintain optimal humidity levels, consider placing your propagator in a covered area or using a humidifier nearby. Monitor your plant’s response and adjust the humidity accordingly.
Insufficient light is also crucial to address when propagating monstera nodes. These plants thrive in bright, indirect light conditions. Make sure you’re providing enough light by placing them near an east- or west-facing window or using grow lights specifically designed for indoor plants.
Advanced Techniques: Multiplying Monstera Nodes
Once you’re comfortable propagating a single node, it’s time to multiply your success and learn how to multiply multiple Monstera nodes at once. This technique requires some finesse and extra patience, but yields impressive results.
Tissue Culture vs. Traditional Propagation
Tissue culture propagation is an advanced technique for multiplying Monstera nodes. This method involves removing the node from the mother plant and placing it in a sterile environment where it can develop into a new plant. The process typically takes 2-6 weeks, depending on factors like temperature, humidity, and nutrient availability.
Compared to traditional methods, tissue culture has several advantages. For one, rooting time is significantly reduced – sometimes by up to 50%. This means you can enjoy new plants much sooner. Success rates are also higher, with reported success rates ranging from 80-90%. Additionally, tissue culture allows for mass production of genetically identical plants.
However, the disadvantages should not be overlooked. Tissue culture requires specialized equipment and a clean environment, which can increase costs. This method is also more labor-intensive, as each node must be carefully handled and maintained. Furthermore, some enthusiasts may find the process too complex or intimidating. As a result, traditional methods like stem cuttings and air-layering remain popular alternatives for Monstera propagation.
When choosing between tissue culture and traditional methods, consider your goals and resources. If you’re looking for rapid multiplication with high success rates, tissue culture might be the way to go.
Scaling Up Production for Commercial Growers
As you expand your monstera node propagation operation to meet commercial demand, scaling up production is crucial. To achieve this, start by assessing your existing equipment and resources. Consider investing in automated irrigation systems, climate-controlled growth chambers, or high-volume propagators to streamline processes and increase efficiency.
Resource allocation will also play a significant role in scaling up production. Calculate the number of nodes you need to propagate daily based on market demand and production capacity. Allocate sufficient labor, materials, and supplies accordingly. Implement a tiered propagation system to ensure consistency and quality control throughout your operation.
Conduct thorough market analysis to identify trends, competition, and opportunities. This will enable you to tailor your product offerings and pricing strategy for maximum profitability. Stay informed about consumer preferences, seasonal fluctuations in demand, and industry developments to stay ahead of the curve.
Frequently Asked Questions
Can I propagate Monstera nodes from any type of plant?
Yes, you can propagate Monstera nodes from mature plants or young specimens. However, it’s essential to choose healthy mother plants with vibrant green stems and a decent amount of stem material for successful propagation.
How often should I water propagated Monstera cuttings?
Water your propagated Monstera cuttings when the top 1-2 inches of soil feels dry to the touch. For air-layering, ensure the cutting stays moist but not waterlogged during the rooting process. Monitor the plant’s watering needs after transfer to a new pot.
What are some common pests or diseases that can affect propagated Monstera nodes?
Keep an eye out for spider mites, mealybugs, and scale insects, which can infest newly propagated Monstera nodes. Regularly inspect your plants, and treat any infestations promptly with insecticidal soap or neem oil. Fungal diseases like root rot can also occur; ensure good air circulation and avoid overwatering.
Can I propagate Monstera nodes in a greenhouse?
Yes, propagating Monstera nodes in a greenhouse can be an excellent option, especially for commercial growers. A controlled environment allows you to optimize conditions for rooting and growth. However, maintain high humidity levels (around 70-80%) and ensure adequate air circulation to prevent fungal diseases.
How long does it take for propagated Monstera cuttings to develop roots?
The time it takes for propagated Monstera cuttings to develop roots varies depending on the method used. Water rooting can take anywhere from 2-6 weeks, while soil rooting may take longer (4-8 weeks). Be patient and monitor root growth by gently tugging on the stem; when resistance is met, it’s a sign that roots have developed.