Growing seeds can be a thrilling experience for any gardener or beginner. Whether you’re looking to harvest your own fresh produce, save money on store-bought groceries, or simply enjoy the satisfaction of nurturing new life from scratch, knowing how to grow seeds successfully is an essential skill.
The process may seem intimidating at first, but with the right guidance and understanding of optimal conditions, seed starting mix, light and water requirements, temperature control, and more, you’ll be well on your way to achieving a bountiful harvest. In this ultimate guide, we’ll walk you through every step of the journey – from choosing the perfect seeds for your climate and needs to harvesting your crop with confidence. By the end of this article, you’ll have all the expert advice you need to grow seeds like a pro!
Choosing the Right Seeds
When it comes to growing seeds successfully, selecting the right ones is crucial. In this important step, we’ll walk you through what to consider when choosing the perfect seeds for your garden.
Understanding Seed Classification and Types
When it comes to choosing the right seeds for your garden, understanding seed classification and types is crucial. There are three main categories: hybrid, heirloom, and open-pollinated. Hybrid seeds are bred specifically for their high yield and disease resistance, but they may not produce true-to-type offspring. Heirloom seeds, on the other hand, have been saved and handed down through generations, offering a diverse range of characteristics.
Open-pollinated seeds are another option, allowing you to save and replant seeds from your own harvest. This type is ideal for gardeners who want to preserve their favorite varieties or experiment with new ones. Consider factors such as the climate in your area, the length of your growing season, and the space available when selecting a seed type.
When choosing between these options, think about what you’re looking for: high yields, disease resistance, or the ability to save seeds for future harvests? You can also consider consulting with local nurseries or experienced gardeners in your community to get recommendations on the best seeds for your specific region and growing conditions.
Selecting Seeds Based on Climate and Region
When selecting seeds for your garden, it’s crucial to consider the local climate and region you’re growing in. This ensures that your plants will thrive and not be vulnerable to extreme temperatures, frost, or diseases prevalent in your area.
To begin with, check the temperature tolerance of the seed variety. Some seeds can handle high heat while others require cooler temperatures to grow. For instance, tomato seeds are typically grown in warmer climates (above 55°F) whereas broccoli seeds prefer milder temperatures between 60-70°F.
Next, assess the frost sensitivity of your chosen seeds. If you live in an area with frequent frosts, choose varieties that can withstand light or moderate frost. For example, lettuce and spinach are cool-season crops that can tolerate some frost but will bolt (go to seed) if exposed to prolonged cold temperatures.
In addition to temperature tolerance and frost sensitivity, disease resistance is another essential factor to consider. Certain diseases like powdery mildew, downy mildew, or root rot are more prevalent in specific regions due to climate conditions. Research the disease resistance of your chosen seeds and select varieties with built-in resistance to minimize disease risks.
Consider consulting seed catalogs, gardening websites, or talking to local nursery experts for region-specific advice on choosing the right seeds for your area.
Preparing the Soil and Growing Medium
When it comes to growing seeds successfully, the foundation lies in preparing a suitable soil and growing medium. This crucial step will set your seeds up for optimal growth and development.
Understanding Seed Starting Mix and Potting Compost
When it comes to growing seeds successfully, using the right seed starting mix and potting compost is crucial. A good quality mix provides a healthy environment for your seeds to germinate and grow, while a poor one can lead to stunted growth, root bound issues, or even plant death.
To choose the best seed starting mix, look for one with a pH level between 6.0 and 7.0, which is slightly acidic to neutral. This pH range allows for optimal nutrient availability and uptake by your seeds. A mix with a balanced fertilizer content is also essential, as it provides the necessary nutrients for seedling growth.
When selecting potting compost, consider its water retention capacity, drainage, and nutrient release rate. An ideal potting compost should retain moisture but not be too soggy, allowing roots to breathe while preventing root rot. Some popular options include peat moss-based mixes, coconut coir-based mixes, or even organic, biodegradable alternatives like worm castings.
When in doubt, read the label and look for reputable brands that offer reliable seed starting mixes and potting composts. Keep in mind that store-bought mixes may contain additives, such as fungicides or pesticides, which can harm your seeds. To avoid this, opt for natural and organic options whenever possible.
Creating an Optimal Soil Environment
Before planting seeds, it’s essential to create an optimal soil environment that will support healthy growth. This starts with testing the pH levels of your garden bed or containers. You can use a DIY kit or send a sample to a lab for analysis. Most seedlings prefer a slightly acidic to neutral soil pH between 6.0 and 7.0.
Once you’ve determined your soil’s pH level, it’s time to add organic matter. This can be in the form of compost, well-rotted manure, or peat moss. These materials not only improve soil structure but also provide essential nutrients for seed growth. Aim to mix in at least 2-3 inches of organic matter into the top 6-8 inches of soil.
Proper drainage is also crucial for seedling health. Make sure your garden bed or containers have adequate holes for excess water to escape, and consider adding a layer of perlite or vermiculite to improve soil porosity. By following these steps, you’ll be creating an optimal soil environment that will give your seeds the best chance at success.
Sowing Seeds Effectively
When it comes to giving your seeds the best chance at germination, sowing them effectively is crucial. In this section, we’ll explore the essential techniques for successful seed sowing.
Understanding Seed Germination Rates and Factors Affecting Them
When it comes to growing seeds successfully, understanding seed germination rates and the factors that affect them is crucial. Temperature, moisture, and light exposure are the primary factors that influence a seed’s ability to sprout.
Temperature plays a significant role in seed germination. Most seeds require a temperature range between 65°F and 75°F (18°C and 24°C) for optimal germination. However, some seeds like tomatoes and peppers prefer warmer temperatures above 80°F (27°C), while others like broccoli and cauliflower thrive in cooler temperatures around 60°F (15°C).
Moisture is another essential factor. Seeds need consistent moisture to absorb the necessary water for germination. Overwatering can be detrimental, causing seedlings to rot before they even have a chance to sprout.
Light exposure also affects seed germination rates. Some seeds require light to germinate, while others prefer darkness. For example, lettuce and radish seeds germinate faster in the dark, whereas beans and peas need indirect light to grow. By optimizing these conditions for maximum germination success, you can significantly improve your chances of successfully growing seeds.
To optimize temperature, ensure your soil is at room temperature before sowing seeds. You can also use a heating mat or cold frame to control temperatures if needed. For moisture, water your seeds gently but thoroughly after sowing and maintain consistent moisture levels throughout the germination period.
In terms of light exposure, research the specific seed variety you’re growing to determine its light requirements. Most vegetable seeds require indirect light during the germination phase, while flower seeds often prefer direct sunlight. By understanding these factors and adjusting your environment accordingly, you’ll be well on your way to achieving maximum germination success.
Techniques for Sowing Seeds by Hand or Using a Planter
When sowing seeds by hand or using automated planters, it’s essential to follow proper techniques to ensure optimal growth and development. To begin with, prepare the growing medium by loosening it to a depth of about 1-2 inches. This will give the roots ample room to grow without encountering any resistance.
For hand-sowing, place one or two seeds in the prepared soil, depending on the variety, and cover them with a thin layer of the growing medium. The general rule of thumb is to plant seeds at a depth that’s 1-2 times their width. For example, if you’re sowing sunflower seeds, which are about 0.5 inches wide, plant them about 0.5-1 inch deep.
When using automated planters, follow the manufacturer’s instructions for proper spacing and alignment of seeds. Some common mistakes include planting seeds too shallowly or overcrowding the growing medium. To avoid this, use a seed spreader to distribute the seeds evenly and at the correct depth.
Providing Adequate Light and Watering
When it comes to growing seeds successfully, providing adequate light and proper watering is crucial for their healthy development. Let’s dive into these essential steps together.
Understanding Seedling Light Requirements
When it comes to growing seeds successfully, understanding seedling light requirements is crucial for their development. Different types of seedlings have varying light needs, and providing insufficient light can lead to weak and spindly growth.
Most seedlings require bright, indirect light, especially during the germination stage. Direct sunlight can be too intense and may cause damage or scorching. For example, tomato and pepper seedlings thrive in a spot with 12-14 hours of indirect light per day. On the other hand, lettuce and herbs like basil prefer partial shade.
To provide sufficient light for your seedlings, you have two options: direct sunlight or supplemental lighting. If possible, place seed trays near an east-facing window or use a sheer curtain to filter direct sunlight. Alternatively, invest in LED grow lights specifically designed for seed starting. These energy-efficient lights offer precise spectrum control and can be adjusted to suit the needs of different plant species.
When choosing a grow light, consider factors like spectrum, intensity, and timer functionality. Some popular options include CFL (Compact Fluorescent Lamp), T5, or LED grow lights with adjustable arms. By understanding seedling light requirements and providing adequate lighting, you’ll give your seeds the best chance to thrive.
Watering Strategies for Seeds and Seedlings
When it comes to watering seeds and seedlings, consistency is key. The frequency, amount, and timing of water supply play a crucial role in promoting healthy growth. Overwatering can be just as detrimental as underwatering, causing roots to rot or leading to weak and spindly stems.
Aim to water your seeds when the top inch of soil feels dry to the touch. This is usually every 2-3 days for most seedlings, but this may vary depending on temperature, humidity, and potting mix. To avoid overwatering, check the moisture level by sticking your finger into the soil or using a moisture meter.
Water thoroughly at the right time, such as early morning or evening when the sun is not intense. Avoid getting water on leaves to prevent fungal diseases, instead focus on watering the soil directly. Consistency in water supply will encourage deep root growth and promote strong seedlings that can withstand adverse weather conditions. By following this simple yet crucial step, you’ll be well on your way to growing healthy and robust seedlings.
Managing Temperature and Humidity
Now that you’ve got your seeds sown, let’s talk about two crucial elements for seed growth: temperature and humidity. Mastering these conditions will give your seeds a solid foundation to thrive.
Understanding Optimal Temperature Ranges for Different Crops
When it comes to growing seeds successfully, understanding optimal temperature ranges for different crops is crucial. Different seedlings respond uniquely to temperature fluctuations, and maintaining the right temperatures can make all the difference between a healthy harvest and a struggling crop.
For example, tomatoes thrive in daytime temperatures between 65-70°F (18-21°C) and nighttime temperatures around 55-60°F (13-15°C). On the other hand, peppers prefer slightly warmer temperatures during the day (75-80°F or 24-27°C) and cooler nights (60-65°F or 16-18°C).
Other popular crops have similar requirements. Cucumbers need a warm and humid environment with daytime temperatures between 70-85°F (21-29°C) and nighttime temperatures around 60-70°F (15-21°C). Leafy greens like lettuce and spinach prefer cooler temperatures, typically between 40-65°F (4-18°C), while broccoli and cauliflower require slightly warmer temperatures (50-70°F or 10-21°C).
To ensure optimal growth, make sure to research the specific temperature requirements for each crop you’re growing. By understanding how different seedlings respond to temperature fluctuations, you can create a perfect environment for your seeds to thrive.
Strategies for Controlling Humidity and Preventing Damping Off
Maintaining a stable humidity level around your seeds and seedlings is crucial for their healthy growth. When the air is too humid, it creates an ideal breeding ground for fungal diseases that can cause damping off. This condition occurs when the young roots of the seedling rot due to excessive moisture.
To prevent overwatering, which often leads to damping off, make sure you don’t water your seeds or seedlings more frequently than they need. Check the soil moisture by sticking your finger into it up to the first knuckle. If the soil feels dry, it’s time for a drink. Water thoroughly but avoid getting excess water on the leaves and crown of the plant.
You can also use a cloche or mini-greenhouse to maintain optimal humidity levels while keeping the seedlings dry. This is particularly useful when starting seeds indoors. Additionally, ensure good air circulation around your plants by providing adequate space between them. A temperature range of 65-75°F (18-24°C) and moderate humidity (around 50-60%) are ideal for most seedlings.
A study on seed germination showed that a humid environment can promote faster growth, but excess moisture can be detrimental to the young roots. Keep your greenhouse or indoor growing space clean and free from debris to prevent fungal spores from spreading. By following these tips, you can maintain the perfect balance of humidity for healthy seedling growth.
Monitoring Progress and Troubleshooting Common Issues
Now that you’ve got your seeds sprouting, it’s time to keep a close eye on their progress and troubleshoot any potential problems as they grow.
Recognizing Signs of Healthy Seed Growth and When to Expect Germination
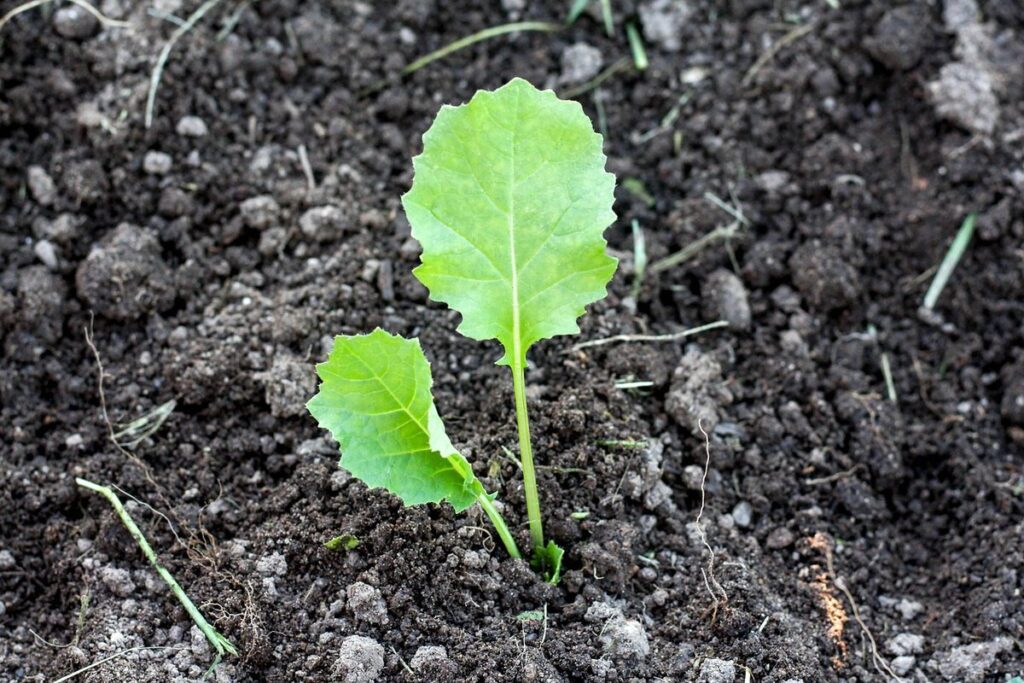
Recognizing signs of healthy seed growth is crucial for achieving success in growing seeds. At the initial stages, you may not be able to see anything happening above ground. However, below the surface, a lot is happening. One of the first signs of healthy seed growth is root development. This can be observed by gently feeling the soil with your fingers about 5-7 days after sowing. A gentle tug on the seed indicates that roots have started developing.
As the seeds germinate, you’ll start to notice leaf emergence. Keep an eye out for tiny white or green shoots pushing their way through the surface of the soil. These initial leaves are usually flat and not fully formed but indicate that the seedling is making progress.
Keep in mind that germination rates can vary depending on conditions like temperature, moisture levels, and light exposure. Generally, most seeds take anywhere from 7-21 days to germinate under optimal conditions. With a consistent environment and proper care, you should start seeing sprouts within this timeframe. Monitor your seeds closely for any signs of damage or disease, and don’t hesitate to adjust the growing conditions if necessary.
Identifying and Addressing Common Problems During Seed Growth
When it comes to growing seeds, identifying and addressing common problems is crucial for a successful outcome. Poor germination rates can be frustrating, but they’re often caused by issues that are easily rectifiable. Check the seed viability by performing a simple test: place 10-15 seeds in a damp paper towel, seal it in a plastic bag, and wait for 3-5 days. If fewer than half of them sprout, it’s likely a problem with the seeds themselves.
Slow growth can be due to inadequate light, water, or temperature conditions. Make sure your growing environment is suitable: most seedlings require bright indirect light, consistent moisture (not overwatering), and temperatures between 65-75°F (18-24°C). Pests and diseases can also devastate your seeds – keep an eye out for signs of infestation like holes in leaves or white powdery patches. Use neem oil or insecticidal soap to control pests, and treat fungal infections with a fungicide specifically designed for seeds.
Regular monitoring and quick action are key: the sooner you identify the problem, the less damage it will cause. By staying vigilant and taking corrective measures, you can prevent issues from becoming major problems and ensure your seeds grow strong and healthy.
Harvesting Your Crop
Now that your seeds have germinated and are thriving, it’s time to harvest them at their peak freshness for optimal flavor and nutritional value. In this crucial final step, you’ll learn how to bring in a successful crop.
Knowing When to Harvest Seeds Based on Maturity Dates
Knowing when to harvest seeds is just as crucial as sowing them. This is where maturity dates come into play. Different seed varieties have unique maturation periods, and it’s essential to monitor these signs closely to avoid over-harvesting or leaving the seeds on the plant for too long.
When a seed is mature, you’ll typically notice visual changes such as a color change in the seed pods, leaves, or stems. For example, some pea varieties turn from green to yellow or brown as they ripen. Other signs include texture changes like softening or hardening of seeds, or a slight drying out of the stem.
Timing is everything when it comes to harvesting seeds for optimal flavor, texture, and longevity. Harvest too early, and you’ll end up with immature seeds that won’t germinate well. Conversely, delaying harvest by just a few days can make all the difference in achieving perfect ripeness. For instance, some varieties of lettuce are best harvested at the “loose-leaf” stage when they’re still slightly firm to the touch.
Keep an eye on your seed crop’s specific maturation period and watch for these telltale signs to ensure you harvest your seeds at the right time. This will not only preserve their quality but also guarantee a bountiful harvest next season.
Preparing Seeds for Storage and Long-Term Preservation
When you’ve harvested your seeds, it’s essential to prepare them for long-term storage to maintain their viability. Proper drying, cleaning, and packaging are critical steps to ensure that your seeds remain healthy and ready for planting.
First, let’s talk about drying. Seeds contain a high moisture content, which can cause them to rot or become moldy if not dried properly. To dry your seeds, spread them out in a single layer on a paper bag, cloth towel, or parchment paper. You can also use a seed dryer or desiccant packets to speed up the process. The goal is to reduce the moisture content to around 8-10%. This will help prevent mold and fungal growth.
Once your seeds are dry, it’s time for cleaning. Use a soft-bristled brush or a clean cloth to remove any debris, dirt, or plant material that may be clinging to the seeds. You can also use a small sieve or mesh screen to separate larger seed types from smaller ones.
When packaging your seeds for storage, use airtight containers like glass jars or plastic bags with silica gel packets to maintain a dry environment. Label each container with the seed type, date harvested, and any other relevant information. Store the containers in a cool, dark place, such as a basement or cupboard.
Frequently Asked Questions
What are some essential tools I need to get started with growing seeds?
When starting your seed-growing journey, it’s crucial to have the right equipment. You’ll need a good quality seed tray or container, a watering can or spray bottle, and a propagation mat for maintaining optimal temperature and humidity levels. Don’t forget a reliable soil thermometer and a label maker for keeping track of your seedlings.
Can I grow seeds indoors year-round, regardless of my climate?
While it’s possible to grow seeds indoors, understanding the specific needs of your region is vital. In areas with cold winters or extreme temperatures, you may need to adjust your growing schedule or use additional light sources to ensure healthy growth. Research the optimal temperature ranges for different crops and consider using a grow tent or indoor garden system.
How often should I water my seedlings to prevent overwatering?
Watering is a delicate balance when it comes to seed growth. Aim to keep the soil consistently moist but not waterlogged. Check the top inch of soil daily, and only water when it feels dry to the touch. Remember that seedlings need adequate moisture during the germination phase, so monitor their progress closely.
Can I mix different types of seeds together in the same pot?
While it’s tempting to grow multiple varieties together, mixing different types of seeds can lead to reduced growth rates and increased competition for resources. Instead, plant similar seeds with the same growing requirements together, such as herbs or leafy greens. This will promote optimal growth and minimize potential issues.
What should I do if my seedlings develop damping off?
Damping off is a common issue that occurs when seedlings are exposed to high humidity levels. If you notice yellowing leaves, stunted growth, or a sudden decline in plant health, take action immediately. Increase air circulation around your plants, reduce watering frequency, and apply a fungicide specifically designed for seedlings. Monitor their progress closely to prevent further damage.
Can I save seeds from my harvested crop for future planting?
Saving seeds can be an excellent way to preserve the genetic diversity of your crops and ensure continued success in future seasons. However, it’s essential to follow proper seed saving techniques to maintain the integrity of your harvest. Research specific guidelines for storing and preserving different types of seeds, such as drying, cleaning, and packaging methods.