Starting seeds indoors can be a great way to get a head start on the growing season, but it requires the right conditions to thrive. One key factor is providing adequate light, which is where grow lights come in. Not all grow lights are created equal, and choosing the right type for your needs is crucial for healthy seedlings. In this article, we’ll explore the world of grow lights for seed starting indoors, covering everything from selecting the best type to setting up a system that works for you. We’ll also touch on common issues that can arise and offer troubleshooting tips to get your seedlings growing strong and healthy. Whether you’re a seasoned gardener or just starting out, this guide will help you learn how to use grow lights effectively for indoor seed starting.
Choosing the Right Grow Lights
With so many options available, choosing the right grow lights can be overwhelming. In this next part of our guide, we’ll break down what to consider when making your selection.
Types of Grow Lights
When it comes to growing seedlings indoors with grow lights, selecting the right type of light is crucial for their health and development. There are several types of grow lights available, each with its pros and cons. Let’s break down three popular options: LED, fluorescent, and HID.
LED grow lights are energy-efficient and produce minimal heat, making them ideal for indoor growing spaces. They also offer a wider spectrum of light, which promotes healthy growth and development in seedlings. For instance, the Philips LED Grow Light emits a balanced spectrum that mimics natural sunlight, perfect for seed starting. However, LED lights can be more expensive upfront.
Fluorescent grow lights are another popular choice for indoor growing. They’re affordable, easy to install, and produce minimal heat. However, they tend to have a shorter lifespan compared to LED lights and may not provide the same level of intensity as other options. T5 fluorescent lights are a good example of this type, offering a balanced spectrum but requiring frequent replacement.
HID (High-Intensity Discharge) grow lights are known for their high output and intense light spectrum, which can promote rapid growth in seedlings. However, they consume more energy than LED or fluorescent lights and produce significant heat. This makes them less suitable for indoor growing spaces with limited ventilation.
Considerations for Small Spaces
When working with small indoor spaces for seed starting, it’s essential to consider the size and type of grow light that will best suit your needs. Compact grow lights are a great option for tiny areas, as they provide high intensity while taking up minimal space.
If you have an extremely limited area, LED strips can be a fantastic solution. These flexible lights can be bent and placed around specific plants or corners, allowing for targeted lighting without overwhelming the surrounding space.
When choosing compact grow lights, look for models with adjustable arms to direct light where it’s needed most. Consider also the wattage output – 10-20 watts is often sufficient for small spaces. Be mindful of heat buildup and ensure your chosen light has adequate ventilation or a built-in cooling system.
Some growers even repurpose LED strips from other devices, like old TVs or smartphone screens, which can be an eco-friendly and budget-conscious option. Just make sure the LEDs are compatible with your specific needs and have the necessary color temperature for plant growth.
Setting Up Your Grow Light System
To get started, you’ll need to set up your grow light system properly, which involves choosing the right fixtures and placing them at the optimal distance from your seedlings.
Essential Components
To set up an effective grow light system for seed starting indoors, you’ll need to gather some essential components. A basic setup typically includes a grow light unit, reflector, timer, and stand.
A good quality grow light unit is the heart of your system, providing the necessary spectrum and intensity for your seedlings to thrive. When selecting a unit, consider factors such as LED type (e.g., cool white or full-spectrum), wattage, and coverage area. Make sure it’s designed specifically for indoor growing and suitable for your seedling stage.
A reflector is also crucial in a grow light setup, helping to direct the light downwards towards the plants while minimizing energy waste. You can choose between aluminum or Mylar reflectors; each has its own advantages.
Next, you’ll need a timer to automate your lighting schedule, ensuring your seedlings receive adequate light during photosynthesis hours. This is especially important for indoor growing, as it’s easy to over- or under-light your plants without proper control.
Finally, a sturdy stand will support your grow light unit, keeping it at the right height and stable. Consider a adjustable stand that allows you to customize the distance between the light and your seedlings.
Tips for Optimal Placement
When it comes to setting up your grow light system, the placement of the lights is crucial for optimal growth. To maximize the effect of your grow lights, you’ll want to position them carefully, taking into account three key factors: distance, angle, and ambient light.
Distance is a critical consideration, as seedlings need light but also require protection from intense radiation. Typically, a distance of 12-24 inches between the grow light and the seedling tray is ideal for most standard indoor growing situations. However, if your seedlings are more mature or you’re using high-intensity lights, you may need to adjust this distance accordingly.
Angle is another important aspect to consider. Aim for a horizontal angle of around 30-40 degrees between the grow light and the seedling tray. This will help prevent hot spots and ensure even illumination.
Ambient light levels can also impact your seedlings’ growth. Natural light or other artificial lighting sources in the room should be minimal, as they may compete with the focused beam of your grow lights. Keep any windows shaded during peak sunlight hours to maintain optimal growing conditions for your indoor seedlings.
Seed Starting Essentials
To grow healthy seedlings under grow lights, you’ll need a few key essentials that we’ll cover next, including optimal light intensity and temperature requirements.
Preparing Seeds and Soil
When it comes to growing seedlings indoors with grow lights, preparation is key. This starts with selecting high-quality seeds that are specifically bred for indoor growth. Look for varieties labeled as “microgreens” or “indoor greens,” which tend to mature faster and produce more compact growth.
Before sowing your seeds, consider soaking them in water overnight to promote germination. Use a paper towel or cloth to gently wrap the seeds, then let them sit in a bowl of water. This simple step can boost germination rates by up to 20%.
When it comes to sowing seeds indoors, use a high-quality potting mix specifically designed for seed starting. Avoid using regular garden soil, as it can be too dense and may not provide enough oxygen for young roots. Instead, opt for a mix that’s labeled as “seed starting” or “indoor potting mix.” This will help ensure your seeds get off to the best possible start.
Keep in mind that potting mixes come with varying levels of fertilizers and nutrients, so choose one that’s balanced and free of harsh chemicals.
Watering and Humidity Control
Watering seedlings under grow lights can be a delicate balance between providing enough moisture and preventing overwatering. Seedlings need consistent moisture to develop strong root systems, but they’re also prone to rot if the soil is too wet. To strike the right balance, check the soil daily by sticking your finger into it up to the first knuckle. If the soil feels dry, it’s time for a drink.
Maintain optimal humidity levels between 40-60% around your seedlings. You can achieve this using a humidifier or by placing the pot on a tray filled with water and pebbles. Keep in mind that seedlings under grow lights tend to lose more moisture through transpiration due to the increased light intensity. To avoid drying out the soil, increase watering frequency when the temperature is high.
Monitor your seedlings’ response to different humidity levels by observing their growth. If they’re experiencing leaf curl or droopy stems, it may be a sign that the air is too dry. On the other hand, if you notice fungal growth or root rot, the humidity might be too high. Adjust your watering and humidity control accordingly to ensure healthy seedling development.
Providing Adequate Spectrum and Intensity
When selecting grow lights for seed starting, ensuring your plants receive sufficient spectrum and intensity is crucial to promote healthy growth. This involves choosing a light that provides the right balance of colors.
Understanding the Importance of Spectra
When it comes to growing seedlings indoors with grow lights, understanding the importance of spectra is crucial for promoting healthy development. You see, different types of light have distinct effects on plants, and choosing a grow light with the right spectrum can make all the difference.
Let’s break down the three main categories: blue, red, and full-spectrum lights. Blue lights promote vegetative growth, encouraging seedlings to develop their leaves and stems. Red lights, on the other hand, stimulate flowering and fruiting, which isn’t ideal for young seedlings that need to focus on developing roots.
A full-spectrum light, often considered the best option for seed starting, combines both blue and red spectrums. This type of light promotes balanced growth, supporting the development of strong roots, healthy leaves, and robust stems. When choosing a grow light, look for one that has a balanced spectrum with equal parts blue and red light.
In practical terms, you can think of it like this: if you’re growing seedlings indoors, you want to prioritize their overall health and development rather than pushing them towards flowering too quickly. A full-spectrum light will help you achieve that balance, giving your seedlings the best possible start in life.
Balancing Light Intensity
When it comes to providing adequate spectrum and intensity for seedlings, balancing light intensity is crucial. As seedlings progress from germination to establishment, their lighting needs change dramatically. To ensure optimal growth, you’ll need to adjust the light intensity accordingly.
During the germination phase (1-3 days), seedlings require a low light intensity of around 10-20 μmol/s. A gentle glow is enough to provide them with the energy they need to sprout. You can use a lower-wattage LED grow light or place the seed tray further away from the light source.
As seedlings transition into the vegetative phase (3-7 days), their lighting needs increase. Aim for an intensity of 30-50 μmol/s, which will promote healthy leaf growth and development. Increase the light duration or move the seed tray closer to the light source.
Remember, seedling roots are sensitive to high light intensities, so it’s essential to provide a gentle transition from low to moderate light levels. By adjusting the light intensity according to your seedlings’ growth stage, you’ll be providing them with the optimal conditions for healthy development.
Troubleshooting Common Issues
Don’t get discouraged if things don’t go as planned – we’ve got you covered. This section will walk you through common issues that arise when growing seedlings indoors with grow lights and how to resolve them.
Common Problems and Solutions
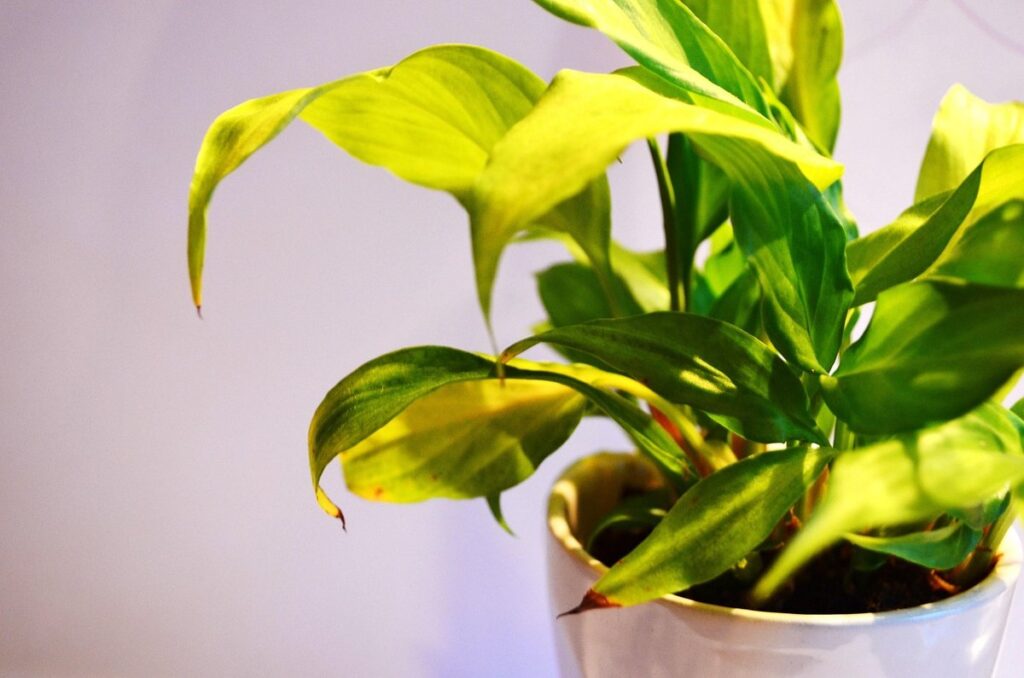
When using grow lights for seed starting indoors, you may encounter some common issues that can impact the health and growth of your seedlings. One of the most common problems is yellowing leaves, which can be caused by overwatering or underwatering, inadequate light spectrum, or excessive heat from the lights. To resolve this issue, check the soil moisture regularly and adjust your watering schedule accordingly. Make sure to provide a balanced light spectrum with equal parts blue and red light.
Another common problem is slow growth, which can be due to insufficient light intensity or duration. Ensure that you’re providing sufficient light hours for your seedlings, ideally 12-14 hours per day. You may also need to adjust the distance between the lights and your seedlings to optimize photosynthesis.
Lastly, pests like spider mites, mealybugs, or aphids can infest your plants under grow lights. To prevent this, maintain good air circulation around your plants and inspect them regularly for any signs of infestation. Use neem oil or insecticidal soap to control pest populations if necessary.
Prevention is Key
Maintaining a healthy environment for your seedlings to thrive is crucial when growing indoors with grow lights. To prevent problems from arising, it’s essential to ensure proper temperature control. The ideal temperature range for most seeds and seedlings falls between 65°F to 75°F (18°C to 24°C). Avoid placing your grow light too close to a heat source or drafty area, as this can cause sudden temperature fluctuations that may harm your plants.
Proper air circulation is also vital for preventing moisture buildup and the growth of fungal diseases. Make sure there’s enough space between each seedling for air to circulate freely. A minimum of 6-8 inches (15-20 cm) between seedlings should be sufficient, depending on their size and type. You can also use a fan to gently circulate the air around your grow lights.
Monitoring light levels is equally important. Most seedlings require a photoperiod of 14-16 hours of light per day, but some may need more or less depending on their specific needs. Be sure to research the requirements for your particular seeds and adjust your grow light’s schedule accordingly. Keep an eye on your seedlings’ response to the light levels, and make adjustments as needed to ensure they’re receiving the right amount of illumination.
Frequently Asked Questions
How can I ensure my LED grow lights are providing the right spectrum for seed starting?
LED grow lights provide a wide range of spectra, but not all seeds require the same light output. For most seedlings, a balanced spectrum with equal amounts of blue and red light is ideal. However, some plants may benefit from more intense blue or red light. Research specific lighting requirements for your plant species to ensure optimal growth.
What’s the best way to set up my grow lights for maximum efficiency in a small space?
In a compact growing area, energy efficiency is crucial. To optimize your setup, consider using adjustable arms or chains to direct light where it’s needed most. Also, keep your grow lights at least 6-8 inches away from seedlings to prevent burning and promote healthy growth.
Can I use the same lighting system for both vegetative and flowering stages?
Yes, but with careful consideration. Some plants require increased intensity during the flowering stage, which can be achieved by adjusting the spectrum or increasing light duration. Be sure to research specific requirements for your plant species to ensure optimal results.
How often should I replace my grow lights to maintain their effectiveness?
The lifespan of grow lights varies depending on usage and quality. Typically, LED grow lights last around 25,000-50,000 hours, while fluorescent lights may need replacing every 8,000-10,000 hours. Monitor your light output and replace them as needed to prevent decreased yields.
What are some common mistakes beginners make when setting up their grow light system?
One common mistake is overwatering due to increased humidity from the lighting. Be mindful of your watering schedule and ensure proper air circulation in your growing space to prevent issues like root rot and fungal diseases.