If you’ve ever looked closely at your plants and spotted tiny, moving dots on their leaves, chances are you’re dealing with an unwelcome guest: spider mites. These pesky pests can quickly infest even the healthiest-looking plants, sucking the sap from their leaves and causing damage that’s hard to repair. But don’t worry – getting rid of spider mites is definitely possible, and we’ve got a comprehensive guide to help you do just that. In this article, we’ll cover not only organic methods for controlling these pests but also Integrated Pest Management (IPM) techniques and chemical controls. We’ll also share tips on how to prevent infestations from happening in the first place, ensuring your plants stay healthy and thriving.
Understanding Spider Mite Infestations
To get rid of spider mites for good, it’s crucial to understand how infestations occur and what factors contribute to their proliferation in your plants. Let’s dive into the details of these tiny pests’ behavior.
The Life Cycle of Spider Mites
Spider mites go through four distinct stages of development: egg, larva, protonymph, and adult. The female spider mite lays her eggs on the underside of leaves, where they are protected from pesticides and other treatments. Eggs typically hatch within 3-5 days, depending on temperature and humidity.
During this initial stage, spider mites feed on plant sap through small openings in the leaf surface. As they molt into their larval stage, they begin to develop distinctive white or yellowish markings on their bodies. This stage is critical, as it’s during this time that spider mite populations can quickly explode if not addressed.
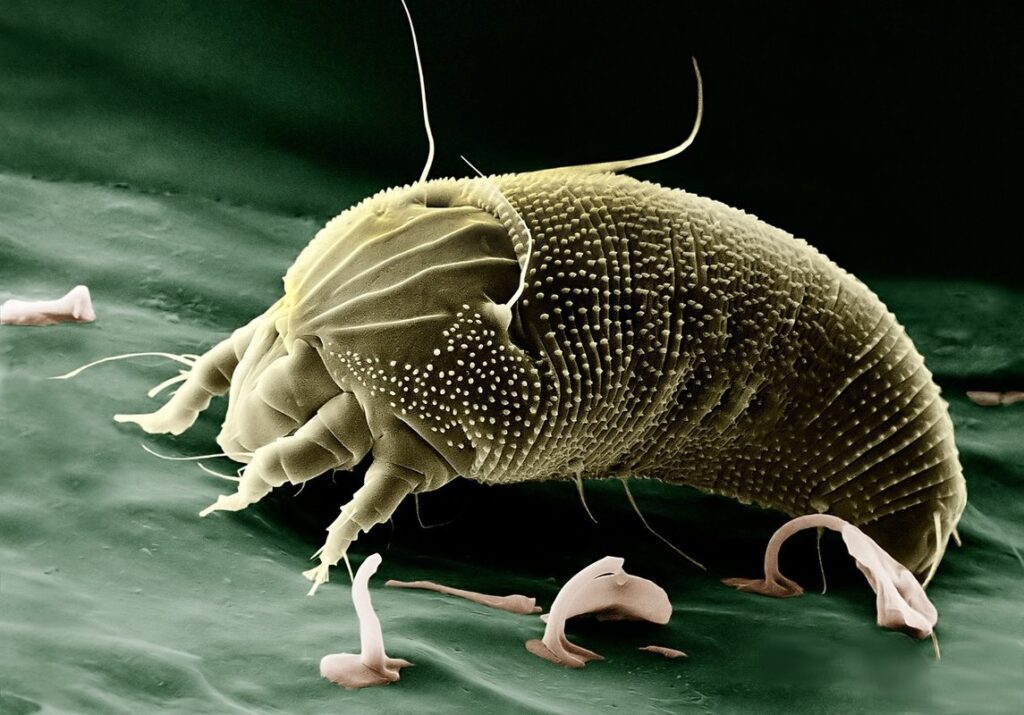
Adult spider mites then emerge, measuring around 0.5mm in length. These tiny arachnids feed on plant sap, injecting toxic saliva into the leaves and causing damage. They also reproduce rapidly, with females laying up to 20 eggs at a time. Understanding this life cycle is crucial for effective management of spider mite infestations, as it highlights the importance of addressing populations early in their development.
Identifying Signs of a Spider Mite Infestation
When it comes to identifying signs of a spider mite infestation, gardeners need to be vigilant and know what to look for. One of the first indicators is yellowing leaves on the plant. This can start with a few leaves at the top or bottom of the stem and spread throughout the plant if left unchecked.
Another common symptom is fine webbing on the stems and leaves of the plant. Spider mites produce silk threads that they use to move around and protect themselves from predators, but it can also become visible as a thin, white cottony material on the surfaces of the plant.
In addition to these visual cues, you may actually see spider mites crawling on the undersides of leaves or stems. These tiny insects are usually pale yellow or brown in color and about 1/20 inch long. They can be difficult to spot with the naked eye, but a hand lens or magnifying glass can help.
If you notice any of these symptoms, it’s essential to take action quickly to prevent further damage to your plants. Check under leaves regularly for signs of mites, especially after watering or when the plant is under stress from heat or drought.
Causes and Prevention
To effectively get rid of spider mites, it’s essential to understand what causes infestations and how you can prevent them from occurring in the first place. Let’s take a closer look at these crucial factors.
Understanding Environmental Factors Contributing to Infestations
When it comes to getting rid of spider mites, understanding the environmental factors that contribute to infestations is crucial. High temperatures are one of the primary contributors to spider mite populations. These pests thrive in warm environments, typically above 75°F (24°C), which allows them to reproduce rapidly. In fact, studies have shown that at temperatures between 80-90°F (27-32°C), spider mite eggs can hatch within a week.
Another significant factor is low humidity. Spider mites are extremely sensitive to moisture levels and tend to thrive in dry environments. When the air is too dry, it’s easier for these pests to penetrate plant tissues, leading to severe infestations. In fact, research has shown that relative humidity below 30% can exacerbate spider mite infestations by up to 300%.
Pest pressure also plays a significant role in spider mite infestations. When other pests, such as aphids or whiteflies, are present on a plant, it creates an ideal environment for spider mites to thrive. This is because these pests can introduce fungal diseases that weaken the plant’s defenses, making it more susceptible to further infestation.
Using Integrated Pest Management (IPM) Techniques for Prevention
When it comes to preventing spider mites from taking hold in your garden, Integrated Pest Management (IPM) techniques offer a holistic and effective approach. At its core, IPM involves combining physical, cultural, biological, and chemical controls to minimize the use of pesticides and maintain a balanced ecosystem.
Crop rotation is one of the most effective IPM methods for preventing spider mites. By rotating your crops seasonally, you break the life cycle of these pests, making it difficult for them to establish themselves in your garden. For example, if you’ve had a problem with spider mites on your tomatoes last season, try planting something else in that spot this year.
Physical barriers can also be an effective IPM method. Covering plants with fine mesh or row covers can prevent spider mites from reaching them, while keeping beneficial insects like ladybugs and lacewings safe. Introducing beneficial insects to your garden is another key aspect of IPM. These natural predators feed on spider mite eggs and nymphs, helping to keep their populations in check.
Remember, prevention is always better than treatment when it comes to dealing with spider mites. By adopting an IPM approach, you can create a balanced ecosystem that promotes the health and well-being of your plants, while minimizing the risk of pest infestations.
Organic Methods for Controlling Spider Mite Populations
If you’re looking for a more natural approach, we’ll explore organic methods for controlling spider mite populations that are gentle on your plants. These alternatives can be just as effective in keeping these pests under control.
Neem Oil Treatment: How it Works and Its Effectiveness
Neem oil is a popular organic control method for managing spider mite populations. This oil is extracted from the seeds of the neem tree (Azadirachta indica) and contains several active ingredients, including azadirachtin, salannin, and nimbin. These compounds are responsible for disrupting the mites’ life cycle, preventing them from reproducing.
To use neem oil as a control method, mix 2-3% neem oil with water according to the label instructions. Spray this solution on affected areas of your plants, making sure to cover all surfaces thoroughly. For best results, apply the treatment when mites are in their active stage of development, typically during warm weather conditions.
Studies have shown that neem oil can reduce spider mite populations by up to 90% within a week or two of application. Regular treatments at 7-10 day intervals can provide long-term control and prevent mite infestations from recurring. By incorporating neem oil into your pest management routine, you can effectively manage spider mites without exposing your plants to harsh chemicals.
Soap Solution Treatments: Their Pros and Cons
When it comes to controlling spider mite populations, one often overlooked treatment option is using mild dish soap solution. This method has gained popularity among gardeners due to its perceived simplicity and eco-friendliness. The active ingredients in mild dish soap typically include sodium lauryl sulfate (SLS) and other surfactants that help break down the spider mites’ exoskeletons, ultimately leading to their demise.
To use a mild dish soap solution treatment, mix 1-2 teaspoons of mild dish soap with 1 gallon of water. Spray this solution directly onto the affected plants, making sure to cover all surfaces evenly. This method can be used as a standalone treatment or in conjunction with other methods like introducing beneficial insects or adjusting environmental conditions.
While mild dish soap solution treatments have shown some effectiveness against spider mites, it’s essential to note that overuse or improper application can lead to more harm than good. The potential drawbacks include damage to the plant’s leaves and stems due to excessive surfactant concentrations. It’s crucial to exercise caution when using this method and follow the recommended guidelines closely to avoid any adverse effects.
Chemical Controls – A Last Resort
When chemical controls are necessary, it’s essential to understand how they work and when to use them, as misuse can harm your plants further. This is where things get serious for your plants’ health.
Systemic Insecticides and Fungicides
When it comes to tackling spider mite infestations, some gardeners may consider using systemic insecticides and fungicides. These products can be effective in controlling the pests, but they come with their own set of considerations.
Systemic insecticides, such as imidacloprid and dinotefuran, work by being absorbed by plants, providing long-lasting protection against spider mites. Neonicotinoids like imidacloprid are widely used to control a range of pests, including spider mites. However, their use has raised concerns about toxicity to beneficial insects, such as bees and butterflies.
Fungicides like chlorothalonil and propiconazole can also be effective against spider mite-related diseases. For example, in severe infestations, applying a fungicide at the first sign of disease symptoms can help prevent its spread. When using these products, it’s essential to follow the label instructions carefully and consider factors like application rates and timing to minimize harm to beneficial insects and the environment.
Keep in mind that systemic insecticides and fungicides should be used judiciously, as they can have unintended consequences on garden ecosystems.
Precautions When Using Chemical Controls
When using chemical controls to get rid of spider mites, it’s essential to take necessary precautions to avoid harm to yourself and others. Always read the label carefully before applying any pesticide, and make sure you understand the recommended safety precautions. Wear protective gear such as long sleeves, gloves, and a mask to prevent skin contact and inhalation of chemicals.
When handling pesticides, be mindful of your surroundings and avoid mixing different chemicals together, as this can lead to unpredictable reactions. Also, keep in mind that some chemical controls can contaminate soil and water, so be sure to follow the recommended application rates and take steps to minimize environmental impact. For example, if you’re using a systemic pesticide, make sure to apply it in a well-ventilated area to avoid inhaling fumes.
It’s also crucial to keep children and pets away from treated areas until the product has dried completely. If you have multiple plants, consider treating them separately to prevent cross-contamination. Remember, chemical controls should be used as a last resort – before applying pesticides, make sure you’ve tried other methods of getting rid of spider mites, such as introducing beneficial insects or improving cultural practices.
Biological Control Methods
When it comes to getting rid of spider mites, biological control methods can be a game-changer for your garden or indoor plants. Let’s explore these natural ways to combat spider mite infestations.
Beneficial Insects: Lacewings and Predatory Mites
Lacewings and predatory mites are two beneficial insects that feed on spider mites, making them excellent allies in your quest to get rid of these pesky pests. Lacewings, for instance, have a voracious appetite for spider mites, consuming up to 20 times their own body weight in a single day! They’re also easy to attract to the garden by planting nectar-rich flowers like angelica or dill.
Predatory mites, on the other hand, are tiny but mighty predators that feed on spider mite eggs and larvae. These tiny superheroes can be introduced to your garden through biological control agents or by buying them from a gardening store. To attract predatory mites to your garden, focus on creating a diverse ecosystem with a mix of plants that provide shelter and food for these beneficial insects.
To encourage lacewings and predatory mites to visit your garden, avoid using broad-spectrum pesticides, which can harm these beneficial insects. Instead, opt for targeted control methods or use natural pest control products that are safer for beneficial insects. By introducing these beneficial insects into your ecosystem, you’ll be taking a crucial step towards getting rid of spider mites and maintaining a balanced and healthy garden environment.
Other Natural Predators and Their Role in Biocontrol
In addition to the aforementioned natural predators like phytoseiulus and predatory mites, other beneficial insects can play a crucial role in controlling spider mite populations. Ladybugs, for instance, are voracious consumers of aphids and spider mites alike. By introducing ladybugs into your garden or indoor space, you can encourage them to feed on these pests, thereby reducing the need for chemical pesticides.
Another effective natural predator is parasitic wasps, specifically species within the genus Acerophagus and Anagyrus. These wasps lay their eggs inside spider mite eggs, ensuring that the next generation of mites will be killed before it even has a chance to hatch. This strategy is not only effective but also environmentally friendly.
To effectively integrate these natural predators into your biocontrol strategy, ensure that the conditions are conducive for them to thrive. Provide a suitable environment by maintaining optimal temperature and humidity levels, as well as ensuring an adequate food supply. By doing so, you can create a balanced ecosystem where beneficial insects work together with other methods to eradicate spider mites.
Recovery and Post-Treatment Care
After successfully treating your infested plants, it’s essential to provide them with proper care to ensure they bounce back from the damage caused by spider mites. This section will cover steps for recovery and post-treatment maintenance.
Steps to Reinvigorate a Spider Mite-Damaged Plant
Recovering from a spider mite infestation requires attention to both immediate care and long-term health. After treating your plant for spider mites, inspect it carefully for damage. Check the leaves, stems, and buds for signs of mite-related stress such as discolored or distorted areas, yellowing, or premature drop.
If you notice significant damage, prune affected areas immediately to prevent further infestation and promote new growth. Use clean pruning tools and dispose of any clippings to avoid transferring mites to other plants. For heavily damaged plants, consider a gentle repotting in fresh potting mix to provide a healthy foundation for recovery.
In the weeks following treatment, focus on providing optimal growing conditions to stimulate new growth. Increase humidity around the plant by placing it on a tray filled with water and pebbles or using a humidifier. Maintain consistent temperatures between 65-75°F (18-24°C), and ensure your plant is receiving sufficient light for its species.
Monitor your plant closely as it recovers, keeping an eye out for signs of mite re-infestation or other pests. By addressing damage promptly and providing proper care, you can help your plant recover from the effects of spider mites and thrive once again.
Long-term Strategies for Preventing Future Infestations
To ensure that spider mite infestations become a thing of the past, it’s essential to implement long-term strategies as part of your post-treatment care. One crucial aspect is maintaining optimal growing conditions for your plants. This involves providing them with sufficient water, nutrients, and light. Spider mites thrive in hot and dry environments, so ensuring that your plants receive adequate moisture will discourage these pests from setting up camp.
Regular monitoring for pests is another vital component of preventing future infestations. Set aside time each week to inspect your plants carefully, looking for signs of spider mite activity such as fine webbing or tiny, moving dots on the leaves. By catching issues early, you can take prompt action to address them before they spiral out of control.
Additionally, be prepared to adjust your gardening practices accordingly based on what you learn from monitoring and treating your plants. This might involve changing your irrigation schedule, pruning infested areas, or introducing beneficial insects that prey on spider mites. By being proactive and responsive, you’ll be well-equipped to prevent future infestations and enjoy a healthier, more balanced garden ecosystem.
Frequently Asked Questions
How can I be sure my plants are completely free of spider mites after treatment?
To confirm your plants are free of spider mites, inspect them regularly for signs of re-infestation. Look for new eggs, webs, or actual mite activity on the leaves and stems. If you notice any of these signs, re-treat your plants as necessary.
Can I use chemical controls in combination with organic methods to control spider mites?
Yes. Chemical controls can be used in conjunction with organic methods when dealing with severe infestations. However, always follow the instructions on the label and take necessary precautions to avoid over-exposure to chemicals, which can harm your plants or contaminate soil.
How often should I inspect my plants for signs of spider mites?
Inspect your plants regularly, especially during peak growing seasons when pests tend to thrive. Check for new eggs, webs, or actual mite activity on the leaves and stems at least once a week, ideally twice if you live in humid climates.
What are some common mistakes people make when trying to get rid of spider mites?
Common mistakes include using pesticides too frequently, not addressing environmental factors contributing to infestations, or failing to monitor plants closely after treatment. To avoid these pitfalls, ensure you’re treating the root cause of the problem and maintaining a healthy growing environment.
Can I use neem oil on all types of plants, including delicate ones like orchids?
No. While neem oil is generally safe for most plants, it can be toxic to sensitive species like orchids or succulents. Before using neem oil, research its compatibility with your specific plant type and follow the instructions carefully to avoid damaging leaves or other tissues.