Pruning your dill plants is an essential step in promoting healthy growth and maximizing harvests. But when and how you prune can make all the difference between a bountiful crop and a disappointing yield. Many gardeners struggle to know when to prune, or risk cutting off more than they intended – but with the right techniques and timing, you can enjoy a continuous supply of fresh dill leaves throughout the growing season.
In this article, we’ll show you how to prune your dill plants at the right time, using simple yet effective techniques that will keep them thriving. We’ll also share expert tips on after-care and pest management, so you can reap the rewards of your hard work and enjoy a healthy, productive crop. Whether you’re a seasoned gardener or just starting out, our guide to pruning dill will give you the confidence to get the most from this versatile herb.
Choosing the Right Time to Prune
When it comes to pruning dill, timing is everything. Learning when to prune your dill plant will help you encourage healthy growth and maximize its yield.
Determining the Plant’s Maturity
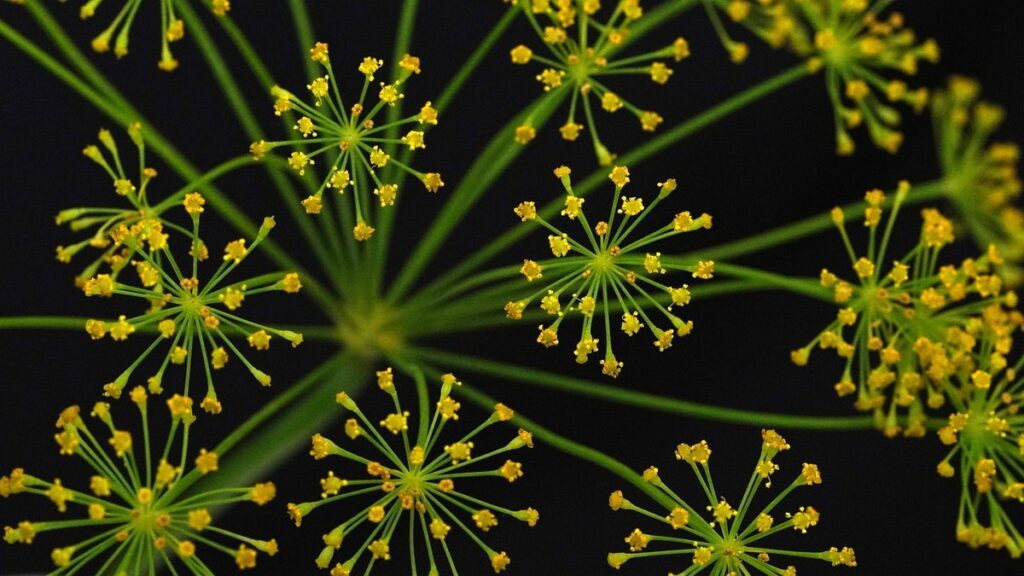
When assessing the maturity of your dill plant, look for signs of overgrowth and flowering. Check if the plant has reached its maximum height and is beginning to stretch towards the sun. The leaves may start to become elongated and lose their fresh green color as the plant diverts energy towards producing seeds. A key indicator of maturity is the formation of flower buds, which can be identified by small yellowish or purple clusters at the top of the stem.
It’s essential to prune your dill plant before seeds form, as this will encourage new growth and prevent it from going to seed. Pruning after seeds have formed can be less effective in stimulating regrowth. As a rule of thumb, wait until the flowers are still in bud but not yet open, then snip off the flower stalk about an inch above a leaf node. This technique is called “pinching” and will help control the plant’s growth while preserving its flavor and aroma. Timing pruning correctly will enable you to enjoy multiple harvests from your dill crop.
Considering the Weather Conditions
When considering pruning your dill plant, it’s essential to take into account the weather conditions that can impact its growth and need for pruning. Temperature, humidity, and sunlight all play a significant role in determining when and how much to prune.
During hot summer months, dill plants tend to bolt quickly, producing seeds instead of leaves. Prune these plants regularly to encourage leaf growth and prevent them from flowering too early. Conversely, in cooler temperatures, dill grows more slowly, so pruning may not be as frequent.
In humid climates, dill is more susceptible to powdery mildew and other diseases. Pruning during the morning or evening when humidity levels are lower can help minimize the risk of disease transmission. Be sure to disinfect your pruning tools between cuts to prevent spreading any potential issues.
During periods of drought or extreme cold, prune your dill plant lightly to conserve energy and promote root growth. This will help the plant recover more quickly once favorable conditions return. By being mindful of these weather factors and adjusting your pruning schedule accordingly, you can keep your dill plant healthy and thriving throughout the growing season.
Preparing for Pruning
Before you start pruning your dill, it’s essential to prepare your plants and tools to ensure a successful and stress-free experience. Gather your pruning shears and inspect your dill plants for signs of damage or disease.
Gathering Essential Tools
When it comes to pruning dill, having the right tools is crucial for achieving optimal results. To get started, you’ll need a few essential items that will make the process smoother and more efficient.
First and foremost, invest in a good pair of scissors or pruning shears specifically designed for herb gardening. These are ideal for making clean cuts and can be used to trim back overgrown stems or harvest individual leaves. Look for ones with sharp blades and comfortable handles that fit your hand nicely.
Pruning shears, also known as secateurs, are another essential tool for dill pruning. They allow you to make precise cuts without damaging the plant’s delicate tissues. Use them to remove damaged or diseased areas, shape the plant, and promote new growth.
Don’t forget to wear a pair of gardening gloves while pruning dill. Not only will they protect your hands from thorns and scratches, but they’ll also prevent the oils in the plant from irritating your skin. This is especially important if you have sensitive skin or are prone to allergic reactions.
In addition to these basic tools, it’s also a good idea to have some twine or string on hand for supporting weak or top-heavy stems. By securing them, you can ensure that your dill plants remain upright and continue to grow healthy and strong.
Understanding Different Pruning Techniques
When it comes to pruning dill, understanding different techniques is crucial for promoting healthy growth and encouraging abundant harvests. Pinching involves gently removing the top set of leaves to encourage bushy growth and prevent legginess. This technique is ideal for young dill plants, typically within their first two weeks of growth.
Topping, on the other hand, involves cutting off the entire flower head to direct the plant’s energy towards foliage production. This method is suitable for mature dill plants, as it prevents seed formation and encourages leafy growth. Cutting back involves removing a portion or all of the plant’s stems to maintain shape and promote new growth.
When selecting a pruning technique for your dill plants, consider their current stage of development. For young plants, pinching stimulates branching, while for mature plants, topping and cutting back can help control size and direct energy towards leaf production. Regular monitoring of your plants’ growth will help you determine the best pruning schedule to ensure optimal results.
Pinching and Topping
Now that you have a thriving dill plant, it’s time to focus on pinching and topping to encourage bushy growth and prevent flowering. Learn how to pinch off flower buds to promote leaf production.
What is Pinching?
When you’re pruning dill, you might hear gardeners talk about pinching. This involves removing the flower buds or young leaves from the plant to encourage bushy growth and prevent it from flowering too quickly. By doing so, you’ll be directing the plant’s energy towards producing more foliage rather than seeds.
Think of pinching like a haircut for your dill plant – it’s all about maintaining shape and controlling the direction of growth. To pinch your dill, simply snip off any buds or leaves that are appearing in clusters at the top of the stem with scissors or pinch them off by hand. This will help to stimulate branching and create a fuller, more robust plant.
By pinching your dill regularly, you can expect to see an increase in harvests as the plant produces more leaves for you to use in cooking. Plus, it’ll also prevent seed formation, which means less mess and more control over when (or if) your dill goes to seed.
Topping Dill Plants for Better Harvests
Topping dill plants can be a game-changer for maximizing leaf production and preventing flowering. By removing the top set of leaves on mature stems, you encourage new growth, allowing the plant to focus its energy on producing more foliage rather than seeds.
When deciding which stems to top, look for those that are around 6-8 inches tall, with a decent-sized leaf cluster at the top. Avoid topping weak or spindly stems, as this can further weaken the plant. Instead, choose sturdy stems with a good balance of leaves and stem length.
The key is to remove only the top 1/3 of the stem, just above a node (where a leaf meets the stem). This allows the plant to redirect its energy into producing new growth from below. You can repeat this process every few weeks to maintain healthy, leafy tops and prevent flowering. Regular topping will also promote bushy growth, resulting in more robust plants with better yields overall.
Cutting Back
Now that you’ve got your dill plant established, it’s time to think about cutting back – this process will help encourage new growth and prevent flowering. We’ll walk you through how to cut back your dill plant successfully.
When to Cut Back Dill Plants
Cutting back dill plants is essential to maintain their health and prevent them from becoming too leggy. If left unchecked, dill can grow out of control, leading to reduced flavor and aroma. One sign that it’s time to cut back your dill plant is when you notice it starting to flower. This is a natural process, but if allowed to continue, the plant will put all its energy into seed production rather than leaf growth.
Another reason to cut back dill plants is to control disease susceptibility. Overgrown plants are more prone to fungal diseases like powdery mildew and leaf spot, which can quickly spread and destroy the entire crop. Regular cutting-back helps maintain air circulation around the plant, reducing the risk of disease infection.
Additionally, pests like aphids and spider mites often target overgrown dill plants, further compromising their health. Cutting back your dill regularly will help keep these pests under control and prevent them from multiplying. By pruning your dill plant every 1-2 weeks, you’ll encourage bushy growth, improve its flavor, and ensure a healthy and productive harvest.
Techniques for Cutting Back Dill
Cutting back dill plants requires some finesse to promote healthy growth and prevent overcrowding. One effective technique is to prune to the ground, which involves cutting off all above-ground stems to about an inch from the soil surface. This method encourages new growth and helps control height.
To do this, simply snip the entire stem just above a node using sharp, clean pruning shears. Make sure to remove any weak or spindly growth at the same time. For a more precise cutback, you can reduce the length of individual stems by about one-third to encourage branching and prevent legginess.
If you notice any affected areas on your dill plant – such as yellowing leaves or signs of pests or disease – remove them immediately to maintain plant hygiene. Use clean tools to avoid spreading any potential issues. Regularly inspect your plants for these signs, and prune accordingly to keep your dill healthy and thriving throughout the growing season.
Maintaining Pruned Dill Plants
Now that you’ve pruned your dill plant, it’s essential to maintain its health and encourage new growth by following a few simple care tips. Proper care will keep your dill thriving for weeks to come.
Providing Adequate Care After Pruning
After pruning your dill plants, it’s essential to provide adequate care to support their recovery and encourage new growth. This is a critical phase of their life cycle, and neglecting proper care can lead to weakened plants that are more susceptible to pests and diseases.
First and foremost, make sure to water your pruned dill plants thoroughly after pruning. This helps to settle the soil around the newly cut stems and promotes healthy rooting. Be cautious not to overwater, as this can cause root rot and other problems. A general rule of thumb is to provide about 1-2 inches of water per week, either from rainfall or irrigation.
In addition to watering, fertilizing your pruned dill plants will promote healthy growth and development. Use a balanced fertilizer that’s specifically formulated for herbs, following the manufacturer’s instructions for application rates. You can also add a high-phosphorus fertilizer to encourage root development and flowering.
Regularly monitoring your plants for pests or diseases is also crucial during this period. Check for signs of infestation, such as aphids, whiteflies, or spider mites, and treat promptly if necessary. Keep an eye out for fungal diseases like powdery mildew or leaf spot, and apply fungicides if you notice any symptoms.
By providing the right care after pruning, you’ll be able to encourage your dill plants to recover quickly and produce a fresh crop of fragrant leaves. With proper attention, your pruned dill plants will reward you with an abundance of delicious and aromatic herbs.
Encouraging New Growth and Regrowth
After pruning your dill plant, it’s essential to encourage new growth and regrowth. This is where patience comes into play, as regrowth may take some time to occur. To promote healthy regrowth, ensure that your pruned dill plants receive sufficient light. Dill requires a lot of sunlight to produce new foliage, so consider moving the plant to a brighter location or supplementing with grow lights.
Maintaining suitable temperatures is also crucial for regrowth. Most dill varieties prefer daytime temperatures between 65°F to 75°F (18°C to 24°C) and nighttime temperatures around 55°F (13°C). Avoid exposing your pruned plants to extreme temperatures, as this can shock the plant and hinder regrowth.
Watering your pruned dill plant properly is also vital. Make sure the soil isn’t too dry or waterlogged, but rather consistently moist. Check the top inch of soil daily and water when necessary. With proper care, including adequate light, suitable temperatures, and sufficient water supply, your pruned dill plants should start to regrow within a few weeks. Be patient, as this process can take some time, but with consistent care, you’ll be harvesting fresh dill in no time.
Troubleshooting Common Issues
Don’t worry if you encounter problems while pruning dill – this section will walk you through common issues and their easy-to-fix solutions. We’ll tackle the most frequently encountered challenges head-on!
Addressing Overgrowth or Undergrowth
One of the most common issues that can arise from improper pruning is overgrowth or undergrowth. If you’ve noticed that your dill plant is becoming too leggy or sparse, don’t worry – it’s an easy fix.
When a dill plant becomes too tall and leggy, it can be due to not pinching off the tips regularly enough. This allows the plant to focus its energy on growing taller rather than producing new growth. To address this issue, simply pinch off the top inch or two of the stem using your fingers or a pair of scissors. This will encourage the plant to produce side shoots and become bushier.
On the other hand, if your dill plant is becoming too sparse, it may be due to not harvesting individual stalks frequently enough. To prevent this from happening, make sure to regularly pinch off mature stalks to encourage new growth. Regular pruning also helps to promote a balanced shape and prevents the plant from flowering prematurely.
By being mindful of these common issues and taking corrective action, you can keep your dill plant healthy and thriving all season long.
Managing Pests and Diseases After Pruning
After pruning your dill plants, it’s essential to be on the lookout for pests and diseases that can take advantage of their weakened state. Common culprits include aphids, whiteflies, spider mites, and powdery mildew, which can quickly spread if left unchecked.
To prevent infestations, make sure to inspect your plants regularly, especially after pruning. Look for signs such as yellowing or distorted leaves, sticky honeydew droplets, or fine webbing. If you catch the problem early, simply spray the affected areas with water and treat with neem oil or insecticidal soap.
For more severe infestations, consider using systemic pesticides like imidacloprid or pyrethrin-based sprays as a last resort. However, be sure to follow the manufacturer’s instructions carefully to avoid harming beneficial insects. Regularly removing weeds and debris around your dill plants can also help reduce the risk of pests and diseases.
In terms of disease prevention, maintain good air circulation by pruning nearby plants and ensuring adequate spacing between rows. Avoid overwatering, which can create a moist environment conducive to fungal growth. By staying vigilant and taking proactive measures, you can prevent long-term damage and keep your dill plants healthy and thriving.
Conclusion
In conclusion, pruning dill is an essential step in maintaining your herb garden’s health and productivity. By following the steps outlined in this guide, you’ll be able to promote bushy growth, encourage new stems, and prevent flowering. Remember that regular pruning will help extend the life of your dill plants, allowing you to enjoy fresh herbs for a longer period.
Pruning dill is also an excellent opportunity to harvest and use up any excess foliage. Simply snip off the cut stems with scissors or pinch them between your fingers to release the leaves. You can then add these freshly pruned dill leaves to your favorite dishes, from soups to salads. With a little practice and patience, you’ll be well on your way to becoming a pruning pro and enjoying the many benefits of homegrown herbs.
Frequently Asked Questions
How often should I check on my dill plants after pruning?
After pruning, it’s essential to keep a close eye on your dill plants’ growth. Check them every few days to ensure they’re not showing signs of overgrowth or pest issues. This will help you catch any potential problems early and prevent damage to your crop.
Can I prune my dill plant at night or in low light conditions?
Yes, pruning can be done during any time of day, including nighttime or low-light conditions. However, it’s best to prune when the plant is dry, as pruning a wet plant can lead to infection or other problems. Make sure the plant has sufficient light and water after pruning.
How do I handle dill plants with pest infestations after pruning?
If you notice pests on your dill plants before pruning, it’s crucial to address the issue immediately. After pruning, you may still need to manage pests like aphids or spider mites using natural methods such as introducing beneficial insects or spraying neem oil.
Can I use regular kitchen scissors for pruning my dill plant?
No, regular kitchen scissors are not suitable for pruning dill plants. You’ll need sharp, clean pruning tools specifically designed for cutting herbs to avoid spreading diseases and to make precise cuts that promote healthy growth. Clean your pruning tools regularly to prevent the spread of diseases.
How do I handle dill plants that have become too leggy or stretched out after pruning?
If you notice your dill plants are becoming leggy or stretched out, it’s essential to address this issue promptly. Pinch off the tips of the longest stems to encourage bushy growth and prevent further stretching. You can also consider transplanting the plant into a larger pot with more room for growth.
Can I use any fertilizer on my dill plants after pruning?
While you can use various fertilizers on your dill plants, it’s crucial to choose an organic or balanced fertilizer that provides essential nutrients without overfertilizing. Avoid using high-nitrogen fertilizers, as they can promote leaf growth at the expense of flowering and seed production.