Are you tired of constantly checking on your plants to make sure they’re getting enough water? Do you struggle with forgetfulness or busy schedules, only to come home to wilted and dying leaves? Don’t worry, we’ve got a solution for you! With a DIY self-watering pot, you can enjoy the benefits of gardening without the hassle. Not only will this system help your plants thrive in dry weather conditions, but it’s also eco-friendly and budget-friendly. In this article, we’ll guide you through the process of creating your own self-watering pots at home, complete with a materials list, step-by-step instructions, and expert tips for optimizing performance. Whether you’re a seasoned gardener or just starting out, this DIY project is perfect for anyone looking to create low-maintenance, water-efficient gardens.
Introduction to Self-Watering Pots
Let’s start by covering the basics of self-watering pots, including what they are and how they work, so you can understand their benefits. This will set the stage for our DIY projects.
Benefits of Using Self-Watering Pots
Using self-watering pots can bring about numerous benefits that make plant care easier and more efficient. For one, you’ll notice a significant reduction in the frequency of watering, which can be a game-changer for those who often forget to water their plants or are away from home for extended periods. This is because these pots have built-in reservoirs that allow plants to draw water as needed, eliminating the need for daily or even weekly watering.
In addition to this convenience, self-watering pots also promote improved plant health by providing a consistent supply of moisture. This leads to healthier roots, which in turn support lush and vibrant growth. Plants grown in self-watering pots are more resilient to drought conditions and require less maintenance overall. By using these pots, you can ensure that your plants receive the right amount of water at all times, resulting in stronger and more robust foliage. With self-watering pots, you’ll enjoy a stress-free way to care for your plants, giving them the best possible chance to thrive.
How Self-Watering Pots Work
At its core, self-watering pots are designed to provide plants with a steady supply of water without manual intervention. This is achieved through a clever combination of two main components: the water reservoir and the wicking system.
The water reservoir is essentially a built-in container that holds the water, usually at the bottom or in the center of the pot. It’s typically made from a durable material such as plastic or ceramic. When you fill the reservoir, the excess water flows out through small holes or channels into the surrounding soil.
The wicking system consists of a network of absorbent fibers, often made from cotton, wool, or synthetic materials. These fibers draw water from the reservoir up into the potting mix, providing plants with consistent moisture levels. This eliminates the need for frequent watering, allowing you to enjoy your plants without worrying about overwatering or underwatering.
When selecting a self-watering pot, look for one that uses a high-quality wicking system and has adequate space between the water reservoir and the soil to prevent clogging.
Materials Needed for DIY Self-Watering Pots
To create your self-watering pot, you’ll need a few basic materials that can be easily sourced from most hardware stores. Let’s take a look at what’s on the list.
Choosing the Right Container
When it comes to creating a DIY self-watering pot, choosing the right container is crucial for its success. This means considering several factors before making your selection.
First and foremost, think about the material of your container. You can use plastic, ceramic, or terra cotta pots, but some materials are better suited than others. For instance, plastic pots are lightweight and inexpensive, but they may not provide good insulation for your plants’ roots. On the other hand, terra cotta pots offer excellent aeration and drainage, but they can be prone to cracking.
The size of your container is also an essential factor. Make sure it’s large enough to accommodate the plant you’re growing and has sufficient room for water storage. A general rule of thumb is to choose a pot that is at least 5-7 gallons in size. This will allow you to store enough water to sustain your plants between waterings.
Lastly, don’t forget about drainage. Your container should have holes or gaps to prevent water from accumulating and causing root rot. You can either drill holes into the bottom of your pot or use a separate saucer with built-in drainage. By considering these factors, you’ll be able to choose a container that meets your DIY self-watering pot’s needs.
In terms of specific dimensions, look for a pot that is at least 10-12 inches deep and 14-16 inches wide. This will provide ample space for the plant’s roots and water storage. Remember to take into account the mature size of your plant when selecting a container, as you don’t want it to outgrow its pot too quickly.
When choosing a material, keep in mind that some materials are more suitable than others for self-watering pots. For example, ceramic or terra cotta pots are great options because they allow for good airflow and drainage. Plastic pots can also work well, but make sure they have built-in drainage holes to prevent water from accumulating.
Consider the weight of your container as well. If you plan on moving your pot frequently, a lighter material like plastic may be more suitable. However, if you’re willing to leave it in one place, a heavier material like terra cotta can provide better insulation and stability for your plant’s roots.
Water Reservoir Options
When it comes to designing and building your self-watering pot’s water reservoir, you’ve got several options to choose from. A water reservoir is essentially a container that stores excess water for the plant, which is then absorbed by the roots as needed.
One of the most popular and inexpensive choices for a water reservoir is using an old plastic bottle. Clean and cut off the top third of a 2-liter or 1.5-liter bottle to create a unique reservoir. Make sure it’s positioned in a way that allows for easy access for watering and maintenance. This DIY method is ideal for plants with smaller root systems, as the small size of the reservoir limits the amount of water available.
For larger plants or those requiring more water, consider using wooden crates or ceramic containers. Wooden crates provide an aesthetically pleasing option while also offering ample storage space for excess water. Ceramic containers are another attractive choice and can be easily hidden from view. When selecting any of these options, ensure they’re food-grade safe to prevent contamination. Be mindful of the reservoir’s size in relation to your plant’s needs to avoid overwatering or drying out.
Building Your Self-Watering Pot: A Step-by-Step Guide
Now that you’ve gathered all the materials, let’s dive into building your self-watering pot. We’ll take it step by step to ensure a successful and functional DIY project.
Assembling the Container
Now that you have all the necessary parts of your self-watering pot, it’s time to assemble them. The container is the heart of your system, and its assembly requires some care to ensure everything works seamlessly together.
Start by placing the water reservoir at the bottom of the container. This can be a separate plastic or metal tank specifically designed for this purpose or a simple bucket with a small hole drilled into it. Attach the wicking system, which usually consists of a length of absorbent material like cotton rope or a specialized self-watering pot insert, to the water reservoir. Secure it in place using wire or tape.
Next, attach the wick to the container’s soil level, making sure not to bury it too deeply. The ideal depth is about 2-3 inches from the top of the soil. This will allow for efficient water uptake and prevent waterlogged conditions.
When assembling the container, make sure all connections are secure and won’t leak or dry out quickly. Double-check that the wick is properly seated in both ends to avoid any blockages or kinks.
Installing the Wicking System
Installing the wicking system is a crucial step in building your self-watering pot. This involves cutting and arranging the absorbent material to ensure proper water distribution throughout the plant’s roots. Start by selecting the right type of absorbent material, such as cotton strings or yarns, which should be cut to approximately 1-2 inches in length.
To install the wicking system, begin by soaking the absorbent material in water for a few hours. This will help it expand and become more pliable. Next, place the absorbent material at the bottom of the pot, arranging it evenly to ensure optimal water absorption. Make sure to leave about 1-2 inches of space between each strand to prevent clogging.
As you arrange the wicking system, keep in mind that the goal is to create a network of tiny tubes that will draw water from the reservoir up to the plant’s roots. Use a gentle touch when placing the absorbent material to avoid damaging it or creating air pockets that can impede water flow. By following these steps, you’ll be able to effectively install your wicking system and enjoy a self-watering pot that’s perfect for busy gardeners or those new to indoor gardening.
Tips for Optimizing Your Self-Watering Pot’s Performance
To get the most out of your self-watering pot, it’s essential to fine-tune its performance by optimizing water flow and soil moisture levels. With a few simple tweaks, you’ll be enjoying healthier plants in no time.
Plant Selection and Placement
When selecting plants for your self-watering pot, it’s essential to choose species that thrive in moist environments and can adapt to varying water levels. Some popular options include ferns, peace lilies, and begonias, which are known for their ability to tolerate excess moisture.
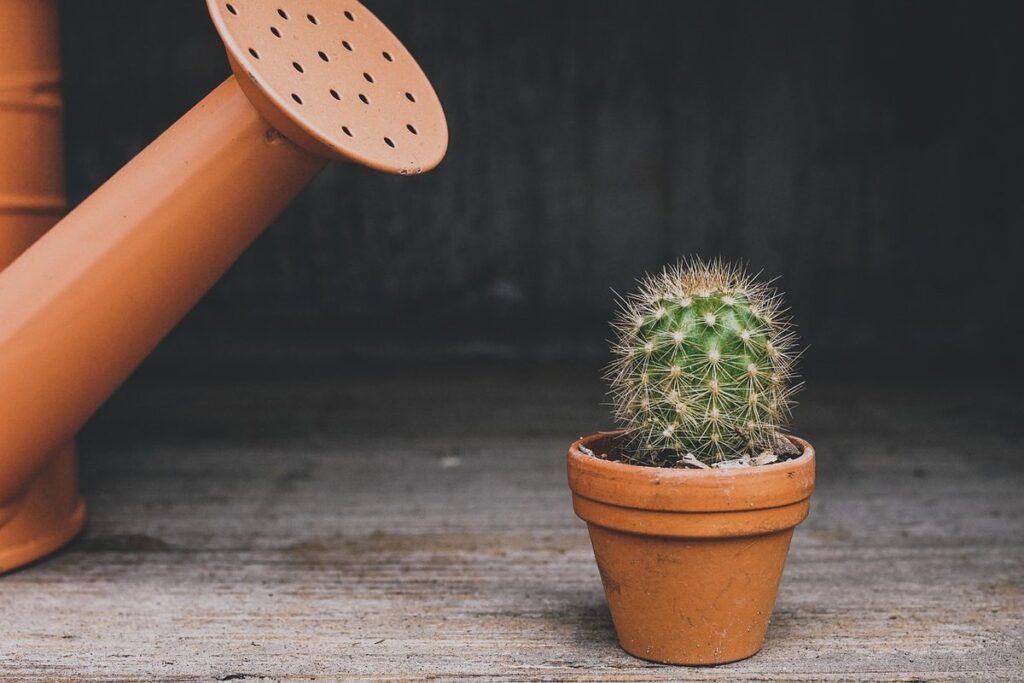
However, some plants like cacti and succulents might not be the best fit for self-watering pots, as they prefer dry conditions and can quickly become waterlogged. Instead, opt for plants with deep roots or those that have adapted to survive in wet environments.
When placing your chosen plants within the pot, consider their mature size and growth habits. Leave enough space between plants for air circulation and root growth, typically 6-8 inches apart. Also, place taller plants towards the back or center of the pot to prevent them from overshadowing smaller ones. This careful planning will ensure that all your plants receive adequate light and water while preventing overcrowding and promoting healthy growth.
Water Level Maintenance
Maintaining the optimal water level in your self-watering pot is crucial for its performance. To ensure your plant receives the right amount of moisture, it’s essential to monitor and adjust the water level as needed. Check the water level regularly by looking at the float or sensor that indicates when the water reservoir is low.
If you notice the water level dropping rapidly, it may be a sign that your plant is using more water than expected. This could be due to factors such as high temperatures, dry air, or increased watering needs during certain seasons. To adjust the water level, simply refill the reservoir with fresh water. You can also consider using a self-watering pot with an adjustable float, allowing you to customize the water level to suit your plant’s specific needs.
To avoid overwatering and prevent root rot, make sure not to fill the reservoir too high. A good rule of thumb is to leave about 1-2 inches of space between the top of the water level and the pot’s rim. This will give you room for adjustments while ensuring excess water doesn’t accumulate in the pot. By following these simple steps, you’ll be able to maintain an optimal water level and keep your self-watering pot functioning efficiently.
Troubleshooting Common Issues with DIY Self-Watering Pots
Don’t let a dry pot stress you out! This section will help you tackle common issues that can arise when creating your very own self-watering pots at home.
Overwatering and Underwatering Signs
When working with self-watering pots, it’s not uncommon to encounter issues related to overwatering and underwatering. These problems can be detrimental to the plant’s health if left unchecked. To prevent this, it’s essential to recognize the signs of overwatering and underwatering.
Some common indicators of overwatering include yellowing leaves, soft or mushy stems, and a foul odor emanating from the pot. If you notice any of these symptoms, reduce watering frequency immediately. Be cautious not to waterlog the soil by allowing excess water to drain out before replacing the self-watering mechanism. On the other hand, signs of underwatering include dry, crispy leaves and a reduced rate of growth.
To address these issues, inspect your plant regularly for any changes in its appearance or behavior. Adjust the watering schedule accordingly, taking into account factors like temperature, humidity, and soil type. Keep in mind that self-watering pots are designed to minimize watering frequency, but they still require some maintenance to ensure optimal performance.
Repairing or Replacing Components
When you’re working with self-watering pots DIY, it’s inevitable that components will need repairing or replacing at some point. The wicking system and water reservoir are particularly prone to damage due to their critical role in maintaining the water level.
To repair a damaged wicking system, inspect the wick for any visible blockages or kinks. You can clean the wick using a soft brush or replace it entirely if necessary. If you’re experiencing issues with water flow, check that the reservoir is not clogged and that there are no obstructions in the tubing.
Replacing the water reservoir is often a matter of unscrewing the existing one and installing a new one. Make sure to choose a reservoir that’s compatible with your self-watering pot DIY project. If you’re handy with tools, consider adding a check valve to prevent backflow from the plant into the reservoir.
Regular maintenance can also help extend the lifespan of your components. Regularly inspect the wicking system and water reservoir for signs of damage or wear, and address any issues promptly. This will save you time and effort in the long run by preventing more severe problems down the line.
Advanced DIY Self-Watering Pot Projects
Take your self-watering pot skills to the next level with these advanced projects, perfect for those who’ve mastered the basics and are ready for a challenge.
Automating Water Level Monitoring
Automating water level monitoring is a game-changer for self-watering pot enthusiasts. By using sensors and electronic devices, you can ensure that your plants receive the right amount of water without having to manually check the levels every day.
To get started, you’ll need a water level sensor, such as a float switch or a capacitance sensor. These sensors can detect when the water level falls below a certain threshold, triggering an alert or activating a pump to refill the pot. For example, you can use a sensor that sends a notification to your phone or email when the water level drops.
You’ll also need a microcontroller or a small computer like Arduino or Raspberry Pi to read data from the sensor and control the pump. This setup allows for automated monitoring of the water level, so you don’t have to worry about overwatering or underwatering your plants. Some popular options include using a relay module to control the pump or a DIY solution using a simple circuit with a transistor.
When choosing sensors and electronic devices, make sure they are compatible with each other and can be easily integrated into your self-watering pot setup. With this setup, you’ll enjoy a more hands-off approach to caring for your plants while ensuring their optimal health.
Customizing Your Self-Watering Pot Design
When it comes to creating your own self-watering pot design, there’s no one-size-fits-all approach. The beauty of DIY projects lies in their customizability, and self-watering pots are no exception. As you dive deeper into the world of self-watering pots, you’ll inevitably think about how to incorporate additional features that make your project even more efficient, effective, or just plain cool.
One way to take your design to the next level is by adding temperature control. This feature allows you to monitor and regulate the temperature of the soil, which can be especially useful for plants that thrive in specific temperature ranges. For example, if you’re growing orchids, you’ll want to keep their roots at a consistent temperature between 65-75°F (18-24°C). To achieve this, you can install a thermostat or temperature sensor that triggers a heating element when the soil reaches a certain temperature.
You can also experiment with other features like automatic lighting systems, misting mechanisms, or even built-in pH level monitors. The key is to understand your plant’s specific needs and incorporate features that address those requirements. Remember, the possibilities are endless when it comes to customizing your self-watering pot design!
Frequently Asked Questions
Can I use self-watering pots for plants with different watering needs?
Yes, one of the best things about DIY self-watering pots is their versatility. You can create separate compartments or use adjustable wicking systems to cater to plants with varying watering requirements. This means you can have both drought-tolerant and high-maintenance plants in the same pot without worrying about overwatering or underwatering.
How often should I check and maintain the water level in my self-watering pots?
You’ll need to inspect the water reservoir every 7-10 days, depending on climate and plant type. Add more water as needed, making sure not to overfill the reservoir. Also, monitor for signs of pests or mold growth in the reservoir.
Can I use a pre-made plastic container instead of building one from scratch?
Yes, you can repurpose an old plastic container like a bucket or tub by adding a wicking system and water reservoir. Just make sure it’s clean and dry before starting your DIY project. This is a great way to upcycle materials and save money on container costs.
What kind of plants are best suited for self-watering pots?
Plants with low to moderate watering needs, such as herbs, succulents, and flowering plants, thrive in self-watering pots. Avoid placing water-sensitive plants like ferns or peace lilies in these pots, as they may not perform optimally due to the risk of overwatering.
How can I customize my DIY self-watering pot design for a specific plant or space?
Get creative! Use materials like PVC pipes, wooden crates, or recycled containers to build your self-watering pot. Add features like automatic water level monitoring or a built-in trellis to create a customized system that suits your needs and space constraints.