Calendulas are a delight to grow, aren’t they? Those bright, cheery blooms that add a pop of color to your garden. But did you know that deadheading calendula flowers can make all the difference in their performance and overall health? By removing spent blooms, you’re essentially encouraging your plant to produce more flowers, which means even more vibrant beauty for your outdoor space. But where do you start with deadheading calendulas? Whether you’re a seasoned gardener or just beginning, our comprehensive guide is here to walk you through the process from prep to advanced techniques and long-term care. We’ll share expert tips on how to get the most out of your calendula blooms, ensuring they thrive all season long and beyond.
Understanding Calendula and the Importance of Deadheading
Calendula is a low-maintenance flower that thrives on regular deadheading, allowing it to focus energy on producing vibrant blooms and bushy growth. Proper care leads to healthier plants and more abundant flowers.
What is Calendula and Its Benefits for Gardens
Calendula is a versatile and easy-to-grow flower that’s perfect for gardeners of all levels. Botanically known as Calendula officinalis, it belongs to the daisy family and is native to the Mediterranean region. This annual or biennial plant boasts bright orange, yellow, red, and pink flowers that are not only a visual delight but also offer numerous benefits when properly cared for.
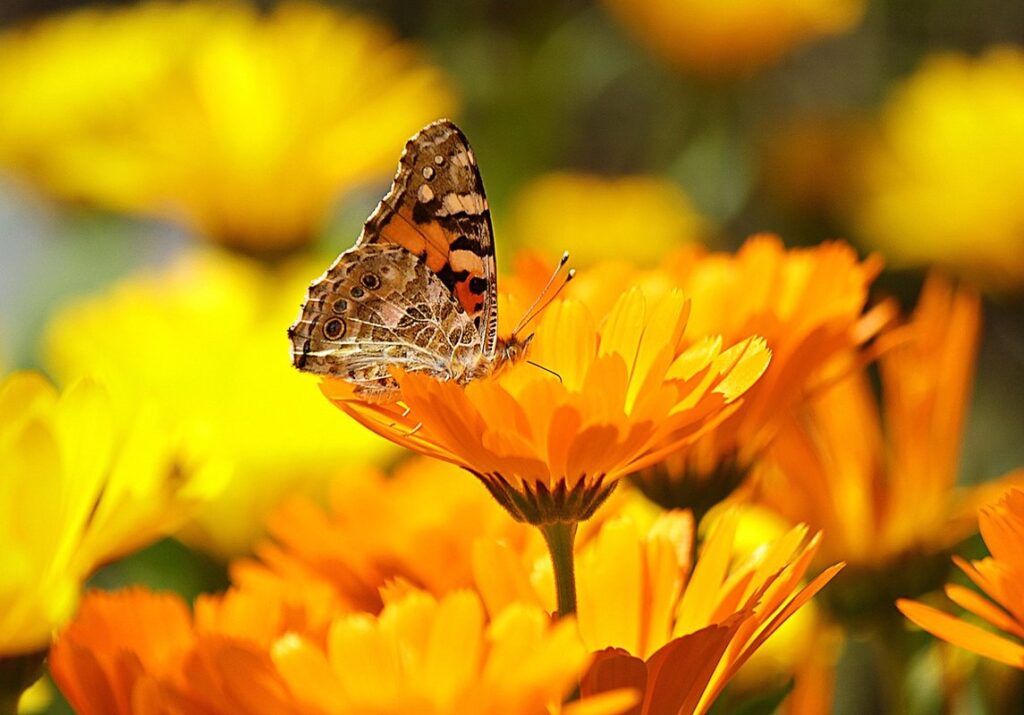
One of the key advantages of calendula in gardening is its ability to attract pollinators like bees and butterflies. By incorporating this flower into your garden design, you’ll create a welcoming habitat for these essential insects. Companion planting is another effective way to utilize calendula’s benefits – it repels pests like nematodes and whiteflies while attracting beneficial insects that prey on aphids.
When grown in ideal conditions, calendula can produce multiple blooms throughout the season, providing an extended period of color and interest in your garden. Regular deadheading will encourage more blooms and prevent the plant from flowering too profusely, promoting healthy growth and preventing seed production. This is particularly important if you want to prolong the blooming cycle or save seeds for next year’s planting.
To get the most out of calendula, ensure it receives full sun to partial shade and well-draining soil. Water regularly but avoid overwatering, which can lead to root rot and other issues. By following these guidelines and incorporating regular deadheading into your calendula care routine, you’ll unlock its full potential and enjoy a vibrant display of blooms throughout the growing season.
Regularly removing spent flowers also helps prevent self-seeding and keeps your garden looking tidy. This annual process will keep your calendula plants producing new growth and encourages the plant to direct energy towards root development rather than seed production.
Incorporating calendula into your gardening routine not only enhances its visual appeal but also supports a balanced ecosystem within your garden. By providing a source of nectar for pollinators and beneficial insects, you’ll create a harmonious environment that encourages biodiversity and minimizes pest issues.
Why Deadheading is Crucial for Calendula Plants
Deadheading is a crucial practice for calendula plants, and neglecting it can lead to several issues. One of the primary reasons deadheading is essential is that it encourages continuous blooming. When you remove spent flowers, or blooms, the plant directs its energy towards producing new buds instead of seed production. This leads to an extended flowering period, keeping your calendula looking vibrant and healthy.
Failing to deadhead can also impact the overall appearance of your plant. As spent blooms drop off, they can leave behind unsightly seed heads that detract from the plant’s aesthetic appeal. Moreover, if you allow calendulas to go to seed, they may start to look leggy or weak as the plant focuses its energy on seed production.
To avoid these issues, make deadheading a regular part of your care routine. Check your plants every few days and remove any spent flowers promptly. This simple practice can make a significant difference in maintaining the health and appearance of your calendula plants. By doing so, you’ll be rewarded with an abundance of blooms throughout the growing season.
Preparing Your Calendula for Deadheading
Now that you’ve harvested your calendula flowers, it’s time to prepare the stems for a fresh round of blooms by removing spent flowers. This simple process is crucial for promoting continuous flowering and preventing seed formation.
Tools and Materials Needed for Deadheading
To successfully deadhead your calendula plants, you’ll need to have the right tools and materials on hand. Start by gathering a pair of sharp pruning shears specifically designed for cutting flowers, as they will make the process much easier and less likely to damage the stems.
In addition to pruning shears, consider investing in some gardening gloves to protect your hands from thorns and prickles that can be present on calendula plants. You’ll also want a pair of scissors or floral snips for trimming spent blooms and cleaning up any debris.
Other essential materials include a bucket or tray for collecting the cut flowers, which you can use as fresh bouquets or press for later use in crafts and arrangements. It’s also a good idea to have some gardening kneeler or cushion on hand to provide comfort while working at ground level.
Remember, having the right tools will make the deadheading process much more efficient and enjoyable, allowing you to focus on promoting healthy growth and encouraging new blooms in your calendula plants.
Timing and Frequency of Deadheading
When it comes to deadheading calendula, timing and frequency are crucial for maintaining its health, promoting continuous blooming, and preventing seed production. As a general rule, you should remove spent flowers when they begin to wilt or drop petals. However, the optimal time varies depending on your plant’s growth stage.
For young plants (around 6-8 weeks after sowing), deadhead every 1-2 days during peak blooming periods to encourage more flower production. As the plant matures, you can reduce frequency to once a week, allowing it to focus energy on seed development. Consider environmental conditions when deciding on deadheading frequency: hot and dry weather may require more frequent removals to prevent seed formation.
Don’t forget that regular deadheading is also essential for managing pests like aphids, whiteflies, and spider mites, which often target blooming flowers. Make sure to inspect your plants regularly and adjust your deadheading schedule accordingly. By understanding the growth stage of your calendula, environmental factors, and pest management needs, you can strike a balance between encouraging blooms and preventing seed production.
Basic Techniques for Effective Deadheading
Deadheading is a crucial step in encouraging your calendula plants to produce more blooms, and mastering these basic techniques will make all the difference. Let’s dive into the fundamental methods you need to know.
Hand-Removal Method: Removing Spent Flowers and Foliage
When removing spent flowers and foliage from calendula plants using the hand-removal method, it’s essential to do so carefully to avoid damaging the surrounding plant tissue. Start by gently grasping the stem of the dead flower or foliage with your thumb and index finger, making sure to get a firm but not overly tight grip.
Begin to twist the stem counterclockwise while pulling away from the main plant axis, working from the base of the flower or leaf upwards. This will help you remove the spent material without leaving behind any fragments that could potentially become seed-producing structures. Be cautious not to leave behind any remaining flowers or buds, as these can continue to produce seeds.
To prevent over-handling and potential damage, consider removing spent materials in one sweep, rather than individually plucking each flower or leaf. Regularly inspecting your plants will also help you identify areas that require attention and maintain a neat, tidy appearance throughout the growing season.
Pruning Shears and Other Tool-Based Methods
When it comes to deadheading calendulas on a larger scale or when working with particularly dense plantings, tool-based methods can be more efficient and effective. Among the various options available, pruning shears remain a popular choice for their precision and versatility.
Pruning loppers, on the other hand, are better suited for thicker stems, allowing you to tackle more substantial deadheading tasks without risking damage to the stem or surrounding flowers. For even larger areas or more extensive pruning requirements, hedge clippers can be used to speed up the process while maintaining a neat finish.
When selecting tool-based methods for deadheading calendulas, consider the specific needs of your plants and the scale of your project. Pruning shears work well for smaller stems and finer details, loppers excel at thicker cuts, and hedge clippers are ideal for larger areas or bulkier pruning tasks. Remember to always clean and sanitize your tools between uses to prevent the spread of disease and ensure a healthy outcome for your calendula plants.
Advanced Techniques for Promoting Healthy Growth
Now that you’ve mastered the basics of calendula deadheading, it’s time to take your skills to the next level and learn advanced techniques for promoting healthy growth. These strategies will help you get the most out of your blooms.
Pinching and Trimming: Enhancing Calendula’s Bushy Shape
When it comes to maintaining Calendula’s signature bushy shape, pinching and trimming techniques are essential. By selectively removing spent flowers and stems, you’re not only encouraging a full, lush appearance but also promoting lateral growth. This is crucial for preventing legginess, which can leave your plant vulnerable to disease and pests.
To pinch or trim Calendula effectively, focus on the stem tips – particularly after it has flowered. Simply snip off the spent blooms about an inch below their base, using scissors or pinching tools. This will redirect the plant’s energy towards developing new growth rather than seed production.
Regular pruning also helps to maintain a bushy shape by encouraging side shoots and promoting a more balanced growth habit. By doing so, you’ll create a stunning display of vibrant flowers that will draw attention from passersby and attract beneficial pollinators like bees and butterflies. Remember to always prune your Calendula in the morning, when the plant is at its highest water content – this makes it easier to handle and minimizes shock. By incorporating these techniques into your regular deadheading routine, you’ll enjoy a robust, thriving Calendula display throughout the growing season.
Dividing and Repotting: Revitalizing Mature Calendula Plants
Dividing mature calendula plants is an excellent way to propagate new ones and revitalize the health of your existing blooms. When done correctly, it can also help prevent overcrowding and promote healthy growth.
To divide a mature calendula plant, start by gently removing it from its container or soil. Use a fork or sharp knife to carefully separate the roots, taking care not to damage them. You should aim to create multiple sections with their own set of roots and foliage. This can be as simple as separating the plant into thirds or fourths, depending on the size of the roots.
For repotting purposes, choose a container that is slightly larger than the original one and filled with well-draining potting mix. Gently place the divided section into its new home, firming the soil gently around it to secure the roots in place. Keep the soil consistently moist during the first few weeks after division, reducing watering as the plant becomes established.
This process not only helps to propagate new calendula plants but also revitalizes the health of your existing blooms by giving them more room to grow and receive essential nutrients.
Common Challenges and Solutions in Deadheading Calendula
Deadheading calendula can be a bit tricky, especially when faced with common challenges like stem failure and reduced flowering. Let’s tackle these issues together and explore some effective solutions.
Overdeadheading: Avoiding Excessive Flower Removal
Overdeadheading can be detrimental to calendula plants. Removing too many spent flowers at once can stress the plant, making it more susceptible to pests and diseases. This can also lead to a decrease in overall flower production, as the plant focuses its energy on recovering from the shock of excessive deadheading.
To avoid overdeadheading, observe your calendula plant regularly. Check for signs such as droopy leaves or a decrease in new flower growth. These are warning signals that you’re removing too many flowers at once. When you do need to remove spent blooms, consider taking only 1/3 to 1/2 of the total flowers. This balance allows the plant to continue producing new buds while also maintaining its overall health.
Additionally, consider deadheading in moderation and spacing out removals over a few days or weeks. This will give your calendula plant time to recover between each session and minimize the risk of stress. By striking this balance, you can maintain an abundance of vibrant blooms throughout the growing season without harming your plants’ well-being.
Pest and Disease Control After Deadheading
When you’re deadheading calendula, it’s essential to be mindful of potential pests and diseases that can be introduced into your garden through this process. This is especially true if you’re cutting flowers at the base of the stem or handling the plant extensively.
Some common pests that may be brought in include aphids, whiteflies, and thrips. These tiny insects can feed on the sap of the plant, weakening it and making it more susceptible to disease. To prevent this, make sure to thoroughly inspect your plants before deadheading, and remove any visible insects or eggs. You can also use neem oil or insecticidal soap as a preventative measure.
As for diseases, calendula is generally resistant to many common issues. However, fungal diseases like powdery mildew and leaf spot can still occur if the plant is stressed or damaged during deadheading. To prevent this, make sure to clean your pruning tools regularly with soap and water, and avoid over-handling the plant. If you do notice any signs of disease, treat the affected area immediately with a fungicide.
Tips for Long-Term Calendula Care and Maintenance
Now that you’ve mastered the art of deadheading calendulas, let’s dive into some essential tips for maintaining their beauty throughout the growing season. Proper care will keep them blooming all summer long.
Companion Planting: Enhancing Growth and Deterrents
When it comes to long-term calendula care and maintenance, companion planting is an essential technique to enhance growth, deter pests, and attract beneficial insects. By strategically planting certain species alongside calendula, you can create a thriving ecosystem that promotes healthy growth and minimizes the need for pesticides.
To start, consider pairing calendula with plants like basil, chamomile, or nasturtiums, which repel aphids and other pests that target calendula. These companion plants also attract beneficial insects like bees and butterflies, which help pollinate your calendula blooms. For example, marigolds can be planted alongside calendula to deter nematodes, microscopic worms that can harm the roots of your flowers.
Some popular companion planting techniques include:
• Planting calendula with herbs like mint or lemongrass to repel aphids and other pests
• Pairing calendula with vegetables like tomatoes or peppers to create a mutually beneficial relationship
• Using calendula as a trap crop for pests like whiteflies and spider mites, which can damage nearby plants
By incorporating these companion planting techniques into your calendula care routine, you’ll be able to create a healthy and balanced garden ecosystem that promotes long-term growth and minimizes the need for maintenance.
Seasonal Adjustments: Adapting Deadheading for Various Climate Conditions
As we delve into the world of calendula care, it’s essential to remember that this lovely flower is not immune to seasonal fluctuations. Just like humans, calendulas have their preferences when it comes to temperature and humidity levels. In fact, excessive heat or cold can significantly impact their blooming cycle and overall health.
In regions with scorching summers, for instance, calendulas may experience a slowdown in growth due to extreme temperatures above 90°F (32°C). To combat this, deadheading should be done more frequently – ideally every 2-3 days during the hottest months. This not only prevents seed formation but also encourages new blooms to emerge.
On the other end of the spectrum, areas with frigid winters may require a different approach. Calendulas grown in colder climates might benefit from being protected by mulching or covering them with a frost blanket when temperatures dip below 40°F (4°C). In these conditions, it’s better to deadhead every 7-10 days, as the plant may take longer to recover.
In moderate climates with mild winters and springs, calendulas will thrive in temperatures ranging from 60°F to 80°F (15°C to 27°C). Here, you can stick to the regular deadheading schedule of every 4-5 days.
Frequently Asked Questions
What’s the best time to deadhead calendula flowers for optimal bloom production?
The ideal time to deadhead is when the flower starts to fade or drop its petals, usually early morning after the dew has evaporated. This allows you to catch spent blooms before they seed, promoting continuous flowering and preventing self-seeding.
How do I handle calendula plants that have stopped blooming despite regular deadheading?
If your calendula plant is not producing flowers despite regular deadheading, it might be due to overdeadheading or nutrient deficiencies. Check if the plant has enough light, water, and fertilization. Also, consider dividing or repotting mature plants to revitalise their growth.
Can I use any pruning tool for deadheading, or are there specific tools recommended?
While you can use any sharp pruning tool, it’s best to use hand-removal methods initially as they allow for more precise control and don’t damage the stem. For thicker stems or larger quantities of flowers, use a pair of long-handled loppers or pruning shears.
Will deadheading calendula affect its natural growth pattern?
No, regular deadheading will actually encourage bushy growth in calendulas by directing energy towards producing new blooms rather than seed production. This can lead to more vibrant and abundant flower displays throughout the growing season.
What’s a common mistake that gardeners make when deadheading calendula flowers?
A frequent error is overdeadheading, where too many spent flowers are removed at once. This can stress the plant and reduce future flowering potential. To avoid this, remove only the faded blooms, allowing some seed heads to mature for natural propagation.