Are you looking for ways to support your local bee population? Planting clover can be a simple yet effective solution. Bees are essential pollinators, but their numbers have been declining due to habitat loss and lack of food sources. By planting clover, you can provide them with the nutrients they need to thrive. This article will guide you through selecting, growing, and maintaining a thriving clover patch that attracts bees and enhances your garden’s ecosystem. We’ll cover expert tips on choosing the right type of clover for your region, preparing the soil, and ensuring your patch remains healthy and productive. With these tips, you can make a real difference in supporting your local bee population and enjoying a more sustainable garden.
Benefits of Clover for Bees
Clover is a game-changer for beekeepers, providing bees with a rich source of nectar and pollen. By planting clover in your garden, you’ll be giving these crucial pollinators a vital food source to thrive on.
Importance of Bee-friendly Plants in Urban Areas
As you work towards creating a bee-friendly environment in urban areas, it’s essential to incorporate plants that support these vital pollinators. Urban bees face unique challenges such as reduced food sources, habitat destruction, and pesticide exposure. By planting bee-friendly plants like clover, you can significantly contribute to their well-being.
In cities, bee populations often rely on local green spaces for sustenance. When choosing plants, prioritize those that are native to your region and provide a continuous source of nectar throughout the growing season. Incorporating a mix of annuals and perennials ensures a constant food supply.
Urban gardens can also serve as refuges for solitary bees, which require undisturbed nesting sites. Consider incorporating plants with hollow tubes or cavities that these solitary bees can occupy. Planting clover is an excellent starting point, as its dense growth habit provides shelter from harsh weather conditions and supports beneficial insect populations.
Incorporate bee-friendly plants like lavender, coneflower, and black-eyed Susan into your urban garden to create a diverse foraging landscape. These additions will not only attract pollinators but also contribute to the local ecosystem’s health and biodiversity. By planting clover and other bee-friendly species, you’ll be making a tangible impact on supporting these vital pollinators in urban areas.
Choosing the Right Clover Species for Your Region
When it comes to choosing the right clover species for your region, there are several factors to consider. Climate, soil conditions, and local regulations can all impact the types of clover that will thrive on your land.
White clover (Trifolium repens) is a popular choice for many bee-friendly gardens. It’s a perennial legume that tolerates shade and dry soils, making it an excellent option for areas with partial sun or low water availability. White clover also has the added benefit of being a nitrogen-fixing plant, which can enrich your soil over time.
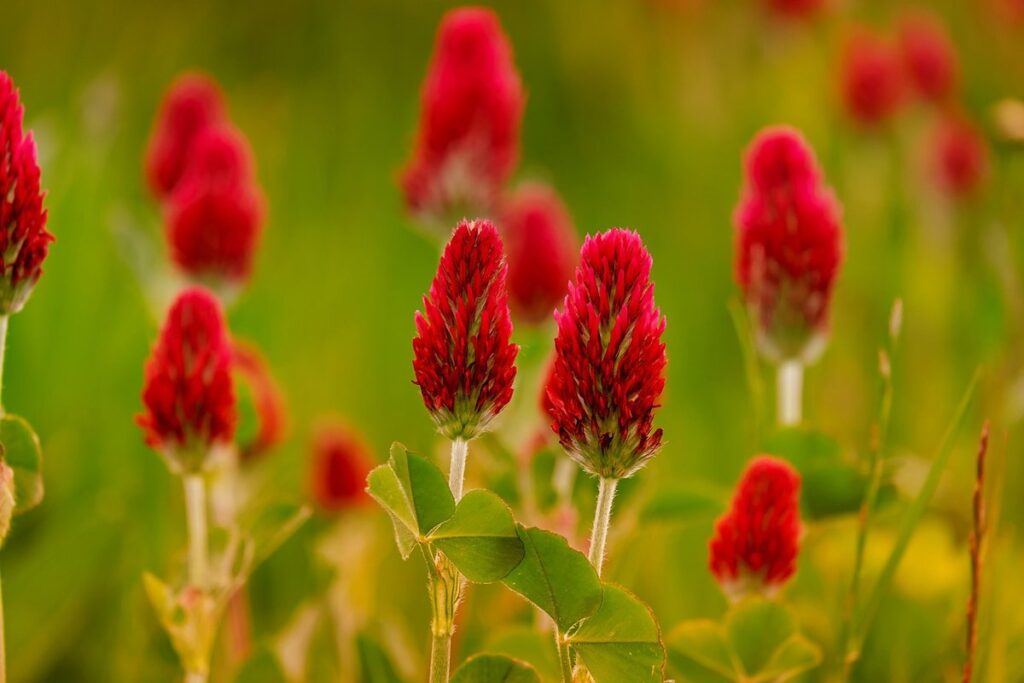
Red clover (Trifolium pratense), on the other hand, is more tolerant of wet conditions and thrives in regions with mild winters. It’s an excellent choice for areas with moist soils or where you want to attract honeybees to your garden. Sweet clover (Melilotus officinalis) is another option that’s well-suited for a variety of climates and soil types, but it can be more aggressive and require regular mowing.
Before selecting a clover species, consider the specific needs of your region and climate. Check with local nurseries or extension services to determine which types of clover will perform best in your area. By choosing the right clover for your region, you’ll create a bee-friendly haven that’s both beautiful and sustainable.
Preparing Your Garden for Clover Planting
Before planting clover, it’s crucial to prepare your garden soil and eliminate any existing weeds that could compete with your new clover crop. This will ensure a healthy start for your bee-friendly clover.
Soil Preparation for Optimal Growth
When it comes to planting clover for bee forage, soil preparation is an often-overlooked but crucial step. To ensure optimal growth and a healthy crop, you’ll want to focus on achieving the right pH balance. Clover prefers a slightly acidic to neutral soil pH between 6.0 and 7.0, so test your soil to determine its current level. If it’s too alkaline or acidic, amend it with lime or sulfur accordingly.
Next, consider adding essential nutrients like nitrogen, phosphorus, and potassium (NPK) through organic means such as compost or well-rotted manure. Clover is a legume and has the ability to fix atmospheric nitrogen, but supplemental N can still be beneficial for initial growth. Use a 5-10-10 NPK ratio as a starting point.
Removing weeds is another essential aspect of soil preparation. Clear your garden bed of any existing vegetation by hand or with a non-selective herbicide like glyphosate. Once the area is weed-free, till it to create a smooth surface for sowing clover seeds. This will ensure even germination and prevent competition from unwanted plants.
Selecting a Suitable Location for Your Clover Patch
When selecting a suitable location for your clover patch, it’s essential to consider several key factors that will ensure its success. First and foremost, think about sunlight – white clover prefers partial shade to full sun, while red clover can tolerate more shade. Choose a spot that receives at least 4-6 hours of direct sunlight per day.
Another crucial factor is water access – clover needs consistent moisture, especially during its establishment phase. Ensure your chosen location has a reliable source of water nearby, such as a hose or a rainwater harvesting system. You’ll also want to consider the proximity of your clover patch to bee habitats – ideally, it should be within 1-2 acres of your apiary.
Additionally, think about the surrounding landscape and any potential obstacles that might affect your clover’s growth. Avoid planting in areas with poor drainage or where water tends to collect. By carefully evaluating these factors, you’ll be able to create a thriving clover patch that will attract bees and support their health for years to come.
Planting and Caring for Your Clover Forage
To grow a thriving clover forage, you’ll want to focus on proper planting techniques and regular maintenance to ensure your bees have an abundance of nectar-rich flowers throughout the seasons. This section will walk you through both steps.
Proper Planting Techniques for Clover Seeds
When planting clover seeds, getting them right is crucial for a thriving and beneficial stand. The sowing depth is key – clover seeds should be planted about 1/8 inch deep, which is roughly the same as pressing them into the soil with your finger. This allows enough moisture to get through while preventing the seeds from drying out.
Spacing also plays a significant role; for optimal growth and maintenance, space seeds about 6-12 inches apart. This will give each clover plant ample room to develop without crowding or competing with one another. Timing is equally important – spring planting typically occurs in late March or early April, while fall planting takes place around mid-to-late September.
Keep in mind that weather conditions may necessitate adjustments; for instance, if your area experiences a dry spell, it’s best to sow seeds slightly deeper to compensate for the lack of moisture. Additionally, avoid sowing during periods of high wind, as this can cause seeds to scatter or become dislodged from the soil.
Clover seeds germinate in about 7-10 days, and with proper care, your stand will be a lush haven for pollinators by late spring. To ensure a healthy start, it’s essential to sow in well-prepared soil with sufficient organic matter, which will help retain moisture and suppress weeds.
Maintenance and Upkeep of Your Clover Patch
To keep your clover patch thriving and providing a bounty of nectar for your bees, regular maintenance is essential. Watering is critical during the first year after planting, especially during periods of drought. Aim to provide about 1-2 inches of water per week, either from rainfall or irrigation.
Fertilizing your clover patch can also make a significant difference in its health and productivity. Clover has a unique relationship with nitrogen-fixing bacteria, which allows it to convert atmospheric nitrogen into a form that’s accessible to plants. However, supplementary fertilizers can help promote healthy growth. Consider using a balanced fertilizer during the growing season, but avoid over-fertilizing, as this can harm your bees.
Pest control is also crucial in maintaining a healthy clover patch. White clover is susceptible to aphids and spider mites, while red clover is often affected by powdery mildew. Regularly inspect your patch for signs of infestation, and use organic pest control methods whenever possible, such as introducing beneficial insects or using neem oil.
By following these simple care practices, you can ensure a lush and vibrant clover patch that will continue to provide an abundance of nectar for your bees throughout the growing season.
Supporting Local Beekeepers through Clover
When it comes to supporting local beekeepers, providing a reliable source of forage is crucial. By planting clover in your garden, you’re helping these vital pollinators thrive year-round.
The Role of Home Gardeners in Supporting Local Beekeeping
As you plant clover in your home garden to support local bees, you’re not only creating a haven for these crucial pollinators but also contributing to the success of local beekeepers. It’s a symbiotic relationship that may seem far-fetched at first, but bear with us – it’s more connected than you think.
When you plant bee-friendly plants like clover in your garden, you’re providing bees with an essential source of forage during a critical time of year. This bounty directly benefits local beekeepers by helping their colonies thrive. A healthy colony is better equipped to produce honey and other valuable products that bring in income for these dedicated individuals.
In fact, research has shown that when gardens like yours provide a consistent food source, bee populations can surge as much as 25% within just a few seasons. This is music to the ears of local beekeepers who’ve seen firsthand how well-managed colonies with plenty of forage can outperform those struggling to find food.
By planting clover and other pollinator-friendly plants in your garden, you’re essentially giving local beekeepers a leg up on their competition – without even knowing it! So go ahead and give your bees the TLC they deserve. Plant some clover today and watch your yard become a haven for both these vital pollinators and the hardworking beekeepers who rely on them.
Collaborating with Beekeepers: Creating a Sustainable Relationship
As you cultivate clover for its benefits to local pollinators, consider the potential impact on the broader beekeeping community. Building relationships with nearby beekeepers can amplify the positive effects of your efforts and create a thriving ecosystem.
To establish these connections, start by researching local bee associations or clubs in your area. Attend their meetings or events to meet fellow enthusiasts who share your passion for pollinator conservation. You might also consider joining online forums or social media groups focused on apiculture to connect with nearby beekeepers.
Once you’ve made contact, discuss ways you can collaborate and support each other’s endeavors. This could involve offering clover seedlings to local beekeepers in exchange for knowledge sharing or technical expertise. Alternatively, you might assist with hive maintenance or monitoring pollinator populations, providing valuable data to inform best practices.
By fostering these partnerships, you’ll not only enhance the health of your local ecosystem but also contribute to a more resilient and diverse bee population.
Monitoring and Enjoying Your Clover’s Impact on Local Bees
As you enjoy watching your clover bloom, you’ll want to know how it’s affecting the local bee population. This is where monitoring and tracking their visits will come in handy.
Tracking the Success of Your Clover Forage
As you enjoy watching your clover patch thrive and support local bees, it’s essential to track its success. This will not only help you refine your planting strategy but also ensure that your efforts are making a tangible impact on the bee population.
Start by assessing bee activity around your clover patch. Take note of the number of bees visiting your plants during peak hours (usually between 10 am and 3 pm). You can also set up a bee hotel nearby to attract solitary bees, which are essential for pollination. Record the types of bees you observe, as this will help you understand their preferences.
Another crucial aspect is monitoring the health of your clover patch itself. Check for signs of pests or diseases, such as aphids, whiteflies, or powdery mildew. Regularly water and fertilize your plants to maintain optimal growth conditions. Take note of the clover’s flowering cycle – typically, it blooms from late spring to early fall – and plan accordingly.
Keep a record of your observations over time to see how your strategies affect bee activity and plant health. This will help you make informed decisions for future planting seasons, ensuring that your efforts continue to support local bee populations.
Observing the Benefits of a Bee-friendly Garden
Watching bees at work in your garden is a joy unlike any other. As you sit among the blooming flowers, you’ll witness a symphony of activity as they flit from flower to flower, collecting nectar and pollen for their hives. This experience will not only bring you closer to nature but also provide valuable insights into the importance of bee-friendly gardens.
One of the most striking aspects of observing bees in your garden is witnessing their social behavior. You’ll see different castes performing specific roles, from foragers gathering food to nurses caring for young larvae. By observing this intricate social structure, you’ll appreciate the complexity and organization within a single species.
To enhance your observation experience, consider creating a bee-friendly seating area or installing a bird’s-eye view platform. This will allow you to observe bees at eye-level, giving you a more intimate perspective on their behavior. Remember, the benefits of planting clover go beyond just feeding local bees – they also bring you closer to nature and provide endless entertainment.
Tips for Long-term Maintenance and Expansion
To ensure your clover patch remains a thriving haven for bees, it’s essential to learn how to maintain and expand your planting over time. Regular care will keep your bees happy and coming back for more.
Strategies for Expanding Your Clover Patch
As your clover patch matures and becomes a thriving haven for local pollinators, it’s natural to want to expand its reach. With careful planning and execution, you can successfully diversify and grow your clover patch, providing even more benefits for bees and other beneficial insects.
One strategy for expansion is to create satellite patches of clover in nearby areas. This approach allows you to establish multiple sites that provide a diverse range of nectar sources throughout the growing season. Consider planting smaller patches in community gardens, schoolyards, or other public spaces where pollinators can freely roam.
To maintain the health and effectiveness of your expanded patch, be sure to:
* Monitor soil quality and adjust fertilizer applications as needed
* Maintain a balanced mix of white and red clover varieties for optimal nectar production
* Regularly inspect for signs of pests and diseases, taking swift action if necessary
By adopting these strategies, you’ll not only enhance the overall biodiversity of your garden but also create a thriving network of pollinator-friendly habitats that will attract bees and other beneficial insects throughout the growing season.
Sustainable Management Practices for a Healthy Ecosystem
To maintain a healthy ecosystem for both your garden and local pollinators, it’s essential to adopt sustainable management practices. Start by implementing a regular maintenance routine that includes tasks such as watering, mowing, and fertilizing at optimal times. For example, avoid overwatering clover, which can lead to the growth of invasive weeds.
Consider integrating beneficial insects into your garden through companion planting, like introducing marigolds or nasturtiums to deter pests naturally. By adopting these strategies, you’ll create a balanced ecosystem that promotes biodiversity and minimizes chemical use.
In terms of specific management practices, make sure to:
• Rotate crops regularly to prevent soil depletion and pest buildup
• Leave some areas of your garden unmanicured to provide shelter for beneficial insects and pollinators
• Monitor soil pH levels and adjust fertilization accordingly to maintain optimal nutrient levels
By incorporating these strategies into your gardening routine, you’ll create a thriving ecosystem that supports the health of both your garden and local pollinators. Regular monitoring and adjustments will help you maintain this delicate balance over time, ensuring a sustainable future for your clover patch.
Conclusion: Planting Clover for Bee Forage as an Ongoing Commitment to Sustainability
As you’ve learned how to plant clover for bee forage, it’s essential to maintain your commitment to sustainability by incorporating regular maintenance and renewal into your routine. This section will guide you through that process.
Recap of Key Takeaways
As you’ve made it to the end of our article on planting clover for bee forage, we hope you’re feeling inspired and equipped with the knowledge to create a haven for local bees in your own backyard. Let’s recap the key takeaways from our conversation.
First and foremost, planting clover is an effective way to provide essential nutrients and shelter for honeybees and other pollinators. By incorporating this simple yet powerful strategy into your gardening routine, you’ll be contributing to a healthier ecosystem and supporting the local bee population.
We also emphasized the importance of selecting the right type of clover for your climate and soil conditions. Whether it’s white clover or red clover, there are many varieties to choose from, each with its unique benefits and requirements.
In addition to planting clover, we discussed ways to maintain a thriving beeyard, including regular watering and monitoring for pests and diseases. By making these commitments to your garden, you’ll not only be supporting local bees but also reaping the rewards of a more sustainable and resilient ecosystem.
As you begin or continue your journey with planting clover, remember that every small step counts in creating a bee-friendly environment. With dedication and care, you can make a meaningful impact on the lives of these incredible pollinators.
Encouraging Readers to Share Their Experiences and Tips
As we come to the end of our journey together on planting clover for bee forage, we want to encourage you to continue sharing your experiences and expertise with others. Your voice is an essential part of creating a vibrant community that supports sustainable gardening practices.
We’d love to hear about how planting clover has impacted your garden, from the types of bees you’ve seen visiting to the challenges you’ve faced along the way. Share your tips on optimal planting times, soil preparation methods, and any other secrets you’ve discovered for cultivating a thriving clover patch.
If you’re unsure where to start, try asking yourself these questions: What worked well for me? What didn’t work so well? How have I adapted my approach over time? By sharing your insights, you’ll not only help others but also reflect on your own journey and gain new perspectives.
Some ideas for sharing your experiences include:
* Writing a guest post or commenting on this blog
* Joining online forums or social media groups focused on bee-friendly gardening
* Starting a local clover-forage club or meetup group
We look forward to hearing about your adventures with planting clover!
Frequently Asked Questions
Can I plant clover in containers or does it need a lot of space?
You can definitely grow clover in containers, but make sure the pot is at least 6-8 inches deep to accommodate its taproot. Also, use a well-draining potting mix and provide full sun for optimal growth.
How long does it take for clover to establish itself as a bee-friendly habitat?
Clover can germinate within 1-2 weeks after planting, but it may take around 6-8 weeks for the plants to mature and start producing flowers that bees love. Be patient and enjoy watching your garden transform into a thriving bee haven.
Can I mix clover with other flowering plants or should I create a separate patch?
Mixing clover with other flowers is perfectly fine, as long as they have similar growing conditions and are not too competitive for resources. This will actually enhance biodiversity and provide bees with an even wider range of nectar sources.
What’s the best time to plant clover in different regions and climates?
The ideal planting time varies depending on your location. In temperate zones, spring or fall is usually the best time, while in warmer climates like California, you can plant year-round. Always check local weather forecasts and soil conditions before planting.
How do I monitor the success of my clover patch and track bee activity?
Observe bees visiting your clover patch regularly, and take note of their numbers and behavior. You can also set up a bee hotel or nest box nearby to attract solitary bees. Consider partnering with local beekeepers or entomologists for expert advice on monitoring and maintaining your bee-friendly garden.