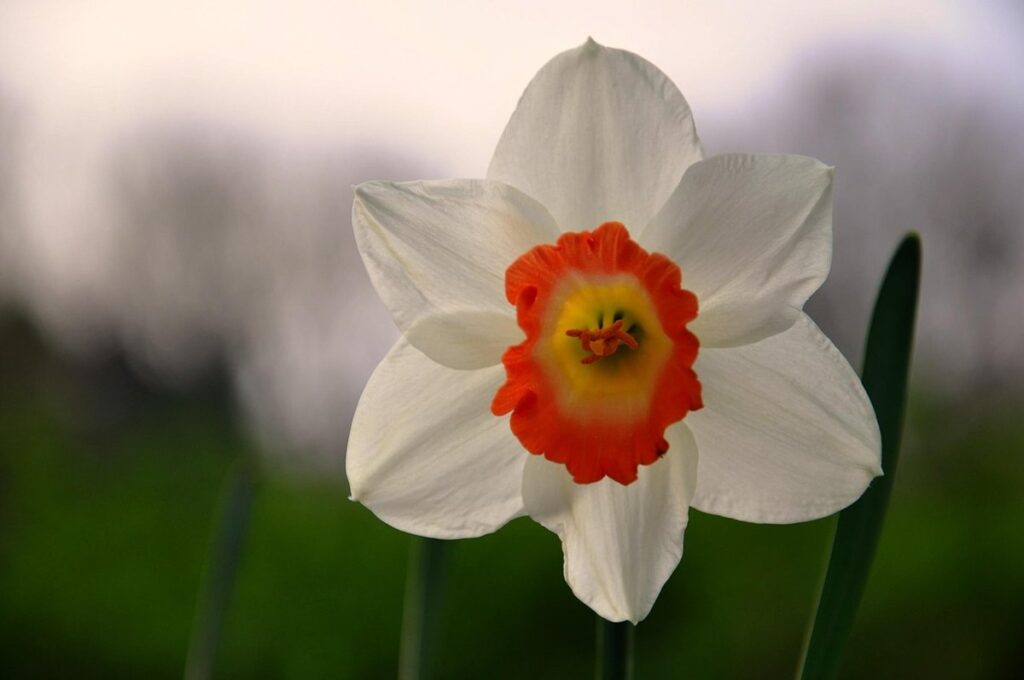
Are you ready to welcome the sunshine into your garden with vibrant daffodils? Planting these beautiful flowers at the right depth is crucial for optimal growth, stunning blooms, and long-term health. But did you know that choosing the correct planting spot and soil type can make all the difference?
If you’re eager to grow healthy and thriving daffodils but aren’t sure where to start, this guide is here to help. We’ll dive into the essential details of planting daffodils at the right depth, covering common mistakes to avoid and expert tips for a blooming success. With our comprehensive guide, you’ll learn how to plant daffodils like a pro, from selecting the perfect spot to understanding soil types that will nourish these beautiful flowers.
Choosing the Right Location
When it comes to growing daffodils, selecting a suitable location is crucial for their success. In this next part of our guide, we’ll explore what factors to consider when choosing the right spot.
Understanding Sunlight Requirements
When it comes to growing daffodils, sunlight requirements are crucial for their blooming success. Daffodils need full sun to partial shade to perform at their best, and the amount of sunlight they receive will directly impact their flowering performance.
To determine if a spot in your garden receives sufficient sunlight, consider the following factors: the time of day, the season, and any nearby obstructions that might block or filter the sun’s rays. Ideally, daffodils should be planted in a location that receives at least six hours of direct sunlight per day during the growing season (spring-fall). If your garden doesn’t receive full sun, partial shade is still acceptable, but you may need to adjust the planting depth accordingly.
In general, south-facing locations are best for daffodils as they receive maximum sunlight. However, be cautious of areas that are exposed to intense afternoon sun, which can lead to scorching or drying out of the leaves. By considering these factors and selecting a spot with suitable sunlight conditions, you’ll be well on your way to growing thriving daffodil plants.
Preparing the Soil
When it comes to planting daffodils, many gardeners overlook one crucial aspect: the soil itself. A well-draining soil is essential for healthy daffodil growth, as these bulbs don’t like standing water. If you’re planting on a slope or low-lying area, make sure to create a gentle incline to prevent water from collecting.
Before planting, take some time to loosen the earth in your chosen location. Use a fork to gently dig up the soil, working it over to a depth of about 12 inches. This will help break up any compacted soil and allow roots to grow freely. As you’re loosening the soil, keep an eye out for debris like rocks, twigs, or other obstructions that could hinder your daffodils’ growth.
Remove any weeds or debris from the area, taking care not to damage the surrounding soil. If your soil is particularly dense or heavy clay, consider mixing in some organic matter like compost to improve drainage and aeration. A well-prepared soil will set your daffodils up for success and ensure they thrive for years to come.
Factors Affecting Plant Depth
When choosing where to plant daffodils, understanding the factors that affect planting depth is crucial for their healthy growth and blooming. Planting too deep can lead to rot, while not deep enough may expose bulbs to harsh weather conditions.
Climate plays a significant role in determining the optimal planting depth. In areas with mild winters and cool summers, such as coastal regions, daffodils can be planted relatively shallow – 2-3 times their bulb height above ground level. However, in colder climates, deeper planting is necessary to protect bulbs from frost heave.
Soil type also affects planting depth. Well-draining soil requires shallower planting, while heavy clay or loamy soils necessitate deeper placement to prevent waterlogged conditions. Additionally, the size of the daffodil bulb influences planting depth – larger bulbs require more space and can be planted 3-4 times their height above ground.
It’s essential to consider these factors when determining your daffodil planting depth. Planting too deep or shallow can lead to poor growth, reduced blooming, and even plant loss.
Determining the Optimal Planting Depth
To ensure your daffodils thrive, it’s crucial to determine the optimal planting depth for your specific climate and soil conditions. This section will help you make an informed decision.
Considering Bulb Size and Age
When planting daffodils, it’s essential to consider the size and age of the bulbs to determine the optimal planting depth. Larger bulbs typically require deeper planting, while smaller ones can thrive with shallower depths.
For example, a large daffodil bulb (about 2-3 inches in diameter) should be planted around 4-5 inches deep, leaving about an inch between the bulb and the soil surface. On the other hand, smaller bulbs (around 1-2 inches in diameter) can be planted at a depth of 2-3 inches.
The age of the bulb also plays a crucial role in determining the optimal planting depth. Newer bulbs tend to be smaller and more delicate, requiring shallower planting to avoid damaging their fragile roots. Older bulbs, however, have established root systems and can handle deeper planting. As a general rule, older bulbs (3-5 years old) should be planted around 4-6 inches deep, while newer bulbs (1-2 years old) require only 2-3 inches.
Keep in mind that these are general guidelines, and specific daffodil varieties may have unique requirements.
The Role of Soil Type and Moisture
When planting daffodils, it’s essential to consider the role of soil type and moisture levels on their growth. Different soils have unique characteristics that can affect root development and bulb establishment. For example, sandy soils drain quickly, which may cause roots to dry out if not enough water is provided. On the other hand, clay soils retain too much water, leading to rot and poor growth.
To determine the optimal planting depth for your daffodils in these conditions, consider the following:
* In sandy soils, plant bulbs 1-2 inches deeper than recommended to help retain moisture.
* In heavy clay soils, plant bulbs at the recommended depth, but be sure to mix in organic matter like compost or well-rotted manure to improve drainage and structure.
* For loamy soils, which are typically well-balanced, follow the standard planting guidelines.
Keep in mind that soil pH also plays a crucial role. Daffodils prefer slightly acidic to neutral soils (pH 6.0-7.0). If your soil is too alkaline or acidic, it may impact nutrient availability and plant growth. Test your soil pH and adjust accordingly before planting.
Planting Techniques and Tools
When planting daffodils, it’s essential to use the right techniques and tools to ensure proper growth and blooming. First, choose a location with well-draining soil and full sun to partial shade. Use a garden fork to gently loosen the soil to a depth of about 12-18 inches, making sure not to damage any underground structures like pipes or wires.
Next, select a suitable planting tool, such as a bulb planter or a trowel, to carefully dig a hole that’s three times the size of the bulb. Place the daffodil bulb in the hole, pointing its basal plate (the flat base) upwards. Cover with soil and gently firm it down to secure the bulb. Water thoroughly after planting to settle the soil and provide enough moisture for establishment.
Avoiding Common Mistakes and Problems
Don’t let mistakes ruin your daffodil planting experience. In this crucial section, we’ll share tips on avoiding common problems that can impact your blooms’ success.
Overcrowding and Underplanting
When planting daffodils, it’s essential to consider the impact of overcrowding and underplanting on their blooms and overall health. Overcrowding occurs when daffodil bulbs are planted too close together, which can lead to reduced blooming, increased susceptibility to disease, and even death.
If you’ve got a smaller garden bed or want to create a lush display of daffodils in one spot, make sure not to overcrowd the area. Plant them at least 3-4 inches apart for optimal growth and flowering. This space also allows for better air circulation, which is crucial in preventing disease.
Underplanting refers to planting bulbs too shallow or deep. Daffodil bulbs typically require a depth of 2-3 times their height. If planted too shallow, the bulb won’t be able to store enough energy for blooming, resulting in reduced flowers or no blooms at all. Conversely, if you plant too deeply, the bulb may rot before it has a chance to sprout.
When planting daffodils, make sure to check the package instructions and local guidelines for recommended planting depths.
Dealing with Pest and Diseases
When planting daffodils, it’s essential to consider not only the depth but also the potential risks of pests and diseases. Daffodils are susceptible to a range of common issues, including bulb mites, spider mites, and aphids. These tiny creatures can cause significant damage by feeding on the plant’s sap, leading to yellowing or distortion of leaves.
One way to prevent these problems is by planting daffodil bulbs at the correct depth. This ensures that the bulb is protected from pests that might be lurking in the top layer of soil. A general rule of thumb is to plant daffodils 2-3 times their height below the surface, which helps keep them safe from hungry insects.
In addition to proper planting depth, it’s also crucial to choose healthy bulbs and inspect your plants regularly for signs of disease or pests. Regular watering and fertilization can help promote overall plant health, making them less susceptible to infestations. By taking these precautions, you can enjoy vibrant daffodils come springtime without worrying about unwanted visitors.
Maintaining Your Daffodils After Planting
Once you’ve planted your daffodils, it’s time to think about ongoing care: from watering and fertilizing to deadheading and repotting. Proper maintenance will keep them blooming beautifully year after year.
Watering and Mulching Strategies
When it comes to maintaining your daffodils after planting, proper watering and mulching strategies are crucial for optimal growth and bloom times. Watering is perhaps the most critical aspect of post-planting care. Daffodils prefer well-draining soil, so avoid overwatering, which can lead to rot and other issues.
Instead, aim for about 1 inch of water per week, either from rain or irrigation. You can check if your daffodils need water by inserting a finger into the soil up to the knuckle; if it feels dry, it’s time to water. Water thoroughly but avoid getting excess moisture on the foliage.
Mulching around your daffodils is another key strategy for retaining moisture and suppressing weeds. Organic mulches like wood chips or bark are excellent choices. Spread a 2-3 inch layer of mulch around the base of your daffodil plants, keeping it several inches away from the crowns to prevent rot.
Regular watering and mulching will help ensure your daffodils receive consistent moisture levels throughout their growing season, promoting healthy growth and robust blooms come springtime.
Timing for Spring Growth and Maintenance
As we’ve established that daffodils require proper planting depth to thrive, it’s equally essential to understand when and how to care for them post-planting. Timing is crucial for optimal growth, so let’s dive into the specifics.
In most regions, you can expect daffodil blooms around late March to early May, depending on your climate and weather conditions. As soon as you’ve planted your bulbs, water them thoroughly to settle the soil. However, it’s essential not to overwater – a general rule of thumb is to provide about 1 inch of water per week.
Once established, daffodils require minimal maintenance. They prefer well-draining soil and full sun to partial shade. Fertilize your daffodils in the spring after they’ve finished blooming with a low-nitrogen fertilizer. This will promote healthy foliage growth without encouraging too much vegetative development.
Keep an eye out for signs of pests or diseases, such as aphids, slugs, or powdery mildew. If you notice any issues, treat them promptly to prevent further damage. With proper care and attention, your daffodils should continue to thrive and bloom beautifully year after year.
Frequently Asked Questions
How Do I Ensure Consistent Moisture Levels for My Daffodils?
When planting daffodils, it’s essential to provide consistent moisture levels during the first growing season. To achieve this, make sure to water your bulbs deeply after planting and maintain a 2-3 inch layer of mulch around them. This will help regulate soil temperature and prevent excessive drying out.
Can I Plant Daffodil Bulbs in Containers or Are They Strictly for In-Ground Planting?
Yes, you can plant daffodils in containers if you don’t have suitable garden space. Choose a container with good drainage (at least 6-8 inches deep) and use a high-quality potting mix specifically designed for bulbs. Keep the soil consistently moist but not waterlogged during the first growing season.
How Do I Protect My Daffodils from Pests Like Slugs and Snails?
To protect your daffodils from pests, place crushed eggshells or copper tape around the base of the plants. These will deter slugs and snails without harming beneficial insects. Additionally, keep your garden clean by removing weeds and debris that can attract pests.
Can I Plant Daffodil Bulbs in Shaded Areas with Partial Sun?
While daffodils prefer full sun to partial shade, they can still thrive in shaded areas. However, you may notice reduced flowering performance. To mitigate this, choose a variety of daffodil that is known for its ability to tolerate shade.
How Long Does It Take for Daffodils to Bloom After Planting?
The time it takes for daffodils to bloom after planting can vary depending on factors like soil quality, moisture levels, and bulb size. Generally, you can expect daffodils to take 6-8 weeks to produce flowers in the spring after planting.