If you’re growing marigolds in your garden or indoor space, you’re probably eager to enjoy their vibrant blooms for as long as possible. One simple yet effective technique can help you maximize those beautiful flowers and keep your plants looking their best: deadheading. By regularly removing the spent blooms from your marigolds, you’ll encourage them to produce even more flowers throughout the growing season. In this article, we’ll dive into the benefits of deadheading marigolds, including improved appearance and prolonged flowering periods. We’ll also cover when to deadhead, which tools to use, and what post-deadheading care looks like. Whether you’re a seasoned gardener or just starting out, learning how to properly deadhead your marigolds will help you get the most from these lovely plants.
Understanding Marigold Care
To get the most out of your marigolds, you’ll want to understand how to care for them properly. This involves providing the right conditions and regular maintenance, including watering and fertilizing.
What are Marigolds?
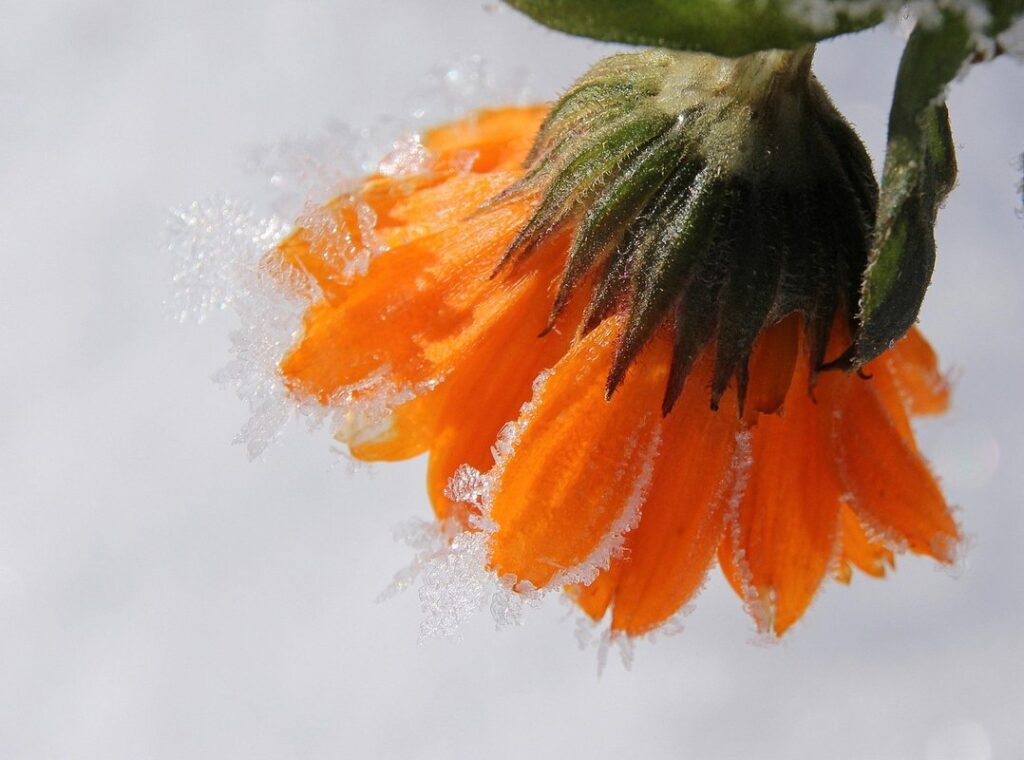
Marigold plants are one of the most vibrant and low-maintenance additions to any garden. These bright and cheery flowers are a favorite among gardeners due to their ease of growth and ability to thrive in a variety of conditions. With over 50 different species, marigolds come in an array of shapes, sizes, and colors, from the common orange and yellow varieties to more exotic purple and red hues.
One of the key characteristics that set marigolds apart is their hardiness. These plants are highly resistant to pests and diseases, making them a great choice for gardeners looking to reduce chemical use in their gardens. They also require minimal care, tolerating dry spells and poor soil with ease. This makes them an excellent choice for new gardeners or those short on time.
In addition to their practical benefits, marigolds are also highly valued for their ornamental appeal. Their bright blooms can add a pop of color to even the most mundane gardens, making them a popular choice for borders and containers. Whether you’re looking to attract pollinators or simply add some visual interest to your outdoor space, marigolds are an excellent option.
Benefits of Deadheading Marigolds
When you deadhead marigolds regularly, it’s not just their appearance that benefits – but also their overall health. By removing spent flowers, you’re essentially sending a signal to the plant that there’s still plenty of energy available for new growth and blooming.
This simple habit can lead to improved appearance, as the plant puts its energy into producing more vibrant, healthy blooms instead of focusing on seed production. It’s like giving your marigold a mini-makeover every few days! Regular deadheading also encourages marigolds to prolong their blooming period, some varieties even going from spring to fall without a break.
Reduced seed production is another perk – while it might seem counterintuitive that you’d want fewer seeds, too many can stress the plant and lead to weaker stems. By taking control of seed production through deadheading, you’re actually helping your marigold put its energy into producing stronger, more resilient growth.
When done consistently, deadheading becomes second nature – and your marigolds will thank you for it!
Preparing Your Marigolds for Deadheading
Now that you’ve learned when and how to deadhead your marigolds, let’s prepare them for the process by removing any weak or dying blooms. This will ensure a bountiful harvest of beautiful flowers.
Choosing the Right Time to Deadhead
When it comes to deadheading marigolds, timing is everything. You want to remove spent blooms at the right moment to encourage more flowering and prevent seed production. But when exactly should you do this? The answer lies in understanding your plant’s maturity level, weather conditions, and growth stages.
As a general rule, wait until your marigold plant has reached its full height and has a robust stem structure before starting to deadhead. This is usually around 6-8 weeks after transplanting or sowing seeds. However, if you’re dealing with extreme temperatures or weather fluctuations, adjust your schedule accordingly. Avoid deadheading during intense heatwaves or when the plant is stressed from disease or pests.
In terms of growth stages, focus on removing spent blooms during the active growing season (spring and summer). This typically coincides with the plant’s peak flowering period. By doing so, you’ll stimulate the plant to produce new flowers and maintain its vibrant appearance. Remember, deadheading regularly will not only promote blooming but also direct the plant’s energy towards root development and overall health.
Identifying Dead Flowers
When performing deadheading on your marigolds, it’s essential to identify flowers that have already bloomed and are no longer contributing to the plant’s beauty. Dead flowers can be easily spotted by their wilted petals, drooping stems, and discolored blooms.
Start by inspecting each flower head for signs of wilting or dryness. If a petal is crinkled or has lost its shine, it’s likely reached the end of its life cycle. Additionally, take note of any flowers that are sagging or leaning away from the stem – these are often struggling to stay attached.
Check the color of your blooms as well; faded or discolored petals can be a clear indication that a flower has stopped blooming. If you notice any of these characteristics, gently remove the spent bloom by pinching it off at the base of the petal or stem. This will direct the plant’s energy towards producing new flowers and encourage maximum blooms throughout the growing season.
Removing dead flowers in a timely manner will also prevent them from producing seed pods, which can be unsightly and steal resources away from your desired blooms.
Techniques for Effective Deadheading
Now that you’ve learned why deadheading is essential for marigolds, let’s dive into some practical techniques to get the most blooms out of your plants.
Hand-Deadheading: A Step-by-Step Guide
When manually deadheading marigolds, it’s essential to have the right grip and cutting technique to minimize damage to the plant. To start, gently grasp the stem of the spent flower with your thumb and index finger, making sure not to squeeze too hard and cause unnecessary stress on the stem. Next, use a pair of sharp, clean scissors or pruning shears to cut the stem at an angle just above the node from which the flower emerged.
Cutting at an angle helps prevent water from collecting on the stem, reducing the risk of rot and disease. It’s also crucial to make a clean cut, as this promotes healthy healing and encourages new growth. To do so, use a gentle sawing motion with your scissors or pruning shears, working from the bottom up.
When cutting, take care not to crush or bruise the stem, as this can cause damage to the plant’s vascular tissue. By following these simple steps, you’ll be able to deadhead your marigolds effectively, promoting healthy growth and encouraging more blooms throughout the season.
Using Pruning Tools: Scissors, Pinchers, or Loppers?
When it comes to deadheading marigolds, having the right pruning tools can make all the difference. The type of tool you choose depends on several factors, including the size and type of marigold, as well as personal preference.
Scissors are ideal for deadheading small or delicate marigolds, such as those in containers or hanging baskets. They allow for precise cuts and are gentler on the plant’s stems. However, they may not be suitable for larger plants with thicker stems.
Pinchers, also known as clippers or trimmers, are versatile tools that can be used for a variety of tasks beyond deadheading. They’re perfect for removing spent blooms from marigolds with medium-sized stems and are often preferred by gardeners who value their durability and ease of use.
Loppers, on the other hand, are best suited for larger marigold plants or those with thick, woody stems. These long-handled pruning tools offer more leverage and power, making them ideal for heavy-duty deadheading tasks.
When choosing a tool, consider the size of your marigolds and the frequency of deadheading. Scissors are perfect for small-scale gardeners, while pinchers and loppers are better suited for larger spaces or frequent maintenance.
Post-Deadheading Care
After deadheading, make sure to give your marigolds a little TLC to keep them thriving and promoting new blooms. This includes tasks like watering, fertilizing, and pruning.
Watering After Deadheading
After deadheading marigolds, it’s essential to provide them with proper care to promote healthy growth and encourage more blooms. This includes watering your marigolds correctly. When you remove the spent flowers, you’re essentially giving your plant a new lease on life, and it needs adequate moisture to thrive.
To maintain soil moisture after deadheading, make sure to water your marigolds when the top inch of soil feels dry to the touch. Avoid overwatering, which can lead to root rot and other issues. A good rule of thumb is to water them deeply once or twice a week, depending on weather conditions. For example, if it’s been hot and dry, you may need to water every two days.
Be mindful of the soil type as well. If your marigolds are in a pot, check the moisture level by sticking your finger into the soil up to the first knuckle. This will give you an idea of whether the soil is parched or not. For garden beds, gently dig your finger into the soil to gauge its dryness.
Overwatering can be just as detrimental as underwatering, so monitor your marigolds’ watering needs closely. Aim for a balance that keeps the soil consistently moist but not waterlogged.
Fertilizing Marigolds for Maximum Growth
When it comes to fertilizing marigolds after deadheading, you want to provide them with a boost of nutrients to promote healthy growth and maximize blooms. The type of fertilizer you use is crucial – look for a balanced, water-soluble formula that contains nitrogen (N), phosphorus (P), and potassium (K). This will give your marigolds the necessary energy to produce vibrant flowers and strong foliage.
Application timing is also essential; fertilize your marigolds after deadheading, about 1-2 weeks apart. This allows the plants to absorb the nutrients quickly and direct their energy towards producing new blooms. For frequency, apply a balanced fertilizer once a month during the growing season (spring-fall). You can also consider using a high-phosphorus formula to promote even more blooming.
Remember, overfertilization is just as detrimental as underfertilization – so be sure to follow the recommended application rates on your fertilizer package. By fertilizing your marigolds correctly after deadheading, you’ll see an explosion of growth and color in no time!
Pest and Disease Control After Deadheading
Now that you’ve deadheaded your marigolds, it’s essential to keep an eye out for pests and diseases that can spread quickly through damaged flowers. We’ll walk you through how to prevent these issues.
Common Pests Affecting Marigolds
Marigolds are susceptible to various pests that can infest them after deadheading. Some common culprits include aphids, whiteflies, and spider mites. Aphids, for example, are small, soft-bodied insects that feed on plant sap, causing curled or distorted leaves. They multiply rapidly in warm temperatures and high humidity.
To control aphid infestations, inspect your marigolds regularly and spray them with a strong jet of water to dislodge the pests. Use neem oil or insecticidal soap to kill any remaining aphids. Whiteflies, on the other hand, are tiny flying insects that also feed on plant sap, causing yellowing leaves and stunted growth.
Spider mites are another pest that can infest marigolds, particularly in dry conditions. They’re tiny, web-spinning arachnids that suck plant sap, leaving behind a fine webbing. To control spider mite infestations, use a gentle spray of water to knock them off the plants and treat with insecticidal soap or neem oil.
Keep your marigolds healthy by providing optimal growing conditions and using physical barriers to prevent pests from reaching them in the first place.
Managing Diseases in Marigold Plants
Marigold plants can be susceptible to various diseases that can spread rapidly after deadheading. One common issue is powdery mildew, a fungal disease characterized by white powder on the leaves and stems. To prevent this, ensure good air circulation around your marigolds and avoid overhead watering, which can facilitate the growth of fungi. You can also use neem oil or fungicides to treat affected areas.
Another concern is leaf spot, caused by bacterial or fungal pathogens that create small lesions on the leaves. This disease can be managed by removing infected leaves immediately and practicing good hygiene when handling your plants. To prevent root rot, make sure not to overwater your marigolds, as this can lead to waterlogged soil and encourage the growth of pathogenic fungi.
In addition to these preventative measures, it’s essential to monitor your plants regularly for any signs of disease. Be on the lookout for yellowing leaves, soft stems, or blackened roots – if you notice any of these symptoms, act quickly to prevent the spread of disease.
Advanced Deadheading Techniques
To really get the most out of your marigold blooms, let’s dive into some advanced techniques for deadheading to encourage repeat flowering and maximize your display.
Propagation Through Cuttings
If you’ve fallen in love with the vibrant blooms of marigolds, why not propagate new plants through cuttings from your deadheaded flowers? This technique is a great way to multiply your favorite varieties and share them with friends. To get started, choose healthy stems from your deadheaded marigolds, making sure they have at least two sets of leaves.
Prepare the cuttings by cutting them just above a node (where a leaf meets the stem) using a pair of clean scissors or pruning shears. Remove lower leaves to prevent waterlogged soil and promote root growth. Then, dip the cut end in a rooting hormone powder or liquid to stimulate root development.
Fill small pots or a propagation tray with a well-draining rooting medium, such as perlite or vermiculite. Plant the cuttings about 1-2 inches deep, firming the medium gently around the stem. Water thoroughly and provide bright, indirect light. Roots should develop within 1-3 weeks, depending on the variety and growing conditions. Transplant the new seedlings into individual pots once they’ve developed a robust root system and have at least two sets of leaves.
Companion Planting for Marigolds
Companion planting is an excellent way to enhance marigolds’ growth and resistance to pests. By strategically placing other plants nearby, you can create a harmonious ecosystem that benefits from each other’s unique characteristics.
When it comes to companion planting for marigolds, consider the following principles: (1) pest-resistant plants repel or attract beneficial insects; (2) plants with similar growth habits complement each other in terms of sunlight and water requirements; and (3) visually appealing combinations create a stunning display.
Some recommended companion plants for marigolds include basil, which repels pests that target marigolds like nematodes; nasturtiums, whose bright flowers attract beneficial insects; and dill, which grows similarly to marigolds and provides shade in hot climates. Additionally, plant radish near marigolds, as its roots help to loosen compacted soil.
Remember, companion planting is all about creating balance within your garden. By experimenting with different combinations, you can develop a thriving ecosystem that showcases the best of each plant’s unique qualities.
Frequently Asked Questions
Can I deadhead marigolds even if they’re indoors?
Yes, you can still deadhead marigolds that are growing indoors to encourage more blooms and maintain their appearance. Simply use scissors or pinching tools to remove the spent flowers, just as you would with outdoor plants.
Will deadheading affect my marigold’s ability to produce seeds?
Deadheading will not harm your marigold’s seed production. In fact, by encouraging more blooming, you may end up with more seeds than if you had let some of the blooms go to seed naturally. However, keep in mind that removing spent flowers can reduce the plant’s overall energy expenditure.
How often should I deadhead my marigolds during peak flowering periods?
During peak flowering seasons, aim to deadhead your marigolds every 2-3 days to encourage continuous blooming and maintain their appearance. This will help you enjoy the vibrant flowers throughout the growing season.
Can I use loppers for deadheading, or should I stick with scissors or pinching tools?
While loppers can be used for deadheading, it’s often more effective and safer to use scissors or pinching tools. These allow for more precision and control when removing individual blooms without damaging surrounding foliage.
Will fertilizing my marigolds after deadheading promote even more blooming?
Fertilizing your marigolds after deadheading can indeed encourage continued blooming, but be sure to choose a balanced fertilizer that meets the plant’s needs. Over-fertilization can actually harm your plants, so follow the manufacturer’s instructions and start with a light application.