Growing your own bay laurel can be a rewarding experience, especially for cooking enthusiasts who appreciate its unique flavor. Not only is this fragrant herb easy to care for, but it’s also a great addition to any kitchen garden or Mediterranean-inspired landscape. With so many varieties to choose from, selecting the right type of bay laurel can be overwhelming – should you opt for the compact ‘Angustifolia’ or the more robust ‘Cultivated’? In this article, we’ll walk you through everything you need to know about growing and caring for bay laurel. From planting and pruning techniques to troubleshooting common issues like pests and diseases, our expert guide will cover all aspects of cultivating this versatile herb at home. Whether you’re a seasoned gardener or just starting out, read on to learn how to grow and care for your very own bay laurel with confidence.
Choosing the Right Bay Laurel Variety
When growing bay laurel, selecting the right variety is crucial for success. In this section, we’ll help you navigate the different types of bay laurel to find the best fit for your garden.
Understanding the Different Types of Bay Laurels
When it comes to growing bay laurel, you’ll find that there are several varieties to choose from. While they share many similarities, each type has its unique characteristics, making some more suitable for specific climates and uses.
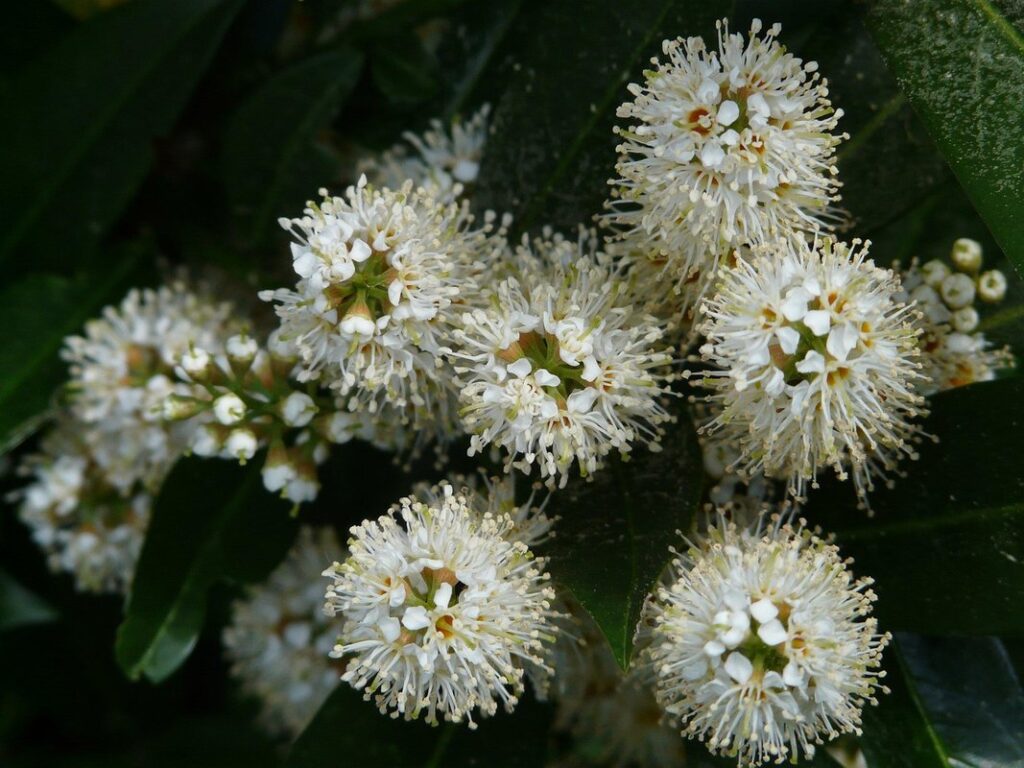
Sweet bay (Laurus nobilis) is the most common variety, native to the Mediterranean region. It’s known for its fragrant leaves and moderate growth rate. If you’re looking for a compact option, sweet bay might be the way to go.
California bay (Umbellularia californica), on the other hand, is native to the western coast of North America. Its leaves have a stronger flavor than sweet bay and can grow quite large. This variety thrives in cooler temperatures and moist environments.
Portuguese bay (Laurus nobilis ‘Portuguese’) is another popular variety, originating from Portugal. It’s known for its larger leaves and slower growth rate compared to sweet bay. If you’re looking for a more ornamental option, Portuguese bay might be the choice.
Understanding these differences will help you choose the best bay laurel variety for your specific needs and growing conditions.
Selecting the Best Variety for Your Climate
When selecting a bay laurel variety for your garden, it’s essential to consider the specific climate and region you’re growing in. This will ensure that your plant thrives and produces the best results.
First, check the hardiness zone map to determine which zones are suitable for bay laurel growth. Most varieties prefer USDA Hardiness Zones 6-9, but some can tolerate colder or warmer temperatures. Look for cultivars like ‘Camphora’ or ‘Cultivar’, which have higher cold tolerance and are suitable for zones 5-7.
Another critical factor is temperature tolerance. Bay laurel prefers mild winters and cool summers. If you live in a region with scorching summers, choose varieties like ‘Compacta’ or ‘Golden’, which have better heat tolerance. On the other hand, if your area experiences harsh winters, opt for cultivars like ‘Globosa’ or ‘Suffruticosa’, which can withstand frost and cold temperatures.
When selecting a variety, also consider the local microclimate and soil conditions in your garden. Some bay laurel varieties prefer well-draining soils, while others tolerate wetter conditions. By choosing a suitable variety for your climate, you’ll be one step closer to growing a healthy and thriving bay laurel plant.
Planting Bay Laurel from Seed or Nursery Stock
You can grow bay laurel from seed, but it’s generally easier to start with nursery stock. Let’s explore both options in more detail.
Preparing the Soil and Site
When planting bay laurel from seed or nursery stock, it’s essential to create an optimal growing environment. Bay laurels thrive in well-draining soil that’s rich in organic matter, but poor in nutrients. This may seem counterintuitive, but bay laurels are highly sensitive to root rot and overwatering. To prepare the site, choose a location with full sun to partial shade, depending on your climate. In areas with intense sunlight, provide some afternoon shade to prevent scorching.
Before planting, test the soil pH and amend it if necessary. Bay laurels prefer slightly acidic conditions between 6.0 and 7.0. Add compost or well-rotted manure to improve drainage and fertility. Remove any weeds or debris, and till the soil to a depth of about 8-10 inches. This will help loosen compacted soil and allow for better root growth.
If you’re planting in a new garden bed, consider raised beds or containers with good drainage. Bay laurels can tolerate some drought, but consistent moisture promotes healthy growth. Water your bay laurel regularly during its first year of growth to ensure establishment.
Planting from Seed vs. Nursery Stock
When deciding on whether to start your bay laurel journey from seed or nursery stock, it’s essential to consider the advantages and disadvantages of each approach. Planting from seeds can be a cost-effective option, allowing you to grow multiple plants at once. However, this method requires patience as seeds take significantly longer to mature – often 2-5 years before they reach their full potential.
In contrast, nursery stock typically yields faster growth and can produce fragrant leaves within a year or two after planting. This accelerated growth means you’ll have access to fresh bay leaves sooner, ideal for cooking enthusiasts who crave the herb’s unique flavor. Furthermore, nursery-grown plants often require less maintenance than seedlings, as they’ve already undergone the critical stages of development.
Ultimately, whether you choose seeds or nursery stock depends on your personal preferences and growing goals. If time is of the essence, opting for a mature plant from a nursery might be the better decision. However, if you’re willing to invest the time and patience required for seed germination, this approach can also yield rewarding results.
Caring for Bay Laurel: Tips and Tricks
Once you’ve successfully grown your bay laurel, it’s essential to learn how to care for it properly to ensure its continued health and vitality in your garden. We’ll share our top tips for keeping your bay laurel thriving.
Watering and Fertilization Habits
When it comes to watering and fertilizing bay laurels, consistency is key. Over-watering can be detrimental to these Mediterranean plants, so make sure to water them only when the top inch of soil feels dry to the touch. This typically translates to once or twice a week during hot summer months, depending on your climate.
For fertilization, opt for a balanced fertilizer (10-10-10) during the growing season (spring and fall). Apply it according to the manufacturer’s instructions, usually every 4-6 weeks. You can also use compost tea as an alternative, which provides beneficial microbes that promote healthy root growth. A good rule of thumb is to fertilize sparingly, as bay laurels are sensitive to over-fertilization.
Regular pruning also plays a crucial role in maintaining the health and shape of your bay laurel plant. Remove any dead or damaged branches, and trim back leggy stems to encourage bushy growth. Prune in late winter or early spring, before new growth begins, to minimize shock to the plant. By following these watering, fertilization, and pruning habits, you’ll be well on your way to growing a thriving bay laurel tree.
Managing Pests and Diseases
Managing pests and diseases is an essential aspect of caring for bay laurels. These plants are susceptible to various issues that can compromise their health and appearance. Spider mites, scale insects, and root rot are common problems you may encounter.
Spider mites are tiny, spider-like creatures that feed on the sap of bay laurel leaves. They cause yellowing or bronzing of the foliage and can be difficult to spot with the naked eye. To control them, spray your bay laurels with water daily for a week to dislodge the mites. You can also use neem oil or insecticidal soap as a natural pesticide.
Scale insects secrete sticky honeydew that attracts ants and promotes fungal growth on plants. They appear as small white or yellowish lumps on stems and leaves. Use a cotton swab dipped in rubbing alcohol to remove them gently.
Root rot is often caused by overwatering, which leads to soft, mushy roots. Check the soil moisture regularly, and ensure good drainage to prevent waterlogged conditions. Treat root rot promptly with a fungicide specifically designed for trees and shrubs.
Preventative measures like pruning infected branches and inspecting your plants frequently can help you catch problems early on. Monitor your bay laurels’ health closely, and address any issues before they become severe.
Pruning and Shaping Bay Laurel
To keep your bay laurel healthy and looking its best, learn how to prune it properly, and discover tips for shaping it into a beautiful hedge or topiary.
Why Prune Bay Laurels?
Pruning bay laurels is an essential aspect of maintaining their health and promoting optimal growth. When done correctly, pruning can have a significant impact on the plant’s overall appearance, productivity, and longevity. For one, regular pruning encourages bushy growth by stimulating the production of new shoots and leaves. This not only enhances the plant’s aesthetic appeal but also increases its yields. By removing old or damaged foliage, you’re allowing more light to reach the inner branches, which in turn promotes healthy growth.
In terms of productivity, pruning can increase the plant’s essential oil content, making it more aromatic and flavorful for culinary purposes. This is especially beneficial if you’re growing bay laurel for its leaves, as they’re a key ingredient in many traditional dishes. Moreover, regular pruning helps to maintain the plant’s shape, preventing it from becoming leggy or overgrown. By regularly pruning your bay laurel, you’ll enjoy a lush, full-looking shrub that remains healthy and productive throughout the growing season.
Pruning also encourages root growth, which is essential for a bay laurel’s overall health and resilience. As new roots develop, they help to absorb nutrients more efficiently, supporting the plant’s continued growth and development.
Techniques for Pruning Different Parts of the Plant
Pruning bay laurel involves cutting back different parts of the plant to promote healthy growth, maintain shape, and encourage new foliage. To prune leaves, simply remove any dead or damaged leaves from the plant using a pair of clean pruning shears. This will help prevent the spread of disease and keep the plant looking its best.
When it comes to pruning stems, you’ll want to cut back the tips of the branches by about one-third to encourage branching and promote a fuller shape. Cut just above a node (where a leaf meets the stem), using a sharp, clean tool. This will help direct the plant’s energy towards producing new growth rather than focusing on a single, long stem.
Root pruning is typically only necessary when transplanting or repotting bay laurel. To prune roots, gently remove any dead or damaged root material from the pot, taking care not to damage any healthy roots in the process. This will help promote healthy root growth and support the plant’s overall health.
It’s also essential to consider the time of year for pruning different parts of the plant. Pruning in late winter or early spring encourages new growth, while pruning during the summer months can be more detrimental to the plant’s health.
Propagating Bay Laurel: Tips and Tricks
Once you’ve got your bay laurel plant thriving, it’s time to learn how to propagate it – a great way to share with friends or multiply your favorite scented shrubs. We’ll walk you through the process step by step.
Stem Cuttings vs. Leaf Cuttings
When it comes to propagating bay laurel, you have two primary options: stem cuttings and leaf cuttings. While both methods can be effective, they have distinct advantages and disadvantages.
Stem cuttings typically offer a higher success rate, with a rooting time of around 2-3 weeks. This method involves taking a section of the current season’s growth from the mother plant and inserting it into a pot filled with a well-draining propagation mix. To increase your chances of success, make sure to use healthy, disease-free stem sections and keep them consistently moist.
Leaf cuttings, on the other hand, can be more challenging to root, but they do offer some advantages. For one, leaf cuttings are less invasive than stem cuttings, making them a better option for smaller bay laurel plants or those with limited foliage. However, the rooting time for leaf cuttings is typically longer, ranging from 4-6 weeks. To increase your chances of success with leaf cuttings, use healthy leaves and insert them into a propagation medium that’s specifically designed to promote root growth.
Ultimately, the choice between stem cuttings and leaf cuttings will depend on your specific situation and preferences.
Grafting and Budding Techniques
Grafting and budding are advanced techniques that can significantly enhance the growth and productivity of bay laurel plants. By joining a scion (a stem or branch) onto a rootstock (an established plant), you can tap into the robust root system, improved disease resistance, and increased yields.
To graft a bay laurel scion onto a rootstock, choose healthy stems with at least two nodes and select a compatible rootstock. For example, a young bay laurel tree or a rootstock from a related species like Laurus nobilis can be used as the base for your grafted plant. Use a sharp, sterile knife to make a precise cut on both the scion and rootstock, then join them together using grafting tape or wax.
When choosing a scion, select one with similar growth habits and resistance traits to those of the rootstock. You can also use budding techniques, where a single bud is removed from the scion and inserted into a slit in the rootstock. This method allows you to introduce desirable characteristics while still benefiting from the strong root system.
Keep in mind that grafting requires careful attention to detail and may not be suitable for all growers. However, with practice and patience, it can lead to exceptional results and help you achieve optimal yields from your bay laurel plants.
Troubleshooting Common Bay Laurel Problems
Don’t worry, we’ve all been there: bay laurel leaves turning yellow or your tree refusing to thrive. In this section, we’ll tackle common issues and find solutions to get your bay laurel back on track.
Addressing Common Issues with Leaf Drop and Yellowing Leaves
Leaf drop and yellowing leaves are two of the most common issues gardeners face when growing bay laurel. These problems can be caused by a variety of factors, including overwatering, underwatering, and poor air circulation.
To address leaf drop, it’s essential to adjust your watering schedule. Bay laurel prefers well-draining soil and should not be waterlogged. Check the moisture level in the soil before watering, and avoid getting water on the leaves or crown of the plant. If you’re overwatering, reduce the frequency of watering, and make sure the pot has good drainage holes.
Yellowing leaves can also be caused by underwatering, but it’s often due to poor air circulation. Bay laurel needs air movement around its foliage to prevent fungal diseases that cause yellowing leaves. To improve air circulation, prune nearby plants or trees, and keep a small gap between bay laurel plants if you’re growing multiple specimens.
Resolving Root Rot and Other Structural Issues
Root rot and other structural issues can be devastating for bay laurel plants. To diagnose these problems, look out for signs such as yellowing leaves, droopy branches, and a soft, mushy texture to the stems or trunk. These symptoms often indicate that the plant is struggling with root rot, which can be caused by overwatering, poor drainage, or using water that’s too cold.
If you suspect your bay laurel has root rot, take action immediately. First, stop watering and repot the plant in fresh, well-draining soil. Remove any dead or dying roots and trim back affected branches to prevent further damage. To promote healthy growth, fertilize with a balanced, water-soluble fertilizer at half the recommended strength.
Other structural issues like stem dieback can also occur due to factors such as sudden temperature fluctuations or pests like spider mites. Inspect your plant regularly for signs of infestation and treat promptly if necessary. Regular pruning and maintenance can help prevent these problems from arising in the first place.
Harvesting and Using Bay Leaves
Now that you’ve successfully grown your bay laurel, it’s time to harvest those fragrant leaves for use in cooking. We’ll walk you through how to dry, store, and use them effectively.
When to Harvest Bay Leaves for Best Flavor and Aroma
Bay leaves are at their peak flavor and aroma when they’re young and tender. As the plant matures, the leaves become more bitter and lose some of their aromatic properties. To maximize the flavor and aroma of your bay leaves, it’s essential to harvest them correctly.
Wait until the new growth appears in early spring or after a winter pruning session. This is usually around late March to early April, depending on your climate. Bay leaves that are too mature will have a more bitter taste and less aromatic properties.
To harvest bay leaves without damaging the plant, use a sharp pair of scissors or pruning shears to snip off individual stems or small bunches of leaves. Avoid pulling the leaves directly from the stem, as this can damage the delicate roots. Instead, cut just above a leaf node to encourage new growth and prevent the plant from becoming leggy. Harvest only what you need, leaving some leaves intact to allow the plant to continue growing and producing new foliage. This will ensure a steady supply of fresh bay leaves for cooking.
Preserving Bay Leaves: Drying, Freezing, and More
When you’ve harvested a bounty of bay leaves from your garden, it’s essential to preserve them properly to maintain their flavor and aroma. One of the most common methods is drying, which helps remove excess moisture and prevent spoilage. You can air-dry bay leaves by tying them in small bunches and hanging them upside down in a warm, dry location with good airflow. This method takes about 1-2 weeks, depending on the humidity level.
Alternatively, you can speed up the process using a food dehydrator or your oven on its lowest temperature setting (usually around 150°F). Simply spread the leaves out in a single layer and allow them to dry completely before storing.
Freezing is another effective method for preserving bay leaves. Simply place the leaves in an airtight container or freezer bag, label it, and store it in the freezer. Frozen bay leaves are perfect for adding to soups, stews, or braising liquids without having to worry about their potency waning over time.
When storing bay leaves, whether dried or frozen, make sure to keep them away from direct sunlight, moisture, and heat sources to maintain their flavor and aroma. You can also store them in airtight containers like glass jars or plastic bags to prevent contamination and extend shelf life.
Frequently Asked Questions
Can I grow bay laurel indoors year-round, even in cooler climates?
Yes, you can grow bay laurel indoors, but it requires careful consideration of lighting and temperature conditions. Provide your plant with a bright, sunny spot (at least 4-6 hours direct sunlight) and maintain temperatures between 65°F to 75°F (18°C to 24°C). Indoor growing may limit the plant’s overall size, but it will still thrive and provide fresh bay leaves.
How often should I prune my bay laurel to promote healthy growth?
Prune your bay laurel regularly to maintain its shape, encourage new growth, and prevent overgrowth. Prune in late winter or early spring when the plant is dormant, removing any dead or damaged branches. This will help control the size of your plant and promote a bushy, full appearance.
What are some common pests that can infest bay laurel plants?
Bay laurel plants are susceptible to various pests, including spider mites, mealybugs, and scale insects. Regularly inspect your plant for signs of these pests, such as white powdery patches or sticky substance on the leaves. Use neem oil or insecticidal soap to control infestations, and ensure good air circulation around your plant to prevent re-infestation.
Can I propagate bay laurel using stem cuttings, or is grafting a better option?
Both methods are viable for propagating bay laurel, but they differ in success rates and ease of implementation. Stem cuttings can be successful with a high rate of success (around 80-90%), while grafting involves more expertise and specialized equipment. Start by trying stem cuttings, as they require minimal tools and are relatively easy to execute.
How do I troubleshoot common issues like leaf drop and yellowing leaves in my bay laurel?
If your bay laurel is experiencing leaf drop or yellowing leaves, it may be due to overwatering, underwatering, or nutrient deficiencies. Adjust your watering schedule to ensure the soil isn’t too wet or dry. Also, consider fertilizing your plant with a balanced fertilizer (10-10-10 NPK) to provide essential nutrients for healthy growth. Monitor your plant’s response and adjust your care routine accordingly.