Growing your own herbs indoors can be a game-changer for home cooks, and one of the easiest options is growing chives. Not only do they add a burst of fresh flavor to everything from soups to salads, but they’re also incredibly easy to care for. However, knowing where to start can be overwhelming, especially if you’re new to indoor gardening.
If you’re looking to enjoy fresh chives year-round, our comprehensive guide is here to help. We’ll walk you through the process of selecting the right variety of chives for your space, preparing their ideal soil conditions, and providing tips on how to keep them thriving indoors. With these expert advice and care tips, you’ll be harvesting fragrant, healthy chives in no time – perfect for adding a pop of flavor to your favorite recipes.
Choosing the Right Variety
When it comes to growing chives indoors, selecting the right variety is crucial for success. Not all chive varieties thrive in indoor conditions, so let’s explore your options together.
Understanding Chive Types
When it comes to growing chives indoors, you’ll find that there are several varieties to choose from. Each type has its unique characteristics, which can impact the flavor, appearance, and hardiness of your plants. Understanding these differences will help you decide which variety is best suited for indoor growing.
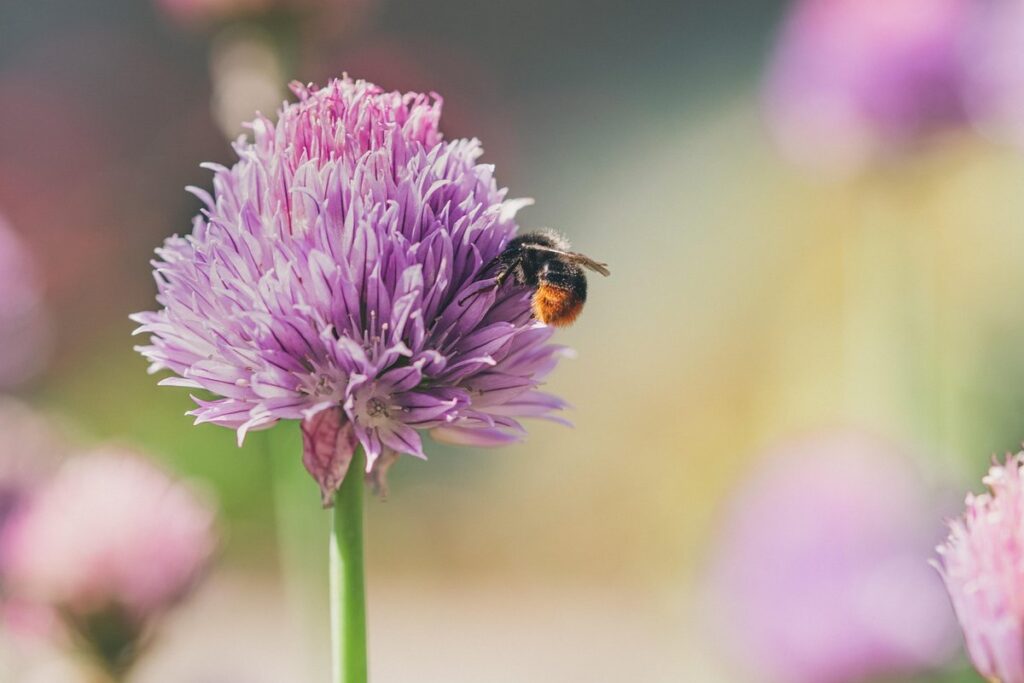
Common chives (Allium schoenoprasum) are the most widely available and versatile variety. They have a mild onion flavor and a delicate, grass-like appearance. Garlic chives (Allium tuberosum), on the other hand, have a stronger garlic flavor and a slightly more robust texture. Onion chives (Allium cepa) have a sweeter, more onion-forward flavor.
If you’re new to growing chives indoors, common chives are an excellent choice. They require minimal maintenance and can thrive in indoor conditions with proper care. Garlic chives are also relatively easy to grow, but they may require more frequent pruning to control their spread. Onion chives are a bit more challenging to grow indoors due to their high water requirements.
Selecting Healthy Chives from a Nursery or Store
When selecting healthy chives from a nursery or store for indoor growing, it’s essential to examine them carefully. First, inspect the foliage: look for vibrant green leaves that are neither too pale nor wilted. Avoid chives with signs of pests or diseases such as yellowing, black spots, or actual insects.
Next, check the roots. Freshly potted chives should have a decent root system, but it’s not necessary to see extensive growth since they’ll develop more indoors. Be wary of bare-rooted plants or those with exposed roots as this can indicate poor handling or storage.
The overall appearance is also crucial: choose chives with a sturdy stem and an even distribution of leaves around the base. Avoid any plants that appear leggy, sparse, or top-heavy, as these may struggle to adapt to indoor conditions. Opt for fresh, healthy-looking chives, and you’ll be more likely to have success growing them indoors.
Preparing the Soil and Container
To grow chives indoors, you’ll first need to prepare a suitable environment by selecting the right container and soil. This is where it all starts!
Understanding Indoor Growing Conditions
When growing chives indoors, it’s essential to understand the ideal conditions that will promote healthy growth and flavorful leaves. Chives require bright, indirect light to thrive, making a south-facing window an ideal location for cultivation. However, if direct sunlight is not available, you can also use grow lights with a balanced spectrum to provide the necessary illumination.
The ideal temperature range for growing chives indoors is between 65°F (18°C) and 75°F (24°C). Avoid placing your chive plants near heating vents or radiators, as this can cause temperatures to fluctuate and negatively impact growth. Maintaining a consistent humidity level between 40% and 60% will also help prevent fungal diseases that thrive in humid environments.
To replicate these conditions, consider using a propagation tray with built-in grow lights or a self-watering planter to maintain optimal moisture levels. This will not only promote healthy chive growth but also ensure your plants receive the necessary light and temperature requirements for optimal flavor development.
Choosing the Right Potting Mix
When it comes to growing chives indoors, one of the most crucial steps is choosing the right potting mix. Indoor plants like chives have specific needs when it comes to soil drainage and nutrient retention. A well-draining potting mix specifically designed for indoor plants will ensure that your chives receive the perfect balance of moisture and nutrients.
Opting for a general-purpose potting mix can lead to waterlogged soil, which is detrimental to chive growth. On the other hand, using a high-quality potting mix formulated for indoor plants like chives will help prevent root rot and promote healthy root development.
Some key characteristics to look for in an indoor potting mix include good water-holding capacity, balanced pH levels, and the absence of fertilizers or additives that may burn your plant’s roots. Consider using a mix that contains ingredients such as perlite, vermiculite, or coconut coir, which provide excellent drainage and aeration. By choosing the right potting mix for your chives, you’ll be setting them up for success in their indoor environment.
Planting Chives Indoors
To grow chives indoors, you’ll first need to know how to plant them successfully, and that’s exactly what we’re going to cover next. Let’s dive into planting chives indoors.
Preparing the Container Before Planting
Before you start planting chives indoors, it’s essential to prepare the container properly. This will give your chive plants a healthy start and ensure they thrive throughout their growth cycle.
To begin, sterilize the container by washing it with soap and warm water. Rinse thoroughly and let it air dry completely to prevent any residue from affecting the soil or plant roots. If you’re using a new pot, check if it’s been pre-treated with fertilizers or chemicals that might harm your plants. Some containers may also have a non-stick coating, which can affect seed germination.
Next, fill the container about 1/3 to 1/2 with high-quality potting mix. You can also add a layer of fertilizer or soil conditioner specifically designed for indoor herb gardens. This will provide essential nutrients and help your chives grow strong and healthy. Some popular options include slow-release fertilizers or natural products like worm castings. Follow the manufacturer’s instructions to ensure you’re using the right amount, as over-fertilization can be detrimental to your plants.
By following these simple steps, you’ll create a perfect environment for your chive seeds to sprout and grow into robust, flavorful herbs. Remember to handle the soil gently when transplanting, and avoid compacting it too much, which can restrict root growth.
Transplanting Chives from a Nursery or Store
When transplanting chives from a nursery or store into their indoor containers, it’s essential to handle the roots and foliage with care. Start by gently removing the plant from its pot, taking note of the root system. Chives have a delicate fibrous root system that can be easily damaged, so avoid tugging on the roots excessively.
Trim back any overgrown or damaged leaves to encourage new growth and prevent overcrowding in the container. This will also help prevent moisture from accumulating around the base of the plant, which can lead to root rot.
Prepare the indoor container with a well-draining potting mix, and gently place the chive plant into its new home. Water the soil thoroughly after transplanting to settle the roots and provide adequate moisture for establishment. It’s crucial not to overwater, as this can cause more harm than good. Monitor your transplanted chives closely during the initial settling period to ensure they receive sufficient light and maintain optimal moisture levels.
Caring for Indoor Chives
To keep your indoor chive plants thriving, it’s essential to understand their specific care requirements, including watering and fertilization tips. Regular maintenance will ensure a healthy and continuous harvest throughout the year.
Watering and Humidity Considerations
When it comes to growing chives indoors, proper watering and humidity levels are crucial for healthy growth. Over-watering is a common mistake that can lead to root rot and kill the plant, while under-watering can cause stress and slow down growth.
To avoid these issues, check the soil moisture by sticking your finger into the soil up to the first knuckle. If it feels dry, it’s time to water. Water your chives thoroughly until you see water coming out of the drainage holes in the pot. However, don’t overdo it – if the soil is already moist, wait a few more days before watering again.
Maintaining a humid environment can also promote healthy growth. You can place the pot on a tray filled with water and pebbles to increase the surrounding humidity without over-saturating the soil. Aim for a humidity level of 40-50% – any higher or lower, and your chives might start to show signs of stress, such as yellowing leaves or slow growth.
Watch out for these warning signs: if your chives’ leaves turn yellow or develop brown tips, it could be a sign that the soil is too dry. Conversely, if they’re constantly soggy and developing root rot, you may be over-watering.
Fertilizing Indoor Chives
Indoor chives require regular fertilization to promote healthy growth and maintain their signature flavor. Without adequate nutrients, these plants may become leggy, produce fewer leaves, and eventually lose their potency.
When it comes to choosing a fertilizer for indoor chives, you have two main options: organic and synthetic. Organic fertilizers are made from natural ingredients like fish emulsion or bone meal, which release nutrients slowly as they break down in the soil. These options are ideal for indoor gardening because they’re environmentally friendly and less likely to burn your plant’s roots.
Synthetic fertilizers, on the other hand, provide a quick dose of nutrients but can be harsh on plants if overused. Look for products specifically labeled as “balanced” or “complete,” which contain a mix of nitrogen, phosphorus, and potassium (NPK) that mirrors the natural nutrient balance found in soil.
Apply organic fertilizers at half the recommended strength to avoid burning your chives’ roots. For synthetic options, follow the instructions carefully to avoid overfertilizing. A balanced diet of nutrients will keep your indoor chives thriving and ensure a continuous supply of fresh leaves for your cooking needs.
Common Issues and Pests
As you nurture your indoor chive plants, it’s not uncommon for them to encounter some common issues and pests that can impact their health and growth. Let’s tackle these problems head-on together.
Dealing with Overgrowth and Pruning
As your chive plants continue to thrive indoors, you may eventually face the challenge of overgrowth. Chives are a hardy perennial herb that can quickly become unruly if not regularly maintained. To keep them under control and encourage healthy growth, it’s essential to prune and harvest them regularly.
When pruning chives, start by removing any dead or damaged leaves to prevent the spread of disease. Use a pair of clean scissors or pinch off the affected areas with your fingers. Next, cut back the stems to about one-third of their height, using sharp, sterile tools to avoid spreading bacteria. This will help promote new growth and encourage bushy development.
Regular harvesting also plays a crucial role in maintaining chive plants’ shape and size. Pinch or cut off individual leaves as needed, making sure not to remove more than one-third of the foliage at any given time. This will prevent stress on the plant and ensure it continues to produce new growth throughout its lifecycle.
Managing Common Pests Like Spider Mites and Mealybugs
When growing chives indoors, it’s not uncommon to encounter common pests like spider mites and mealybugs. These tiny critters can quickly take over your plant if left unchecked, causing stress and potentially even killing the leaves.
Spider mites are particularly problematic because they’re so small that you might not even notice them at first. They’re usually visible as tiny dots on the underside of leaves or on stems. To manage a spider mite infestation, start by thoroughly watering your chives to help dislodge the pests. Then, use a gentle soap solution (1 tablespoon of mild dish soap per 1 quart of water) to spray the leaves and stems. This will help suffocate the mites.
Mealybugs are slightly larger but just as pesky. They appear as white, cottony patches on the stem or leaves. If you notice mealybugs, use neem oil (a natural pesticide that can be found at most gardening stores) to repel them. Mix 2-3 teaspoons of neem oil with water and spray it directly onto the affected areas.
Regular inspections are key in preventing these pests from taking over your indoor chives. Set aside time each week to check for signs of infestation, and take action as soon as you spot any trouble. By staying vigilant and using the right techniques, you can keep these common pests at bay and enjoy a thriving, pest-free indoor chive plant.
Harvesting and Using Indoor Chives
Now that you’ve successfully grown your indoor chive plants, it’s time to reap the rewards by harvesting their fresh leaves for use in cooking. We’ll show you how to harvest and utilize these fragrant herbs effectively.
Understanding When to Harvest Chives
When you’ve got chives growing indoors, it’s essential to harvest them at the right time for optimal flavor and texture. Chives are a hardy perennial herb that can be harvested regularly throughout the growing season.
For regular harvesting, simply snip off individual stems or leaves with scissors as needed. This will encourage new growth and prevent the plant from flowering. Try to harvest chives in the morning after they’ve had time to rehydrate overnight – this is when their flavor and aroma are at their peak.
To avoid weakening your plants, only remove what you need, leaving about an inch of stem intact. Regular trimming back also helps maintain the plant’s shape and encourages bushy growth. As a general rule, trim off about one-third of the plant every few weeks to keep it healthy and promote new foliage.
This regular maintenance will ensure your indoor chives remain vibrant and productive throughout the growing season.
Incorporating Chives into Recipes
Now that you’ve successfully harvested your indoor chives, it’s time to unleash their flavor and aroma in a variety of dishes. Chives are incredibly versatile and add a unique twist to many recipes. Their onion-like flavor is milder than scallions but stronger than parsley, making them an excellent addition to both savory and sweet creations.
When using fresh chives in cooking, consider the following key points:
* Add them towards the end of cooking time to preserve their delicate flavor.
* Use them as a garnish or sprinkle on top of dishes for added visual appeal.
* Combine with other herbs like parsley, dill, or tarragon to create unique flavor profiles.
Some popular ways to incorporate chives into recipes include:
* Adding fresh chives to dips and spreads, such as hummus or salsas.
* Mixing them into salads, like caprese or spinach salads.
* Using them in sauces and marinades for grilled meats or vegetables.
Frequently Asked Questions
Can I grow chives indoors year-round without any issues?
Chives are a hardy perennial herb, but even they can be susceptible to pests and diseases if not properly cared for. To minimize the risk of common indoor pests like spider mites and mealybugs, ensure you’re providing your chives with adequate air circulation and maintaining a balanced watering schedule.
How often should I harvest my indoor chives to keep them healthy?
Over-harvesting can weaken your plants, making them more vulnerable to disease. Harvest your chives when the leaves are about 1/3 of their full size. This will encourage bushy growth and prevent overgrowth. You can also use scissors to trim off flower buds as they form, directing the plant’s energy towards leaf production.
What if I notice my indoor chives are getting too tall or leggy?
Yes, this is a common issue when growing chives indoors! To address it, simply prune your chives back to about 1 inch from the soil surface. This will encourage new growth and help maintain their desired shape. You can also consider pruning them regularly to keep them bushy and prevent overgrowth.
Can I grow chives in a small space like a window box or a hanging basket?
Yes, you can definitely grow chives in a compact space like a window box or a hanging basket! Just make sure the container has good drainage holes and is at least 6-8 inches deep to accommodate the plant’s roots. Use a well-draining potting mix and follow the same care instructions as for larger containers.
How do I propagate my indoor chives if I want to share them with friends or expand my collection?
Yes, you can easily propagate your indoor chives by dividing the clumps after they’ve become crowded. Simply separate the individual plants, making sure each section has some roots attached. Plant them in new pots filled with a fresh potting mix, and water well.