Growing your own celery can be a game-changer for home cooks and gardeners alike. Not only is celery a versatile ingredient in many recipes, but it’s also surprisingly easy to cultivate at home with the right tips and tricks. However, celery can be finicky when it comes to climate and soil conditions, which is why many of us struggle to grow it successfully.
In this comprehensive guide, we’ll take you through everything you need to know about growing perfect stalks of celery every time. We’ll cover the ideal climate and soil requirements for celery, as well as expert tips on sowing, caring for, and harvesting your crop. Whether you’re a seasoned gardener or just starting out, our step-by-step advice will help you overcome common obstacles and achieve a bountiful harvest of crunchy, delicious celery.
Choosing the Right Variety
When it comes to growing celery, selecting the right variety is crucial for success. This section will walk you through the factors to consider when choosing a celery variety that suits your needs and climate.
Selecting a Suitable Climate and Soil Type
When selecting a suitable climate and soil type for growing celery, it’s essential to consider the specific requirements of this crop. Celery thrives in temperate climates with moderate temperatures between 60°F (15°C) and 70°F (21°C). Avoid areas with extreme temperature fluctuations, as this can cause stress to the plants.
In terms of sunlight, celery requires partial shade to full sun, depending on the variety. Most varieties need at least four hours of direct sunlight per day, but some compact or dwarf varieties can tolerate more shade. When it comes to soil pH, celery prefers a slightly acidic to neutral environment with a pH between 6.0 and 7.0.
In addition to temperature and sun requirements, consider the soil type itself. Celery grows best in well-draining, fertile soils rich in organic matter such as compost or manure. Avoid clay-heavy soils that can cause waterlogging and root rot. If you’re unsure about your soil conditions, perform a soil test to determine its pH level and nutrient content. Based on the results, amend the soil with necessary fertilizers or conditioners to create an optimal growing environment for your celery crop.
Understanding Different Types of Celery
Celery is one of those vegetables that’s often overlooked until you realize just how versatile it is. But with so many types to choose from, deciding which variety to grow can be a daunting task. Let’s break down the main categories: stalky, leafy, and miniature.
Stalky celery varieties are what most people think of when they picture a bunch of fresh celery at the grocery store. They’re great for snacking, salads, and using in soups or stews. These varieties tend to have larger stalks that are easier to chop up. If you’re new to growing celery, this is probably a good place to start.
Leafy celery, on the other hand, is perfect for those who want a more delicate flavor. It’s often used in Asian-style dishes and can be grown as a microgreen or full-sized plant. Leafy varieties tend to have smaller stalks and a milder taste than their stalky counterparts.
Miniature celery is another popular variety that’s gaining traction among gardeners. These compact plants are perfect for small spaces, containers, or even indoor growing. They’re often used in salads or as a garnish.
Preparing the Soil
Before planting celery, it’s crucial to prepare the soil by loosening and aerating it, as well as testing its pH level to ensure it’s suitable for your crop. This step is often overlooked but makes a huge difference in growth.
Testing and Amending the Soil
Testing and amending the soil is an essential step in growing healthy celery. To determine if your soil pH levels are suitable for celery, you’ll need to test its acidity or alkalinity. Most home gardeners can use a DIY kit to measure their soil’s pH level. These kits typically include a small strip that changes color depending on the pH level of the soil sample.
If your soil test reveals a pH level that’s not within the optimal range for celery (between 6.0 and 7.0), you’ll need to amend it. Adding organic matter like compost or well-rotted manure can help adjust the pH levels and improve overall soil fertility. You can also use dolomitic limestone to raise the pH, but be cautious not to overdo it, as this can lead to nutrient deficiencies.
Compost is an excellent addition to your soil because it’s rich in nutrients and improves its structure. To create a compost pile, mix equal parts “green” materials (like food scraps or grass clippings) with “brown” materials (like dry leaves or shredded newspaper). As the mixture breaks down, it will become a nutrient-rich additive for your celery plants.
Creating a Suitable Bed or Container
When preparing a bed or container for celery growth, it’s essential to prioritize drainage and aeration. Celery roots are sensitive to waterlogged soil, so make sure the area drains well. If planting in a container, choose one with good drainage holes to prevent water from accumulating. If your container lacks drainage, consider adding a layer of small rocks or broken pottery at the bottom to facilitate airflow.
Aim for about 6-8 inches between each celery stalk when spacing them out, as this will give the plants room to grow and receive adequate air circulation. Avoid overcrowding, which can lead to reduced growth rates and increased susceptibility to disease.
For in-ground beds, loosen the soil to a depth of 12-18 inches to allow for healthy root development. If your native soil is heavy clay or sandy, consider mixing in organic matter like compost to improve its structure and fertility. This will help support celery’s extensive taproot system and promote strong growth.
Sowing Celery Seeds
To grow celery from seed, you’ll need to sow them indoors 8-10 weeks before the last frost date in your area. This will give them a head start on their outdoor life.
Preparing Seedlings for Transplanting
Sowing celery seeds indoors 8-10 weeks before the last frost date is an excellent way to get a head start on growing this crop. To do this successfully, you’ll want to make sure you’re providing your seedlings with the right conditions.
Start by sowing your celery seeds about 1/4 inch deep in a well-draining seed starting mix. The ideal soil temperature for germination is around 70-75°F (21-24°C). You can speed up the process by using a warm location or a heating mat, but be careful not to overheat the soil.
Celery seedlings prefer bright, indirect light, so place them in a sunny south-facing window or under grow lights. Aim for at least 12 hours of light per day. Keep the soil consistently moist during this period, but avoid overwatering, which can lead to weak and spindly growth.
By following these guidelines, you’ll be well on your way to growing healthy seedlings that are ready to transplant into their final location.
Transplanting Seedlings into Larger Containers
When the seedlings have 2-3 sets of true leaves and are about 1-2 inches tall, it’s time to transplant them into larger containers or directly into the garden. This process is crucial for the continued growth and health of your celery plants.
To begin, gently remove the seedlings from their current pots or cells by sliding a fork under the soil and lifting them out. Take care not to damage the roots during this process. Next, trim off any weak or damaged leaves with scissors to encourage healthy growth.
If transplanting into larger containers, choose a well-draining potting mix and a container that is at least 6-8 inches deep. Plant the seedling in the center of the new container, burying it up to the first set of true leaves. If transplanting directly into the garden, select a spot with full sun and well-drained soil. Space the seedlings about 2-3 inches apart to allow for proper growth.
Make sure not to overcrowd your plants, as this can lead to reduced growth and increased susceptibility to disease. Keep the soil consistently moist but not waterlogged, as this can cause root rot.
Care and Maintenance
To keep your celery crop healthy and thriving, it’s essential to perform regular care and maintenance tasks that ensure optimal growing conditions. This includes watering, fertilizing, and pruning techniques you need to know.
Watering and Mulching Techniques
When it comes to watering and mulching celery, consistency is key. Celery needs about 1-2 inches of water per week, either from rain or irrigation. To achieve this, water your celery plants deeply once or twice a week, depending on weather conditions. Aim for the base of the stem rather than the leaves, as excessive moisture can lead to rot.
Mulching is an essential technique to retain moisture and suppress weeds around your celery crop. Organic mulch options like straw, bark chips, or grass clippings work well. Apply a 2-3 inch layer around the plants, keeping it a few inches away from the base of the stems. As the mulch breaks down, it will release nutrients into the soil.
Remember to keep the mulch depth consistent and replenish as needed to maintain its effectiveness. You can also use plastic or landscape fabric for added weed suppression, but make sure to perforate them to allow for air and water circulation around the roots.
Providing Support and Pruning
As your celery plant grows, it’s essential to provide support for its tall stalks. Without proper support, the stalks can become leggy and may even topple over. To prevent this, use tomato cages, trellises, or stakes to hold up the stems. You can also try using a celery clip, which is specifically designed to support individual stalks.
When it comes to pruning, timing is everything. For optimal growth, prune your celery plant when the stalks are around 6-8 inches tall. This will encourage branching and promote a fuller crop. To prune, simply cut off any weak or spindly stems at the base of the plant, leaving about an inch of stem intact.
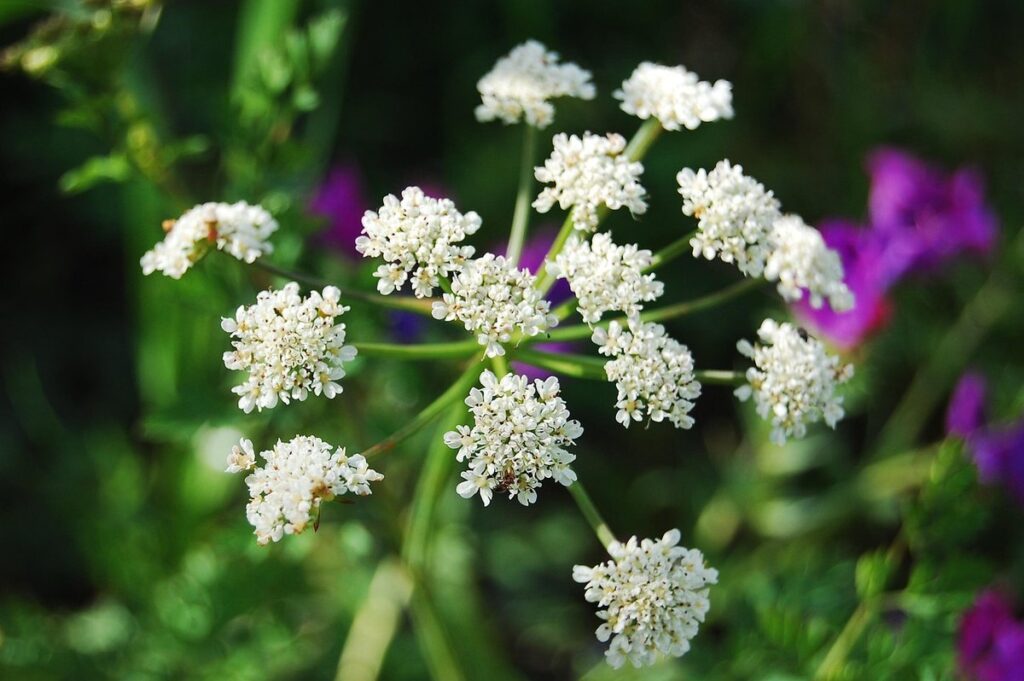
To prevent legginess, also remove any seed heads that form on the plant. These can drain energy from the rest of the plant and encourage it to focus its resources on producing seeds rather than new growth. By providing support and pruning regularly, you’ll be able to enjoy a healthy, robust celery crop with minimal waste.
Troubleshooting Common Issues
Even seasoned gardeners can encounter problems when growing celery, which is why we’ve put together this troubleshooting guide to help you overcome common issues. We’ll cover solutions for pests, diseases, and more.
Identifying and Addressing Pests and Diseases
When growing celery, it’s not uncommon for gardeners to encounter pests and diseases that can significantly impact crop yield and quality. To address these issues effectively, it’s essential to be aware of the most common culprits and take preventative measures.
Some common pests that affect celery include aphids, slugs, and caterpillars. Aphids are small, sap-sucking insects that can transmit plant viruses and cause curled or distorted leaves. Slugs, on the other hand, can chew through stalks and leaves, causing significant damage. Caterpillars, particularly the diamondback moth larvae, feed on celery leaves and can leave behind holes.
Preventing pest infestations involves maintaining a clean and healthy growing environment. This includes removing weeds that can harbor pests, ensuring good air circulation around plants, and using row covers to prevent insect migration. If an infestation occurs, treat affected areas with neem oil or insecticidal soap.
Diseases like powdery mildew, leaf blight, and root rot are also prevalent in celery crops. These conditions often result from overwatering, poor air circulation, and high humidity. To prevent disease outbreaks, avoid watering at night, ensure plants receive adequate sunlight, and practice crop rotation to reduce soil-borne pathogens.
Common signs of these diseases include yellowing leaves, white powdery patches, or soft, mushy stalks. If you notice any of these symptoms, treat affected areas with fungicides like copper-based products or sulfur-based solutions.
Managing Nutrient Deficiencies
Celery is a nutrient-hungry crop that requires a balanced diet of essential nutrients to thrive. However, nutrient deficiencies can creep in if the soil isn’t adequately supplemented. One of the most common nutrient deficiencies in celery plants is potassium (K) deficiency.
This condition often presents itself as yellowing leaves and stunted growth. To address this issue, you can apply a high-phosphorus fertilizer during the growing season. A well-balanced 10-20-10 NPK fertilizer will also help replenish lost nutrients. It’s essential to maintain soil pH between 6.0 and 7.0 for optimal nutrient uptake.
If your celery plants are suffering from nitrogen (N) deficiency, you may notice a yellowing of the older leaves with green veins. In this case, side-dress with an ammonium sulfate-based fertilizer or compost tea to boost N levels. Regular soil testing will also help identify potential nutrient deficiencies before they become severe issues.
It’s worth noting that using too much nitrogen can lead to excessive leaf growth at the expense of the plant’s overall health. Aim for a balanced approach, and don’t hesitate to seek advice from local gardening experts or extension services if you’re unsure about fertilizing your celery crop.
Harvesting and Storing
Now that you’ve successfully grown your celery, it’s time to think about harvesting and storing your crop to ensure it stays fresh for as long as possible. This section will guide you through both processes.
Timing and Methods for Celery Harvest
When it’s time to harvest your celery crop, timing is everything. Typically, celery stalks are ready for harvesting between 60 to 90 days after planting, depending on the variety and growing conditions. To ensure optimal flavor and texture, wait until the stalks reach a diameter of about 1 inch.
To harvest, use a sharp knife or garden snips to cut the stems at the base, leaving about an inch of stem attached to the plant. This will help prevent damage to the remaining leaves and encourage new growth. Alternatively, you can snap the stalks off by hand, starting at the base and working your way up.
Harvesting celery in the cooler morning hours helps reduce moisture loss and prevents the development of off-flavors. Be sure to use a clean cutting tool or snips to prevent spreading diseases from one plant to another. Regular harvesting also promotes continuous growth, making it essential to check on your crop regularly and pick stalks as they reach maturity.
Tips for Long-Term Storage and Preservation
When you’re ready to enjoy your homegrown celery for months to come, proper storage and preservation techniques are essential. Here’s what you can do:
First, make sure the harvested stalks have dry leaves attached; this will help prevent moisture from accumulating and causing spoilage. Remove any damaged or wilted stalks, as they’ll only shorten the shelf life of your stored celery.
Store the celery in a sealed container or plastic bag to maintain humidity levels. Keep it refrigerated at a consistent temperature below 40°F (4°C). You can also wrap individual stalks in paper towels and store them in an airtight container for up to two weeks.
If you want to preserve your celery for longer, consider blanching and freezing or making pickled celery. Blanch the stalks in boiling water for three minutes, then chill them in an ice bath before freezing them in airtight containers or freezer bags. This method can help retain the vegetable’s nutrients and texture for up to 8-10 months.
Frequently Asked Questions
Can I grow celery indoors if I live in a small space or have limited outdoor area?
Yes, you can grow celery indoors using containers or hydroponic systems, which can be ideal for small spaces. Ensure good air circulation and provide sufficient light, either through natural sunlight or LED grow lights. Keep the temperature between 60°F (15°C) and 70°F (21°C), and maintain high humidity to promote healthy growth.
How do I prevent celery from becoming soggy or developing root rot in wet conditions?
To prevent sogginess and root rot, ensure good drainage by using well-draining pots or containers with holes. Avoid overwatering, and instead, water your celery plants when the top inch of soil feels dry to the touch. Mulch around the base of the plants can also help retain moisture without causing waterlogged conditions.
Can I use regular potting mix for growing celery, or do I need a specific type?
While you can use regular potting mix, it’s recommended to use a mix specifically designed for root vegetables like celery. These mixes typically contain ingredients that promote healthy root growth and prevent nutrient deficiencies. If using regular potting mix, consider adding organic matter like compost to improve soil structure and fertility.
How do I know when my celery is ready for harvest?
Check the stalks regularly for readiness by gently tugging on them. Harvest your celery when the stalks are firm but still tender, usually within 120-150 days after sowing. Cut off the entire plant at the base of the stem using a sharp knife or pruning shears to encourage new growth and prevent regrowth from occurring.
Can I save celery seeds for future harvests, or do they have a limited shelf life?
Celery seeds can be saved for future harvests but may lose viability over time. To maximize seed longevity, store them in an airtight container in the refrigerator at 40°F (4°C) to 50°F (10°C). For best results, use fresh seeds each season or consider purchasing new packets of high-quality seeds to ensure optimal germination rates.