Growing your own arugula at home can be a game-changer for salad lovers and foodies alike. Not only does it add a peppery kick to any dish, but it’s also surprisingly easy to cultivate with the right guidance. However, many of us struggle to get this delicious green growing in our gardens or indoor spaces due to its specific climate preferences.
In this article, we’ll walk you through everything you need to know about growing arugula, from preparing the perfect soil to harvesting techniques that ensure a continuous supply of fresh leaves. We’ll explore how to sow seeds indoors and outdoors, as well as provide tips on what makes arugula thrive in different climates and environments. By the end of this guide, you’ll be equipped with the knowledge to grow mouth-watering arugula right at home.
Choosing the Right Location and Climate
When it comes to growing arugula, selecting a suitable location and climate is crucial for optimal results. Let’s explore how to choose the perfect spot for your arugula crop.
Understanding Arugula’s Climate Preferences
Arugula loves to grow in temperate climates with moderate temperatures between 60°F to 80°F (15°C to 27°C). While it can tolerate some heat and cold, this temperature range is ideal for optimal growth. If you’re planning to grow arugula outdoors, look for a spot that receives partial shade, especially during the hottest part of the day.
In terms of temperature extremes, arugula can’t handle prolonged exposure to temperatures below 40°F (4°C) or above 90°F (32°C). Prolonged frost can damage the plant, while extreme heat can cause it to bolt, leading to a bitter flavor and a less desirable texture. If you’re growing in an area with harsh winters or scorching summers, consider using row covers or bringing your arugula indoors during these periods.
When selecting a location for your arugula crop, also keep in mind the soil temperature. Arugula prefers cooler soil temperatures around 55°F to 65°F (13°C to 18°C) when it’s first planted. You can check the soil temperature by inserting a thermometer into the soil or observing how quickly the seeds germinate – they should sprout within 7-10 days in optimal conditions.
Selecting a Sunny Spot
When selecting a spot to grow arugula, it’s essential to prioritize sunlight. Arugula needs at least 4-6 hours of direct sunlight per day to thrive. When choosing a location, consider the sun pattern in your garden or yard and select an area that receives consistent sunlight throughout the day.
Be mindful of extreme weather conditions, such as intense heatwaves or sudden downpours, which can damage your arugula crop. A location with some protection from harsh winds is also beneficial. Look for a spot near a structure like a fence, wall, or trellis to provide shelter and support for your plants.
Consider the microclimate in your garden, as some areas may receive more sunlight due to surrounding obstacles or topography. Observe the sun’s movement throughout the day to identify the optimal location for your arugula crop. By selecting a spot with sufficient sunlight and protection from extreme weather conditions, you’ll be well on your way to growing healthy and delicious arugula.
Preparing the Soil
Before you start sowing arugula seeds, it’s essential to prepare the soil to give your crop a strong foundation for healthy growth and development. This involves loosening the top 6-8 inches of soil.
Testing Your Soil pH Level
Testing your soil’s pH level is crucial for optimal arugula growth. Arugula prefers a slightly acidic to neutral soil pH, ranging between 6.0 and 7.0. If the pH level is too high or too low, it can lead to nutrient deficiencies and poor growth.
To test your soil’s pH level, you’ll need a soil testing kit available at most gardening stores or online. Follow the instructions provided with the kit to collect a soil sample from your garden bed. You can also send a sample to a laboratory for more detailed analysis. Once you have the results, compare them to the ideal range.
If your soil’s pH level is outside the optimal range, don’t worry – it’s easy to adjust. To lower the pH, add elemental sulfur or aluminum sulfate according to the product’s instructions. To raise the pH, mix in lime or dolomitic limestone. Remember to follow the recommended application rates to avoid over- or under-correction. A simple pH test can make a significant difference in your arugula crop’s health and yield.
Adding Organic Matter and Nutrients
When it comes to growing arugula, one of the most crucial steps is preparing the soil. This includes adding organic matter and nutrients that will give your crop a strong foundation for growth.
Incorporating compost or well-rotted manure into the soil has numerous benefits. For instance, compost adds beneficial microbes that help break down nutrients, making them readily available to arugula’s roots. It also improves the soil structure, allowing it to retain moisture and reduce erosion. Compost can be made from kitchen scraps, leaves, or grass clippings, making it a sustainable option.
Arugula requires essential nutrients like nitrogen (N), phosphorus (P), and potassium (K) for healthy growth. Nitrogen promotes leaf development, while phosphorus aids in root growth and flowering. Potassium helps with overall plant health and resistance to disease. You can add these nutrients through compost, fertilizers, or cover crops.
To give your arugula a nutrient boost, mix 2-3 inches of compost into the top 6-8 inches of soil before planting. Alternatively, side-dress with a balanced fertilizer (10-10-10 N-P-K) once a month. By adding organic matter and essential nutrients to the soil, you’ll be creating an ideal environment for your arugula to thrive.
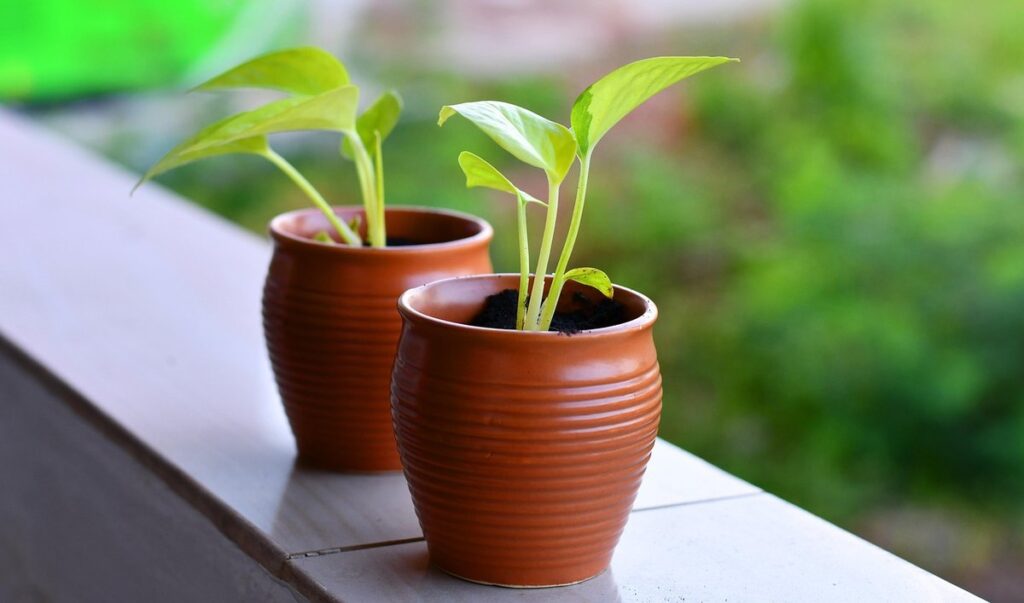
Sowing Arugula Seeds
To grow arugula successfully, it all starts with sowing its seeds at the right time and in the right conditions. In this next step, we’ll walk you through the process of sowing arugula seeds.
Preparing the Seedbed
To grow healthy and vigorous arugula plants, it’s essential to prepare a smooth seedbed with loose, well-draining soil. This may seem like a straightforward task, but it can make all the difference in the world when it comes to germination rates and overall plant growth.
When creating your seedbed, start by loosening the top 2-3 inches of soil using a garden fork or spade. If you’re working with compacted or heavy clay soils, consider adding organic matter like compost or well-rotted manure to improve drainage and structure. Rake the area gently to remove any debris and smooth out the surface.
You can also use a hand tool, such as a weeding fork or a small rake, to create a seedbed by hand. This method is ideal for smaller areas or when you want more control over the soil preparation process. Regardless of which method you choose, make sure the seedbed is even and smooth – this will ensure that your arugula seeds have the best chance of germinating evenly and growing strong.
Sowing Seeds at the Right Depth and Spacing
When sowing arugula seeds, it’s essential to get the depth and spacing just right. As a general rule of thumb, arugula seeds should be sown about 1/4 inch deep into the soil. This may seem shallow, but trust us – it allows for proper germination and prevents the seeds from rotting.
As for spacing, arugula plants can become quite crowded if they’re too close together. To avoid this, sow your seeds about 2-4 inches apart. If you’re sowing in rows, make sure to leave about 12-18 inches between each row. This will give the plants enough room to grow without becoming leggy or competing for resources.
You can also sow arugula seeds directly into beds, rather than starting them indoors and then transplanting. Simply create a shallow furrow in the soil, drop your seeds in, and cover with a thin layer of compost or potting mix. Keep the soil consistently moist during the first few weeks after sowing to ensure proper germination.
Watering and Maintenance
To keep your arugula plants thriving, it’s essential to understand how often to water them and when to perform regular maintenance tasks. This will help ensure a healthy harvest.
Providing Consistent Moisture Levels
Maintaining consistent moisture levels is crucial for healthy arugula growth. If the soil becomes too wet, it can lead to fungal diseases and root rot, while excessive dryness causes stress, resulting in bolting – a sudden, unwanted jump in plant height that makes the leaves taste bitter. To avoid this, ensure the top 1-2 inches of soil remain consistently moist but not waterlogged.
Water your arugula plants deeply once or twice a week, depending on weather conditions and soil type. A good rule of thumb is to provide about 1 inch of water per week, either from rainfall or irrigation. Monitor your soil’s moisture levels by inserting your finger into the soil up to the first knuckle; if it feels dry, it’s time for watering.
It’s also essential to avoid overwatering, which can be detrimental to your arugula plants. Check for signs of underwatering such as wilted leaves or a decrease in growth rate. In this case, increase the frequency of watering but avoid getting water on the leaves to prevent fungal diseases from developing.
Keep in mind that young seedlings require more moisture than mature plants. Water them gently but thoroughly after sowing and keep the soil consistently moist during their first few weeks of growth.
Controlling Pests and Diseases
Arugula is a popular leafy green that’s susceptible to pests and diseases, especially during its germination and growth stages. Aphids, whiteflies, and caterpillars are common culprits that can cause significant damage to your crop.
To control infestations, consider using integrated pest management (IPM) techniques that combine physical, cultural, biological, and chemical controls. For example, introducing beneficial insects like ladybugs or lacewings, which prey on aphids and caterpillars, can be an effective method. You can also use neem oil to repel pests or spray with a mixture of water and mild dish soap to deter whiteflies.
Another approach is to adopt good gardening practices that prevent pest infestations in the first place. This includes watering your arugula plants at the base instead of from above, which reduces the risk of fungal diseases. Regularly inspecting your crop for signs of pests or disease can also help you catch problems early on and take swift action.
Some common pests to watch out for include:
* Aphids: These small, soft-bodied insects feed on plant sap, causing curled or distorted leaves.
* Caterpillars: Large caterpillars can munch through arugula leaves, while smaller ones may cause only minor damage.
* Whiteflies: These tiny flying insects suck plant sap and can spread diseases.
By being proactive and adopting a combination of prevention methods, you can reduce the risk of pest infestations and keep your arugula crop healthy and thriving.
Harvesting Arugula
To get the most out of your arugula crop, it’s essential to know when and how to harvest, as over-ripened leaves can become bitter and unpalatable. In this section, we’ll cover the optimal timing for harvesting arugula.
Timing the First Harvest
Timing the first harvest is crucial to ensure you enjoy the best-tasting arugula possible. As a general rule of thumb, you can expect to harvest your arugula around 20-25 days after sowing the seeds. However, this timeframe may vary depending on factors such as weather conditions, soil quality, and temperature.
To identify mature leaves, look for those that are at least 4-6 inches long and have a nice balance of bitterness and peppery flavor. Avoid picking individual leaves too soon, as they will continue to grow and become more tender with time. Instead, harvest entire rosettes by cutting off the stems about an inch above the soil line using scissors or pinch them off with your fingers. This technique helps prevent damaging the plant’s crown, which can lead to reduced yields in subsequent harvests.
By timing your first harvest correctly and harvesting mature leaves, you’ll be able to enjoy a continuous supply of fresh arugula from your garden for months to come.
Techniques for Continuous Harvesting
To maintain continuous harvesting of arugula, it’s essential to encourage bushy growth and prevent the plant from flowering. One effective technique is pinching or pruning the growth tips. This process involves removing the top sets of leaves to promote branching and increase yields.
By pinching or pruning, you can direct the plant’s energy towards producing more leaves rather than focusing on seed production. For example, if you notice a few long stems with flowers forming at the top, simply pinch off the tip to encourage side shoots to develop.
Another technique is to harvest individual leaves as they mature, rather than waiting for the entire head to form. This will not only encourage new growth but also prevent the plant from becoming leggy and reducing yields. Harvesting regularly will also help maintain the plant’s vigor and promote continuous production throughout its growing cycle. Aim to harvest arugula every 2-3 weeks for optimal results.
Frequently Asked Questions
Can I grow arugula indoors year-round with sufficient lighting?
Arugula thrives in temperate climates, but you can still grow it indoors with the right setup. Use a south-facing window or invest in LED grow lights to provide 12-14 hours of light per day. Ensure good air circulation and maintain temperatures between 60°F to 80°F (15°C to 27°C) for optimal growth.
How do I prevent pests from damaging my arugula crop?
Common pests like aphids, slugs, and snails can harm your arugula plants. Use organic methods like neem oil or insecticidal soap to control infestations. Keep your garden clean, remove weeds, and avoid overwatering to discourage pest populations.
Can I use regular potting soil for growing arugula in containers?
While you can use regular potting soil, it’s recommended to create a custom blend with added organic matter like compost or worm castings. This will provide the necessary nutrients and drainage for healthy arugula growth in container gardens.
How often should I harvest my arugula crop to encourage continuous production?
Harvest your arugula regularly by picking individual leaves or stems when they reach 6-8 inches tall. This will promote bushy growth, preventing flowering and encouraging new leaves to develop. Harvest every 7-10 days for a continuous supply of fresh arugula.
What are some common mistakes beginners make when growing arugula?
New growers often overwater their arugula plants or expose them to extreme temperatures. Be mindful of your climate and adjust your care routine accordingly. Regularly check the soil moisture, ensure good air circulation, and provide partial shade during hot periods to prevent stress and disease.