If you’re tired of tilling your garden every season or struggling with soil erosion, you might be interested in learning about no dig gardening. This approach to growing your own food and flowers has gained popularity among gardeners who want a low-maintenance way to maintain their outdoor spaces.
By removing the need for digging, no dig gardening can help preserve the health of your soil, reduce waste, and promote sustainable gardening practices. In this article, we’ll explore the principles behind no dig gardening and show you how to get started. We’ll cover everything from removing lawn and preparing garden beds to overcoming common challenges like weeds and poor drainage.
Understanding the Principles
At its core, no dig gardening is built on a few key principles that set it apart from traditional methods and allow for healthy soil and thriving plants. Let’s take a closer look at what these principles are.
What is No Dig Gardening?
No dig gardening is a method that has gained popularity in recent years due to its emphasis on minimal disturbance of soil and maximum retention of nutrients. The concept behind no dig gardening dates back to the 1970s, when permaculture pioneers like Bill Mollison and David Holmgren began exploring ways to reduce soil compaction and erosion.
Unlike traditional gardening methods, which often involve digging and tilling the soil to prepare it for planting, no dig gardening focuses on preserving the existing ecosystem. This approach recognizes that soil is a living, breathing entity that requires care and respect rather than manipulation. By not disturbing the soil, gardeners can maintain its natural structure and nutrient levels, leading to healthier plants and less maintenance.
The benefits of no dig gardening are numerous. For one, it eliminates the need for frequent tilling, which can disrupt soil life and cause erosion. It also reduces the amount of water required by plants, as undisturbed soil retains moisture better than tilled soil. Additionally, no dig gardens often require fewer fertilizers and pesticides, making them a more sustainable choice for gardeners looking to reduce their environmental impact.
Advantages of No Dig Gardening
No dig gardening offers numerous advantages that can transform your garden into a thriving ecosystem. One of the primary benefits is reduced physical labor, as you don’t need to repeatedly dig and turn over soil. This not only saves time but also minimizes back strain and other potential health issues.
Improved soil structure is another significant advantage of no dig gardening. By preserving the existing soil ecosystem, you allow beneficial microorganisms and organic matter to thrive. As a result, your soil becomes more fertile and better equipped to support plant growth. In contrast to traditional gardening methods, where topsoil can be depleted over time, no dig gardens retain their fertility.
Increased biodiversity is also a notable benefit of this approach. By not disturbing the soil, you create an environment that’s conducive to wildlife habitats. This encourages beneficial insects, pollinators, and other organisms to flourish, which in turn supports ecosystem health and resilience.
Preparing Your Garden for No Dig Techniques
Before you start using no dig techniques, it’s essential to prepare your garden by clearing away debris and checking soil structure. This simple process sets the stage for a thriving no dig garden.
Assessing Your Soil Conditions
Understanding your garden’s soil conditions is a crucial step before adopting no dig techniques. It may seem daunting, but assessing your soil is easier than you think, and it sets the stage for a thriving, low-maintenance garden.
Start by observing your soil’s texture and structure. Is it sandy, clay-like, or does it hold together well? You can also perform simple tests to determine pH levels. Mix 1 tablespoon of white vinegar with 1 tablespoon of soil in a jar – if it fizzes, your soil is alkaline; if not, it’s acidic. Alternatively, try the baking soda test: mix 1 tablespoon of baking soda with 1 tablespoon of soil and water – if it dissolves easily, your soil is likely acidic.
Take note of how your garden drains excess water. Does it puddle or drain quickly? This will help you determine if you need to amend your soil with perlite or vermiculite. Take a small sample of your topsoil and examine its color, consistency, and smell – these can all provide clues about nutrient levels, moisture content, and potential issues.
By understanding your garden’s unique conditions, you’ll be able to choose the right no dig approach for your specific needs.
Removing Lawn and Debris
Removing lawn and debris without digging is an essential step in preparing your garden for no dig techniques. This process allows you to create a weed-free and fertile environment that’s perfect for planting. One effective method for removing existing lawn or debris is sheet mulching.
To do this, start by laying down a 2-3 inch layer of cardboard over the affected area. This will help suppress weeds and break down any remaining roots. Next, add a layer of organic mulch such as straw or wood chips on top of the cardboard. As it breaks down, it will create a nutrient-rich soil that’s perfect for planting.
Alternatively, you can use cardboard covers to remove debris. Simply cut the cardboard into smaller sheets, place them over the affected area, and weigh them down with rocks or bricks. Over time, the cardboard will decompose and leave behind a weed-free space. This method is ideal for small areas of debris or weeds. Remember to choose cardboard that’s free from chemicals and dyes to ensure your garden remains chemical-free.
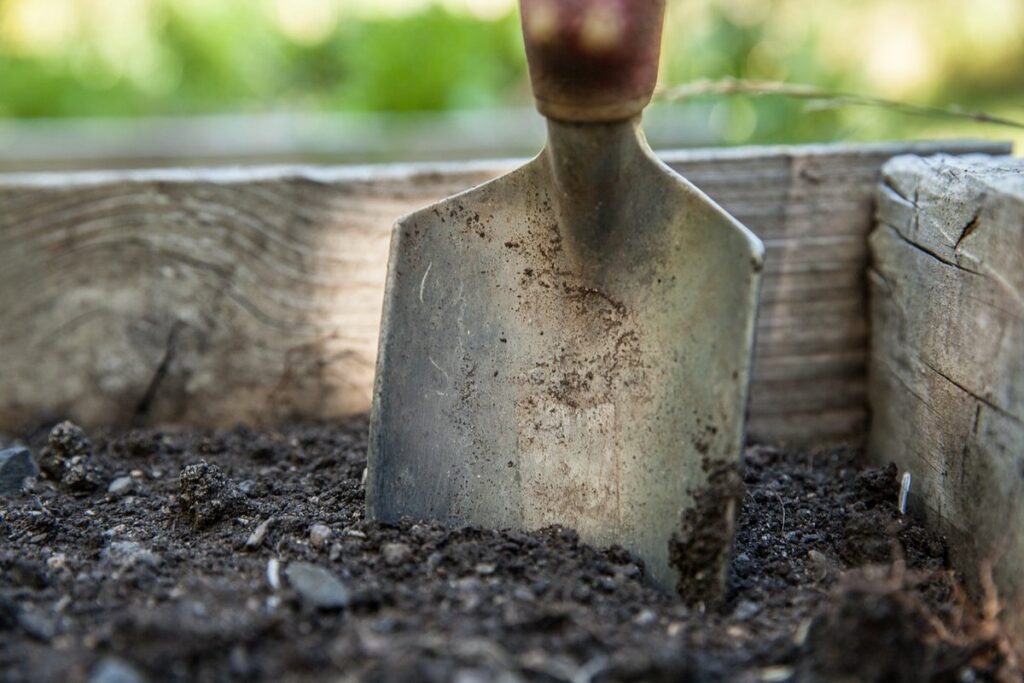
Creating a No Dig Garden Bed
To create a thriving no dig garden bed, you’ll first need to prepare the space by clearing debris and loosening any compacted soil. This is where the magic of no dig gardening begins.
Layering Materials for Success
When creating a no dig garden bed, one of the most crucial steps is layering materials to provide the perfect environment for plant growth. This involves carefully selecting and arranging various components, including compost, manure, green waste, and other organic matter.
Start by spreading a 2-3 inch layer of coarse material such as wood chips or bark at the bottom of the bed. This helps with drainage and prevents the garden from becoming waterlogged. Next, add a 4-6 inch layer of nutrient-rich compost or well-rotted manure on top. This provides essential nutrients for plant growth and supports the development of beneficial microorganisms.
Green waste, such as kitchen scraps and leaves, can be added in moderation to provide additional organic matter. However, avoid overloading the bed with too much green material, which can lead to an excessive carbon-to-nitrogen ratio. Instead, mix it in with other materials to achieve a balanced blend.
When layering materials, remember that the key is to create a diverse and well-balanced ecosystem. This will not only support healthy plant growth but also foster a thriving community of beneficial microorganisms.
Compost Tea and Fertilization
Compost tea is a natural, nutrient-rich liquid fertilizer that’s perfect for no dig gardens. Unlike traditional fertilizers, compost tea is made by steeping compost in water, which allows the beneficial microbes to break down and become bioavailable to plants. This liquid gold can be used as a foliar spray or added directly to the soil, providing an instant boost of nutrients.
To make your own compost tea, you’ll need a bucket or container with a secure lid, some aged compost, and a string or cloth bag for steeping. Fill the bucket 1/4 full with compost, add water, and let it steep for 24-48 hours. Strain the liquid and discard the solids – your compost tea is now ready to use!
In a no dig garden, compost tea is especially beneficial because it introduces beneficial microbes into the soil ecosystem. These microbes will help break down organic matter, suppress diseases, and even stimulate plant growth. For optimal results, apply compost tea every 7-10 days during the growing season or whenever your plants show signs of stress.
Planting and Maintaining Your No Dig Garden
Now that you’ve got your no dig garden set up, let’s dive into the next steps: planting and maintaining a thriving ecosystem without any digging. We’ll cover how to plant seeds and seedlings successfully.
Choosing Plants for No Dig Gardens
When it comes to choosing plants for your no dig garden, you’ll want to select species that thrive in these conditions. Native plants are an excellent choice as they’ve adapted to the local climate and soil type over time. They require less maintenance and care, making them perfect for a no dig setup.
Some popular native perennials include coneflower, black-eyed Susan, and bee balm. These plants are not only low-maintenance but also attract pollinators and other beneficial insects to your garden. Consider the specific growing conditions in your area and choose plants that match those requirements.
In addition to natives, you can also opt for non-native perennials like lavender or daylilies, which are known to perform well in no dig gardens. These plants will not only add color and texture but also require minimal upkeep. When selecting plants, keep an eye out for species with deep root systems, as these will be better equipped to handle the no dig conditions.
When shopping for plants, don’t forget to check their specific growing requirements, including sunlight, watering needs, and soil preferences. This will ensure a smooth transition into your no dig garden setup.
Mulching and Watering Techniques
Mulching is an essential aspect of maintaining a no-dig garden. It helps retain moisture, suppress weeds, and regulate soil temperature. There are several types of mulch to choose from, including organic materials like wood chips, bark, straw, and compost, as well as inorganic options like gravel or rubber mulch.
When selecting a mulch type, consider the specific needs of your garden. For example, if you’re looking for a long-lasting solution, wood chips or bark may be a good choice. On the other hand, if you prefer an eco-friendly option, straw or compost are excellent alternatives.
To maintain optimal moisture levels in your no-dig garden, focus on applying mulch regularly, ideally 2-3 inches thick. This will help retain up to 70% of water and reduce evaporation. Avoid over-mulching, as this can lead to waterlogged soil. Watering techniques also play a crucial role. Use a soaker hose or drip irrigation system to deliver moisture directly to the roots, reducing evaporation and runoff.
By combining these mulching and watering strategies, you’ll be able to maintain a lush, weed-free no-dig garden with minimal maintenance.
Common Challenges and Solutions
As you embark on your no dig journey, you’ll likely encounter some common obstacles – but don’t worry, we’ve got solutions to help you overcome them. From soil issues to pest problems, we’re about to tackle it all together.
Dealing with Weeds and Pests
As you begin to enjoy the benefits of no dig gardening, you may encounter some common challenges that can be discouraging. Weeds and pests are two of the most prevalent issues faced by gardeners using this method. One of the key differences between traditional digging and no dig is how plants compete with weeds for resources. In a no dig system, undisturbed soil allows beneficial microorganisms to thrive, often outcompeting weed seeds for water and nutrients.
However, it’s not uncommon for weeds to still pop up, especially in areas where soil depth is shallow or moisture levels are high. To manage weeds effectively without chemical control methods, consider implementing a mulching strategy. Apply a thick layer of organic matter such as wood chips or straw around your plants. This will suppress weed growth and regulate soil temperature.
In addition to mulching, maintain good garden hygiene by regularly removing weeds you see before they go to seed. Composting any removed weeds can also help return nutrients back into the system. Some no dig gardeners also swear by using physical barriers like landscape fabric or cardboard to prevent weeds from growing beneath plants.
As for pests, these too can be managed naturally through integrated pest management (IPM) techniques. Monitor your plants regularly and take action early if you notice any signs of infestation. Consider introducing beneficial insects such as ladybugs or lacewings that prey on common pests like aphids and whiteflies. By being proactive in your no dig garden, you can enjoy the benefits while minimizing the challenges associated with weeds and pests.
It’s also worth noting that a diverse range of plants can help deter pests naturally. For example, basil is known to repel aphids and mosquitoes, while marigolds keep nematodes at bay. By incorporating these types of plants into your no dig garden, you can create a balanced ecosystem where beneficial organisms thrive and pests are kept under control.
Maintaining Soil Health Over Time
Maintaining soil health over time is crucial for the long-term success of a no dig garden. Regular monitoring and maintenance activities help to identify potential issues before they become major problems, ensuring that your garden remains fertile and productive.
One of the most effective ways to maintain soil health is through composting. By adding nutrient-rich compost to the soil, you can replenish its fertility levels and support healthy plant growth. To make this process easier, consider setting up a regular composting routine, incorporating kitchen scraps and yard waste into your mix.
Crop rotation also plays a vital role in maintaining soil health. This involves changing the types of plants grown on specific areas of the garden to avoid depleting the soil of particular nutrients. For example, if you grow tomatoes in one area, rotate to a legume like beans or peas in the next season, as they will replenish nitrogen levels.
By incorporating these practices into your no dig gardening routine, you’ll be well on your way to creating a thriving and sustainable garden ecosystem that continues to flourish over time.
Conclusion and Next Steps
Now that you’ve learned the basics of no dig gardening, it’s time to think about implementing these techniques in your own garden. Let’s discuss next steps and how to get started on this exciting new journey.
Recap of Key Takeaways
In this article, we’ve explored the world of no dig gardening and its numerous benefits. To recap, let’s revisit some of the key takeaways that will help you get started with this method.
By adopting a no dig approach, you’ll be able to reduce soil compaction, retain moisture, and create a healthier ecosystem for your plants. This is achieved by avoiding tilling or digging, which can disrupt the delicate balance of beneficial microorganisms in the soil. By not disturbing the soil’s natural structure, you’ll also save time and energy that would otherwise be spent on preparation.
Some practical tips to keep in mind include starting small with a no dig bed, incorporating compost and mulch to maintain soil health, and being mindful of plant selection for your climate and conditions. Additionally, consider using raised beds or containers to further reduce the need for tilling.
Remember, the key to successful no dig gardening is patience and a willingness to adapt to changing conditions. With these basics under your belt, you’ll be well on your way to enjoying the many rewards of this sustainable and low-maintenance approach.
Encouraging Readers to Give No Dig Gardening a Try
As you’ve learned about the benefits and basics of no dig gardening, we hope you’re excited to give it a try. We’d like to share some inspiring stories from our community of gardeners who have successfully transitioned to this method.
Imagine transforming your garden without the backbreaking labor of digging and turning over soil. Our readers have reported significant time savings, healthier plants, and improved soil structure after adopting no dig gardening techniques. For instance, Sarah from California reduced her watering schedule by half and witnessed a 300% increase in her tomato yields.
If you’re eager to start your no dig journey, remember that it’s all about making small changes. Begin with one bed or a single plant and gradually expand as you gain confidence. Start by removing weeds and debris, then add a layer of compost or mulch. Water deeply but infrequently to encourage roots to grow downward.
Don’t be afraid to make mistakes – they’re an opportunity to learn and refine your approach. With patience and persistence, you’ll be enjoying the rewards of no dig gardening in no time.
Frequently Asked Questions
Can I still use raised beds or containers with no dig gardening?
Yes, you can adapt the principles of no dig gardening to raised beds and containers. The key is to focus on preserving the existing ecosystem and minimizing soil disturbance. Use a mix of organic materials like compost, bark chips, and straw to create a nutrient-rich growing environment.
How do I deal with heavy clay or sandy soils in my garden?
Heavy clay or sandy soils can be challenging for no dig gardening, but there are ways to adapt. For clay soils, add more organic matter like compost or well-rotted manure to improve drainage and structure. For sandy soils, use a layer of mulch or compost to retain moisture and suppress weeds.
Can I mix different types of materials together in my no dig garden bed?
Yes, you can mix different types of materials like compost, bark chips, and straw to create a diverse and thriving ecosystem. Just be sure to balance the carbon-to-nitrogen ratio by using equal parts “brown” (dry) materials and “green” (nitrogen-rich) materials.
How long does it take for a no dig garden bed to become established?
It can take anywhere from 6-18 months for a no dig garden bed to become fully established, depending on the quality of the materials used and the local climate. Be patient and observe your garden’s progress over time – with proper care, it will reward you with healthy plants and a thriving ecosystem.
Can I use synthetic fertilizers in a no dig garden?
No, we recommend avoiding synthetic fertilizers in no dig gardening as they can disrupt the delicate balance of your soil ecosystem. Instead, rely on natural amendments like compost tea, well-rotted manure, or fish emulsion to provide essential nutrients for your plants.