Starting seeds is an art that requires patience, attention to detail, and a gentle touch. Whether you’re a seasoned gardener or just beginning your green thumb journey, learning how to start seeds like a pro can make all the difference in your gardening success. The right techniques and tools can mean the difference between healthy, thriving plants and struggling seedlings.
In this comprehensive guide, we’ll walk you through the ins and outs of starting seeds, covering everything from selecting the perfect seed type to preparing the ideal soil conditions. We’ll also share expert tips on sowing techniques and troubleshooting common issues that can plague even the most enthusiastic gardeners. From basic to advanced, our goal is to equip you with the knowledge and confidence to start seeds like a pro and grow your gardening skills.
Choosing the Right Seeds
When it comes to starting seeds, selecting the right variety is crucial for a successful outcome. This section will guide you through choosing the perfect seeds for your garden.
Understanding Seed Types
When it comes to choosing seeds for starting, you’ll encounter various types that cater to different needs and preferences. Heirloom seeds are a popular choice among gardeners who value unique characteristics and traits passed down through generations. These seeds often produce plants with distinct flavors, textures, and appearances, making them perfect for preserving heirloom varieties or creating diverse gardens.
Hybrid seeds, on the other hand, are bred to combine the best qualities of their parent varieties. They typically offer improved yields, disease resistance, and enhanced growth rates. Hybrid seeds can be a good option for gardeners who want high-quality crops with specific characteristics, such as heat tolerance or drought resistance.
Genetically modified (GM) seeds have been engineered to introduce new traits through genetic modification. While they can offer benefits like pest resistance and improved yields, many gardeners are hesitant to use GM seeds due to concerns about their environmental impact and potential effects on human health. Ultimately, the choice of seed type depends on your specific needs, climate, and growing conditions.
Selecting Varieties Suitable for Your Climate
When selecting seed varieties for starting seeds, it’s essential to choose ones that are well-suited to your local climate. This means considering factors such as frost tolerance, disease resistance, and growth habits.
For example, if you live in an area with short growing seasons or frequent frosts, look for seeds labeled as “cold hardy” or “frost tolerant.” These varieties can withstand temperatures below 32°F (0°C) without damage. If you’re in a region prone to heatwaves, opt for seeds that are resistant to drought and high temperatures.
Also consider the type of soil you have. Some plants prefer well-draining soils while others thrive in acidic or alkaline conditions. Check the seed packet or online description to ensure the variety is suitable for your soil type. Additionally, take note of disease resistance. Many seed varieties now come with built-in resistance to common diseases like powdery mildew or downy mildew.
By choosing seeds adapted to your local climate and soil type, you’ll set yourself up for success in starting seeds. Research different varieties and talk to local gardening experts or nursery staff to find the best options for your area.
Preparing the Seed Starting Environment
Before you can start sowing those seeds, it’s essential to prepare a suitable environment for them to germinate and grow. This means creating an optimal space with precise temperature, humidity, and light conditions.
Creating a Suitable Growing Medium
When it comes to creating a suitable growing medium for starting seeds, you have several options to choose from. One popular method is using paper towels. This is a great option if you’re short on space or want a low-cost solution. To prepare the paper towels, simply moisten them with water and place the seeds about ¼ inch deep in each fold. Keep in mind that this method can be a bit tricky to manage, as the towels can dry out quickly.
Another common choice is cell packs, which are small plastic containers designed specifically for starting seeds. These are ideal for seedlings that need more room to grow and can be easily transplanted into larger pots once they’re ready. Cell packs typically come with a built-in growing medium, but you can also use your own mix of peat moss, vermiculite, and perlite.
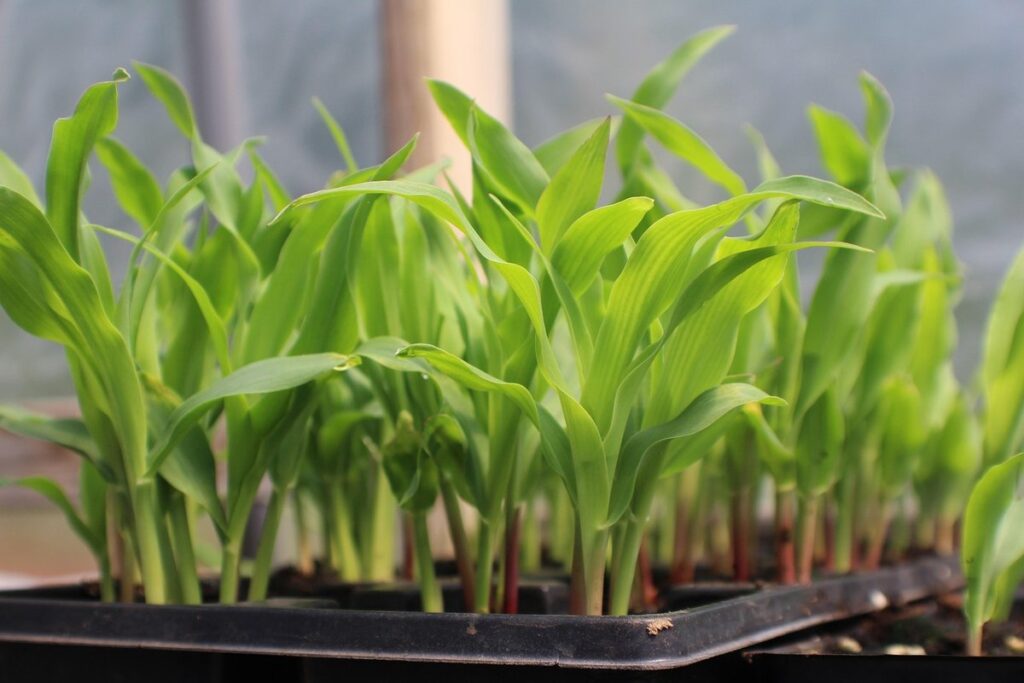
Seed trays are another popular option, often used for starting large quantities of seeds at once. These trays usually have multiple cells that allow for even growth and can be easily moved from one location to another. When using seed trays, make sure to fill the cells with a well-draining growing medium to prevent waterlogged soil.
In all cases, it’s essential to choose a growing medium that is specifically designed for starting seeds. Avoid using regular potting soil as it can be too dense and may cause the seeds to rot. Instead, opt for a seed starting mix that contains ingredients like peat moss, vermiculite, or perlite. These will provide the necessary nutrients and drainage for optimal germination.
In addition to choosing the right growing medium, make sure to also consider the pH level of your soil. Most seeds prefer a slightly acidic to neutral soil pH between 6.0 and 7.0. To ensure that your growing medium is at the correct pH, you can purchase a DIY pH test kit or use a pre-mixed seed starting mix that’s already calibrated for optimal growth.
When preparing your growing medium, make sure to moisten it thoroughly before planting seeds. This will help prevent water stress and encourage even germination. Water should be poured gently over the soil to avoid washing away the seeds or creating air pockets in the soil.
Finally, don’t forget to label each cell or seed pack with the type of seed you’re starting, so you can easily keep track of which ones need more care and attention.
When it comes to using a growing medium specifically designed for starting seeds, make sure to follow these guidelines:
* Use 1-2 tablespoons of growing medium per cell or seed pack
* Fill the cells about ¼ inch deep with moistened growing medium
* Plant seeds about ¼ inch deep in each cell or seed pack
* Water gently but thoroughly after planting
Providing Optimal Temperature Conditions
Temperature plays a crucial role in seed germination and growth. Most seeds have an ideal temperature range for optimal germination, which can vary depending on the type of plant. For example, tomato seeds prefer warmer temperatures between 70-80°F (21-27°C), while lettuce seeds thrive at cooler temperatures around 65-75°F (18-24°C). To provide optimal temperature conditions, you can use a heating mat specifically designed for seed starting.
Alternatively, you can place the seed tray in a warm location like a greenhouse or sunroom. These areas tend to maintain a consistent temperature throughout the day, which is perfect for seeds. If you don’t have access to a greenhouse or sunroom, you can also use a sunny windowsill as a makeshift warming station. Just be sure to keep the temperature range within the recommended limits for your specific seed type.
Some popular heating mats on the market include those from AeroGarden and Seed Starting Heat Mat. When choosing a heating mat, consider the size and coverage area to ensure it meets your needs. Additionally, always follow the manufacturer’s instructions for safe usage.
Sowing Seeds: Techniques and Timing
When it comes to sowing seeds, timing is everything. Learn the best techniques for getting your seedlings off to a strong start in this crucial part of the growing process.
Understanding Seed Depth and Spacing
When it comes to sowing seeds, getting the depth and spacing just right is crucial for optimal growth. The ideal seed-to-soil ratio will vary depending on the type of plant you’re growing, but as a general rule, most seeds should be planted about 2-3 times their diameter deep into the soil.
To calculate this accurately, refer to the specific seed packet or consult online resources that provide detailed guidelines for each variety. For example, if you’re planting tomatoes, which have relatively large seeds, aim for a depth of about ¼ inch (6-8 mm). On the other hand, delicate herbs like basil or marjoram require only a shallow depth of about 1/8 inch (3-4 mm).
When handling fragile seeds, be sure to handle them gently and avoid compacting the soil around them. A good starting point for spacing is to plant seeds at twice their mature width apart. So if you’re planting a row of lettuce, space each seed about 6-12 inches (15-30 cm) apart, allowing for proper air circulation and growth room as they develop.
Determining the Right Time to Sow Seeds
Determining the right time to sow seeds is crucial for optimal germination and growth. The key factors to consider are weather patterns, soil temperature, and daylight hours.
Weather plays a significant role in seed sowing, as extreme temperatures can either hinder or promote germination. For most plants, springtime (March to May) or fall (September to November) are ideal periods for sowing seeds. Avoid planting during the hottest summer months when the temperature is above 75°F (24°C), and cold winter months below 40°F (4°C).
Soil temperature also affects seed germination. Most vegetables prefer soil temperatures between 60°F (15°C) to 70°F (21°C). Some plants, like lettuce and spinach, thrive in cooler temperatures as low as 50°F (10°C), while others, such as tomatoes and peppers, require warmer temperatures above 65°F (18°C).
Daylight hours are another essential consideration. Most seedlings require at least 12 to 14 hours of daylight for optimal growth. Seeds sown during the transition from spring to summer or fall to winter may benefit from additional light sources.
By considering these factors and selecting seeds that match your local climate, you can increase the chances of successful germination and healthy plant growth.
Caring for Seedlings
Now that you’ve got your seeds germinated and growing, it’s time to focus on providing the right care to help them thrive. We’ll cover essential tips for watering, pruning, and protecting seedlings from pests and diseases.
Providing Adequate Light and Watering
Light is essential for seedling growth, and it’s surprising how often we take it for granted. Insufficient light can lead to weak and spindly seedlings that struggle to survive once transplanted outside. To create a suitable lighting environment, consider using grow lights if you don’t have access to a south-facing window.
Grow lights come in various types, including LED, fluorescent, and high-intensity discharge (HID). When choosing grow lights, look for those with a spectrum that mimics natural sunlight, as this will promote healthy seedling growth. For example, LED grow lights are energy-efficient and emit minimal heat, making them an excellent choice.
Watering is another critical aspect of seedling care. Overwatering can be detrimental to young seedlings, leading to root rot and other issues. On the other hand, underwatering can cause stress and stunt growth. Check the soil moisture by sticking your finger into it; if it feels dry, it’s time to water. Aim for about 1-2 inches of water per week, either from rainfall or irrigation.
Keep in mind that seedlings have delicate roots and need gentle watering. Avoid getting water on the leaves or crown to prevent fungal diseases. By providing adequate light and watering your seedlings correctly, you’ll set them up for success as they develop into healthy young plants.
Fertilizing and Pruning Seedlings
When it comes to promoting healthy growth and development in seedlings, fertilizing and pruning play crucial roles. Fertilizers provide essential nutrients that support the seedling’s rapid growth, while pruning helps control overgrowth and encourages bushy, productive plants.
To choose the right fertilizer for your seedlings, consider their specific needs based on the plant variety, climate, and growing conditions. For most seedlings, a balanced, water-soluble fertilizer (20-20-20) is a good starting point. However, some plants require more nitrogen or other micronutrients. Research the specific requirements of your seedlings and adjust your fertilizing schedule accordingly.
Pruning techniques should also be tailored to the individual plant variety. For example, tomato seedlings benefit from having lower leaves removed to prevent fungal diseases, while legume seedlings can tolerate more aggressive pruning to encourage bushy growth. Regularly inspect your seedlings for signs of overgrowth and prune them as needed to maintain a balanced shape and promote healthy development.
Troubleshooting Common Issues
Don’t let setbacks stop you from growing your seeds into thriving plants. This section will walk you through common issues and provide solutions to get you back on track quickly.
Identifying and Resolving Germination Problems
Germination problems can be frustrating, especially when you’re eager to see your seeds sprout. However, with a little troubleshooting, you can identify the root cause and take corrective action.
Poor soil quality is a common issue that can hinder germination. If your soil lacks essential nutrients or has poor drainage, it may not support seed growth. Check if your potting mix is fresh and well-draining. A simple way to test this is by gently squeezing a handful of the mixture – if it crumbles easily, it’s likely too dry.
Inadequate temperature can also affect germination. Seeds have optimal temperature requirements for germinating. For example, tomato seeds require a minimum temperature of 70°F (21°C) to germinate, while lettuce seeds prefer cooler temperatures around 60°F (15°C). Check the seed packet or consult online resources to determine the ideal temperature range for your specific variety.
Inadequate light is another potential issue. Seeds need sufficient light to undergo photosynthesis and grow. If you’re starting seeds indoors, make sure they’re placed in a bright location with direct sunlight or use grow lights to supplement natural light.
Managing Pests and Diseases
When starting seeds, it’s not uncommon for new gardeners to encounter pests and diseases that can quickly spread and devastate an entire crop. One of the most common pests is the aphid, which feeds on sap and can weaken seedlings over time. Check plants regularly for signs of infestation, such as curled or distorted leaves.
Another pest to watch out for is slugs and snails, which thrive in moist environments and can quickly destroy tender shoots. To prevent slug damage, use copper tape around planters or apply crushed eggshells around the base of seedlings. If you do find pests on your plants, treat them promptly with neem oil or insecticidal soap.
When it comes to diseases, seedlings are particularly susceptible to fungal infections such as powdery mildew and downy mildew. To prevent these issues, maintain good air circulation around plants by spacing them at least 6-8 inches apart. Also, avoid overwatering, which can create a humid environment that fosters disease growth.
Incorporating organic and integrated pest management (IPM) strategies into your gardening routine is essential for managing pests and diseases effectively. This includes using natural predators like ladybugs or lacewings to control aphid populations, as well as introducing beneficial bacteria to the soil to boost plant immunity. By being proactive and taking preventative measures, you can reduce the risk of pest and disease issues in your seedlings and set yourself up for a successful harvest.
Transplanting Seedlings
Now that your seedlings have a solid start, it’s time to move them outside where they can grow and thrive. This is where transplanting comes in – don’t worry, we’ve got you covered.
Preparing Soil for Transplantation
Preparing soil for transplanting is an often-overlooked but crucial step in the seed starting process. A well-conditioned soil environment can make all the difference in the success of your transplanted seedlings. To start, assess your soil’s pH level and nutrient content. If it’s too alkaline or acidic, add organic matter like compost or well-rotted manure to balance it out.
Consider adding fertilizers specifically designed for seedlings, as they tend to be lower in nitrogen and higher in phosphorus. A general rule of thumb is to use a balanced fertilizer (10-10-10) for the first application, followed by a bloom booster (15-30-15) once your seedlings have two sets of leaves.
Create a suitable soil environment by loosening the top 6-8 inches of soil and mixing in any amendments. Make sure the soil is moist but not waterlogged, as this can lead to root rot and other issues. A final step is to consider using row covers or black plastic mulch to retain moisture and regulate soil temperature. By taking these steps, you’ll be creating an optimal environment for your seedlings to thrive once transplanted.
Hardening Off Seedlings Before Transplantation
Hardening off seedlings before transplantation is a crucial step that often gets overlooked. This process involves gradually acclimating them to outdoor conditions, reducing their reliance on supplemental lighting, and preparing them for the rigors of direct sunlight.
To harden off seedlings, start by moving them from a greenhouse or indoor growing space to a shaded area outdoors for 1-2 hours a day. Gradually increase the duration over the course of 7-10 days, allowing the seedlings to adjust to wind, temperature fluctuations, and changing light conditions. This will help prevent shock when transplanting into their final location.
It’s also essential to provide seedlings with partial shade during the hardening off process. East- or north-facing locations are ideal for this step. Monitor the weather forecast and avoid exposing seedlings to extreme temperatures, heavy rain, or intense sunlight.
If you’re transplanting seedlings outdoors in the evening, consider bringing them back indoors overnight to protect them from potential temperature drops. By following these steps, you’ll help your seedlings develop a stronger root system and increase their chances of thriving after transplantation.
Frequently Asked Questions
Can I start seeds from leftover vegetables or fruits?
Yes, you can experiment with saving seeds from your homegrown produce for future planting. However, be aware that saved seeds may not retain their original traits and might not grow true to the parent plant’s characteristics.
How do I handle common seed starting mistakes, like overwatering or underwatering my seedlings?
Pay close attention to seedling development, monitoring for signs of both overwatering (yellowing leaves, soft stems) and underwatering (wilted leaves, brittle stems). Adjust your watering schedule accordingly. For overwatering, repot in fresh medium with good drainage; for underwatering, increase the frequency of water applications.
What are some additional factors to consider when selecting seeds suitable for my climate?
Beyond choosing varieties adapted to your specific climate zone, also consider factors such as frost tolerance (if starting seeds outdoors), heat requirements, and drought resistance. Some seeds may need protection from extreme temperatures or require more frequent watering in arid climates.
How can I ensure optimal germination rates when starting seeds indoors?
Maintain a consistent temperature between 70°F to 85°F (21°C to 29°C) for most seed types. Use a thermometer to monitor your growing environment’s temperature, and ensure proper humidity levels by covering the tray or pot with plastic wrap or a cloche.
Can I propagate plants using seeds from store-bought produce?
It is generally not recommended to try propagating plants from store-bought produce due to the potential for variability in seed quality, disease presence, or hybridization. However, if you’re looking to explore this option, research specific varieties known to retain viable seeds and follow proper storage and sowing procedures to increase chances of success.