Are you tired of breaking the bank on expensive vegetable seeds every season? You’re not alone. With just a little creativity, you can save money and grow a wide variety of unique vegetables in your garden without spending a dime. In this article, we’ll show you how to source free vegetable seeds, from repurposing last year’s harvest to scouring the internet for giveaways and giveaways. We’ll also cover the benefits of using free seeds, including reduced waste and increased diversity in your garden. You’ll learn how to properly store your seeds for long-term use, as well as tips for growing healthy seedlings from scratch. Whether you’re a seasoned gardener or just starting out, this comprehensive guide will help you make the most of free vegetable seeds and take your gardening game to the next level.
Benefits of Growing Vegetables from Seed
Growing your own vegetables from seed can be a game-changer for any gardener, offering unique rewards and benefits that will make you wonder why you ever used store-bought seedlings. Let’s dive into what makes growing from seed so special.
Why Choose Free Seeds Over Purchased Ones
Choosing free seeds over purchased ones can be a game-changer for gardeners on a budget. One of the most significant advantages is cost-effectiveness. With free seeds, you don’t have to worry about breaking the bank or depleting your seed stash. You can save money that would otherwise go towards purchasing new packets and use it towards other essential gardening supplies.
Another benefit of using free seeds is the ability to preserve heirloom varieties. When you buy seeds from a large commercial company, you’re often buying hybrids that may not produce true-to-type offspring. This means that even if you collect seed from your crop, it might not grow into plants with the same desirable traits as the parent plant. By using free seeds, particularly those saved from last season’s harvest or obtained through seed swaps, you can ensure that your garden stays genetically diverse and preserve these unique varieties for future generations.
Consider joining a local seed library or trading seeds with fellow gardeners to access this treasure trove of diversity. Not only will you save money, but you’ll also be contributing to the preservation of our botanical heritage.
Tips for Selecting High-Quality Free Seeds
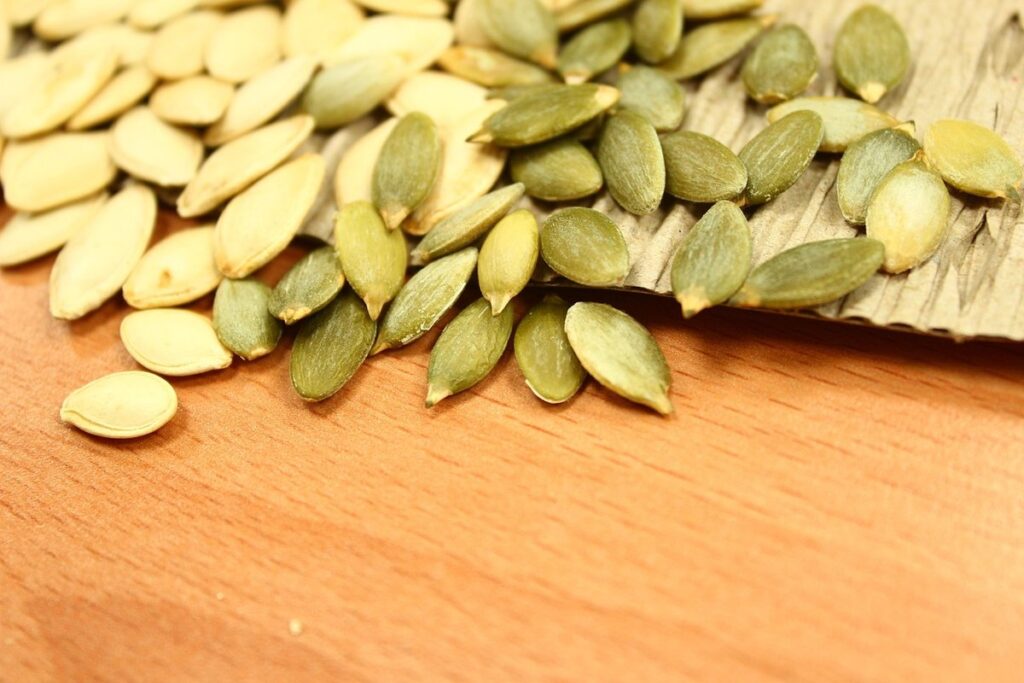
When selecting high-quality free seeds, it’s essential to consider their viability, germination rates, and overall health. Viability refers to a seed’s ability to sprout and grow into a healthy plant. Look for seeds that have been stored properly and are within their shelf life.
A good indicator of a seed’s quality is its germination rate. This can be found on the seed packet or through online research. Generally, a high-quality seed should have a germination rate of at least 80%. If you’re unsure about the seed’s viability, it’s best to err on the side of caution and choose a different option.
Healthy seeds typically exhibit certain characteristics, such as being plump, firm, and free of visible damage. They may also have a slightly sweet or earthy aroma. When handling seeds, be gentle to avoid damaging them further. Store your selected seeds in an airtight container to maintain their viability until you’re ready to plant.
When sourcing free seeds, consider the reputation of the seed provider and the type of seeds being offered. Some online communities and gardening forums may offer high-quality seeds for free or at a low cost. Be cautious of seeds from unknown sources, as they may be low-quality or even contain pests or diseases.
Sourcing Free Vegetable Seeds
One of the best ways to start growing vegetables from seed is to source them for free. This not only saves you money but also allows you to experiment with new varieties without committing to a full packet of seeds.
You can begin by asking friends, family members, or neighbors if they have any spare vegetable seeds they no longer need. This approach not only helps reduce waste but also allows you to tap into their gardening experience and gain valuable insights from their successes and failures.
Another way to obtain free seeds is through online giveaways or contests. Many companies, nurseries, and seed banks offer free seeds in exchange for reviews, testimonials, or social media shares. Keep an eye on your favorite gardening websites and blogs to stay updated on these opportunities.
Community gardens are also a great source of free seeds. Visit local community gardens in your area and ask if they have any spare seeds available. Many gardeners are more than happy to share their excess with fellow gardeners, and you can even make new friends along the way!
Getting Started with Your Seed Collection
Now that you’ve gathered your free vegetable seeds, let’s dive into the essential steps to get started with building a thriving seed collection. First, we’ll cover what to do next.
Preparing Your Garden for Planting
Before you start planting those free vegetable seeds, it’s essential to prepare your garden bed. This involves testing and amending the soil to ensure optimal growing conditions for your new seedlings.
Firstly, test your soil pH level using a DIY kit or by sending a sample to a lab. Most vegetables prefer a slightly acidic to neutral soil pH (around 6.0-7.0). Based on the test results, you may need to add amendments like lime to raise the pH or sulfur to lower it.
Next, check the nutrient levels in your soil. You can use a soil testing kit or consult with a local gardening expert for guidance. Vegetables require essential nutrients like nitrogen (N), phosphorus (P), and potassium (K). If your soil lacks these nutrients, add organic matter like compost, manure, or peat moss to enrich it.
In addition to testing and amending the soil, also ensure good drainage and aeration by loosening the top 8-10 inches of soil. This will help prevent waterlogged conditions that can lead to root rot and other problems. With these steps complete, you’ll have a garden bed ready for seed planting.
Understanding Seed Storage and Handling
When storing seeds properly, you’re not only maintaining their viability but also ensuring optimal germination rates. This is particularly crucial for free vegetable seeds that you’ve obtained to plant in your garden. Here’s a step-by-step guide on how to store your seeds effectively.
Firstly, it’s essential to choose the right container for seed storage. Airtight glass or plastic containers with tight-fitting lids are ideal. Avoid storing seeds in paper bags or envelopes as they can dry out and compromise the viability of your seeds. Make sure the containers are clean and dry before transferring the seeds.
Label each container clearly, indicating the type of seed, its date of storage, and any relevant notes about germination rates or special requirements. Store the containers in a cool, dark place with consistent temperatures between 40°F to 50°F (4°C to 10°C). Avoid storing seeds near direct sunlight, heat sources, or areas prone to moisture.
Regularly check on your stored seeds every few months to ensure they remain viable and ready for planting when needed.
Planning Your Vegetable Garden Layout
When planning your vegetable garden layout, it’s essential to make the most of available space and maximize yields. A well-designed layout can help you grow more vegetables in less space, while also reducing waste and making maintenance easier.
Start by assessing the size and shape of your garden bed. Consider the mature size of each plant variety and group them according to their growth habits (e.g., tall plants like sunflowers or corn, medium-sized plants like tomatoes or peppers, and compact plants like lettuce or herbs). This will help you create a balanced layout that maximizes space.
To maximize yields, consider using a square foot garden layout. This method involves dividing the bed into 1×1 foot squares, allowing for efficient use of space and easy access to each plant. You can also incorporate trellises or cages for vining plants like peas or cucumbers, making the most of vertical space.
Remember to leave enough space between rows for air circulation and accessibility. A general rule of thumb is to allocate 2-3 feet between rows for easier maintenance and harvesting. By planning your garden layout carefully, you’ll be able to grow a diverse range of vegetables while optimizing your available space.
Types of Free Vegetable Seeds Available
Let’s explore some of the free vegetable seeds that are readily available, from heirloom varieties to open-pollinated seeds and more. You’ll find plenty of options to suit your gardening style.
Heirloom and Open-Pollinated Varieties
Growing heirloom and open-pollinated seeds is an excellent choice for gardeners who want to add some excitement to their vegetable patch. These varieties offer a wealth of benefits that can enhance your gardening experience.
Heirloom seeds, which have been saved and handed down through generations, possess unique characteristics that make them stand out from hybrid or commercial varieties. For instance, they often come in a range of colors, shapes, and sizes, adding visual appeal to your garden. Some heirlooms are also more disease-resistant or better suited to local growing conditions.
Open-pollinated seeds, on the other hand, can be saved and replanted year after year, making them an eco-friendly option. They tend to be more adaptable to specific climates and soil types than hybrid varieties, which makes them ideal for gardeners in areas with unique growing conditions. By choosing heirloom or open-pollinated seeds, you’ll not only be preserving genetic diversity but also ensuring a steady supply of fresh produce from your own backyard.
When working with these varieties, remember to save and replant seeds regularly to maintain their unique traits. You can start by identifying the characteristics that make each seed special and then focus on cultivating those qualities in future harvests. With a little patience and practice, you’ll be enjoying the rewards of growing heirloom and open-pollinated vegetables for years to come.
Hybrid Seed Options
When it comes to hybrid seed options, you’ll find that they offer several advantages. For one, these seeds are bred specifically for their disease resistance and high yields. This means that if you’re concerned about common pests or diseases affecting your crops, such as powdery mildew or root rot, hybrid varieties can provide a level of protection.
For example, some popular hybrid seed options include ‘Better Boy’ tomatoes, which are known to resist verticillium wilt and fusarium wilt. Similarly, hybrid broccoli varieties like ‘Deep Purple’ boast high yields and resistance to downy mildew.
However, it’s essential to note that hybrid seeds also have their limitations. One major drawback is that they’re often sterile, meaning you won’t be able to save the seeds from your harvest for replanting next season. This can make them a more expensive option in the long run. Additionally, some farmers and gardeners may be hesitant to use hybrid seeds due to concerns about genetic modification or the loss of heirloom varieties.
To make the most of hybrid seed options, look for open-pollinated hybrids that retain their fertility.
Specialty and Exotic Vegetable Seeds
If you’re looking to add some excitement to your garden, consider exploring specialty and exotic vegetable seeds. These unusual varieties can bring a unique twist to traditional gardening and provide a fascinating challenge for even the most experienced growers.
Some examples of specialty vegetables include heirloom varieties like ‘Black Jack’ beans, which have been prized by gardeners for their rich, earthy flavor since the 18th century. Exotic varieties like Thai basil or Korean chili peppers can add an international flair to your dishes and offer a burst of flavor unlike anything else.
To find these unique seeds, you can try visiting specialty seed companies that focus on preserving heirloom varieties or exploring online marketplaces like eBay or Etsy for rare and unusual seeds. Be sure to research the specific growing requirements and climate suitability for any new variety before planting, as some may require special care or conditions.
By incorporating specialty and exotic vegetables into your garden, you can break up the monotony of traditional gardening and discover new flavors and textures to enjoy in the kitchen. With a little creativity and experimentation, you can take your garden to the next level and reap the rewards of a diverse and thriving vegetable patch.
Germinating and Sowing Your Free Seeds
Now that you’ve received your free seeds, it’s time to get them growing. This next step is crucial: learning how to germinate and sow your new seeds successfully.
Techniques for Successful Seed Germination
To ensure optimal seed germination, it’s essential to use various techniques that promote healthy growth. Soaking seeds is one effective method, particularly for hard-seeded vegetables like beans and peas. Simply place the seeds in a bowl of water, making sure they’re fully submerged, and let them soak for 24-48 hours before sowing.
Another technique is using a warm location to encourage germination. Most vegetable seeds prefer temperatures between 65°F to 75°F (18°C to 24°C) to germinate. Place the seed tray or pot near an east- or south-facing window, or use a grow light to provide the ideal temperature. You can also speed up the process by covering the tray with a clear plastic bag or cloche, trapping the heat and humidity.
Some seeds may require even more TLC to germinate. For example, parsnip seeds are notoriously slow to sprout and often benefit from being soaked for several days before sowing. In contrast, fast-growing lettuce seeds can be directly sown into the soil without any pre-treatment. Experimenting with different techniques will help you find what works best for your specific varieties of free vegetable seeds.
Preparing the Soil for Direct Sowing
Preparing the soil before direct sowing is an often-overlooked yet crucial step in ensuring healthy seed germination and growth. Think of it like building a strong foundation for a house – if the base isn’t solid, the entire structure will suffer. Similarly, compacted or poorly aerated soil can hinder root development, making your seedlings vulnerable to disease and pests.
To loosen and aerate your soil, start by removing any debris or weeds that might be competing with your seeds for resources. Then, use a fork or spade to gently dig up the top 6-8 inches of soil, working it over until it’s light and fluffy. This will also help break down any clods or compacted patches.
For particularly dense soils, consider adding a 2-inch layer of compost or well-rotted manure on top before sowing. As the seeds germinate and grow, this will provide an extra boost of nutrients and help improve drainage. With a little effort upfront, you’ll be rewarded with stronger, healthier seedlings that are better equipped to thrive in their new environment.
Overcoming Common Seed-Sowing Challenges
One of the most frustrating aspects of seed sowing is dealing with common challenges that can hinder successful germination and growth. Poor germination rates are a major concern for many gardeners, often resulting from inadequate soil temperature, insufficient moisture, or poor seed quality.
To overcome this issue, ensure you provide optimal conditions for germination by checking the specific requirements for each type of seed you’re planting. For example, some seeds prefer warmer temperatures (around 70-80°F) while others require cooler temperatures (around 50-60°F). Maintaining consistent moisture levels and using a soil thermometer can also help.
Another common challenge is pest infestations, which can destroy newly sown seeds or young seedlings before they even have a chance to grow. To combat this issue, use physical barriers like row covers or fine mesh to keep pests at bay. Additionally, rotate your crops regularly to avoid depleting the soil of nutrients and creating an environment that’s conducive to pest development.
If you notice any signs of infestation, take swift action by manually removing affected areas or using organic pest control methods like neem oil or diatomaceous earth. By being proactive and taking preventative measures, you can minimize the risk of pests ruining your free vegetable seedlings.
Maintaining and Harvesting Your Free Vegetable Garden
Now that you’ve planted your free seeds, it’s time to learn how to tend to them for a bountiful harvest. This next part is crucial in getting the most out of your garden.
Watering and Mulching Techniques for Optimal Growth
As you tend to your free vegetable garden, it’s essential to remember that consistent moisture and healthy soil are key to optimal growth. Adequate watering is crucial, especially during the first few weeks after planting when seeds are establishing themselves. Aim to provide about 1-2 inches of water per week, either through rainfall or irrigation. But how do you ensure your plants aren’t too wet or dry? Start by checking the soil’s moisture levels with a finger test: stick your finger into the soil up to the knuckle; if it feels dry, it’s time for watering.
To retain soil health and prevent erosion, effective mulching strategies are vital. Organic mulches like wood chips, bark, or straw can help suppress weeds by blocking light from reaching them. Spread a 2-3 inch layer of mulch around your plants, keeping it a few inches away from the base to prevent rot. As an added bonus, mulch retains moisture in the soil, reducing the need for frequent watering.
Mulching also regulates soil temperature and prevents nutrient leaching. Consider using a combination of mulches, such as straw and wood chips, to achieve optimal results.
Monitoring Pests and Diseases in Your Garden
As you tend to your free vegetable garden, it’s inevitable that pests and diseases will try to sabotage your hard work. Regular monitoring is key to identifying problems early on, when they’re still manageable. Take a walk through your garden at least once a week, inspecting each plant carefully for signs of trouble.
Some common garden enemies include aphids, whiteflies, and spider mites – tiny but troublesome insects that can weaken plants over time. Look for curled or distorted leaves, sticky honeydew droplets on stems, or actual insects flitting about your plants. To control these pests, try introducing beneficial insects like ladybugs or lacewings to your garden, which feed on aphids and other unwanted visitors.
Diseases like powdery mildew, leaf spot, and downy mildew can also wreak havoc on your crops. Be on the lookout for fuzzy white growths, yellowing leaves, or actual mold developing on plant surfaces. To combat these issues, use neem oil or sulfur-based sprays to control fungal outbreaks, or remove infected leaves to prevent further spread.
Remember that prevention is always better than cure – keeping your garden clean and free of debris can go a long way in preventing pest and disease issues from arising in the first place.
Timing the Harvest for Maximum Flavor and Nutrition
When it comes to harvesting your free vegetable garden, timing is everything. You want to pick your veggies at the peak of freshness and flavor, when they’re packed with nutrients and taste amazing. But when exactly do you harvest?
For leafy greens like lettuce and spinach, the ideal time is when the leaves are still crisp but not wilted. If left too long, they’ll become bitter and lose their nutritional value. For example, research shows that spinach loses 50% of its vitamin C within just two days of being picked. So, harvest these veggies in the morning, after the dew has evaporated but before the heat of the day.
Other vegetables like tomatoes, peppers, and cucumbers are ready when they’re fully ripe. Check for a sweet, slightly soft spot on the skin, which indicates readiness. For example, cherry tomatoes are typically ready to harvest 60-70 days after sowing. Make sure to check them daily, as they can go from perfectly ripe to overripe quickly.
Harvesting your veggies at the right time will not only make them taste better but also ensure you get the most nutrients out of them. So, pay attention to the specific needs of each vegetable and harvest them when they’re ready!
Frequently Asked Questions
Can I use free seeds for all types of vegetables, or are some varieties not suitable?
Free seeds can be used for a wide variety of vegetables, including leafy greens, root vegetables, and even some types of squash and cucumbers. However, some specialty or hybrid varieties may require specific conditions to germinate or grow well. It’s essential to research the specific needs of your chosen free seed variety to ensure success.
How do I store my free seeds for long-term use?
To store your free seeds effectively, keep them in a cool, dry place away from direct sunlight and moisture. You can also store them in airtight containers or envelopes, labeled with the date and contents. When storing, make sure to keep them separate from other foods and potential sources of moisture.
What’s the best way to germinate seeds from last year’s harvest?
When germinating seeds from last year’s harvest, it’s essential to ensure they are still viable. Try soaking the seeds in water for 24 hours before planting, or use a seed starting mix with a higher pH level to help stimulate germination.
Can I share my free seeds with friends and family, or is that not recommended?
Sharing your free seeds with others can be a great way to spread the joy of gardening and save some money! However, it’s essential to note that saved seeds may not retain their original characteristics over time. If you plan to share, make sure to label the seed packets clearly and provide any relevant growing instructions.
How do I handle seed storage for long-term preservation?
For long-term preservation, store your free seeds in a temperature-controlled environment between 32°F and 50°F (0°C to 10°C). You can also use desiccants or silica gel packets to maintain low humidity levels. Regularly checking the viability of your stored seeds will help ensure they remain healthy for future planting.
What if I accidentally save seeds from hybrid varieties – are they still usable?
If you accidentally save seeds from hybrid varieties, they may not produce plants with the same characteristics as the parent plant. However, some hybrid seeds can still be used for replanting and growing, but their performance might vary. It’s always best to save seeds from heirloom or open-pollinated varieties for more consistent results.
How do I know if my free seeds are diseased or infested?
Regularly inspect your stored free seeds for signs of disease, such as mold or fungus, or pests like insects or rodents. Check the seed coat for any visible damage and avoid storing them in areas prone to moisture or pests. If you suspect any issues, discard the affected seeds to prevent spreading problems to other plants.