As a gardener, you know that a healthy raised bed is essential for vibrant plant growth, but do you ever wonder how to keep your soil in top condition? If you’re noticing reduced yields, increased pest problems, or signs of nutrient deficiencies in your plants, it may be time to refresh your raised bed soil. Refreshing your soil can have a transformative impact on your garden’s overall health and productivity. In this comprehensive guide, we’ll walk you through the benefits of refreshing your raised bed soil, how to identify when it needs attention, and a step-by-step process for improving soil quality. By following our expert advice, you’ll be able to boost plant growth, reduce pests and diseases, and enjoy a thriving garden all season long.
Understanding the Importance of Raised Bed Soil Refresh
Let’s take a closer look at why refreshing your raised bed soil is crucial for maintaining healthy plant growth and ensuring your garden thrives over time.
Benefits of Regular Soil Refreshing
Regular soil refreshing is a crucial aspect of maintaining healthy raised beds. By incorporating this practice into your gardening routine, you can significantly improve plant growth, reduce pests and diseases, and increase crop yields. One of the primary benefits of regular soil refreshing is its ability to replenish essential nutrients that plants need to thrive. Over time, raised bed soil can become depleted of these nutrients, leading to stunted growth and decreased productivity.
To combat this issue, consider adding a 2-inch layer of compost or well-rotted manure to your raised beds every six months. This will not only replenish the soil’s nutrient reserves but also improve its structure and water-holding capacity. By doing so, you’ll create an ideal environment for root growth, allowing plants to absorb the nutrients they need to reach their full potential.
Another advantage of regular soil refreshing is its ability to deter pests and diseases. Healthy soil with a balanced pH and optimal nutrient levels is less susceptible to infestations and infections, reducing the need for pesticides and fungicides.
Signs That Indicate Your Raised Bed Soil Needs Refreshing
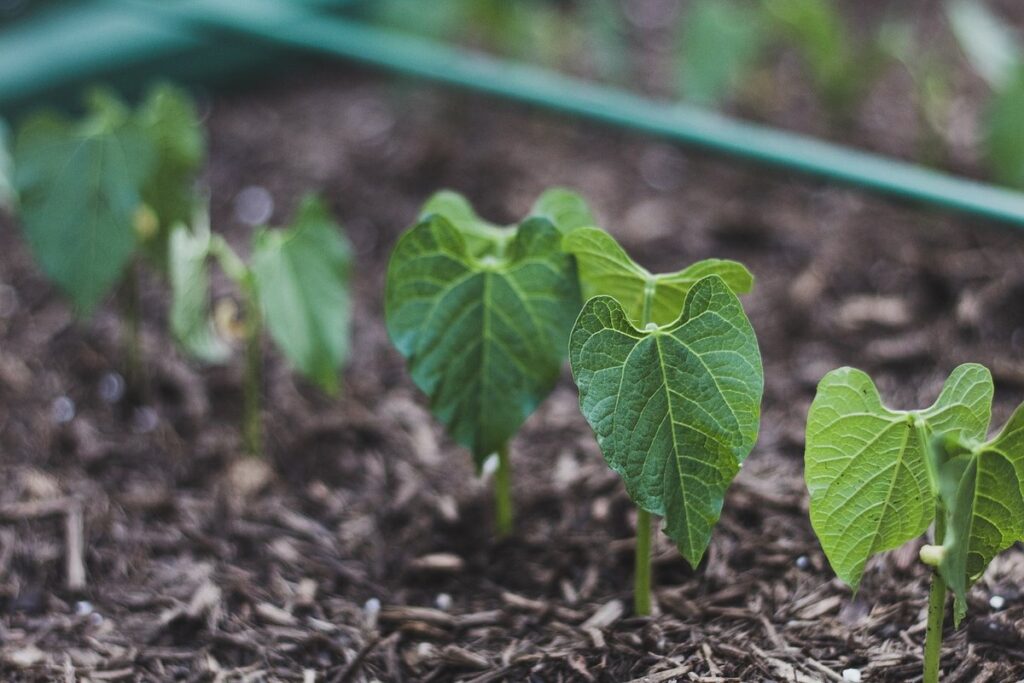
If you’re noticing that your raised bed soil is no longer performing at its best, it may be time for a refresh. One of the most common signs that indicate the need for a raised bed soil refresh is compacted soil. Over time, the repeated tilling and planting in raised beds can cause the soil to become compressed, making it difficult for water and air to penetrate. This can lead to reduced drainage, root growth, and overall plant health.
Another indication of the need for a refresh is nutrient depletion. Raised bed soils, especially those that have been used frequently, can quickly deplete their nutrients due to intensive planting and harvesting cycles. If you notice that your plants are not thriving or if they’re showing signs of nutrient deficiencies such as yellowing leaves or stunted growth, it’s likely that the soil needs a boost.
Lastly, decreased water retention is another common sign that indicates the need for a raised bed soil refresh. If the soil seems to dry out quickly or requires excessive watering, it may be a sign that the soil structure has been compromised. This can be due to nutrient depletion, compacted soil, or even pests like nematodes that can disrupt the soil’s ecosystem.
Choosing the Right Materials for Soil Refresh
When refreshing your raised bed soil, selecting the right materials can make all the difference. We’ll walk you through essential considerations to choose effective and eco-friendly additives.
Organic Amendments for Soil Refresh
When it comes to refreshing raised bed soil, incorporating organic amendments is an excellent way to replenish nutrients and improve overall soil health. Compost, for instance, is a popular choice due to its high nutrient content and ability to retain moisture. However, keep in mind that compost can be heavy and may compact the soil if not mixed properly.
Animal manure, such as chicken or cow manure, is another option, offering a rich source of nitrogen and phosphorus. Yet, it’s essential to choose aged manure to avoid potential pathogens and odors. Green sand, derived from glauconite, can also be beneficial in promoting soil structure and fertility.
When introducing these amendments, start with small amounts (about 10-20% of the total soil volume) and mix thoroughly to prevent nutrient overloading. Monitor your soil’s pH levels and adjust accordingly, as some amendments may alter its acidity or alkalinity. Regularly incorporating these organic materials will not only refresh your raised bed soil but also create a more balanced ecosystem for healthy plant growth.
Inorganic Fertilizers and Other Options
Inorganic fertilizers and other materials can be useful alternatives for refreshing raised bed soil. When choosing these options, it’s essential to understand their benefits and limitations.
Perlite and vermiculite are two popular additions that can improve the structure and drainage of the soil. Perlite is a lightweight, porous material made from volcanic glass that helps retain moisture while preventing waterlogging. Vermiculite, on the other hand, has excellent water-holding capacity and can help regulate temperature fluctuations in the soil.
Inorganic fertilizers like ammonium sulfate, diammonium phosphate, and urea can provide essential nutrients to your plants. These fertilizers are often more concentrated than organic options and should be used with caution to avoid over-fertilization.
Other materials you might consider include peat moss, composted bark, or coco coir, which can help retain moisture, suppress weeds, and regulate soil pH levels. When using these additives, start with small amounts (about 10% of the total mix) and adjust as needed based on your specific growing conditions.
Preparing the Soil for Refresh
Now that you’ve emptied and cleaned your raised bed, it’s time to prepare the soil for a fresh new start. In this next step, we’ll cover the essential tasks for rejuvenating your garden’s foundation.
Removing Debris and Weeds
Removing debris and weeds from your raised bed is a crucial step before refreshing the soil. Left unchecked, these unwanted growths can strangle new plantings, harbor pests and diseases, and even create an environment conducive to weed seed dispersal. Clearing the area will not only give you a clean slate for revitalizing the soil but also prevent any potential damage to your plants.
Start by gently removing any dead or decaying plant material from the bed. Use a fork to loosen and turn over the soil, taking care not to compact it further. This process is called “double digging,” which can help improve drainage and air circulation in the raised bed.
Next, tackle the weeds. You can use a tool like a hoe or weeding fork to remove them from the soil, making sure to get as much of the root system out as possible. For tougher weeds, consider using a pre-emergent herbicide specifically designed for raised beds. Be cautious when handling any chemicals and follow the manufacturer’s instructions carefully.
Regularly inspecting your raised bed can help you catch weeds in their early stages before they take hold and become more difficult to remove.
Testing the Soil pH and Nutrient Levels
Testing the soil pH and nutrient levels is a crucial step before refreshing raised bed soil. You can start by purchasing a DIY soil testing kit or sending a sample to a lab for analysis. These kits usually measure pH, nitrogen (N), phosphorus (P), potassium (K), and other essential nutrients.
A healthy raised bed soil typically has a slightly acidic to neutral pH, ranging from 6.0 to 7.5. If your soil test reveals an excessively high or low pH, it may be necessary to adjust it before refreshing the soil. For example, if your soil is too alkaline (pH above 8), you can add elemental sulfur or peat moss to lower the pH.
Nutrient levels are also essential to consider. Test for nitrogen, phosphorus, and potassium, as these are the primary macronutrients required by plants. Based on the test results, you may need to add organic matter such as compost or well-rotted manure to boost nutrient levels. Keep in mind that over-fertilization can harm your plants, so it’s essential to apply only what is recommended.
A balanced soil pH and adequate nutrient levels will ensure a healthy growth environment for your raised bed garden.
The Refresh Process: Step-by-Step Guide
Now that you have your materials ready, let’s dive into the step-by-step guide on how to refresh your raised bed soil, ensuring a thriving garden. We’ll walk through each crucial stage together.
Digging Up the Old Soil
Before you can start freshening up your raised bed soil, you’ll need to carefully remove the old soil. This is a crucial step, as it allows you to assess the condition of the underlying structure and add new nutrients and amendments as needed.
Begin by gently prying loose any stubborn clumps or rocks that may be holding onto the old soil. Use a fork or spade to loosen the soil, working from one end of the bed to the other. Be sure to avoid using a power tool, which can damage the raised bed frame.
As you dig up the old soil, keep an eye out for any signs of rot or decay in the wood. If you notice any significant damage, it may be necessary to replace the affected boards before proceeding. Once the old soil has been removed, take a moment to inspect the underlying structure and make any necessary repairs.
Now that the old soil is gone, you’ll have a clean slate to work with. In the next step, we’ll cover how to prepare your raised bed for new, nutrient-rich soil.
Adding New Materials and Mixing Well
When adding new materials to your raised bed soil, it’s essential to mix them well with the existing soil to create a uniform blend. Start by digging into the top 6-8 inches of the bed, loosening the soil with a fork or spade. This will help break up any clumps and aerate the soil.
Next, add your chosen materials, such as compost, worm castings, or perlite, in accordance with their recommended application rates. For example, if you’re using 2 cups of compost per square foot, spread it evenly across the bed. Then, use a garden fork to gently mix the new material into the existing soil.
As you mix, work from one corner of the bed to the other, creating a layered effect. This will help prevent compacting the soil and ensure even distribution of nutrients. Continue mixing until the new material is fully incorporated, and the soil feels smooth and consistent. Finally, use a rake or broom to level out the bed, settling the mixture in place.
Post-Refresh Care: Tips for a Healthy Raised Bed
Now that your raised bed soil is refreshed, it’s time to focus on post-refresh care. This will help ensure your garden remains healthy and thriving throughout the growing season.
Watering and Irrigation Considerations
After refreshing your raised bed soil, it’s essential to adjust your watering schedule to ensure optimal growth and prevent overwatering. As you’ve added fresh nutrients and amendments, the soil now has improved structure and water-holding capacity.
Initially, you may need to water more frequently as the soil settles and becomes accustomed to its new composition. Monitor the soil moisture by inserting a finger or a stick into the bed – if it feels dry about an inch down, it’s time for watering. Overwatering can be detrimental to your plants, so make adjustments accordingly.
In general, most raised beds require 1-2 inches of water per week during peak growing periods. You may need to increase this amount after refreshing your soil, especially if you’ve added high-nitrogen amendments that promote rapid growth. To fine-tune your watering schedule, consider factors like climate, plant species, and soil type.
A good rule of thumb is to check the soil moisture in the morning when it’s usually at its driest point. If you notice the soil is consistently drying out too quickly or retaining water excessively, adjust your irrigation plan accordingly. This may involve adding mulch to retain moisture, installing a drip irrigation system for more efficient watering, or adjusting the frequency and duration of your watering sessions.
Monitoring Progress and Making Adjustments
Monitoring plant growth is crucial after refreshing raised bed soil. Check for signs of improvement, such as increased leaf size and color, more vigorous growth, and better root development. These indicators suggest that the refreshed soil is providing essential nutrients and improving drainage.
As plants grow, adjust fertilization schedules accordingly. If you notice slow growth or weak plant performance, consider adding an extra feeding with a balanced fertilizer. However, be cautious not to over-fertilize, as this can cause more harm than good.
Monitor irrigation schedules regularly, too. Adjust watering frequencies based on weather conditions and soil moisture levels. For instance, if the weather is hot and dry, increase watering frequency to prevent drought stress. Conversely, reduce watering during periods of heavy rainfall to avoid waterlogged soil.
Regular checks will help you fine-tune your care routine, ensuring optimal growth and preventing potential problems. Take note of specific plant needs, such as companion planting or specific nutrient requirements. By doing so, you’ll be able to provide the best possible environment for your plants to thrive.
Troubleshooting Common Issues After Soil Refresh
So, you’ve refreshed your raised bed soil and everything seems perfect… until it doesn’t. Let’s tackle some common issues that might arise after refresh.
Addressing Nutrient Deficiencies
Identifying nutrient deficiencies in plants after a soil refresh can be challenging, especially if you’re new to gardening. One way to determine if your plants are deficient is by observing their visual symptoms. For instance, yellowing leaves or stunted growth may indicate a lack of essential nutrients like nitrogen, iron, or magnesium.
To address these issues, it’s crucial to consider the pH level of your raised bed soil. Nutrient deficiencies often occur when the soil pH deviates from what plants require. A simple pH test kit can help you determine if your soil needs adjustments. If necessary, add lime to increase pH or sulfur to decrease it.
Another approach is to incorporate organic amendments that provide a broad range of nutrients. Compost tea, for example, acts as a fertilizer by infusing microorganisms into the soil. Similarly, adding well-rotted manure or bone meal can replenish depleted nutrient stores. Be sure to follow application instructions and start with small amounts to avoid over-fertilizing.
In addition, monitor your plants’ responses to these additions, adjusting as needed to achieve optimal growth.
Managing Compaction and Drainage Issues
After refreshing your raised bed soil, you may encounter issues with compaction and drainage. Compacted soil can lead to poor root growth, reduced aeration, and decreased water penetration, while inadequate drainage can cause waterlogging, root rot, and other problems. To manage these issues, start by inspecting your bed for signs of compaction, such as uneven or hard surfaces.
To alleviate compaction, use a fork or spade to gently loosen the soil, being careful not to damage any plant roots. If the issue is more severe, consider using a aerator or decompactor specifically designed for raised beds. Regularly incorporating organic matter like compost or well-rotted manure can also help improve soil structure and reduce compaction.
For drainage issues, check the bed’s slope and elevation to ensure it’s not waterlogged. Add organic materials like perlite, vermiculite, or sand to improve soil porosity and increase water infiltration. Installing a French drain or creating a swale can also direct excess water away from your raised bed, reducing the risk of waterlogging and associated problems.
Frequently Asked Questions
How long does it take for the soil to show improvements after refreshing?
The time frame for noticing improvements varies depending on factors such as plant type, climate, and initial soil condition. Generally, you can expect noticeable changes within 2-6 weeks after refreshing your raised bed soil.
Can I refresh my soil in the middle of a growing season, or should I do it during the off-season?
You can refresh your raised bed soil at any time, but it’s best to do so during the dormant season (winter or early spring) for newly planted areas. If you’re refreshing in the midst of a growing season, focus on replenishing essential nutrients and consider using organic amendments.
How often should I retest my soil pH and nutrient levels after refreshing?
It’s recommended to retest your soil every 6-12 months, especially if you’ve added new materials or have concerns about nutrient deficiencies. This will help you monitor the soil’s response to refreshing and make adjustments as needed to maintain optimal growing conditions.
What if I don’t know what type of amendments my plants need? Can I still refresh my raised bed soil?
Yes! Even without knowing specific nutrient requirements, refreshing your raised bed soil with a balanced mix of organic amendments can help alleviate common deficiencies. Consider consulting local gardening experts or taking a soil test to determine the best course of action for your specific garden.
How do I ensure that my refreshed soil drains properly and doesn’t become waterlogged?
To prevent waterlogging, incorporate materials like perlite, vermiculite, or sand into your refreshed soil to improve drainage. Also, ensure proper watering habits by avoiding overwatering and allowing the soil to dry slightly between waterings.