Are you ready to tap into the world of fungi and grow your own delicious mushrooms at home? With a little knowledge and some basic equipment, you can cultivate your very own fresh produce right in your kitchen or garden. Not only is mushroom growing a fun and rewarding hobby, but it’s also a great way to save money on groceries and reduce your carbon footprint. In this comprehensive guide, we’ll walk you through the basics of mushroom cultivation, from selecting the perfect species for your needs to harvesting and storing your fresh produce. Whether you’re a seasoned gardener or just starting out, our expert tips and tricks will have you growing like a pro in no time. Get ready to embark on an exciting journey into the world of mycology!
Understanding Mushroom Cultivation Basics
Getting started with mushroom cultivation can be overwhelming, but don’t worry, we’ve got you covered. This section will break down the fundamental concepts and techniques to help you grow mushrooms at home with ease.
Choosing the Right Species
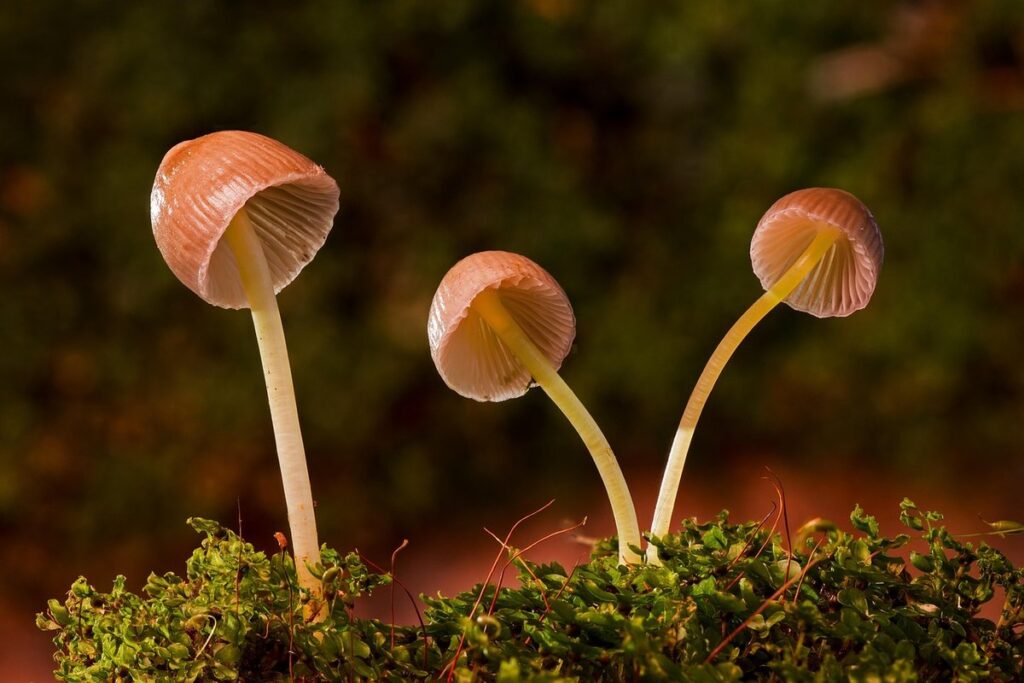
When it comes to choosing the right species for home cultivation, you have several options. Some popular varieties include oyster mushrooms, shiitake mushrooms, and button mushrooms. Each has its unique characteristics, growth requirements, and uses.
Oyster mushrooms are a great choice for beginners due to their ease of cultivation and adaptability. They can grow on a wide range of substrates, including straw, compost, or even wood chips. Their delicate flavor and texture make them perfect for stir-fries and salads. Shiitake mushrooms, on the other hand, require more specific conditions to thrive, but reward growers with rich, earthy flavors. Button mushrooms are another popular variety, prized for their crisp texture and mild taste.
Consider what you plan to use your homegrown mushrooms for when selecting a species. If you’re new to cultivation, oyster or button mushrooms might be the better choice due to their ease of growth.
Preparing the Growing Environment
Creating an ideal environment for mushroom growth is crucial to ensure optimal fruiting and healthy mycelium development. Temperature, humidity, and light are the three key factors to consider when setting up a suitable growing space at home.
Temperature control is essential as different species of mushrooms have specific temperature requirements. For example, oyster and shiitake mushrooms thrive in cooler temperatures between 50-60°F (10-15°C), while button and portobello mushrooms prefer warmer temperatures around 65-70°F (18-21°C). A temperature range that is too far from the optimal can slow down or even stop mycelium growth.
Maintaining the right humidity level is also vital. Mushrooms absorb moisture through their caps, so a humid environment helps to promote healthy growth. Aim for a relative humidity of 80-90% during the fruiting stage and around 60-70% before and after inoculation. You can achieve this by placing the growing containers in a plastic bag or using a humidifier.
Light is another crucial factor to consider, but most mushroom species don’t require direct sunlight. In fact, too much light can lead to poor growth or even kill the mycelium. Instead, provide indirect light through a north-facing window or use grow lights specifically designed for mushroom cultivation. This will help to promote healthy growth and prevent over-illumination.
It’s essential to monitor these factors regularly, making adjustments as needed to ensure an optimal growing environment. By paying close attention to temperature, humidity, and light, you’ll be well on your way to successfully cultivating mushrooms at home.
Setting Up Your Mushroom Cultivation Station
When setting up your mushroom cultivation station, there are a few essential items you’ll need to get started, so let’s take a closer look at what those are. This includes choosing the right space and equipment for optimal growth.
Materials Needed for Mushroom Growing
To start growing mushrooms at home, you’ll need to gather the necessary equipment and materials. The most critical component is a substrate, which provides nutrients for the mycelium to grow. You can choose from various types of substrates, such as straw, compost, or wood chips, depending on the type of mushroom variety you’re cultivating.
In addition to substrate, you’ll need water, a clean and sterile environment, and proper equipment for maintaining temperature and humidity levels. A thermometer, hygrometer, and fan are essential tools for creating an optimal growing environment. You’ll also require a contamination-free workspace, with gloves, a face mask, and a sterile knife or spore syringe.
Some other essential supplies include mushroom spawn (the actual mushroom seed), a fruiting chamber or grow bag to contain the substrate, and a watering can or spray bottle for maintaining moisture levels. It’s also helpful to have a good quality light source, such as LED grow lights, to promote healthy growth.
Investing in proper equipment and materials will ensure a successful and safe mushroom growing experience at home.
Preparing the Substrate
When it comes to mushroom cultivation, the substrate is the foundation of your growing operation. It’s the material that provides nutrients and structure for your mycelium to colonize and produce fruiting bodies. The most common types of substrates used in home mushroom growing include straw, compost, wood chips, and even spent coffee grounds.
Before using any of these materials, it’s essential to prepare them properly to prevent contamination and ensure healthy growth. This process is called pasteurization. You can achieve this by heating the substrate to a temperature of around 140°F (60°C) for several hours. For example, you can place the straw or compost in a large container and heat it using a water bath or even your oven.
Alternatively, you can also use a solar pasteurization method where you leave the substrate outside on a sunny day, covering it with plastic sheeting to trap the heat. This method is perfect for smaller batches of substrate.
Inoculation and Fruiting
Now that you’ve got your mushroom spores or plug spawn, it’s time to introduce them to their new home and prepare for fruiting. This next step is crucial for a successful harvest.
Inoculating the Substrate with Spores
Inoculating the substrate with mushroom spores is a crucial step in growing mushrooms at home. It involves introducing the fungal mycelium to the prepared substrate, which will eventually produce the mushrooms. There are two primary methods of inoculation: syringe injection and spawn use.
Syringe injection involves using a specialized tool to inject spore solution directly into the substrate. This method is ideal for small-scale production or when working with sensitive species that require precise control over the inoculation process. When using this method, make sure to wear gloves and work in a sterile environment to prevent contamination. Fill the syringe with the prepared spore solution and inject it slowly into the substrate, taking care not to inject too much liquid and causing damage.
Spawn use is another popular method of inoculation. Spawn is pre-colonized substrate that has already been inoculated with mushroom mycelium. This method is easier than syringe injection and eliminates the risk of contamination during the inoculation process. Simply place the spawn plugs into the prepared substrate, making sure they are buried under a layer of moist material to maintain humidity.
When using either method, it’s essential to ensure the substrate is fully colonized before attempting to fruit the mushrooms. This can take anywhere from 1-6 weeks, depending on factors like temperature, humidity, and species. Keep the substrate consistently moist during this time, as dry conditions will slow down or even halt colonization.
Once the substrate has been fully colonized, you’re ready to induce fruiting by creating a suitable environment for mushroom growth. This includes maintaining optimal temperatures, providing adequate light, and ensuring sufficient moisture levels. With proper care, your mushrooms should begin to grow within 1-3 weeks of inducing fruiting.
Creating an Ideal Environment for Fruiting
To create an ideal environment for fruiting, you need to focus on providing optimal conditions that mimic nature. Temperature plays a crucial role in this process, with most mushroom varieties thriving between 55°F and 60°F (13°C to 15°C). Some species like oyster mushrooms can tolerate warmer temperatures up to 65°F (18°C), but it’s essential to research the specific requirements for your strain.
Maintaining high humidity levels is also critical during the fruiting stage. Aim for a relative humidity of 70-80% to promote healthy mycelium growth and prevent dehydration. You can achieve this by covering the growing area with plastic wrap or using a humidifier. Light control is equally important, as direct sunlight can cause temperature fluctuations and hinder fruiting.
To maintain a healthy environment, it’s vital to monitor temperature, humidity, and light levels regularly. Use a thermometer and hygrometer to track conditions, and make adjustments as needed. This might involve moving the growing area to a more stable location or using shading materials like paper bags to filter direct sunlight. By carefully controlling these factors, you’ll be able to provide your mushrooms with an optimal environment for fruiting and increase your chances of success.
Monitoring and Maintaining Your Mushroom Crop
Now that you’ve successfully cultivated your mushroom crop, it’s time to ensure they continue thriving through regular monitoring and maintenance. This involves checking on temperature, humidity, and substrate conditions daily.
Identifying Common Issues and Solutions
As you tend to your mushroom crop, it’s not uncommon to encounter issues that can impact yields and quality. Contamination is one of the most common problems, often caused by bacteria, mold, or pests introducing themselves into the growing environment. To prevent contamination, maintain a clean workspace, sterilize equipment, and monitor temperature and humidity levels.
Pests like fungus gnats, spider mites, and mealybugs can also wreak havoc on your crop. Use physical barriers to exclude pests from the growing area and introduce beneficial insects that prey on these unwanted visitors. For instance, introducing ladybugs or lacewings can help control aphid populations.
Poor growth is another common issue, often due to inadequate light, temperature fluctuations, or insufficient nutrients. Ensure consistent temperatures between 55-60°F (13-15°C) for most varieties and maintain adequate humidity levels. Fertilize sparingly with a balanced mushroom-specific fertilizer to avoid overfeeding.
Regular monitoring of your crop will help you catch issues early on, allowing you to implement corrective measures before it’s too late. Keep an eye out for discoloration, deformation, or unusual growth patterns, and address any problems promptly to ensure a healthy, thriving crop.
Harvesting and Storing Mushrooms
When it’s time to harvest your mushroom crop, it’s essential to do so at the right moment to ensure optimal flavor and texture. Typically, mushrooms are ready to be picked when the cap is fully open, but still firm to the touch. For most varieties, this occurs 7-10 days after inoculation.
To avoid damaging the delicate mycelium, use a gentle prying motion with your hands or a soft-bristled brush to release the mushroom from its substrate. Handle the mushrooms by their stems rather than touching the caps to prevent bruising and contamination.
For storing harvested mushrooms, maintain a consistent refrigerator temperature between 32-40°F (0-4°C). Store them in breathable containers like paper bags or mesh bags to allow for airflow and moisture exchange. Avoid sealed plastic bags, which can trap ethylene gas and promote spoilage. Proper storage will help extend the shelf life of your mushrooms by up to a week.
When storing, it’s also crucial to keep the mushrooms away from strong-smelling foods, as they are highly susceptible to absorbing odors. By following these simple steps, you’ll be able to enjoy your homegrown mushrooms for longer and maintain their quality.
Advanced Techniques for Expert Growers
As you’ve honed your skills and grown a thriving mushroom garden, it’s time to push the boundaries of what’s possible. This next level of expertise will unlock even more complex techniques and advanced methods.
Scale-Up Methods for Commercial Production
When it’s time to take your mushroom growing operation to the next level, you’ll need to consider scale-up methods for commercial production. This involves implementing automation and mechanization techniques to increase efficiency, consistency, and yield.
One key aspect of large-scale cultivation is substrate preparation. While manual preparation can be sufficient for small batches, automated systems can streamline this process by precisely controlling temperature, humidity, and nutrient delivery. For example, the Mushroom Matrix system uses a combination of robotics and AI to optimize substrate preparation, resulting in higher yields and reduced waste.
Another critical area is spawn production. Automated spawn runners can rapidly inoculate and incubate mushroom substrates, reducing labor costs and minimizing human error. The use of robotic arms or conveyor belts can further enhance efficiency by allowing for continuous processing and monitoring of spawn growth.
When implementing automation and mechanization in your commercial operation, consider factors such as space constraints, energy consumption, and equipment maintenance to ensure a seamless transition from manual to automated systems. With the right setup, you’ll be able to scale up production while maintaining or even improving quality and consistency.
Breeding New Varieties through Genetic Selection
Breeding new mushroom varieties through genetic selection is an advanced technique that can be a game-changer for expert growers. By selectively breeding different species or strains, you can create unique and high-performing cultivars with desirable traits such as faster growth rates, higher yields, or improved disease resistance.
Genetic diversity is crucial in maintaining healthy fungal populations. When you breed new varieties, you’re not only creating something new but also ensuring that your mushroom culture remains resilient to changes in its environment. This is especially important for home growers who may be prone to mistakes or have varying environmental conditions.
To get started with genetic selection, you’ll need a solid understanding of mycology and experience working with different mushroom species. You can begin by selecting parent strains with desirable traits and then crossing them to create offspring with the desired characteristics. Keep in mind that breeding new varieties requires patience, as it can take several generations to achieve the desired outcome.
When selecting parent strains, consider factors like growth rate, yield, flavor, and texture. Research existing cultivars and study their genetic makeup to inform your selection process. With practice and experience, you’ll become proficient in identifying and exploiting desirable traits in your mushroom culture.
Safety Precautions and Best Practices
Before you start growing your own mushrooms, it’s essential to follow some crucial safety precautions to avoid contamination and ensure a healthy harvest. Let’s dive into the best practices for a successful mushroom-growing experience.
Handling Mushroom Spores and Cultures Safely
When handling mushroom spores and cultures, it’s essential to follow proper procedures to prevent contamination and exposure risks. Spores and cultures can be easily contaminated with airborne particles, moisture, and other microorganisms that can lead to unwanted growth or even health hazards.
To minimize these risks, make sure to work in a clean environment with good airflow, away from direct sunlight and heat sources. Use disposable gloves when handling spore prints, cultures, or other materials that may come into contact with the mushroom itself.
Proper storage is also crucial for maintaining the viability of your spores and cultures. Store them in sealed containers, such as zip-top bags or airtight containers, at room temperature (around 60-70°F). Avoid storing them near heat sources, ovens, or any areas where there may be moisture accumulation.
In addition to these precautions, it’s also essential to label your storage containers with the type of spore or culture and date they were stored. This will help you keep track of what you have and ensure that you use the oldest materials first.
Sanitizing Equipment and Work Areas
Maintaining a clean environment is crucial for successful mushroom cultivation. Before starting to grow mushrooms, it’s essential to sanitize all equipment and work areas to prevent contamination and ensure healthy spore growth.
Begin by cleaning and disinfecting all surfaces with a solution of water and bleach or a commercial disinfectant specifically designed for use in food preparation areas. Allow the surfaces to air dry before proceeding. Next, wash your hands thoroughly before donning personal protective gear (PPG) such as gloves, masks, and goggles.
To sanitize equipment, submerge reusable items like grow bags, substrate containers, and utensils in a solution of 1 part bleach to 10 parts water for at least 30 minutes. Remove excess moisture with a clean towel or let air dry before use. Avoid using harsh chemicals that can damage materials or contaminate the environment.
Regular cleaning and maintenance will help maintain a healthy environment for your mushroom cultivation, reducing the risk of contamination and promoting successful growth. Make it a habit to sanitize equipment and work areas after each use to keep your home mushroom-growing space clean and hygienic.
Troubleshooting Common Issues
As you embark on growing mushrooms at home, you may encounter some common hiccups along the way. This section will walk you through troubleshooting solutions to get your mushroom-growing journey back on track.
Identifying and Addressing Contamination
Identifying and addressing contamination is crucial when growing mushrooms at home. Contamination can occur due to various reasons such as poor sterilization techniques, inadequate environment control, or introducing foreign objects into the growing area.
To identify contamination, look for visible signs like mold growth, yellowing or browning of mycelium, or an unpleasant odor. If you notice any of these symptoms, immediately isolate the affected area and take corrective measures.
Implement corrective measures by thoroughly cleaning and disinfecting the affected area with a solution of 3% bleach and water. Replace contaminated substrates and restart the cultivation process from scratch. To prevent future occurrences, maintain a clean and sterile environment, ensure proper temperature and humidity control, and regularly inspect your growing space for any signs of contamination.
Regularly monitoring your mushroom crop’s health can help you catch potential issues before they become major problems. By taking proactive steps to identify and address contamination, you can minimize losses and enjoy a successful mushroom cultivation experience at home.
Managing Pests and Diseases in Mushroom Cultures
When it comes to growing mushrooms at home, one of the most critical aspects is managing pests and diseases that can affect your cultures. A single infestation or infection can not only reduce yields but also contaminate your entire crop.
Integrated Pest Management (IPM) strategies are an effective approach to controlling pests and diseases in mushroom cultures. This involves combining physical, cultural, biological, and chemical controls to minimize the use of pesticides and maintain a healthy environment for your mushrooms.
To implement IPM, start by monitoring your cultures regularly for signs of pests or diseases. Look for holes in the mycelium, unusual growth patterns, or visible insects. Use sticky traps or yellow traps to capture flying pests like fungus gnats or fruit flies. For more severe infestations, use organic pesticides like neem oil or insecticidal soap.
For diseases, practice good sanitation and hygiene by cleaning and sterilizing your equipment regularly. Avoid over-watering, which can lead to fungal growths. Regularly inspect your cultures for signs of disease and isolate infected ones to prevent spread. By taking a proactive approach to pest and disease management, you can ensure healthy, productive mushroom crops at home.
Frequently Asked Questions
How soon can I expect to harvest my first batch of homegrown mushrooms?
You can start harvesting your mushrooms within 1-3 weeks after inoculation, depending on the species and growing conditions. Keep a close eye on their growth, as overgrowth can lead to a decrease in flavor and quality.
What if I notice mold or contamination in my mushroom culture?
No
If you observe any signs of mold or contamination, it’s essential to address the issue promptly. Remove the affected area, disinfect your equipment, and ensure proper ventilation in your growing environment. This will help prevent further damage and promote healthy growth.
Can I grow mushrooms indoors without a dedicated room?
Yes
You can grow mushrooms indoors using a variety of methods, including growing kits or DIY setups. Ensure good air circulation, maintain optimal temperature and humidity levels, and provide sufficient light for the species you’re cultivating. This will help create an ideal environment for your indoor mushroom farm.
How do I prevent pests from damaging my mushroom crop?
No
Pests can be a significant threat to your mushroom crop. To minimize the risk of infestation, maintain a clean and sterile growing environment, use physical barriers, and implement integrated pest management techniques. Regularly inspect your plants and take action promptly if you notice any signs of pest activity.
Can I use reused or recycled materials as substrate for my mushrooms?
Yes
While it’s possible to use reused or recycled materials as substrate, ensure they’re properly sterilized and meet the nutritional needs of your mushroom species. Some materials may not be suitable for mushroom growth due to contamination, pH levels, or nutrient deficiencies. Research and choose the best substrate options for your specific needs.