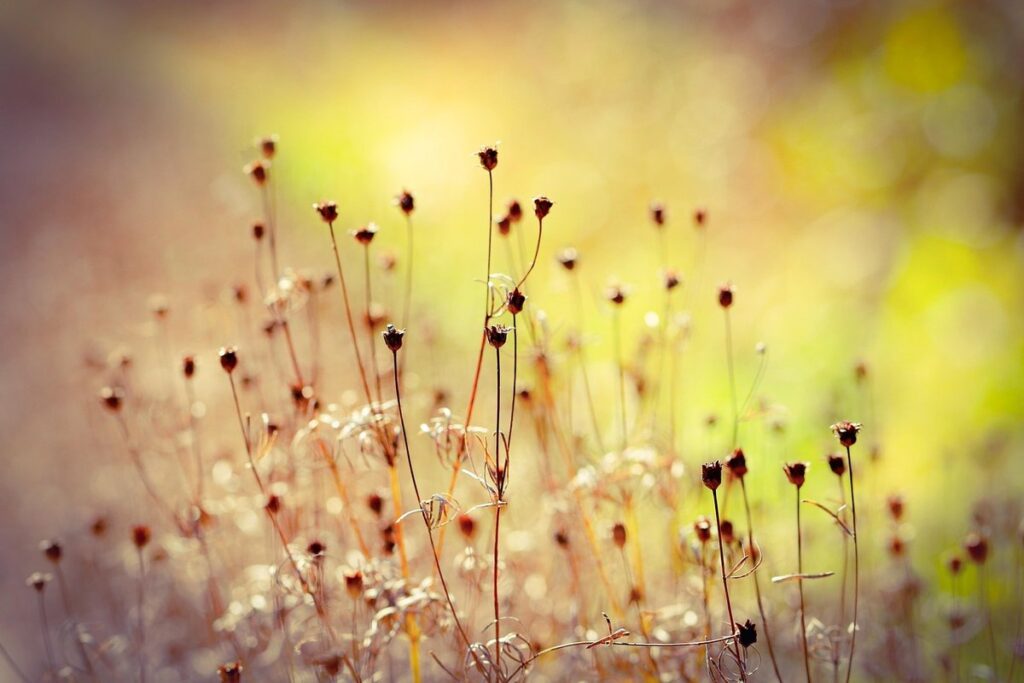
Deadheading flowers is an art that can make all the difference in your garden. When you remove spent blooms, you’re not just cleaning up – you’re also prolonging the life of your plants and encouraging new growth. By deadheading regularly, you’ll enjoy a continuous display of vibrant flowers throughout the growing season. But did you know that different types of plants require different techniques for deadheading? From annuals to perennials, shrubs to bulbs, each has its own unique requirements.
In this comprehensive guide, we’ll walk you through the ins and outs of deadheading flowers. We’ll cover the best methods for prolonging blooms, encouraging new growth, and maintaining a thriving garden. Whether you’re a seasoned gardener or just starting out, our techniques will help you get the most out of your plants and enjoy the beauty of your garden all season long.
Benefits of Deadheading
Deadheading isn’t just a task, it’s also incredibly beneficial for your flowers. By regularly removing spent blooms, you can encourage more vibrant growth and bigger displays of color throughout the season.
What is Deadheading?
Deadheading is a fundamental practice in plant maintenance that involves removing spent flowers from a plant to promote healthy growth, encourage blooming, and enhance its overall appearance. By doing so, you’re allowing the plant to channel its energy towards producing new blooms rather than expending it on seed production.
When left intact, dead flowers can be unsightly and may even attract pests or diseases that can spread quickly through the plant. Regular deadheading helps maintain a neat and tidy look, making your garden or indoor space more visually appealing. It’s especially important for plants like roses, zinnias, and marigolds, which produce multiple blooms throughout the growing season.
To deadhead effectively, simply snip off the spent flower at its base with a pair of clean scissors or pruning shears, taking care not to damage any surrounding foliage. This simple process can have a significant impact on your plant’s overall health and productivity. By practicing regular deadheading, you’ll be rewarded with an abundance of fresh blooms throughout the growing season, keeping your garden looking vibrant and thriving.
Why Deadhead Regularly
When you don’t deadhead regularly, your flowers’ blooming performance can suffer. Reduced blooming is one of the most noticeable consequences of neglecting this simple task. If you allow spent blooms to remain on the plant, energy will be diverted from producing new flowers to seed production instead. This means fewer fresh flowers for you to enjoy in the garden.
Weakened stems are another problem that can arise when deadheading is neglected. As petals drop off and seed pods form, they add weight to the stem, causing it to become weak and more susceptible to damage from wind or pests. This can lead to a decrease in overall plant health and potentially even cause the stem to break.
Additionally, leaving spent flowers on your plants can create an environment conducive to disease. Moisture can become trapped among the dead blooms, creating an ideal breeding ground for fungal diseases that can quickly spread throughout the plant if left unchecked. Regular deadheading helps maintain a healthy balance in the garden and encourages your flowers to continue blooming profusely all season long.
Tips for Effective Deadheading
When it comes to effectively deadheading flowers, having the right tools and understanding the techniques involved are crucial. Start by gathering a good pair of pruning shears or loppers, as well as some gardening gloves for protection.
For annuals like marigolds, petunias, and zinnias, simply snip off the spent blooms at their base, making sure to cut just above a leaf node. This will encourage new growth and prevent seed production. For perennials such as roses, daylilies, and coneflowers, deadheading is essential for maintaining shape and promoting repeat blooming. Cut back spent flowers to about one-third of the stem length, or to an outward-facing bud.
For shrubs like hydrangeas, azaleas, and rhododendrons, remove individual stems after they’ve finished flowering. This will help direct energy towards producing new blooms. Timing is also important: deadhead during the blooming cycle when flowers are fading but before seedpods form. Remove spent blooms as soon as possible to prevent them from drying out and becoming unsightly.
How to Deadhead Different Types of Flowers
Deadheading isn’t a one-size-fits-all task, and each type of flower requires its own unique approach. In this guide, we’ll break down how to deadhead different types of flowers with ease.
Annual Flowers: Daisies, Marigolds, Petunias
When it comes to annual flowers that are prone to self-seeding, deadheading is an essential practice to maintain their blooming performance. Daisies, marigolds, and petunias are excellent examples of annuals that respond well to regular deadheading.
For daisies, remove spent blooms as soon as they fade to encourage new flower growth and prevent seed production. This will also help keep your garden looking tidy and promote a continuous display of flowers throughout the season. For instance, Shasta daisies (Leucanthemum x superbum) produce an abundance of white or pink flowers that can be deadheaded regularly for optimal performance.
Marigolds are another annual flower that benefits from regular deadheading. Removing spent blooms will encourage more vibrant and larger flowers to grow in their place. In fact, studies have shown that marigolds that are deadheaded regularly can produce up to 25% more flowers than those left unattended. When deadheading petunias, remove the entire stem after blooming, as this will help promote bushy growth and prevent them from becoming leggy.
By incorporating regular deadheading into your garden routine, you can enjoy a bountiful display of annual flowers like daisies, marigolds, and petunias throughout the growing season.
Perennial Flowers: Roses, Peonies, Hydrangeas
When it comes to perennial flowers that bloom only once a year, deadheading is just as crucial as it is for annuals. This means that roses, peonies, and hydrangeas – some of the most popular perennials in gardens – require regular deadheading to encourage repeat blooms.
To deadhead these showstoppers without compromising next year’s blooms, follow these simple steps. For roses, cut back spent blooms to about 1-2 inches above a leaf node to promote new growth and prevent seed production. This will direct the plant’s energy towards producing more flowers rather than seeds. For peonies, remove dead flower heads after blooming, making sure to leave the green foliage intact.
When it comes to hydrangeas, you can either cut back spent blooms or let them go – but not both. If you want to encourage repeat blooming, snip off the seed head as soon as it’s finished blooming. This will allow the plant to conserve energy and produce more flowers. Remember, patience is key: while deadheading may seem like a chore, it’s essential for coaxing these gorgeous perennials into multiple blooms.
Shrubs and Vines: Lilacs, Wisteria, Clematis
When it comes to deadheading shrubs and vines that produce long-lasting blooms, timing is everything. For lilacs (Syringa spp.), for example, the best time to prune and deadhead is immediately after they finish blooming in late spring or early summer. This encourages new growth and prevents seed production, which can be unattractive.
Wisteria (Wisteria spp.) is another vine that benefits from regular pruning and deadheading. Its long, flowing stems can become leggy if not regularly trimmed back. To keep it healthy and full, remove spent blooms as soon as they fade to encourage more flowers to form. When pruning wisteria, make clean cuts just above a leaf node using sharp, sterile tools.
Clematis (Clematis spp.) is also a great candidate for regular deadheading. These flowering vines produce profuse blooms in late spring and early summer, but they can quickly become leggy if not maintained properly. Remove spent flowers as soon as they fade to encourage more blooms to form, and prune back the plant after its blooming period has ended. By following these simple steps, you can enjoy a lush, full display of color from your shrubs and vines all season long.
When to Deadhead: Timing is Everything
Now that you know why deadheading matters, let’s dive into when to do it, because timing really is everything for those gorgeous blooms. We’ll cover the key signs and seasons to look out for.
Early Spring vs. Late Summer Deadheading
When it comes to deadheading flowers, timing is everything. While many gardeners focus on removing spent blooms during the peak growing season, early spring and late summer are also crucial times for this task.
In the early spring, deadheading can promote new growth and blooming in late summer or early fall. This is particularly beneficial for perennials like peonies, roses, and hydrangeas, which tend to bloom on old wood. By removing spent blooms in early spring, you encourage these plants to focus their energy on producing new flowers later in the season.
For example, if you have a rose bush that typically blooms in June, deadhead it in late March or early April. This will give the plant time to produce new canes and buds, resulting in a more robust bloom in late summer.
Keep in mind that not all plants benefit from early spring deadheading. Some annuals, like marigolds and zinnias, are best left to focus their energy on producing flowers throughout the growing season. By understanding your specific plant’s needs, you can make informed decisions about when to deadhead for optimal blooming results.
Deadheading During Different Stages of Growth
Deadheading is an essential practice that not only keeps your flowers looking their best but also encourages them to produce more blooms throughout the growing season. However, the timing of deadheading can vary depending on the stage of growth your plant has reached.
In the early stages of growth, it’s crucial to let plants focus their energy on developing a strong root system and foliage. Wait until after initial blooms have faded before deadheading, as this allows the plant to redirect its energy towards producing more flowers. For example, if you’re growing roses or peonies, wait until the first flush of blooms has finished before cutting back the stems.
During periods of rapid growth, such as when plants are in full bloom or producing new shoots, it’s best to deadhead regularly. This encourages the plant to focus its energy on producing more flowers and prevents seed production, which can be beneficial for annuals but detrimental to perennials. By deadheading at these stages, you’ll be rewarded with a longer blooming season and a more vibrant display of color in your garden.
Common Mistakes to Avoid When Deadheading
Deadheading is both an art and a science, but even experienced gardeners make mistakes that can harm your flowers. Let’s go over some common pitfalls to avoid when deadheading.
Over-Deadheading: Removing Too Much Plant Material
Deadheading is an essential part of maintaining healthy and thriving flowers. However, there’s a fine line between removing spent blooms and over-deadheading, which can be detrimental to the plant’s health and productivity.
Over-deadheading occurs when you remove too much of the plant material, either by cutting back stems or pulling out entire branches. This can weaken the plant, reducing its ability to produce new blooms in the future. When a plant is repeatedly deadheaded without giving it time to recover, it may become exhausted, leading to reduced blooming and even plant death.
To avoid over-deadheading, it’s essential to strike a balance between removing spent flowers and allowing some plants to set seed. This will give your plants a chance to focus their energy on producing new growth, rather than constantly producing blooms. For example, you can remove 2/3 of the dead blooms, leaving a few behind to allow for seed production. By doing so, you’ll maintain the plant’s overall health and encourage future blooming.
Under-Deadheading: Missing Opportunities for Growth
When it comes to deadheading flowers, it’s not just about removing spent blooms – it’s also about encouraging healthy growth and promoting new stem production. Under-deadheading can have serious consequences for the overall health of your plants.
By neglecting to remove dead flowers regularly, you may notice a reduction in growth and an increase in weak or leggy stems. This is because the plant’s energy is being diverted away from producing new growth towards seed production. For example, if you don’t deadhead a bloom on a perennial like lavender, it will start to put its energy into developing seeds instead of growing more stems.
Regular deadheading can encourage new stem production by stimulating the plant to focus on vegetative growth rather than seed production. This is especially true for plants that produce multiple blooms throughout the season, such as petunias and geraniums. By removing spent flowers regularly, you’re sending a signal to the plant that it’s time to focus on producing new stems and blooms, leading to a fuller and more vibrant display of flowers.
DIY Deadheading Tools and Supplies
To get started on your deadheading journey, you’ll need some essential tools and supplies to make the process easier and more efficient. We’ve got you covered!
Essential Tools for Deadheading
When it comes to deadheading flowers effectively, having the right tools for the job is essential. You’ll want to invest in a few key pieces of equipment that will make the process easier and more efficient.
First and foremost, pruning shears are an absolute must-have. These versatile scissors can be used to snip off spent blooms on small to medium-sized flowers. Look for high-quality shears with sharp blades and comfortable grips to make the task less tiring. Loppers, on the other hand, come in handy when tackling thicker stems or larger plants.
In addition to pruning tools, don’t forget to protect your hands and knees while working in the garden. Gardening gloves will prevent thorns and dirt from getting under your skin, making it a worthwhile investment. Knee pads are also essential for prolonged periods of gardening, as they provide cushioning and support for your joints.
While these may seem like expensive investments at first, high-quality tools will save you time and effort in the long run.
Additional Tips for Deadheading on a Budget
Deadheading doesn’t have to break the bank. In fact, with a little creativity, you can repurpose household items and find second-hand gems online or at local nurseries to stay within your budget.
Start by scouring your kitchen for scissors, clippers, or even a sharp knife that can double as pruning tools. You’d be surprised how often these everyday items are just waiting to be put to use in the garden! A good pair of household scissors can work wonders on smaller blooms and seed heads.
When it comes to finding second-hand gardening gear online, websites like Craigslist, eBay, or Facebook Marketplace often have gently used deadheading tools at a fraction of the cost. You can even try searching for local nursery sales or trade-in programs in your area. For example, a local garden center might offer discounts on unused pruning shears or exchange old equipment for new purchases.
Remember, it’s not about breaking the bank; it’s about finding creative solutions that fit within your gardening budget. By thinking outside the box and repurposing what you already have, you’ll be well on your way to beautiful, blooming flowers – all without overspending!
Conclusion: Embracing the Art of Deadheading
In conclusion, deadheading flowers is not just a necessary gardening task, but an art form that requires patience, attention to detail, and a willingness to learn. By embracing this art, you’ll be able to coax more blooms from your plants, enjoy their vibrant colors for longer periods, and appreciate the subtle nuances of each variety. Remember to keep your scissors or pinching fingers sharp, as regular deadheading will encourage your flowers to focus energy on producing new growth rather than seed production. With practice and persistence, you’ll develop a keen eye for spotting spent blooms and become more attuned to the needs of your garden’s individual inhabitants.
By incorporating deadheading into your gardening routine, you’ll be rewarded with healthier plants, increased yields, and a deeper connection to nature.
Frequently Asked Questions
Can I deadhead flowers that have already set seed?
While it’s technically possible to deadhead plants after they’ve produced seeds, it’s generally not the most effective method for prolonging blooms. Instead, focus on removing spent flowers before they produce seeds, as this will encourage your plant to direct its energy towards producing new growth and flowers.
How do I know when to stop deadheading a particular flower?
The key is to observe your plants’ responses to regular deadheading. If you notice that a plant continues to bloom profusely even after removing spent flowers, it’s likely that it will continue to produce new blooms without issue. However, if you find that the plant becomes exhausted or stops producing new growth, it may be time to give it a break from deadheading.
What are some common mistakes beginners make when deadheading?
One common mistake is under-deadheading – failing to remove spent flowers regularly enough to encourage new growth. Another mistake is over-deadheading – removing too much plant material and stressing the plant. Be sure to strike a balance between these two extremes, and monitor your plants’ responses to adjust your deadheading schedule as needed.
Can I deadhead flowers in extreme weather conditions?
While it’s generally best to deadhead during mild, dry weather, there are some exceptions. If you live in an area with high humidity or experience frequent rain showers, it may be necessary to deadhead more frequently to prevent fungal diseases from taking hold. On the other hand, if you’re experiencing drought conditions, it’s generally best to wait until after a good soaking rain before deadheading.
How do I store and reuse DIY deadheading tools?
To keep your DIY deadheading tools in good condition, be sure to wash them with soap and water after each use. Then, allow the tools to air dry completely before storing them in a dry, well-ventilated area. This will help prevent rust and other damage that can shorten their lifespan. Consider labeling and organizing your tools by type or project to make them easy to find when you need them again.