Perennial plants are a gardener’s best friend – they come back year after year, requiring less maintenance than annuals and adding beauty to your garden without breaking the bank. But let’s face it: planting perennials can be intimidating if you’re new to gardening. Choosing the right varieties for your climate and soil type is crucial, as is preparing the perfect soil for them to thrive. In this article, we’ll dive into expert tips on how to plant perennials like a pro. From selecting drought-tolerant options for low-maintenance gardens to providing seasonal care to keep them vibrant throughout the year, we’ve got you covered. Whether you’re looking to revamp your garden or start from scratch, this guide will walk you through everything you need to know to create a thriving perennial garden.
Choosing the Right Perennials
When it comes to planting perennials, selecting the right ones for your garden can be a daunting task. Let’s break down what to consider when choosing perennial varieties that will thrive in your space.
Understanding Perennial Types
When selecting perennials for your garden, it’s essential to understand the main types and their characteristics. This knowledge will help you choose plants that thrive in your specific climate and soil conditions.
There are several categories of perennials, including shrubs, flowering plants, foliage plants, and groundcovers. Shrubs provide a framework for the garden, offering structure and texture with leaves or flowers. Examples include boxwood, rhododendron, and hydrangea. These plants often require regular pruning to maintain their shape.
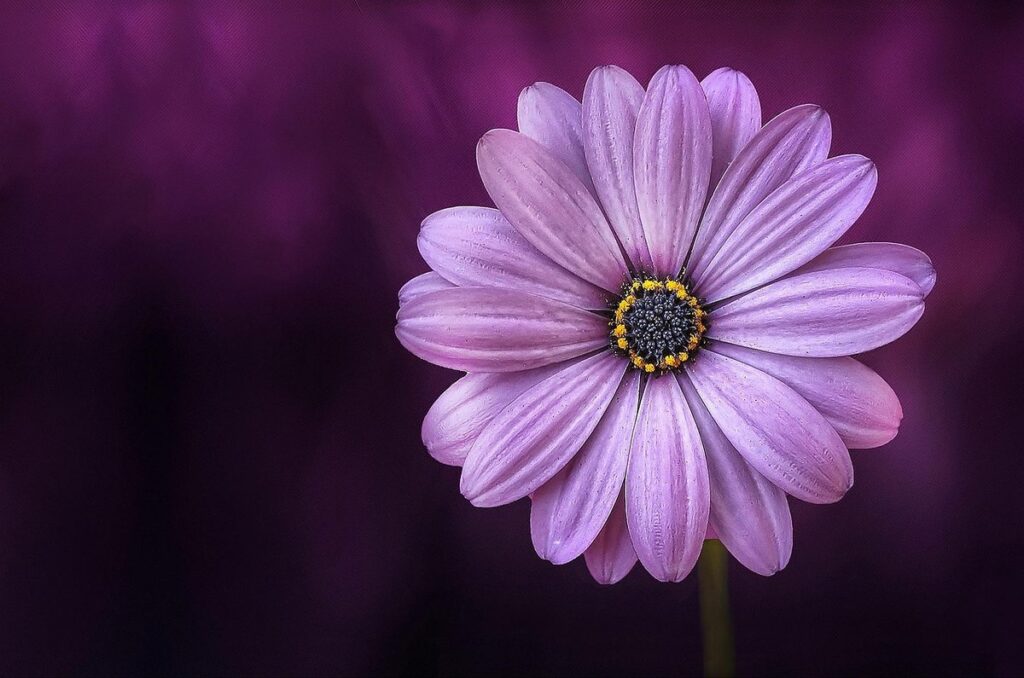
Flowering perennials are a favorite among gardeners due to their vibrant blooms that return year after year. Examples include daylilies, coneflowers, and black-eyed Susans. They typically bloom in the spring or summer but may go dormant during winter. Foliage plants offer attractive leaves throughout the growing season. Plants like hostas, ferns, and grasses provide texture and interest without flowers.
Groundcovers spread quickly to form a dense mat of foliage. Creeping thyme, sedum, and vinca minor are popular options for filling gaps between pavers or stones.
Selecting Perennials for Your Climate
When selecting perennials for your garden, it’s essential to choose plants that thrive in your local climate and region. This means considering factors like temperature, sunlight, soil type, and moisture levels. Start by checking the USDA Plant Hardiness Zone Map to determine your zone, which will help you narrow down options.
Next, think about the specific conditions in your garden. For example, if your yard receives full sun (6+ hours of direct sunlight), choose perennials that can tolerate heat and dryness. If your soil is heavy clay or sandy, select plants that prefer those conditions. Some perennials are more adaptable than others, so consider using a mix of both.
For instance, in warmer zones like 9-11, perennials like lantana, salvia, and zinnia thrive. In cooler zones like 3-5, consider plants like peonies, hostas, or astilbe. Research specific varieties that perform well in your area to ensure success. By selecting perennials suitable for your climate, you’ll save time, money, and frustration down the road.
Preparing the Soil
Before you start planting those gorgeous perennials, let’s talk about preparing the soil. Proper soil preparation is key to giving your new plants a healthy head start.
Testing and Amending Your Soil
When it comes to planting perennials, having fertile soil is essential for their growth and success. However, many gardeners neglect to test their soil, which can lead to poor plant performance, weak roots, and a lack of nutrient uptake. Soil testing helps you understand the pH level, nutrient availability, and any potential contaminants that may be present.
You can purchase a DIY soil testing kit or send a sample to a laboratory for analysis. The results will reveal your soil’s pH level, with most perennials preferring a slightly acidic to neutral range (6.0-7.0). Based on the test results, you can amend your soil with organic matter like compost, manure, or peat moss.
To improve soil structure and fertility, mix 2-4 inches of compost into the top 6-8 inches of soil before planting. You can also add a balanced fertilizer according to the recommended application rates on the label. Regularly replenishing your soil with organic matter will help maintain its health and support healthy perennial growth.
Incorporating Organic Matter
Incorporating organic matter into your soil is one of the most effective ways to create a thriving environment for your perennials. Organic matter such as compost, well-rotted manure, and peat moss act as natural fertilizers that feed microorganisms in the soil, increasing its water-holding capacity and overall fertility.
When you add organic matter to your soil, it breaks down slowly over time, releasing essential nutrients that promote healthy root growth. This process is particularly beneficial for perennials, which often require a consistent supply of nutrients throughout their growing season. In addition, incorporating organic matter helps to improve the soil‘s structure, making it easier for roots to penetrate and for water to drain.
To incorporate organic matter into your soil, start by mixing 2-4 inches of compost or well-rotted manure into the top 6-8 inches of soil before planting. You can also add a layer of peat moss on top of the soil to retain moisture and regulate soil temperature. By doing so, you’ll be creating an ideal environment for your perennials to establish themselves and thrive throughout their growing season.
Planting Perennials
When planting perennials, it’s essential to consider their specific needs and preferences, including sunlight requirements, soil type, and space allocation. Let’s dive into these key factors together.
Digging and Planting Techniques
When it comes to digging and planting perennials, proper technique is essential for their survival and success. Start by selecting a location with well-draining soil that receives the right amount of sunlight for your specific perennial. Next, use a shovel or trowel to dig a hole about twice as wide and just as deep as the plant’s root system.
For example, if you’re planting a large hosta with extensive roots, you’ll need a much deeper hole than if you were planting a small shrub-like coneflower. Be sure to loosen any compacted soil at the bottom of the hole to prevent water from pooling around the roots. Place the plant in the center of the hole and gently spread its roots outwards.
Plant perennials at the same depth they were growing in their pots or containers, taking care not to bury too much stem. Space them according to the variety’s specific needs – some perennials prefer a more crowded arrangement while others thrive with plenty of room to breathe.
Watering and Mulching
When it comes to newly planted perennials, proper watering and mulching techniques are crucial for their survival and success. Watering is often a challenge for new gardeners, as overwatering can be just as detrimental as underwatering.
To determine if your perennials need water, simply stick your finger into the soil up to the first knuckle. If the soil feels dry, it’s time to give them a good soaking. However, avoid frequent shallow watering, which encourages weak and shallow roots. Instead, aim for a thorough but infrequent watering schedule.
Mulching is another essential practice that helps retain moisture, suppress weeds, and regulate soil temperature. Organic mulch materials like wood chips, bark, or leaves can be applied 2-3 inches thick around the base of your perennials. As it breaks down, it will improve the soil structure and fertility, creating a healthier environment for your plants to grow.
By implementing these simple yet effective watering and mulching techniques, you’ll give your newly planted perennials the best possible start in life, setting them up for a thriving and vibrant future in your garden.
Caring for Established Perennials
Now that your perennials have taken root, it’s time to focus on keeping them healthy and thriving. In this next part of our guide, we’ll cover essential tips for caring for established perennials.
Maintenance Tips and Tricks
As your perennials mature, regular maintenance is crucial to keep them thriving. Pruning is an essential task that involves cutting back dead, diseased, or damaged stems to promote new growth and maintain shape. For flowering perennials like peonies and daylilies, cut back spent blooms (deadheading) after they finish blooming to encourage more flowers the following season. This also helps direct energy towards developing root systems.
Fertilize established perennials in early spring with a balanced fertilizer, following the recommended application rates on the package label. You can also add compost or well-rotted manure to improve soil structure and fertility. Some plants like asparagus and rhubarb require more frequent fertilization due to their high nutrient demands.
For plants that have become leggy or top-heavy, consider cutting them back by one-third to one-half in the spring. This will help control their size while encouraging new growth from the base of the plant. Always remove any dead or damaged foliage, as this can harbor diseases and pests, potentially spreading to other nearby perennials.
Troubleshooting Common Issues
Despite their hardy nature, perennials can still fall victim to common issues like pests and diseases. Regularly inspecting your plants will help you catch problems early on, but knowing what to look for is just as important. One of the most common perennial pests is slugs and snails, which can quickly devour leaves and flowers. To prevent this, try using copper tape around the base of the plant or creating a barrier with crushed eggshells.
Diseases like powdery mildew and leaf spot are also prevalent among perennials. These fungal issues often thrive in moist environments, so ensure good air circulation by pruning nearby plants and providing adequate space between each perennial bed. Fungicides can be effective, but it’s essential to identify the specific disease before treatment.
When dealing with pests or diseases, isolate affected plants immediately to prevent further spread. Dispose of any severely damaged leaves or stems, and disinfect your tools to avoid transferring pathogens. For more severe cases, consider consulting a gardening expert or taking cuttings from healthy sections of the plant to propagate new growth.
Seasonal Care and Upkeep
To keep your perennials looking their best, it’s essential to perform regular seasonal care and upkeep tasks that promote healthy growth and prevent pests and diseases. Here are some crucial steps to follow.
Spring and Summer Care
As we transition into spring and summer, perennials require specific care to ensure they continue thriving. During this period, it’s essential to focus on watering, fertilizing, and pruning tasks.
In the spring, perennials typically emerge from dormancy, and their growth accelerates rapidly. Water them deeply once or twice a week, depending on weather conditions. However, be cautious not to overwater, as this can lead to root rot. To prevent this, check the soil moisture by inserting your finger into the soil up to the knuckle.
Summer is usually a peak season for perennials, but it also brings increased risk of pests and diseases. Regularly inspect your plants for signs of infestation or disease. Use organic or chemical controls as needed to protect your investment. Additionally, deadhead spent flowers to encourage more blooms and maintain plant appearance. Finally, divide and replant overgrown perennials in the summer months to maintain their vigor and promote continued growth.
Keep in mind that specific care requirements may vary depending on the type of perennial you have. Always research the unique needs of your plants to provide the best possible care.
Autumn and Winter Preparation
As autumn approaches, it’s essential to prepare your perennials for the changing seasons. Division and pruning are crucial steps to ensure their health and vigor. Divide overgrown perennials like peonies, daylilies, or hostas to promote healthy growth and prevent overcrowding. Cut back perennials like coneflowers, black-eyed Susans, and ornamental grasses to about one-third of their height. This will help control pests, diseases, and reduce winter damage.
To protect your perennials from extreme weather conditions, provide a layer of mulch or straw around the base of the plants. This will retain moisture, regulate soil temperature, and prevent erosion. Bring sensitive plants like tender succulents or ferns indoors to shield them from harsh winds, frost, and ice. If you live in an area with heavy snowfall, consider applying a layer of burlap or breathable fabric to protect your perennials from weight-induced damage.
By taking these steps, you’ll give your perennials the best chance to thrive during the cold months and come back strong in the spring. Remember to also water your perennials well before the ground freezes, as this will help them survive the winter chill.
Troubleshooting Common Problems
Don’t worry if things don’t go as planned – we’ve got you covered with common problems that can arise when planting perennials and how to fix them. Let’s troubleshoot together!
Pest Control Strategies
When it comes to planting perennials, one of the most frustrating issues you can face is pest control. Slugs and snails are notorious for their love of tender shoots and leaves, while deer can completely decimate a garden in a single night. But identifying common pests and knowing how to control them is key to keeping your perennial plants healthy.
To identify slugs and snails, look for slimy trails on the soil or leaves, or holes in the plant’s tissue that are characteristic of their feeding pattern. For deer, look for signs of grazing, such as nibbled stems or eaten flowers. Once you’ve identified the pest, here are some effective control methods:
* Use copper tape around planters to deter slugs and snails
* Install motion-activated sprinklers to scare away deer
* Hand-picking can be an effective method for controlling aphids and whiteflies
* Apply neem oil or insecticidal soap to control pests like spider mites and mealybugs
Disease Prevention and Treatment
When planting perennials, one of the most significant challenges gardeners face is disease prevention and treatment. Fungal diseases like powdery mildew, leaf spot, and root rot can quickly spread and destroy an entire bed. Bacterial diseases such as bacterial blight and crown gall are often caused by poor soil quality or contaminated tools.
Viral diseases, on the other hand, are typically transmitted through insects or contaminated plant material. To prevent these diseases, ensure your perennials receive adequate air circulation, water them properly, and avoid over-fertilizing. Regularly inspect your plants for signs of disease, such as yellowing leaves or black spots.
If you do encounter a diseased perennial, remove the affected area immediately to prevent further spread. Apply fungicides or bactericides according to the product’s instructions. For viral diseases, consider using insecticidal soap or neem oil to control pest populations. By taking proactive steps and staying vigilant, you can reduce the risk of disease in your perennial garden and keep it thriving for years to come.
Some popular perennials like hostas and daylilies are more susceptible to certain diseases. Research specific disease prevention methods for each type of plant in your garden.
Seasonal Color and Interest
As you plan out your perennial garden, let’s talk about how to create a stunning display of color that changes throughout the seasons. This is where selecting perennials for specific bloom times comes in.
Perennial Options for Year-Round Color
When it comes to creating a garden that’s full of color and interest year-round, perennials are an excellent choice. Not only do they require less maintenance than annuals, but many varieties also offer stunning blooms, vibrant foliage, or attractive berries throughout the seasons.
For flowering perennials, consider planting bulbs like tulips or daffodils in early spring, which provide a pop of color before other plants have even emerged from dormancy. Hydrangeas and coneflowers are also great options for summer blooms, while asters and chrysanthemums offer vibrant fall colors.
If you’re looking to add some foliage interest, consider shrubs like boxwood or holly, which provide year-round structure and texture. Ornamental grasses like pampas grass and fountain grass add movement and drama in the garden, even when they’re not producing flowers. Some perennials, like daylilies and hostas, offer both beautiful blooms and attractive foliage throughout the growing season.
When selecting perennials for year-round color, choose a mix of varieties that bloom at different times to ensure interest in every season.
Creating a Seasonal Garden Plan
When planning a perennial garden, it’s essential to consider the changing seasons and how they will impact the display of color and interest. To ensure a constant flow of blooms and foliage, create a seasonal garden plan that takes into account the characteristics of different plants.
Start by identifying which perennials thrive in your specific climate and growing conditions. Research their bloom times, growth habits, and hardiness to determine how they will contribute to each season’s display. For example, consider planting spring-blooming bulbs like tulips or daffodils alongside summer-flowering coneflowers or black-eyed Susans.
Consider creating a layered look by mixing plants with different growth habits and bloom times. This can include tall shrubs for winter interest, low-growing groundcovers for summer texture, and flowering vines for spring and fall color. By incorporating a variety of perennials in each season, you’ll create a dynamic garden that’s always changing yet always beautiful.
As you plan your seasonal display, don’t forget to leave space for maintenance and flexibility. Rotate plants as needed, prune back overgrown stems, and make room for new additions or replacements.
Frequently Asked Questions
What if I’m new to gardening, but I still want to start a perennial garden? Are there any easy-to-grow perennials for beginners?
If you’re new to gardening, it’s essential to choose perennials that are low-maintenance and forgiving. Consider plants like coneflower, black-eyed Susan, or hostas, which are easy to grow and require minimal care. Start with a small selection of beginner-friendly perennials and gradually add more varieties as your skills and confidence grow.
How do I know if my soil is suitable for the perennials I want to plant?
Before planting perennials, it’s crucial to test and amend your soil to ensure it meets their specific needs. Get a soil testing kit or consult with a local nursery or gardening expert to determine your soil type and pH level. Based on the results, add organic matter like compost or well-rotted manure to adjust the soil conditions.
Can I mix perennials with annuals in my garden, or is it better to have separate sections?
Mixing perennials with annuals can create a beautiful and dynamic garden, but it’s essential to consider their growing habits. Perennials tend to spread and take over if not properly contained, so allocate space accordingly. Use containers or plant markers to differentiate between perennial and annual beds, making maintenance easier.
How often should I water my newly planted perennials, especially during periods of drought?
Watering new perennials requires a delicate balance. Water them thoroughly after planting, then reduce watering frequency once they’re established (usually within 6-8 weeks). During dry spells, provide supplemental irrigation for your perennials until the rain returns.
Can I divide and replant perennials in the same growing season, or is it better to wait until spring?
While some perennials can be divided and replanted during the growing season, others may struggle with transplantation. Wait until the next growing season (spring or fall) when plants are dormant to minimize stress and ensure healthy establishment.