Pumpkins are more than just a seasonal decoration – they’re a canvas waiting to be transformed into works of art. Whether you’re a seasoned pro or a DIY novice, choosing the right pumpkin design can elevate your fall decor from ordinary to extraordinary. From classic carvings that evoke nostalgia and tradition, to modern stenciling techniques that bring precision and style, there’s a world of creative possibilities out there.
In this comprehensive guide, we’ll explore the many types of pumpkin designs that are sure to inspire your next decorating project. We’ll delve into nature-inspired patterns that blend seamlessly with outdoor settings, as well as DIY decorating ideas and creative display tips to help you showcase your masterpiece. Whether you’re looking for a simple yet elegant design or something more intricate and elaborate, we’ve got you covered.
Traditional Pumpkin Designs
When it comes to traditional pumpkin designs, classic patterns and motifs are always a popular choice for fall decor. Let’s take a closer look at some timeless designs that never go out of style.
Classic Carvings
Classic carvings are a staple of traditional pumpkin designs, and for good reason. There’s something undeniably charming about the simple shapes and iconic patterns that have been passed down through generations. If you’re new to pumpkin carving or looking to refine your skills, starting with classic carvings is an excellent way to begin.
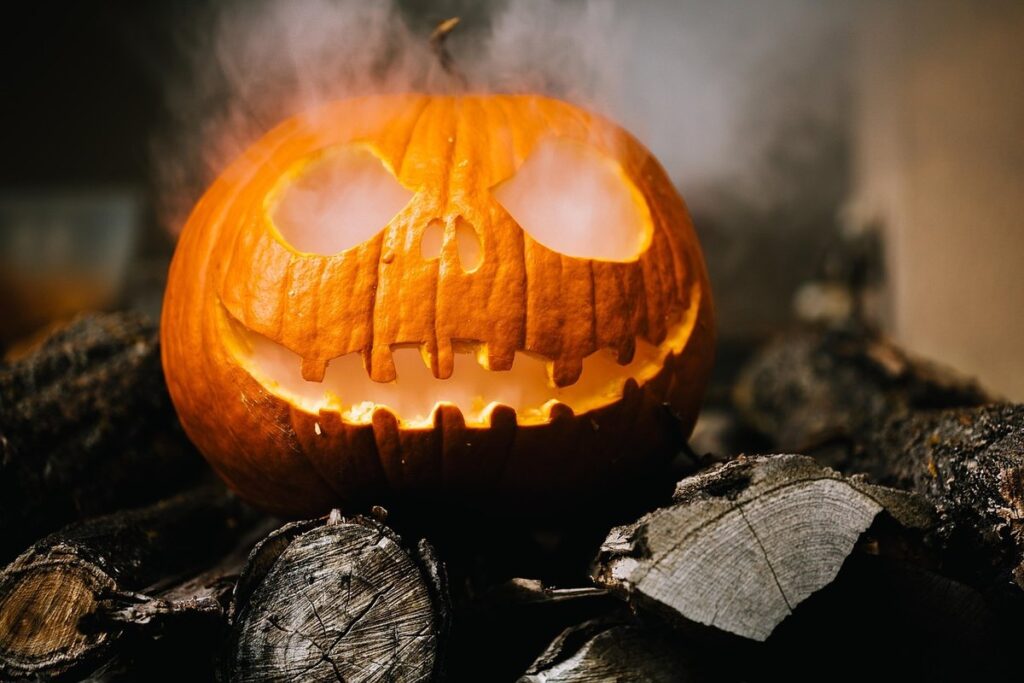
One of the most recognizable classic carvings is the jack-o’-lantern. This traditional design features a symmetrical face with triangle eyes and a toothy grin. To carve a simple jack-o’-lantern, start by drawing a basic face on your pumpkin using a marker or pencil. Next, carefully cut out the shapes for the eyes, nose, and mouth using a serrated knife.
You can also experiment with other classic shapes like triangles, circles, and squares. These designs are perfect for beginners or those looking to add some subtle flair to their pumpkins. Remember, the key to creating beautiful classic carvings is to keep your design simple and symmetrical. With a little practice and patience, you’ll be carving like a pro in no time!
Tribal and Geometric Patterns
Tribal and geometric patterns have long been used to adorn pumpkins, adding an extra layer of meaning and significance to these seasonal decorations. Inspiration for these designs can be found in various cultures around the world.
For example, African and Native American tribes have a rich tradition of using tribal patterns on their textiles and other decorative items. These patterns often feature bold lines, shapes, and motifs that reflect the community’s history and heritage. On pumpkins, tribal patterns can evoke a sense of connection to these cultures and add an element of storytelling to your design.
Geometric patterns, on the other hand, have their roots in ancient cultures such as Greece and Rome. These designs often feature repeating shapes and patterns that create a cohesive and visually striking effect. When applied to pumpkins, geometric patterns can add a touch of sophistication and elegance to your display.
To incorporate tribal or geometric patterns into your pumpkin design, start by selecting a paint or marker that will adhere well to the surface. You can then use stencils or freehand techniques to create your desired pattern. Consider pairing bold, graphic designs with natural elements like leaves or twigs for added visual interest. With a little creativity, you can bring these timeless patterns to life on your pumpkin and add a unique touch to your seasonal decor.
Whimsical Carvings
Whimsical carvings are a delightful way to add personality to your home’s decor during the holiday season. These playful designs can feature beloved cartoon characters, fantastical creatures, or even humorous quotes that reflect your family’s sense of humor. When it comes to creating whimsical pumpkin carvings, you don’t need to be a skilled artist – just have fun with it!
To get started, gather inspiration from popular culture, children’s books, or even social media platforms like Pinterest and Instagram. Look for images of playful designs that resonate with your personality and style. You can also find pre-made stencil patterns online or create your own using a design software.
When carving your whimsical pumpkin, remember to keep it simple and safe. Use a serrated knife specifically designed for pumpkin carving, and make sure the surface is stable before you begin. For more intricate designs, consider using a pattern transfer method like tracing paper or a stencil to help guide your cuts. Don’t be afraid to experiment and try new things – after all, that’s what makes whimsical carvings so special!
Modern Pumpkin Designs
Let’s dive into some of the most stunning and creative modern pumpkin designs that are perfect for adding a pop of personality to your fall decor. From geometric patterns to elegant calligraphy, we’ll explore them all!
3D Pumpkins
3D pumpkins have taken center stage as a modern twist on traditional pumpkin decorating. Using foam, cardboard, or other lightweight materials, creators can craft intricate designs that add depth and visual interest to outdoor spaces. One of the primary benefits of 3D pumpkins is their long-lasting durability – they don’t succumb to the elements like carved pumpkins do.
To create a 3D pumpkin, you’ll need a base material, some decorative elements (like paint, markers, or fabric), and a steady hand. Start by cutting out your design from foam or cardboard, then attach it to a Styrofoam ball or another round base. You can also use a wire armature for added stability.
The versatility of 3D pumpkins makes them an excellent choice for various designs. For example, you could create a 3D pumpkin in the shape of a house, complete with windows and a door. Alternatively, go for a more abstract look by using textured paint or fabric to achieve a unique effect.
LED-Powered Design
LED-powered designs have revolutionized the world of pumpkin decorating. By embedding LED lights within the gourd itself, designers can create mesmerizing patterns and displays that are unlike anything else. These lights can be programmed to change colors, flash, or even respond to sound waves, making for a truly interactive experience.
One popular way to incorporate LED lighting is through the use of conductive paint or tape, which allows the light to flow into the pumpkin itself. This creates a unique, glow-from-within effect that adds an extra layer of depth and visual interest to the design. Some designers also choose to use LED strips or netting to create intricate patterns and designs on the surface of the pumpkin.
For those looking to try their hand at LED-powered design, it’s essential to start with a clean and dry pumpkin. Next, apply a thin coat of conductive paint or tape to the area where you want the light to shine through. Once the paint or tape is dry, attach the LED strip or netting and program the lights according to your desired pattern. With a little creativity and experimentation, you can create truly show-stopping designs that will be the envy of all who see them.
Stenciling and Painting
Stenciling and painting are two modern pumpkin decorating methods that can add a pop of color to any space. Stenciling involves using pre-designed templates or patterns to create intricate designs on the pumpkin. This method is ideal for beginners, as it allows for precise control over the design process.
When choosing stencils, consider the size and shape of your pumpkin, as well as the desired level of complexity in the design. Popular stencil designs include classic fall motifs like leaves and acorns, as well as more modern patterns like chevrons and stripes.
Painting, on the other hand, offers endless possibilities for creativity. Use acrylic or latex paint to add vibrant colors and textures to your pumpkin. For a unique look, try layering different shades of paint or using stencils in combination with freehand painting.
Some popular painting techniques include ombre effects, where the color gradates from one shade to another, and marbling, which involves applying multiple colors in a swirly pattern. To ensure your painted design lasts throughout the season, apply a clear coat of varnish or sealant.
Nature-Inspired Pumpkin Designs
Get creative with nature’s beauty as we explore the captivating world of pumpkins designed to resemble leaves, flowers, and trees, a perfect blend of art and fall aesthetics. From intricate patterns to realistic depictions, these designs are sure to inspire!
Floral Patterns
Floral patterns bring an effortless elegance to pumpkin design. For those who want to add a touch of natural beauty to their fall decor, floral patterns are a great starting point. Inspiration can be drawn from real-life flowers like sunflowers, daisies, and roses, which can be recreated in various shapes and sizes on pumpkins.
When it comes to creating your own unique designs, start by observing the colors and textures of different flowers. Note how petals curve, leaves unfold, or stems twist. You can then translate these observations into paint strokes, stencils, or even vinyl cutouts.
To get started, collect reference images of your favorite flowers. Next, gather various painting tools – brushes, sponges, or even household items like coffee strainers – and practice creating petal shapes and textures on paper or a test pumpkin. This will help you refine your technique before applying it to a larger surface.
Leaf and Branch Carvings
Leaf and branch carvings are an excellent way to add a touch of realism to pumpkin decorations. These designs mimic the intricate patterns found in nature, creating a visually appealing contrast between the carved pumpkin and the surrounding foliage.
When it comes to leaf and branch carvings, consider using stencils or freehand techniques to achieve a more natural look. You can find various stencil designs online or create your own by tracing leaf shapes onto paper and transferring them to the pumpkin. Freehand carving requires more skill but offers greater flexibility in design.
To add depth and dimension to your carvings, experiment with layering different elements, such as leaves on top of branches or flowers amidst foliage. Use a combination of smooth and textured surfaces to create visual interest. Keep in mind that leaf and branch designs work well for both small and large pumpkins.
Some popular patterns for leaf and branch carvings include oak and maple leaves, willow branches, and wildflowers. You can also incorporate seasonal elements like acorns or pinecones to create a cohesive look with your fall decor.
Animal-Themed Designs
When it comes to animal-themed pumpkin designs, there’s a world of inspiration waiting to be unleashed. From the majestic lions of Africa to the gentle pandas of Asia, various cultures around the globe have their own unique takes on animal-inspired pumpkins. For instance, Japanese artisans often depict koi fish and cranes on pumpkins, symbolizing good fortune and longevity.
To incorporate these designs into your own decorations, consider using stencils or hand-painting techniques to achieve intricate details. You can also experiment with natural materials like leaves, twigs, and seeds to create textured, three-dimensional effects. For a more modern twist, try combining animal silhouettes with geometric patterns or abstract shapes.
Some popular animal designs for pumpkins include:
• Tigers and leopards from African cultures
• Dragonflies and butterflies from Asian traditions
• Birds like owls, eagles, and falcons from Native American influences
When selecting an animal design, think about the message you want to convey. Do you want to welcome good luck or celebrate the beauty of nature? Whatever your choice, remember that animal-themed pumpkins are a great way to add personality and whimsy to your autumnal decor.
DIY Pumpkin Decorating Ideas
Get creative and make your pumpkin stand out with these fun and easy DIY decorating ideas, perfect for any fall gathering or celebration. We’ll show you how to add a personal touch.
Upcycled Materials
When it comes to DIY pumpkin decorating, getting creative with materials you already have at home is not only budget-friendly but also environmentally responsible. Upcycled materials are an excellent way to breathe new life into old items and create unique decorations for your pumpkins.
Consider using old CDs as a reflective accent on your pumpkin design. Simply arrange the CDs in a pattern or design, and attach them to the pumpkin using hot glue. You can also use bottle caps, which can be arranged in a mosaic pattern to resemble stained glass. If you have an old book or a collection of vintage postcards, cut out images or words that resonate with the fall season and decoupage them onto your pumpkin.
Other upcycled materials you can use include cardboard tubes (from toilet paper rolls), fabric scraps, or even newspaper pages. Get creative and experiment with different textures and patterns to create a truly one-of-a-kind design. Remember, the beauty of DIY decorating lies in its imperfections, so don’t be afraid to get messy and try new things!
Stenciling Tips and Tricks
Stenciling is an excellent way to add intricate designs and patterns to your pumpkins without getting too messy with paint. To get started, choose a stencil that complements the size and shape of your pumpkin. You can find stencils in various shapes, from geometric patterns to floral motifs.
When applying the stencil, make sure it’s securely positioned on the pumpkin using tape or stickers. Use a small brush to apply a thin layer of paint, starting from the center and working your way outwards. To achieve crisp lines, use a steady hand and avoid over-saturating the design with too much paint.
For more intricate designs, consider using a multi-color stencil set that allows you to create layered effects. Experiment with different stenciling techniques by layering colors or using texture paste for added depth. Remember to let each layer dry completely before moving on to the next step.
Some popular stenciling materials include foam stencils, cardstock stencils, and even digital cutting machines like Cricut. Each has its own advantages, so experiment with different techniques to find what works best for you.
Creative Display Ideas
When it comes to showcasing your beautifully decorated pumpkins, why settle for just placing them on a porch or table when you can create an entire display? Here are some creative ideas to get you started:
To add ambiance and warmth to your pumpkin display, consider pairing your pumpkins with candles. This classic combination is not only visually appealing but also creates a cozy atmosphere perfect for fall gatherings. You can place candles in mercury glass holders or apothecary jars to give them an old-fashioned charm.
For a more whimsical approach, combine your pumpkins with fresh flowers like sunflowers, dahlias, or baby’s breath. This adds a pop of color and texture to your display while also highlighting the natural beauty of your pumpkins. Simply place the flowers in a vase or basket near your pumpkin arrangement, and you’re good to go!
Another idea is to group your pumpkins with other fall elements like pinecones, acorns, or dried corn husks. This creates a beautiful vignette that tells a story about the season. Experiment with different textures and colors to find a combination that works for you.
Frequently Asked Questions
What are some common mistakes to avoid when choosing a traditional pumpkin design?
When selecting a traditional pumpkin design, it’s essential to consider the overall aesthetic you’re aiming for. Avoid overcrowding the design with too many patterns or motifs, as this can make the pumpkin look cluttered and chaotic. Instead, focus on one or two statement pieces that complement your fall decor.
Can I use traditional pumpkin designs with modern pumpkins?
Yes, traditional pumpkin designs can be adapted to fit modern pumpkin styles. For instance, you can pair a classic carving design with a sleek, white pumpkin for a sophisticated look. Experimenting with different materials and shapes can help you create a unique blend of traditional and modern elements.
How do I maintain my carved pumpkins to make them last longer?
To extend the life of your carved pumpkins, it’s crucial to keep them cool and dry. Avoid placing them in direct sunlight or near heat sources, as this can cause the pumpkin to spoil quickly. Also, consider applying a coat of petroleum jelly to protect the carved areas from moisture.
Can I use traditional designs for pumpkins that are not round?
While classic carvings often feature symmetrical, rounded designs, you can still adapt these patterns to fit non-traditional pumpkin shapes. Consider using stencils or transferring your design onto a larger, more unique pumpkin shape for a visually striking effect.
How do I ensure my stenciled pumpkin design adheres well?
To achieve crisp, clean lines with your stenciled pumpkin design, make sure the surface is clean and dry before applying the paint. Use a high-quality stencil and tape to secure it in place. Additionally, apply a light coat of primer or sealant after painting to help the design adhere longer.
Can I use natural materials like leaves or twigs for pumpkin decorating?
Yes, incorporating natural elements can add an organic touch to your fall decor. Consider using real leaves, twigs, or other materials to create a unique, layered look on your pumpkins. This approach is perfect for those who prefer a more rustic, earthy aesthetic.
How do I display my carved pumpkins safely?
To prevent accidents and injuries, ensure that your carved pumpkins are placed in a stable location away from walkways and high-traffic areas. Also, consider using battery-operated candles or LED lights to illuminate your pumpkins instead of real flames for added safety.
Can I customize traditional pumpkin designs with my personal preferences?
Absolutely! While classic carvings provide a great starting point, you can always add your personal touch by incorporating family heirlooms, favorite quotes, or custom elements that reflect your personality. This is an excellent way to make your pumpkin stand out and tell a unique story.
How do I create intricate designs using stencils?
For detailed stenciling, choose high-quality stencils with precise lines and delicate patterns. Apply paint carefully following the stencil’s edges, working from the outside inwards to avoid bleeding or spreading of colors. Use masking tape to secure stray lines and maintain crisp clean lines throughout.
Can I use traditional designs for pumpkins on a budget?
Yes, you can still achieve stunning results with traditional pumpkin designs without breaking the bank. Consider repurposing materials like old stencils, fabric scraps, or household items to create your design. Additionally, shop during sales or look for second-hand stores that carry affordable crafting supplies.
How do I maintain my LED-powered pumpkins?
To prolong the life of your LED-powered pumpkin, keep it away from direct sunlight and heat sources. Also, avoid touching the LEDs with bare hands as oils in skin can damage them over time. Regularly dust the lights to ensure proper function and safety.
Can I combine traditional designs with other decorating ideas?
You can easily blend traditional pumpkin designs with other fall decorating concepts. For example, pair a classic carving with an upcycled wooden vase or use stenciling to incorporate a natural leaf pattern into your design. Experimenting with unique combinations will help you create a cohesive and visually appealing display.
How do I handle minor design mistakes?
Minor errors can be easily corrected by simply erasing the mistake and starting over. Alternatively, you can turn an imperfect area into a deliberate feature of your pumpkin’s rustic charm. If you’re still unsure about how to fix it, consult online tutorials or seek help from fellow crafters.
Can I use stenciling for large-scale designs?
Yes, with the right materials and techniques, you can achieve stunning results on larger pumpkins using stencils. Use a high-quality stencil specifically designed for large-scale projects, and apply multiple coats of paint if necessary to achieve the desired color intensity.
How do I make my pumpkin display more visually appealing?
Consider layering different design elements like carved patterns, stenciled motifs, or even real flowers around your pumpkins to create depth and visual interest. Experiment with various heights, colors, and textures to create a balanced arrangement that complements your fall decor.
Can I use LED lights for all types of pumpkin designs?
Not necessarily – while LED lights are versatile and safe, some traditional designs may require more delicate handling or specific lighting arrangements to showcase the intricate details correctly. However, with careful planning, you can incorporate LED lighting into almost any type of pumpkin design to create an eye-catching display.
How do I store my carved pumpkins for next year’s display?
To preserve your carved pumpkins from one season to another, keep them in a cool, dry place away from direct sunlight. Avoid stacking or pressing down on the pumpkins as this can cause damage and shortening of their lifespan. Regularly inspect the pumpkin for signs of spoilage before displaying.
Can I use stenciling with non-traditional materials?
Stenciling isn’t limited to traditional surfaces like paper or fabric; you can apply it to almost any material, including glass, wood, or even canvas. When working with unconventional materials, ensure they are clean and dry before applying the paint and stencil.
How do I achieve symmetry in my carved pumpkin design?
Achieving perfect symmetry may require patience and practice, but here’s a tip: start by dividing your pumpkin into equal sections using stencils or markers, then carve or paint within those boundaries. You can also use mirrors or other visual aids to double-check your work as you go.
Can I customize traditional designs for different holidays?
While traditional pumpkin designs are often associated with fall and Halloween, you can adapt them for other celebrations like Thanksgiving or Christmas by incorporating seasonal colors, patterns, and themes into the design. This is a great way to give old favorites a fresh twist while still honoring tradition.
How do I make my stenciled pumpkins last longer?
To prolong the life of your stenciled pumpkin designs, apply a coat of clear sealant after painting to protect against moisture and fading. Regularly dust the paint with a soft brush or cloth to maintain the design’s appearance.