As the crisp fall air settles in, many of us start thinking about how to bring some festive cheer to our gardens. One way to do this is by creating stunning pumpkin carving cougars that not only add a pop of color but also pay homage to these majestic creatures. However, if you’re like me and love wildlife, you might be wondering how to coexist peacefully with the real cougars in your garden while still enjoying your spooky decorations.
Well, worry no more! In this article, we’ll explore expert tips and techniques for creating beautiful pumpkin carving cougars that are both eye-catching and respectful of our furry friends. We’ll also cover essential safety measures to ensure a fun and safe fall display. From choosing the right pumpkins to designing your cougar’s fur patterns, you’ll learn how to bring the wild beauty of these animals into your home without putting them or yourself at risk.
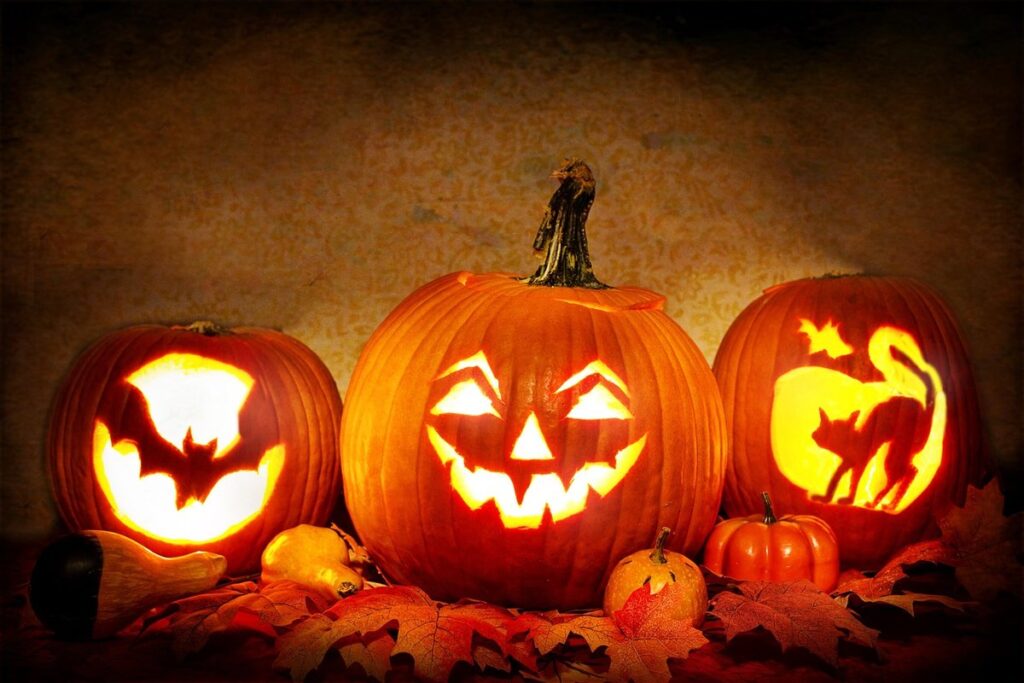
What is a Pumpkin Carving Cougar?
If you’re new to pumpkin carving, you might be wondering what exactly a pumpkin carving cougar is – let’s dive into the basics of this fun and festive fall phenomenon.
Definition and Origins
A pumpkin carving cougar is a unique and creative twist on traditional fall decor. It refers to a design that combines elements of both pumpkins and mountain lions, often featuring the iconic cat’s face carved into a pumpkin. This trend has become increasingly popular over the years, especially among nature enthusiasts and wildlife lovers.
The origins of the pumpkin carving cougar date back to the early days of Halloween celebrations in North America. Carvers began experimenting with various designs, including animals and mythical creatures, to add an extra layer of creativity to their pumpkins. The mountain lion, being a prominent symbol of the region’s wildlife, eventually made its way into the design scene.
Today, you can find pumpkin carving cougar designs in various forms, from intricately carved jack-o’-lanterns to decorative prints and accessories. This trend has not only brought people closer to nature but also highlighted the importance of coexisting with local wildlife. By embracing this trend, homeowners can add a touch of fall charm while promoting awareness about wildlife conservation.
History of Pumpkin Carvings
Pumpkin carvings have been a beloved fall tradition for thousands of years, with roots dating back to ancient Ireland and Scotland. The practice of carving vegetables was initially done as a way to make lanterns for the festival of Samhain, which marked the end of the harvest season and the beginning of winter. These early lanterns were made from turnips and other root vegetables, but when European settlers arrived in America, they found that pumpkins were a more abundant and easier to carve than their native counterparts.
As the tradition of pumpkin carving evolved, it became closely tied to American culture, particularly with the influx of Irish and Scottish immigrants who brought their customs with them. The jack-o-lantern, as we know it today, is believed to have originated in the 1830s in New York state, where farmers would carve turnips and other vegetables to make lanterns for the harvest festival. By the mid-19th century, pumpkins had become the preferred choice, and the modern-day pumpkin carving tradition was born.
Today, pumpkin carvings are a staple of fall decor, with millions of people around the world creating their own intricate designs every year. Whether you’re a seasoned pro or a beginner, there’s something special about bringing your creativity to life in a carved pumpkin.
Designing Your Pumpkin Carving Cougar
Let’s dive into designing your pumpkin carving cougar, where we’ll explore the creative process and techniques to bring your wildlife-inspired design to life.
Tips for Choosing a Design
When it comes to choosing a design for your pumpkin carving cougar, there are several factors to consider. First and foremost, think about your personal style. Are you more of a classic and traditionalist, or do you lean towards something more modern and edgy? Consider the overall aesthetic of your home decor, as well as the theme of your fall celebration.
If you’re looking for a design that’s perfect for fall, consider a pattern or image that incorporates autumnal elements, such as leaves, acorns, or pumpkins. If you want to get creative, try combining different themes and designs to create something truly unique. For example, you could pair a woodland-inspired cougar with a jack-o-lantern face.
Remember to also think about your skill level when selecting a design. Don’t be afraid to start simple if you’re new to pumpkin carving – intricate designs can be intimidating for beginners. As you gain more experience and confidence, you can move on to more complex and detailed designs.
Tools and Materials Needed
To bring your pumpkin carving cougar to life, you’ll need the right tools and materials. First and foremost, choose a high-quality pumpkin with a flat surface for easy carving. Select a stencil specifically designed for a cougar silhouette or create your own pattern using reference images of these majestic animals.
For carving, you’ll need a sharp, retractable knife with a curved blade, ideally one designated for pumpkin carving to avoid accidents. A gouge and a scoop will also come in handy for removing excess pulp and creating texture. Make sure to work on a stable, well-lit surface and consider using a turntable or other support to keep the pumpkin steady.
Other materials you may find useful include a marker or pencil for tracing your design, a saw or craft knife for making more intricate cuts, and a sealant like beeswax or cooking spray to protect your carving from moisture. If you’re working with children, consider using kid-friendly tools and supplies to ensure everyone’s safety.
Carving Techniques for Your Pumpkin Cougar
Now that you’ve carved out your pumpkin cougar shape, let’s dive into some expert techniques to add intricate details and make it stand out in your fall decor. We’ll explore various tools and methods to bring your design to life.
Basic Carving Techniques
When it comes to carving a pumpkin, safety should be your top priority. Make sure you’re using a sturdy, stable surface and keep your tools within reach. A serrated knife is ideal for pumpkin carving, but always cut away from your body and use a gentle sawing motion.
Now that you’ve got the basics covered, let’s dive into some fundamental techniques to get you started. Begin by cutting out the top of the pumpkin in a circular motion, creating a lid that will allow you to scoop out the seeds and pulp. Next, identify the natural curves and contours of your pumpkin and use them as a guide for carving basic shapes.
For simple textures, try using a gouge or a spoon to create patterns on the surface of your pumpkin. You can also experiment with more intricate designs by using a combination of scraping and etching techniques. Remember, practice makes perfect – don’t be discouraged if your first few attempts at carving don’t turn out exactly as you envisioned!
Advanced Carving Techniques
When you’ve mastered the basics of pumpkin carving, it’s time to take your skills to the next level with advanced techniques. Creating intricate designs, patterns, and details can elevate your carved pumpkins from simple decorations to stunning works of art.
To start, practice layering: carve multiple layers of depth into a single design element, like a leaf or branch, to create a sense of dimensionality. This technique requires patience and precision, but the results are well worth it.
Another advanced technique is using stencils with a twist. Instead of simply tracing over a pre-made design, try adapting stencils to fit unique features of your pumpkin, such as a curved stem or asymmetrical shape. This will add an extra layer of personality to your carved creations.
For adding intricate details, like textures or patterns, use a small, sharp tool or a detailer knife. Carve in thin, gentle strokes, following the natural contours of the pumpkin’s surface. To achieve smooth lines and crisp edges, make sure to carve away from yourself, using a steady hand and controlled movements.
With these advanced techniques under your belt, you’ll be able to create truly show-stopping pumpkin carvings that will be the envy of all your friends and neighbors.
Wildlife Safety and Pumpkin Carvings
As you get creative with your pumpkin carvings, it’s essential to remember that wildlife can be attracted to the lights and scents of carved pumpkins, posing a risk to both humans and animals. We’ll explore safe practices to minimize this risk.
Coexisting with Wildlife in the Garden
As you set up your pumpkin display, it’s essential to remember that wildlife is attracted to these seasonal decorations. A few simple precautions can ensure a peaceful coexistence with the critters visiting your yard. Start by choosing pumpkins and gourds that are less likely to attract animals – smaller varieties or those with less appealing exteriors tend to be safer.
When displaying carved pumpkins, keep them away from areas where wildlife tends to congregate. This might include removing any debris or fallen fruit nearby, which can draw in unwanted visitors. Motion-activated sprinklers can also deter larger animals like deer and raccoons that might be attracted to your decorations.
To further safeguard your pumpkin display, consider adding some deterrents such as using lights with UV protection to make the area less appealing to nocturnal critters or placing physical barriers around your pumpkins to prevent tampering. Be mindful of the types of plants you’re using in your fall decor – certain flowers and foliage can be attractive to wildlife. By taking these simple steps, you can enjoy your pumpkin carvings while also respecting the local wildlife that shares your space.
Protecting Wildlife from Human Impact
As you embark on your pumpkin-carving adventures this fall, it’s essential to remember that your enthusiasm shouldn’t come at the expense of local wildlife. The season brings a unique set of challenges for animals adapting to changing temperatures and food sources. By being mindful of their needs and taking simple steps to reduce our impact, we can coexist peacefully with these creatures.
When carving pumpkins, consider composting or recycling the gourds instead of disposing of them in your yard waste. This will help prevent attracting pests and reduce the risk of polluting waterways. Additionally, when selecting a pumpkin-carving spot, choose areas away from sensitive habitats and wildlife corridors to minimize disturbance.
To further reduce waste, repurpose old pumpkins as bird feeders or plant markers for next year’s garden. These creative uses not only save space in landfills but also provide beneficial resources for local wildlife. By being intentional with our fall decor choices, we can maintain the beauty of nature while respecting its inhabitants.
Displaying Your Pumpkin Carving Cougar
Now that you’ve carved your pumpkin cougar, it’s time to showcase it proudly. This section shares creative ways to display your masterpiece and keep it safe from wildlife visitors.
Display Ideas and Inspiration
When it comes to showcasing your pumpkin carving cougar, the display ideas are endless. To start, consider creating a warm and inviting atmosphere by placing your masterpiece on a porch or front entrance. This not only adds a pop of color but also welcomes trick-or-treaters and guests alike.
For indoor displays, opt for a mantle or coffee table as a centerpiece. Arrange surrounding decorations such as leaves, twigs, and pinecones to complement the natural theme. Alternatively, hang your pumpkin carving cougar on a wall using a sturdy hook or nail to create a striking focal point.
Outdoor displays can be just as visually appealing. Suspend your design from a tree branch or wrap it around a garden stake for an eye-catching outdoor decoration. To make your display more impactful, pair it with other fall-themed elements like lanterns, candles, and seasonal flowers. Consider using solar-powered lights to illuminate your pumpkin carving cougar at night, creating a warm glow that will be visible even from a distance.
When displaying your pumpkin carving cougar, don’t forget to have fun and get creative! Experiment with different arrangements and themes until you find one that perfectly complements your home’s decor.
Safety Considerations for Outdoor Displays
When displaying your pumpkin carving cougar outdoors, it’s essential to consider the safety implications. One significant concern is vandalism – unfortunately, beautifully carved pumpkins can be a target for mischief-makers. To minimize the risk, place your display in a well-lit area or near a security camera. You may also want to consider using a motion-activated sprinkler system that will scare off any potential vandals.
Another consideration is attracting wildlife, especially if you live in an area with deer, raccoons, or other curious creatures. While it’s wonderful to coexist with nature, it’s not ideal for your pumpkins. To discourage unwanted visitors, keep your display away from food sources and use deterrents like motion-activated sprinklers or repellent granules around the perimeter.
Fire hazards are another critical safety concern when displaying flammable materials outdoors. Keep a fire extinguisher nearby, and ensure that any candles, lanterns, or electric lights are placed safely away from your pumpkin carving cougar. Be mindful of wind conditions and avoid placing flammable materials near open flames.
Conclusion: The Pumpkin Carving Cougar Experience
Now that you’ve completed your pumpkin carving masterpiece, let’s wrap up with some final thoughts on making the most of your autumn decorations and wildlife-friendly design choices.
Recap of Key Takeaways
As you’ve made it through this comprehensive guide on creating a pumpkin carving cougar, let’s recap the key takeaways to ensure you’re well-equipped for a spook-tacular fall season. First and foremost, understanding the importance of wildlife coexistence is crucial. This involves choosing designs that avoid depicting predators in a threatening manner towards local wildlife.
To achieve this, we covered essential design tips such as simple yet intricate patterns, incorporating shapes inspired by nature, and focusing on friendly or neutral expressions for your cougar’s face. Additionally, proper pumpkin preparation methods were discussed to ensure you’re working with the right tools and techniques for a smooth carving experience.
From selecting the perfect design to cutting out your masterpiece, we’ve walked you through every step of creating a pumpkin carving cougar that celebrates both fall decor and wildlife harmony. Whether you’re a seasoned crafty individual or just starting out, this guide has provided you with actionable tips and inspiration to create your very own unique pumpkin display.
Encouragement for Further Exploration
As you’ve reached the end of our pumpkin carving cougar journey, we hope this experience has inspired you to continue exploring the world of fall decor and wildlife coexistence. There’s so much more to discover, from creative designs to eco-friendly practices.
To take your pumpkin carvings to the next level, consider experimenting with new techniques like layering patterns or using natural materials like leaves and twigs. You can also explore different types of pumpkins and gourds to find unique shapes and textures for carving. For example, try working with sugar pumpkins for their symmetrical shape and compact size.
If you’re eager to learn more about coexisting with wildlife during the fall season, we recommend checking out resources like local park rangers’ websites or online forums focused on wildlife conservation. You can also participate in citizen science projects that help monitor animal populations and habitats. By combining your love of pumpkin carvings with a passion for wildlife conservation, you’ll create a truly special experience this fall.
Frequently Asked Questions
Can I use any type of pumpkin for a cougar design?
You can use various types of pumpkins, but it’s best to choose ones that are symmetrical and have a smooth surface. Some popular options include jack-o’-lantern-style pumpkins or sugar pie pumpkins. Avoid using too large or too small pumpkins, as they might be difficult to carve.
How do I ensure my pumpkin carving cougar doesn’t attract real cougars into my garden?
While it’s unlikely that your pumpkin carving will attract cougars, you can take precautions by placing the display in a well-lit area and avoiding areas with known cougar habitats. You can also consider adding deterrents like motion-sensitive sprinklers or ultrasonic repellent devices.
Can I carve a cougar design into a real stone or rock?
Yes, you can use various materials other than pumpkins to create a cougar design. Stone carving is a great alternative for creating a more permanent and long-lasting display. However, it requires specific tools and techniques, so make sure to research and practice beforehand.
How do I clean and maintain my pumpkin carving cougar once it’s displayed?
Regularly dust your display with a soft brush to prevent dirt buildup. Avoid using harsh chemicals or abrasive materials that can damage the carved design. If you’re displaying your pumpkin outdoors, consider using a sealant to protect it from the elements.
Can I make a 3D or multi-layered cougar design using pumpkins?
While traditional pumpkin carving techniques are two-dimensional, some artists have experimented with 3D and layered designs using stacked pumpkins or carved foam. This requires more advanced skills and tools, but can result in stunning displays that add an extra dimension to your fall decor.