Are you ready to multiply your favorite houseplants with ease? Rooting cuttings is an excellent way to propagate your beloved plants, but it can be intimidating if you’re new to plant parenthood. Don’t worry, we’ve got you covered! With the right techniques and a bit of patience, you’ll be growing healthy new plants in no time.
In this article, we’ll take you through the essential steps to successfully root houseplant cuttings. We’ll start by choosing the perfect plant for propagation, then move on to preparing the cutting site for optimal growth. You’ll learn how to create a conducive environment that encourages healthy roots to develop, and we’ll even share some expert tips to help you overcome common challenges.
Get ready to multiply your plant collection and enjoy more of your favorite green friends!
Choosing the Right Plant and Cutting
When it comes to rooting a successful cutting, selecting the right plant and cut is crucial. This section will help you choose the perfect combination for your project.
Selecting the Right Houseplant
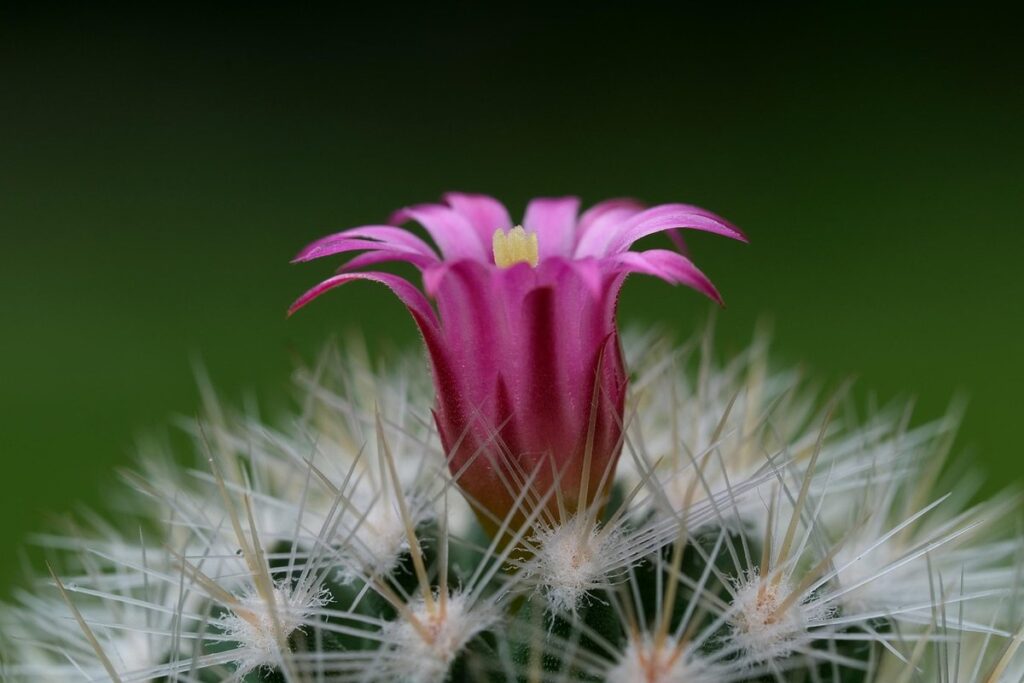
When it comes to selecting the right houseplant for taking cuttings, there are several factors to consider. Succulents and cacti are popular choices because they produce plenty of stem material that can be easily propagated. Look for plants with thick, fleshy stems or pads that have formed well-defined joints – these are ideal candidates for cutting.
Flowering plants like African Violets and Begonias also work well, as long as you choose a healthy specimen with plenty of blooms. Select cuttings from the tips of stems, just below a node (where a leaf meets the stem). Avoid taking cuttings from weak or spindly growth, as these may not produce strong roots.
To ensure success, inspect the plant’s leaves and stems for signs of pests, diseases, or nutrient deficiencies. Make sure the cutting material is firm, plump, and free of damage. If you’re unsure whether a particular houseplant will propagate well, start with a small cutting to test its viability before taking more extensive stem cuttings.
Identifying Healthy Cuttings
When selecting a cutting for rooting, it’s essential to choose one that has the best chance of success. A healthy cutting should have a few key characteristics that make it suitable for propagation.
First, look for cuttings that are around 2-4 inches (5-10 cm) long. This length allows for easy handling and increases the chances of successful rooting. Cuttings that are too short may struggle to develop a strong root system, while those that are too long can become waterlogged and prone to rot.
The diameter of the cutting is also crucial. Opt for cuttings with a diameter between 1/4 inch (6 mm) to 1/2 inch (13 mm). This size range provides enough surface area for rooting hormones to work effectively, while avoiding the risk of the stem becoming too thick and difficult to handle.
Finally, inspect the cutting carefully for any signs of disease or pests. Check for black spots, yellowing leaves, or white powdery patches that could indicate fungal infections. Also, look out for aphids, mealybugs, or spider mites that can spread quickly through the plant’s system. If you notice any issues, discard the cutting and choose a healthier alternative.
Remember, not all cuttings are created equal. By selecting a cutting with the right length, diameter, and health, you’ll be well on your way to successful propagation and growing new plants from your houseplants.
Preparing the Cutting for Rooting
To successfully root a cutting, you’ll first need to prepare it by trimming any weak or damaged leaves and selecting healthy stem sections. This step is crucial for a successful rooting process.
Cleaning and Sterilizing Tools
When working with plant cuttings, it’s essential to use clean and sterile tools to prevent the spread of diseases and ensure a healthy rooting process. To do this, start by cleaning your pruning shears and other equipment after each use. This can be done by wiping them down with a mixture of soap and water or running them through a dishwasher cycle.
For more thorough cleaning and sterilization, you’ll want to submerge your tools in a solution of 1 part bleach to 9 parts water for about 10-15 minutes. Be sure to rinse them thoroughly afterwards with clean water to remove any remaining bleach residue. You can also use hydrogen peroxide or a dedicated plant tool sanitizer as an alternative.
Regular cleaning and sterilization will help prevent the spread of diseases like root rot, leaf spot, and stem rot, which can quickly ruin your chances of successfully rooting a cutting. By following these simple steps, you’ll be able to keep your tools in top condition and give your cuttings the best possible chance at success.
Preparing the Cutting Site
Preparing the cutting site is a crucial step that will determine the success of rooting your houseplant. To begin, remove any lower leaves from the stem, making sure to leave only two or three sets of leaves at the top. This might seem counterintuitive, as you’d think more leaves would be better, but in reality, excess foliage can lead to waterlogged cuttings and root rot. By removing lower leaves, you’re reducing the risk of moisture accumulation and promoting healthy growth.
Next, make a smooth, angled cut just above a node using a clean, sharp knife or pruning tool. This will help stimulate new growth and encourage roots to develop. Avoid tearing or crushing the stem, as this can cause damage to the plant’s vascular tissue. If you notice any weak or damaged tissue, remove it carefully with sterile scissors to prevent the spread of disease.
When preparing your cutting site, remember that cleanliness is key. Make sure your tools are sanitized and your workspace is free from debris. This will help prevent infection and promote healthy rooting.
Rooting Methods for Houseplant Cuttings
Now that you’ve taken your cutting and prepared it for rooting, let’s dive into the various methods you can use to get those roots growing. We’ll cover a range of techniques to suit different plants and preferences.
Water Rooting Method
The water rooting method is a popular and effective way to root houseplant cuttings. To create a rooting medium using this method, you’ll need a glass of water and a clear plastic bag. Fill the glass with fresh, lukewarm water, leaving about an inch at the top for the cutting to sit in. Place the cutting into the water, making sure that the node (where the leaf meets the stem) is submerged.
Cover the glass with a clear plastic bag to maintain humidity and promote rooting. Secure the bag around the rim of the glass with a rubber band or twist tie. The ideal temperature for water rooting is between 65°F to 75°F (18°C to 24°C), which is slightly warmer than room temperature. Keep the cutting in bright, indirect light but not direct sunlight.
This method allows you to monitor the roots developing without having to transfer the cutting to a new pot. Check on the cutting every few days and change the water if it becomes cloudy or dirty. After 7-10 days, carefully remove the cutting from the water and plant it in a well-draining potting mix.
Soil Rooting Method
When it comes to rooting houseplant cuttings, one popular method is the soil rooting method. This involves planting the cutting into a well-draining potting mix specifically designed for rooting new plants. To prepare a pot for this method, start by filling a small container with a high-quality rooting mix that contains ingredients like perlite or vermiculite to ensure excellent drainage.
Next, plant the cutting at the correct depth, making sure the node (where the leaf meets the stem) is buried in the soil but not too deep. This is typically about 1-2 inches below the surface of the potting mix. Gently firm the soil around the roots to secure them in place.
It’s essential to provide your cutting with adequate light and maintain a consistent watering schedule to promote healthy root growth. Aim for bright, indirect light but avoid direct sunlight, which can cause the cutting to dry out too quickly. Water your cutting sparingly, allowing the top inch of soil to dry out between waterings to prevent overwatering.
Tips for Successful Root Development
Now that you’ve successfully propagated your houseplant cutting, let’s focus on the final step: developing those roots into a healthy, thriving new plant. Here are some expert tips to get you started!
Maintaining Optimal Conditions
Maintaining optimal temperature, humidity, and light conditions is crucial for successful root development. Most houseplants prefer temperatures between 65°F to 75°F (18°C to 24°C), but some species have specific requirements. For example, African Violets thrive at warmer temperatures around 70°F to 80°F (21°C to 27°C), while Begonias do well in cooler conditions at around 60°F to 70°F (15°C to 21°C).
Humidity also plays a significant role in root development. Aim for a relative humidity of 40-50% by placing the cutting on a tray filled with water and pebbles or using a humidifier nearby. Avoid direct sunlight, as it can cause the cutting to dry out quickly. Instead, provide bright, indirect light, such as east- or west-facing windows.
Monitor your cutting’s progress closely, and adjust the environment accordingly. If you notice roots developing too slowly, consider increasing humidity by 5-10% or moving the cutting to a warmer location. Conversely, if roots are growing rapidly, reduce humidity slightly to prevent overgrowth.
Monitoring for Signs of Stress
Monitoring for Signs of Stress is crucial when rooting cuttings from houseplants. As you wait for roots to develop, keep an eye out for signs that the cutting might be stressed. One common indicator is a change in leaf color. If the leaves begin to wilt or turn yellow, it could be a sign that the cutting needs more light or water.
Another indication of stress is changes in growth patterns. If the cutting is not producing new leaves or is growing at a slower rate than usual, it might be a sign that something is amiss. This can often be resolved by adjusting the environment to provide optimal conditions for root development.
Some common causes of stress in rooted cuttings include overwatering, underwatering, and inadequate light. Be mindful of these potential issues and adjust your care routine as needed to ensure the cutting continues to thrive. By catching signs of stress early on, you can prevent damage to the cutting and promote healthy root growth.
Common Mistakes to Avoid
When rooting houseplant cuttings, it’s easy to fall into common mistakes that can prevent successful root development. One of the most critical errors is over-watering or under-watering. When you water a cutting too much, the roots may rot, causing the cutting to die. On the other hand, if the soil is too dry for an extended period, the roots won’t develop properly.
To avoid this issue, make sure to check the moisture level of the soil regularly by sticking your finger into it. Water only when the top inch of soil feels dry. You should also ensure that the pot has proper drainage holes to prevent waterlogged soil.
Another common mistake is providing insufficient light for the cutting. Most houseplants require bright, indirect light to develop roots. A south-facing window or a grow light can provide the necessary illumination. Avoid placing the cutting in direct sunlight, which can cause scorching and hinder root growth. By being mindful of these potential pitfalls, you’ll be well on your way to successfully rooting your houseplant cuttings.
Troubleshooting Common Issues
Don’t worry if you encounter problems along the way, we’ve got you covered with solutions to common issues that might arise when rooting a cutting from your houseplant. Let’s troubleshoot together!
Slow Root Development
Slow root development can be frustrating, especially when you’ve taken all the necessary steps to create an ideal environment for rooting. One of the main causes of slow root development is inadequate light conditions. Most houseplants prefer bright, indirect light, but direct sunlight can be too intense and even cause damage to delicate cuttings. If your cutting is placed in a spot with limited natural light or artificial lighting that’s not sufficient, it may hinder root growth.
Another factor contributing to slow root development is temperature fluctuations. Some plants thrive in warmer temperatures (around 70-80°F), while others prefer cooler conditions (55-65°F). Extreme temperatures can shock the cutting and slow down root growth. To address this issue, make sure your propagation station is maintained at a consistent temperature within the preferred range of your plant species.
Adequate humidity and water intake are also crucial for promoting healthy root development.
Pests or Diseases
As you work on rooting your houseplant cutting, it’s essential to monitor its health closely for signs of pests or diseases. These can quickly spread and cause more harm than a failed rooting attempt. Check the cutting regularly for any unusual growths, discoloration, or stickiness.
Common pests like spider mites, mealybugs, and scale insects can infest root cuttings. Look for fine webbing, white cottony patches, or armored bumps on the leaves or stems. If you notice any of these signs, treat the cutting with insecticidal soap or neem oil according to the product’s instructions.
Root rot is a common disease affecting rooted cuttings. Signs include soft, mushy stems, yellowing or browning leaves, and a sour smell. To prevent root rot, ensure good air circulation around the cutting and avoid overwatering. If you suspect root rot, remove the affected section and treat with a fungicide. Regularly inspect your cutting for any signs of stress or disease, and take action promptly to prevent further damage. This will give your rooted cutting the best chance at thriving.
Conclusion
Now that you’ve successfully rooted your houseplant cutting, let’s review what you’ve learned and provide some final tips to ensure a healthy new plant.
Recap of Key Takeaways
In this comprehensive guide to rooting houseplant cuttings, we’ve covered essential steps and key takeaways for successful propagation. To recap, let’s review the main points:
When choosing a plant and cutting, consider factors like species, maturity level, and freshness. Selecting the right material is crucial for root development; look for healthy leaves, sturdy stems, and intact nodes. For example, if you’re working with a fiddle leaf fig, choose a section of stem with at least two nodes to increase your chances of successful rooting.
Preparing the cutting site involves making clean cuts, removing lower leaves, and treating the cut end with a rooting hormone. This step is crucial for promoting root growth and preventing bacterial infection. Make sure to use a sterile tool when handling plant material, and disinfect it regularly to prevent contamination.
Maintaining optimal conditions for root development is also vital. Ensure that your cutting receives bright, indirect light, consistent moisture levels, and temperatures between 65°F to 75°F (18°C to 24°C). Watering should be done carefully, as overwatering can lead to rot and kill the cutting. A well-draining potting mix and a propagation tray or container will help prevent waterlogged conditions.
To recap, our key takeaways are:
* Choose healthy plant material with intact nodes
* Prepare the cutting site by making clean cuts and treating with rooting hormone
* Maintain optimal growing conditions for root development
By following these guidelines and tips, you’ll be well on your way to successfully rooting houseplant cuttings. Remember that patience is essential, as propagation can take time. With the right approach, you can multiply your favorite plants and expand your indoor garden.
Frequently Asked Questions
How do I know if my houseplant is suitable for propagation by stem cutting?
Not all plants can be propagated using stem cuttings, so it’s essential to check the specific needs of your plant before attempting to root a cutting. Succulents and cacti are generally good candidates, as they produce plenty of stem material that can be easily propagated. However, if you’re unsure about the suitability of your plant, consult with a local nursery or gardening expert for guidance.
What is the ideal temperature range for rooting houseplant cuttings?
The temperature at which you root your houseplant cutting can significantly impact the success of the process. Most plants prefer temperatures between 65°F to 75°F (18°C to 24°C) during the day and slightly cooler temperatures at night. Avoid placing your cuttings near heating vents, radiators, or drafty windows, as this can cause stress and hinder root development.
How often should I water my newly rooted cuttings?
Newly rooted cuttings require consistent moisture to develop a healthy root system. Water your cuttings when the top inch of soil feels dry to the touch, usually every 2-3 days in warm temperatures. However, avoid overwatering, which can lead to root rot and kill the cutting.
Can I use a rooting hormone powder or liquid to enhance success rates?
Yes, using a rooting hormone powder or liquid can increase your chances of successful propagation by stimulating root growth. These products contain plant hormones that promote cell division and elongation in the stem cuttings, helping them develop roots more quickly. Always follow the product’s instructions for application rates and timing.
How long does it typically take to see signs of root development?
The time it takes to see signs of root development can vary depending on factors like temperature, humidity, and plant species. Generally, you should start seeing visible roots within 2-4 weeks after rooting your cutting, although some plants may require longer periods. Monitor your cuttings closely for signs of growth, such as a slight softening of the stem or the appearance of new leaves.