Are you eager to grow your own corn plant, but don’t know where to start? You’re not alone! Many gardeners believe that growing corn from seed is a daunting task, especially when using popping corn seeds. However, with the right guidance, it’s completely achievable. In this article, we’ll walk you through the process of successfully growing a corn plant from popping corn seed. We’ll cover everything from selecting the perfect seeds to preparing the soil and providing expert care tips for a bountiful harvest. By the end of this post, you’ll be well-equipped with the knowledge to grow your own delicious corn on the cob, right in your backyard. So, let’s get started and explore the world of growing corn from popping corn seed!
Choosing the Right Variety and Conditions
When it comes to successfully growing a corn plant from popping corn seed, selecting the right variety for your climate is crucial. We’ll explore how to choose the perfect variety for your conditions in this section.
Selecting a Suitable Variety for Your Region
When selecting a corn variety for growing from popping corn seed, it’s essential to consider your region’s unique characteristics. This includes climate, soil type, and the duration of the growing season. Some regions are better suited for sweet corn varieties that mature quickly, while others may be more suitable for dent or flour corn.
Check seed catalogs or online resources for specific recommendations tailored to your area. Look for keywords such as “day-length neuter” or “mid-season maturity” to ensure the variety you choose will thrive in your climate. You can also consult with local nurseries, gardening clubs, or extension offices for advice on suitable varieties for your region.
When browsing seed catalogs, keep an eye out for regional adaptability ratings or “regional trials” data that indicate how well a particular variety has performed in specific areas. This information will help you make informed decisions and choose the best corn variety for your popping corn seeds.
Understanding the Requirements for Growing Corn
When growing corn from popping corn seeds, it’s essential to understand the basic requirements for a healthy and thriving crop. Corn needs full sun to grow well, so choose a location that receives direct sunlight for at least 6 hours a day. This will not only promote photosynthesis but also help in preventing fungal diseases.
Well-drained soil is another crucial aspect of growing corn. Avoid areas with standing water or where water tends to collect after rainfall. You can test your soil’s drainage by digging a small hole and filling it with water. If the water drains quickly, then your soil should be suitable for growing corn.
Adequate water supply is also necessary for corn growth. However, make sure not to overwater, as this can lead to root rot and other problems. Aim for about 1 inch of water per week through rainfall or irrigation.
It’s equally important to choose a location with good air circulation. This will help prevent disease-causing fungi from spreading easily among the plants.
Preparing the Soil and Seeds
To successfully grow a corn plant from popping corn seed, you’ll first need to prepare the soil by loosening it to a depth of about 8-10 inches. This will help your seeds get a strong start.
Testing and Amending the Soil
Before planting corn, it’s essential to test and amend your soil to ensure it provides the necessary conditions for optimal growth. You can purchase a DIY soil testing kit or send a sample to a laboratory for analysis. This will determine your soil’s pH level and nutrient content. Most corn varieties prefer a slightly acidic to neutral soil pH between 6.0 and 7.0.
If your test results indicate a low nutrient level, you can amend the soil with organic matter such as compost or well-rotted manure. These materials not only add nutrients but also improve soil structure and fertility. A general rule of thumb is to mix in 2-4 inches of compost or manure into the top 6-8 inches of soil.
Alternatively, you can use balanced fertilizers like 10-10-10 NPK (nitrogen-phosphorus-potassium) to provide essential nutrients for corn growth. However, be cautious not to over-fertilize, as this can lead to an overabundance of nitrogen that may burn your plant’s roots.
It’s also crucial to consider the specific needs of the popping corn seed you’re using. Some varieties require more nutrients or have different pH preferences than others.
Storing and Handling Popping Corn Seeds
When storing popping corn seeds, it’s essential to keep them in a cool, dry place away from direct sunlight. Direct sunlight can cause the seeds to degrade quickly, leading to reduced germination rates. Ideally, store the seeds in an airtight container or envelope and place them in a cupboard or drawer that maintains a consistent temperature between 40°F to 60°F (4°C to 15°C).
When handling popping corn seeds, it’s crucial to be gentle to avoid damage. Corn seeds are relatively large compared to other types of seeds, making them more prone to scratches and cracks. When sowing the seeds or storing them, use a soft cloth or a dry paper towel to prevent scratching the seed coat.
To further minimize damage, consider separating your popping corn seeds into smaller batches before storing them. This will make it easier to access individual packets when needed, reducing the need for frequent handling of the entire seed supply.
Planting the Seeds and Seedlings
To grow corn from popping corn seed, you’ll first need to separate the seeds from the popped kernels, making sure not to damage them in the process.
Sowing the Seeds Directly into the Soil
When sowing popping corn seeds directly into the soil, it’s essential to create an optimal seedbed that promotes healthy germination and growth. To start, choose a spot with full sun and well-draining soil. If your soil is heavy clay or prone to waterlogging, consider adding organic matter like compost to improve its structure.
For the sowing process itself, follow these guidelines: space seeds about 8-10 inches apart in rows that are 3 feet apart. Plant the seeds about 1 inch deep and 2 inches from the top of the soil. To create a smooth seedbed, rake the soil gently after planting to ensure even contact between the seeds and the soil.
Avoid compacting the soil, as this can prevent water and air from reaching the seeds. Water the seeds lightly but thoroughly after sowing, and keep the soil consistently moist during the germination period, which typically lasts 7-10 days.
Transplanting Seedlings from Containers
When transplanting corn seedlings from containers to larger pots or directly into the garden bed, it’s essential to follow a few key steps. First, make sure your seedlings have at least two sets of leaves before transplanting them outside. This will give them a better chance of survival in their new environment.
Hardening off is another crucial step that cannot be overlooked. Start by moving the containers with the seedlings to a shaded area for 7-10 days before transplanting them outside. Gradually increase their exposure to direct sunlight over this period, starting with just an hour or two per day and increasing it by a few hours each subsequent day.
When hardening off, keep an eye out for signs of stress such as yellowing leaves, droopy stems, or other abnormalities. If you notice any of these symptoms, bring the seedlings back indoors and give them more time to acclimate before trying again. Once they’re hardened off, it’s safe to transplant your corn seedlings into their final location in the garden bed.
Providing Care and Maintenance
Now that you’ve got your seedling growing, it’s time to learn how to provide the right care and maintenance for a healthy and thriving corn plant. This includes watering, fertilizing, and pruning techniques.
Watering and Irrigation Techniques
When it comes to watering and irrigating your corn plant grown from popping corn seed, it’s essential to get it right. Overwatering can lead to root rot, while underwatering can result in poor growth and low yields. So, how do you determine when your corn plant needs water?
Check the soil moisture by inserting your finger into the soil up to the knuckle. If the soil feels dry, it’s time to water. You can also check for signs of stress such as yellowing leaves or a decrease in growth rate. Water your corn plant deeply once or twice a week, depending on weather conditions.
Using drip irrigation systems or soaker hoses is an efficient way to deliver water directly to the roots, reducing evaporation and runoff. These systems also help prevent fungal diseases that thrive in moist environments. For example, if you’re growing in a pot, consider using a self-watering planter with built-in water reservoirs.
Keep in mind that corn plants grown from popping corn seeds have relatively shallow root systems, so they require more frequent watering than other varieties. By following these tips and monitoring your plant’s needs, you’ll be able to provide the right amount of water for optimal growth.
Fertilizing and Mulching Corn Plants
Fertilizing and mulching are crucial steps in providing care and maintenance for corn plants. Fertilizers play a significant role in supplying essential nutrients to the plant, promoting healthy growth and development. When choosing a fertilizer, look for balanced formulas that contain nitrogen (N), phosphorus (P), and potassium (K) in equal proportions. Apply these fertilizers at least once a month during the growing season.
Regular fertilization will help your corn plants grow taller, stronger, and more resistant to disease. It’s also essential to mulch around the base of the plants to retain moisture and suppress weeds. Mulching helps maintain soil temperature, reduces evaporation, and keeps the soil moist. Organic materials like straw or grass clippings make excellent mulches.
To maximize benefits, spread a 2-3 inch layer of mulch around the plants, keeping it at least 6 inches away from the stalks. This allows for air circulation and prevents moisture buildup that can lead to fungal diseases. Keep the mulch replenished throughout the growing season to maintain its effectiveness. By combining regular fertilization with proper mulching techniques, you’ll be well on your way to producing a bountiful corn harvest.
Monitoring and Controlling Pests and Diseases
To grow a healthy corn plant, you need to keep an eye out for common pests and diseases that can damage your crop. Regular monitoring is key to preventing infestations and infections.
Common Pests Affecting Corn Plants
As you nurture your corn plant from popping corn seed, be vigilant for common pests that can sabotage your harvest. Aphids, whiteflies, and spider mites are frequent culprits, sucking the sap from leaves and reducing yields.
Aphids are small, soft-bodied insects that feed on sap, causing curled or distorted leaves. They’re often found on new growth, particularly in warm weather. To identify aphids, check for clusters of small, pear-shaped eggs or live aphids on undersides of leaves. If you spot them, use neem oil or insecticidal soap to control the infestation.
Whiteflies are tiny, flying insects that feed on sap, causing yellowing leaves and stunted growth. They’re often found near flowers or fruiting areas. To identify whiteflies, look for a fine dust or a cloud of small insects hovering around your plant. Use sticky traps or insecticidal soap to control them.
Spider mites are tiny, spider-like creatures that feed on sap, causing yellowing leaves and webbing. They’re often found in dry conditions, particularly near the soil line. To identify spider mites, look for fine webbing on stems or a fine dust on leaves. Use neem oil or insecticidal soap to control them.
To prevent infestations, keep your plant well-watered but not waterlogged, and provide good air circulation. Regularly inspect your plant, looking for signs of pests. With prompt action, you can minimize damage and enjoy a healthy harvest.
Recognizing and Treating Fungal and Bacterial Diseases
Corn plants are susceptible to various fungal and bacterial diseases that can significantly impact their health and productivity. As you grow your corn plant from popping corn seed, it’s essential to be aware of the common symptoms and take preventive measures.
Powdery mildew is a common fungal disease that causes white or gray powdery patches on leaves, stems, and ears of corn. Bacterial leaf spot, on the other hand, appears as small, circular lesions with yellow halos around them. These diseases can be identified by their distinct symptoms and are often exacerbated by humid weather conditions.
To prevent these diseases, maintain good air circulation around your plants, avoid overwatering, and ensure proper spacing to reduce moisture accumulation between leaves. Regularly inspect your corn plant for signs of disease and treat fungal infections with fungicides containing copper or sulfur.
For bacterial diseases, remove infected areas promptly and dispose of them to prevent the spread. For both types, maintaining a balanced fertilization schedule can help strengthen your corn plant’s immune system.
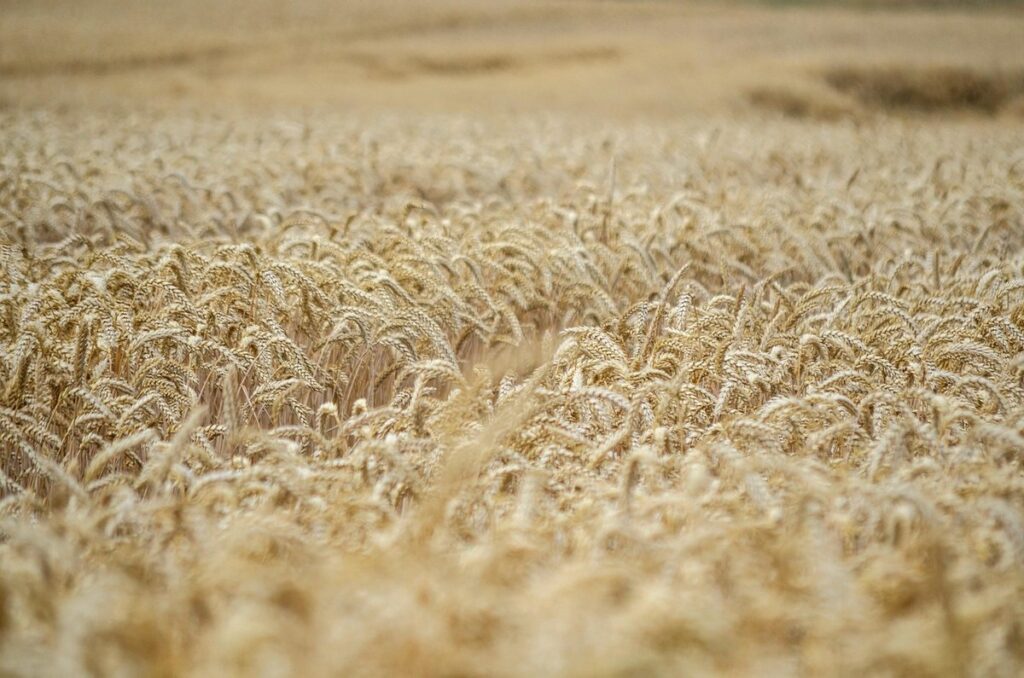
Harvesting and Enjoying Your Corn Crop
Now that you’ve successfully grown your corn plant from popping corn seed, it’s time to harvest the fruits of your labor and enjoy the delicious results. This section will walk you through the process of harvesting and using your homegrown corn.
Determining When to Harvest
Determining when to harvest your corn crop is crucial to enjoying its sweetness and flavor. As you grow corn from popping corn seed, keep an eye out for these signs of maturity: the kernels will turn a deep yellow color, almost golden, with a slightly darker stripe on each kernel. To check for doneness, gently grasp a kernel between your fingers, feeling for firmness – if it yields to pressure, it’s not yet ready.
To ensure you harvest at the right moment, regularly inspect your corn ears over the last few days before maturity. This is also an excellent time to taste-test a small ear by cutting off one of the kernels. If it’s sweet and tender, congratulations – your corn is ready! As a general rule, mature corn will have a hard outer layer that’s difficult to pierce with your fingernail.
When checking for kernel firmness, remember that overripe or underripe ears can be easily mistaken for each other in appearance. A ripe ear of corn should have a slight sheen and a dry, slightly sweet aroma. If you notice any mold or rot on the husk or kernels, it’s best to harvest immediately to prevent spoilage.
Processing and Cooking Popped Corn
Processing and cooking your freshly popped corn from your homegrown crop is an exciting experience. Once you’ve harvested your ears of corn, you’ll want to pop them immediately for the best flavor and texture. To do this, you can use a variety of methods.
Boiling is one of the simplest ways to cook your popped corn. Simply add 2-3 cups of water to a large pot, bring it to a boil, and then carefully place your ears of corn into the boiling water. Cook for about 5-7 minutes or until the kernels are tender. Drain the water and let the corn cool before popping.
Steaming is another great way to cook your popped corn, especially if you want to preserve more nutrients. You can use a steamer basket over boiling water or an electric steamer. Steam the ears of corn for about 5-7 minutes or until they’re tender. For a more flavorful twist, try grilling your popped corn for a few minutes on each side after it’s been cooked.
When cooking your popped corn, be sure to always use fresh and clean equipment to prevent contamination. Also, make sure the water is at a rolling boil before adding your ears of corn to ensure even cooking.
Frequently Asked Questions
Can I use popping corn seeds from a store-bought bag to grow a new corn plant?
Yes, but keep in mind that these seeds may not be suitable for planting due to their processing history and potential lack of viability. Look for specialty seed stores or online suppliers that sell high-quality, untreated seeds specifically labeled as “suitable for planting.”
How long will it take for my popping corn seeds to germinate?
The germination period for popping corn seeds can range from 7-14 days, depending on factors such as soil temperature, moisture, and the specific variety. Keep the soil consistently moist during this time, but avoid overwatering.
What’s the ideal spacing between each corn plant when growing multiple plants in a row?
For optimal growth and air circulation, space your corn plants 12-18 inches apart in rows that are at least 3 feet apart. This will help prevent disease and promote healthy development.
Can I grow popping corn seeds indoors using grow lights or is it strictly an outdoor endeavor?
While growing corn outdoors provides better results due to increased sunlight and wind exposure, you can start the seeds indoors 1-2 weeks before transplanting them outside. Use a large container with good drainage and provide sufficient light (at least 12 hours of supplemental lighting) to promote healthy growth.
How do I store any leftover popping corn seeds for future planting seasons?
To preserve the viability of your popping corn seeds, store them in an airtight container or envelope at room temperature (around 70°F). Avoid moisture and direct sunlight. It’s recommended to use fresh seeds each season for optimal results.