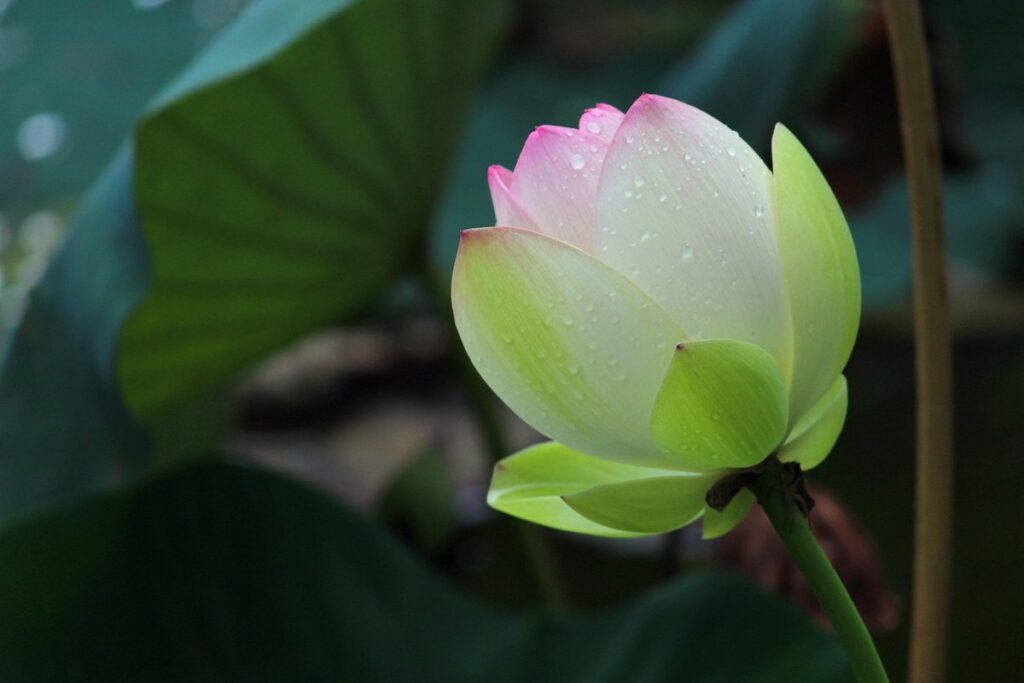
The vibrant blooms of your iris plants have finally faded, but their story doesn’t end there. Proper post-blooming care is essential to encourage these stunning flowers to come back year after year. Neglecting this crucial step can lead to weak and spindly growth, making it harder for your irises to thrive.
In this article, we’ll explore the top techniques for caring for your irises after they’ve bloomed. We’ll delve into the importance of removing dead flower stems, a process that’s often overlooked but makes all the difference in promoting healthy growth. Additionally, you’ll learn how fertilizing and dividing your irises can boost their chances of repeat blooming. By following these simple yet effective tips, you’ll be able to enjoy an explosion of color and beauty from your irises for years to come.
Understanding Post-Blooming Care
Now that you’ve enjoyed your irises’ beautiful blooms, it’s time to focus on their post-blooming care to ensure they come back strong and vibrant next year. Let’s dive into the essential steps for a successful transition.
Importance of Proper Post-Blooming Care
Proper post-blooming care is crucial for maintaining the health and promoting repeat blooming of irises. When an iris finishes blooming, it’s not uncommon for gardeners to let their guard down, assuming that their plant has done its job. However, neglecting proper care during this period can have long-term consequences.
Failing to deadhead spent blooms can lead to seed production, which can divert energy away from the mother plant and reduce future blooming potential. Additionally, allowing foliage to become soggy or diseased can create an environment conducive to pests and diseases that can spread quickly through the garden. To prevent this, make sure to:
* Deadhead spent blooms as soon as possible
* Cut back foliage by one-third to half to maintain air circulation and promote healthy growth
* Water and fertilize regularly, but avoid over-watering which can lead to root rot
By paying attention to these simple tasks, you’ll not only ensure the health of your irises but also encourage them to produce more blooms in the following seasons.
Assessing Iris Health After Blooming
After blooming, it’s essential to assess an iris’s health to ensure its overall well-being. This evaluation will help you identify any signs of stress or decline that require attention. Start by examining the foliage for any damage or discoloration. Check if the leaves are wilted, yellowing, or developing brown tips. These symptoms can indicate a lack of water, extreme temperatures, or nutrient deficiencies.
Another critical aspect is to inspect the rhizomes (the underground storage organs) and roots. Healthy rhizomes should be firm, plump, and free from signs of rot or decay. If you notice any damage or softening, it may be a sign that the iris needs more water, fertilization, or has been affected by pests.
Take note of the flower stalks as well. If they’re brittle, broken, or have fallen over, it could indicate inadequate support or a weak stem. Regularly inspecting your irises will help you catch any issues early on, ensuring their continued health and performance in subsequent growing seasons. Keep an eye out for signs of disease or pests, which can be detrimental to the plant’s overall well-being.
Removing Dead Flower Stems
Now that you’ve enjoyed those gorgeous irises, it’s time to tidy up and encourage more blooms next year. Let’s take a look at how to remove dead flower stems properly.
When to Remove Irises’ Dead Flower Stems
When it’s time to remove dead flower stems from irises, you’ll want to act quickly. This is because leaving them intact can lead to the spread of disease and encourage pests to take up residence on your plants. As soon as the blooms have faded, cut back the dead flower stems to about an inch above the foliage.
Removing these stems promptly also allows the iris plant to direct its energy towards producing new growth and storing nutrients for next year’s blooms. You can think of it like pruning a hair salon – when you remove old hair growth, you make way for new, healthy locks (in this case, irises) to grow in their place.
By removing dead flower stems soon after blooming, you’ll also reduce the risk of seed pods forming on your iris plants. While some gardeners intentionally allow these seeds to develop as a means of propagating new irises, many prefer to prevent them from forming so they can focus on dividing and replanting mature rhizomes instead.
Correct Techniques for Removing Dead Flower Stems
When removing dead flower stems from irises after blooming, it’s essential to handle them carefully to prevent damaging the plant’s foliage. Start by cutting off the dead flower stem at an angle, about 1-2 inches above the rhizome (the thick underground stem). This helps water and nutrients flow freely through the plant.
To avoid injuring the leaves or other stems, work from the base of the plant upwards, carefully pruning any spent blooms and dead foliage. Remove any weak or damaged growths to promote healthy new growth. Use clean, sharp tools to prevent spreading diseases.
Keep in mind that irises typically bloom on their own roots, so it’s crucial not to disturb the rhizome too much during this process. If you notice any dead or dying leaves, simply trim them back to about an inch above a node (where a leaf meets the stem), making sure to cut at an angle to promote new growth.
By following these steps and taking care to minimize damage, you can encourage your irises to focus their energy on producing next year’s blooms.
Fertilizing and Feeding Irises
Now that your irises have bloomed, it’s time to give them some TLC to keep them thriving. In this next part of our guide, we’ll cover how to fertilize and feed your irises properly.
Types of Fertilizers Suitable for Irises
When it comes to fertilizing irises after blooming, you have several options to choose from. Organic and inorganic fertilizers are two main categories that can provide the necessary nutrients for healthy growth.
Organic fertilizers, such as compost or manure tea, promote soil health while providing essential micronutrients. These options release nutrients slowly, reducing the risk of burning your irises’ roots. For instance, adding a 2-inch layer of compost around the base of your iris plant will provide a slow release of nutrients throughout the growing season.
Inorganic fertilizers, like balanced 10-10-10 NPK or high-phosphorus bloom boosters, offer faster results but may require more frequent applications to avoid over-fertilizing. For example, if you’re looking for an instant boost, using a high-phosphorus fertilizer once in the early spring can encourage vigorous growth.
When choosing between these options, consider your soil type and iris variety’s specific needs. Even with careful selection, remember that too much of any fertilizer can be detrimental to your irises.
Timing and Application Guidelines
When it comes to fertilizing your irises after blooming, timing is everything. The ideal time to apply fertilizer depends on several factors, including the type of soil your iris is growing in and its specific needs.
In general, it’s best to wait until the bloom period has ended before fertilizing. This allows you to remove any spent flowers and deadhead the stems, which helps prevent seed production and directs the plant’s energy towards producing new growth. For most irises, a balanced, water-soluble fertilizer (20-20-20) applied at half the recommended strength is a good starting point.
Soil type also plays a crucial role in determining when to fertilize your iris. If you have heavy clay or sandy soil, it’s best to avoid over-fertilizing, as this can exacerbate any existing drainage issues. Instead, opt for a slow-release fertilizer that provides nutrients over a longer period. For example, if your iris is growing in a container, consider using an organic fertilizer specifically designed for potted plants.
Keep in mind that different types of irises have varying needs when it comes to fertilization. Some irises, like Siberian and Japanese varieties, prefer more acidic soil conditions, while others, like Bearded irises, require more alkaline conditions. Research the specific needs of your iris variety to ensure you’re providing the right nutrients at the right time.
Deadheading and Dividing Irises
To keep your irises healthy and thriving, it’s essential to deadhead spent blooms and divide overcrowded rhizomes at the right time, which we’ll cover next. Let’s dive into the specifics of each task.
When to Deadhead Irises
Deadheading irises is an essential task that helps maintain the health and appearance of these beautiful flowers. The primary purpose of deadheading is to remove spent blooms, which encourages the plant to focus its energy on producing new growth rather than seed production. This process also promotes a longer blooming season.
As for when to deadhead irises, it’s best to do so as soon as the flower fades and starts to turn yellow or brown. Check your plants regularly during peak blooming seasons (usually spring and early summer) to catch spent blooms before they drop off naturally. You can remove old flowers at any time of day, but make sure to wear gloves to protect yourself from the sap, which can cause skin irritation in some people.
Deadheading should be done with care, as irises have a unique growth habit. Use scissors or pruning shears to snip off the flower stem just above the foliage, leaving about 1-2 inches of stem intact. This will help prevent damage to the bulb and encourage new blooms.
Correct Techniques for Dividing Irises
Dividing irises is an essential task to maintain their health and promote new growth. It’s best done after blooming, as this allows you to assess the plant’s performance and identify areas that require attention.
To divide irises correctly, start by digging up the entire clump, taking care not to damage any of the rhizomes or roots. Use a fork or spade to gently pry apart the sections, working from one side of the clump to the other. It’s crucial to use a clean and sharp tool to avoid bruising the delicate tissues.
Timing is also vital; divide irises in late summer or early fall when the foliage has died back. This allows you to assess the plant’s performance over the growing season and gives the new divisions time to establish themselves before winter. When dividing, aim for sections with at least one “eye” or growth node each, as these will produce new blooms.
By following these steps, you’ll be able to successfully divide your irises, promoting healthy growth and encouraging more vibrant flowers in the future.
Watering and Moisture Management
Now that your irises have finished blooming, it’s essential to adjust their watering schedule to prevent root rot and promote healthy growth. Proper moisture management is key during this transitional phase.
Understanding Iris Water Requirements
When it comes to watering irises after blooming, understanding their specific water needs is crucial. Irises require adequate moisture, especially during the growing season, but overwatering can be detrimental. The soil type plays a significant role in determining how much water irises need.
In general, irises prefer well-draining soil that’s rich in organic matter. If your iris variety grows in heavy clay or sandy soil, you’ll need to adjust its watering schedule accordingly. For example, if your soil is on the heavier side, you may need to water more frequently to prevent root rot.
Climate also affects an iris’s water requirements. In areas with high temperatures and low humidity, irises will require more frequent watering than those in cooler, more humid climates. As a rule of thumb, water irises when the top 2-3 inches of soil feels dry to the touch. However, it’s essential to avoid overwatering, especially during the dormant season.
To strike the right balance, monitor your iris plants closely and adjust their watering schedule based on changes in weather patterns or soil conditions.
Tips for Proper Irrigation
When it comes to irises care after blooming, one of the most critical aspects is irrigation. Overwatering and underwatering can be detrimental to these beautiful flowers, so it’s essential to strike the right balance.
Overwatering can lead to root rot, which can cause your irises to turn yellow or wilt, ultimately resulting in their demise. On the other hand, underwatering can also have devastating effects, as it can cause the plants to dry out and become vulnerable to pests and diseases.
To avoid these issues, make sure to water your irises deeply but infrequently. Water them when the top inch of soil feels dry to the touch, and make sure not to get water on their leaves or flowers to prevent fungal diseases. A good rule of thumb is to water in the morning so that any excess moisture has a chance to evaporate throughout the day.
Keep an eye out for signs of overwatering, such as yellowing leaves, soft stems, or black roots. If you notice any of these symptoms, adjust your watering schedule immediately and repot your irises in fresh soil. By being mindful of your irrigation techniques, you can help your irises stay healthy and thrive long after they’ve finished blooming.
Common Challenges After Blooming
After irises have bloomed, you’ll likely encounter some common challenges that can impact their health and beauty if not addressed promptly. In this section, we’ll explore these issues together.
Addressing Pests and Diseases
After the blooming season, irises can be susceptible to pests and diseases that can weaken their foliage and reduce their overall health. Some common pests that affect irises post-blooming include aphids, spider mites, and slugs. These pesky insects feed on the plant’s sap, causing curled or distorted leaves.
To prevent infestations, inspect your irises regularly for signs of pests and take action promptly if you notice any issues. For example, use neem oil to repel aphids or introduce beneficial nematodes to combat grubs.
Diseases such as powdery mildew, rust, and leaf spot can also affect irises after blooming. These fungal infections thrive in humid conditions and can be spread through water droplets on the leaves. To prevent diseases, make sure to provide good air circulation around your plants and avoid getting water on the leaves when watering.
In case of an infection, treat with fungicides specifically designed for irises and follow the product’s instructions carefully.
Troubleshooting Common Issues
If you’re facing common challenges after blooming, such as poor growth or lack of blooms, don’t worry – we’ve got you covered. One issue many growers encounter is a decrease in flower production over time. This can be caused by over-blooming the previous year, which exhausts the bulb’s resources. To combat this, allow your irises to rest for 6-8 weeks after blooming, and cut back the foliage to about 3 inches from the ground.
Another challenge is uneven growth or bare spots in the garden. This might be due to inadequate sunlight or water distribution. Ensure that your irises receive at least 6 hours of direct sunlight and maintain consistent moisture levels by watering deeply once a week during hot summer months.
To address these issues, divide and replant your irises every 3-4 years to promote healthy growth and prevent overcrowding. This will also give you the opportunity to inspect and remove any dead or dying rhizomes.
It’s also worth considering that some varieties of irises are naturally less prolific than others. Researching the specific growing requirements for your type of iris can help you better understand its needs and make informed decisions about care.
Frequently Asked Questions
Can I skip fertilizing my irises if they’re already producing plenty of blooms?
No, it’s still essential to fertilize your irises after blooming to replenish nutrients lost during the flowering process and promote healthy growth. Fertilizing will help maintain their vigor and encourage repeat blooming.
What should I do if I’ve missed removing dead flower stems and now have seed pods forming?
Remove any formed seed pods, as they’ll drain energy from your iris plant. Deadhead spent blooms immediately to direct the plant’s energy towards re-growing foliage rather than producing seeds.
How often can I divide and replant irises, and what are the best times for these processes?
You can divide and replant irises every 3-4 years, depending on their growth rate and health. The best time for division is during the dormant season (fall or early spring) when the plant is less stressed.
Can I use any type of fertilizer for my irises, or are there specific recommendations?
Use a balanced, water-soluble fertilizer (20-20-20) that’s high in phosphorus to promote root growth and blooming. Avoid using fresh manure or compost tea as they can cause over-fertilization.
What if I’ve noticed pests like aphids or spider mites on my irises after blooming? How do I address these issues?
Use neem oil or insecticidal soap to control soft-bodied pests like aphids and spider mites. For more severe infestations, consider introducing natural predators or using systemic insecticides as a last resort.