Winter is here, and with it comes an abundance of delicious winter squash. But have you ever wondered how to keep these seasonal gems fresh for longer? Curing winter squash at home is easier than you think, and it’s a game-changer for any home cook or gardener who wants to enjoy the full flavor and nutritional benefits of their squash year-round. By learning how to cure your winter squash properly, you can extend its shelf life, improve its flavor, and even reduce spoilage. In this article, we’ll walk you through the best methods and techniques for curing winter squash at home, including step-by-step instructions and expert tips to help you achieve perfectly cured squash every time. Whether you’re a seasoned gardener or a curious cook, keep reading to discover the secret to storing your winter squash like a pro!
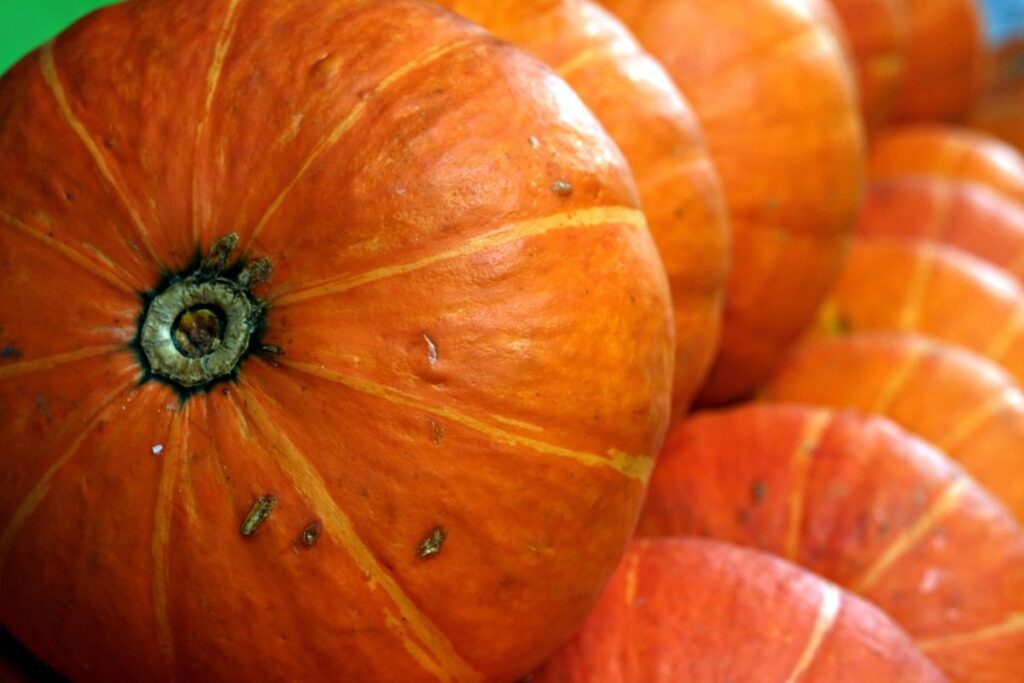
Choosing the Right Winter Squash Variety
When selecting a winter squash variety, consider factors such as size, shape, color, and storage life to ensure you choose one that’s suitable for curing. This will impact the overall quality of your harvest.
Understanding Curing Requirements for Different Varieties
When it comes to curing winter squash, different varieties have unique requirements that can’t be ignored. For instance, acorn squash tends to dry out quickly if over-cured, while butternut squash requires a longer curing period to develop its characteristic sweetness. Spaghetti squash, on the other hand, is more forgiving and can tolerate a slightly shorter curing time.
To choose the right variety for curing, it’s essential to consider their natural moisture levels and texture. For example, sweet dumpling squash has a naturally higher water content than some other varieties, making them better suited for longer curing periods. Similarly, delicata squash has a tender skin that can be prone to decay if not cured properly.
By selecting the right variety for your needs, you’ll be able to determine the ideal curing time and method. This will help prevent spoilage and ensure that your winter squash is stored safely for future use.
Factors Affecting Curing Time and Method
When it comes to curing winter squash, several factors influence both the curing time and method. One of the primary considerations is the size of the squash. Larger squash typically require longer curing times, often between 7-14 days, depending on their moisture content.
Smaller squash, however, can be cured in as little as 3-5 days. This variation underscores the importance of monitoring each individual squash’s curing progress, regardless of its size or shape. For instance, if you have a large pumpkin and a smaller butternut squash, both may require different curing times despite being harvested at the same time.
Moisture content is another crucial factor to consider when determining the optimal curing method for your winter squash. Squash with higher moisture levels will benefit from longer, more gradual curing periods. This is because excessive moisture can lead to rot and spoilage if not managed properly during the curing process.
Preparing Winter Squash for Curing
Before moving on to the curing process, it’s crucial to properly prepare your winter squash by drying and cleaning them. This step helps prevent mold and rot from developing during the curing process.
Cleaning and Wiping Down the Squash
Cleaning and wiping down the squash is an essential step before beginning the curing process. It’s crucial to remove dirt, debris, and any remaining vegetation from the surface of the squash to prevent mold and bacterial growth. These unwanted microorganisms can thrive in the warm, humid environment created during curing, potentially ruining your harvest.
To clean the squash effectively, start by gently brushing away any loose particles with a soft-bristled brush or a clean cloth. Next, mix 1 tablespoon of unscented bleach with 1 gallon of water to create a sanitizing solution. Dip a clean cloth into the solution, wring it out thoroughly, and wipe down the entire surface of the squash, paying special attention to any crevices or cracks where moisture can accumulate.
After cleaning and drying the squash, use a dry towel to remove excess moisture from the surface. This step is crucial in preventing mold growth during curing. You’re now ready to move on to the next stage of preparing your winter squash for curing.
Drying the Squash Before Curing
Drying the squash before curing is an essential step that helps reduce moisture content and improves storage conditions. When winter squash is harvested, it contains a significant amount of water inside its cells. If not dried properly, this excess moisture can lead to mold growth, decay, and other issues during the curing process.
To dry the squash, you’ll need to allow air circulation around the fruit. This can be achieved by placing them on a wire rack or tray, leaving enough space between each squash for good airflow. You can also speed up the drying process by using a fan to circulate the air. Aim to reduce the moisture content of the squash to 15-20% before moving it to the curing chamber.
By drying the squash first, you’ll create an environment that’s less conducive to mold growth and decay, making the curing process more effective. This simple step can significantly impact the quality and shelf life of your winter squash.
The Curing Process: Methods and Techniques
Now that we’ve covered why curing winter squash is crucial, let’s dive into the methods and techniques you can use to cure your gourds successfully. We’ll explore the most common approaches to achieve optimal results.
Air Curing vs. Oven Drying
When it comes to curing winter squash, you have two primary methods at your disposal: air curing and oven drying. Both techniques share a common goal – to dry the squash’s skin and make it easier to store and cook with – but they go about achieving this goal in different ways.
Air curing is a more traditional method that relies on natural airflow to dry the squash. It’s the recommended approach for most winter squash varieties, as it allows the skin to develop its characteristic hard, dry texture without any artificial assistance. To air cure your squash, simply place it in a well-ventilated area with plenty of space around each piece. The key is to ensure good airflow, which can take anywhere from 3-6 weeks, depending on temperature and humidity levels.
On the other hand, oven drying uses heat to accelerate the curing process. This method works best for smaller squash varieties or for those in a hurry. To oven dry your squash, preheat your oven to its lowest temperature setting (usually around 150°F). Place the squash inside and leave it overnight, checking on it periodically to ensure even drying.
While both methods can be effective, air curing has some advantages over oven drying. For one, it’s gentler on the squash, preventing any potential damage from heat exposure. Additionally, air curing allows for a more natural drying process that doesn’t alter the flavor or texture of the squash in any significant way. That being said, oven drying can be beneficial when time is of the essence – just be sure to monitor your squash closely to avoid over-drying.
In terms of storage, cured winter squash should be kept in a cool, dry place with good ventilation. Avoid storing it near direct sunlight or heat sources, as this can cause moisture to build up and lead to spoilage.
Monitoring Moisture Content During Curing
Monitoring moisture content during the curing process is crucial to prevent spoilage and ensure the winter squash remains safe for consumption. You want to cure it until it reaches an optimal level of dryness, usually between 15% and 20%. To measure this, you can use a candy thermometer or a food dehydrator with a built-in moisture meter.
A candy thermometer is an inexpensive option that can give you accurate readings. Insert the probe into the squash, making sure not to touch any seeds or soft spots. Wait for about 30 seconds until the reading stabilizes. The ideal temperature range for curing winter squash is between 65°F and 70°F (18°C and 21°C).
Another method is using a food dehydrator with a built-in moisture meter. This option is more convenient, as it allows you to monitor the moisture levels continuously. Dehydrate the squash at a temperature of around 135°F (57°C) until it reaches the desired level of dryness. Remember to check the squash regularly and adjust the dehydrating time or temperature as needed.
Storing Cured Winter Squash
Once you’ve cured your winter squash, it’s essential to store them properly to maintain their flavor and texture. Learn how to store cured winter squash to keep it fresh for months.
Proper Storage Conditions
Proper storage conditions are crucial to maintaining the quality and longevity of cured winter squash. To ensure that your squash remains fresh for a longer period, you need to store it in an environment with specific temperature, humidity, and light exposure.
Temperature plays a significant role in storing winter squash. A consistent temperature between 50°F and 60°F (10°C and 15°C) is ideal for storage. Avoid placing the squash near heating or cooling vents, fireplaces, or drafty areas, as this can cause uneven drying and affect the quality of the squash.
Humidity levels also need to be controlled when storing winter squash. A relative humidity of 50-60% is recommended to prevent moisture loss and decay. You can maintain the desired humidity level by using a humidifier or placing the squash in a breathable container like a mesh bag.
Light exposure should be minimal, as it can cause the squash to ripen prematurely. Store the cured winter squash in a dark place, such as a pantry or cupboard, away from direct sunlight and artificial light sources. By adhering to these storage conditions, you can enjoy your cured winter squash for several months to come.
Avoiding Common Mistakes During Storage
When storing cured winter squash, it’s easy to make mistakes that can affect its quality and shelf life. One common mistake is exposing the squash to direct sunlight, which can cause it to ripen too quickly. Instead, store it in a cool, dark place with good ventilation. A basement or root cellar is ideal.
Another mistake is storing winter squash in a humid environment. This can lead to mold growth and rot. Check the storage area’s humidity level before storing your squash. If it’s too high, consider using a dehumidifier to maintain a relative humidity of 50-60%.
Storing the squash at improper temperatures is also a mistake. Winter squash should be stored in an area with consistent temperatures between 40°F and 50°F (4°C and 10°C). Avoid storing it near heating vents or radiators, as this can cause temperature fluctuations.
Remember to inspect your winter squash regularly for signs of spoilage, such as soft spots or mold. Remove any affected areas to prevent the spread of rot.
Tips for Curing Winter Squash at Home
Once you’ve harvested your winter squash, it’s essential to cure it properly to bring out its full flavor and texture. This section will walk you through some valuable tips for curing your winter squash at home.
DIY Curing Methods Using Household Items
When it comes to curing winter squash at home, you don’t necessarily need specialized equipment. With a little creativity and resourcefulness, you can use common household items to get the job done.
One popular DIY method is using newspaper to dry and cure your winter squash. Simply place a few sheets of newspaper on the bottom of a wire rack or tray, followed by the squash, then more newspaper on top. The newspapers will absorb excess moisture from the squash, helping it dry evenly and preventing mold growth. You can also use cloth towels in place of newspaper for this method.
Another option is to use a wire rack or tray with good air circulation underneath. This allows air to circulate around the squash, speeding up the drying process and reducing the risk of mold and mildew. If you don’t have a wire rack, you can even prop your squash on top of a stack of books or boxes to create some space between it and any flat surface.
Remember, the key is to provide good air circulation while keeping the squash away from direct sunlight and heat sources. With a little patience and these DIY methods, you’ll be able to cure your winter squash like a pro!
Troubleshooting Common Issues During Curing
Mold growth is one of the most common issues that can occur during the curing process. It’s essential to monitor the squash regularly and take action if you notice any signs of mold. To prevent mold, ensure good air circulation by leaving space between each squash or placing them on a wire rack. You can also use a fan to circulate the air and speed up the drying process.
If you do encounter mold, don’t panic! Simply remove the affected area with a clean knife and allow the squash to continue curing. Be sure to sanitize your equipment and work surface to prevent the spread of mold.
Another common issue is uneven drying, which can lead to soft spots or rotting areas. To avoid this, check on the squash daily and rotate them every few days. This will help ensure even moisture loss and prevent the development of weak spots.
Regularly inspecting your squash during the curing process will help you catch any potential issues early on, allowing for prompt action to be taken to address the problem. By being proactive and keeping an eye out for common problems, you can enjoy a bountiful harvest of perfectly cured winter squash.
Benefits of Cured Winter Squash
Curing winter squash not only extends its shelf life but also enhances its flavor and texture, making it a worthwhile process for any home cook. Let’s explore some of the key benefits you can expect from cured winter squash.
Extended Shelf Life and Better Flavor
Curing winter squash is not just about preserving its storage life; it’s also an opportunity to enhance its flavor, texture, and nutritional value. When you cure winter squash, the natural enzymes within the fruit continue to break down starches into sugars, which intensifies the sweetness and develops a deeper, more complex flavor profile.
This process can also help to soften the rind of the squash, making it easier to cut and cook with. Furthermore, curing helps to reduce moisture content, inhibiting the growth of bacteria, mold, and yeast that can cause spoilage. As a result, cured winter squash can last for several months when stored in a cool, dry place.
In terms of nutritional value, curing doesn’t significantly impact the nutrient levels within the squash. However, it does help to make its nutrients more accessible by breaking down some of the cell walls, making them easier for your body to absorb. By following our step-by-step guide on how to cure winter squash, you can unlock its full potential and enjoy a delicious, nutritious harvest all year round.
Preserving Nutrients During Curing
When you cure winter squash, you’re not only enhancing its flavor and texture but also preserving its nutrient-rich goodness. Curing helps lock in the vitamins A and C that are essential for a healthy immune system and skin health. Vitamin C, in particular, is a delicate nutrient that can be easily lost during storage or cooking, but curing ensures it remains intact.
Potassium, another vital mineral found in winter squash, is also preserved through the curing process. This electrolyte helps regulate blood pressure, promotes bone health, and supports muscle function. Fiber content, which is crucial for digestive health, is also maintained when you cure your winter squash. By preventing water loss and maintaining a stable environment, curing prevents the breakdown of these nutrients.
To maximize nutrient retention during curing, make sure to store your winter squash in a cool, dry place with good air circulation. Avoid exposing them to direct sunlight or moisture, which can cause spoilage and nutrient degradation. By following proper curing techniques and storage conditions, you’ll be able to enjoy your winter squash while preserving its nutritional value.
Frequently Asked Questions
Can I still use my winter squash if it’s already started to soften?
Yes, but be cautious not to over-cure, as this can lead to spoilage. Check the moisture content regularly by inserting a knife or skewer; if it slides in easily, the squash is likely still usable.
How do I know when my winter squash has reached optimal curing time?
The ideal curing time varies depending on the variety, but generally, you’ll notice a change in texture and flavor after 7-10 days. Monitor moisture content and store the cured squash in a cool, dry place to slow down further drying.
Can I use any household item as a drying rack for winter squash?
Not all household items are suitable for curing winter squash. Look for materials that allow airflow, such as mesh screens or wooden trays with slats. Avoid using paper towels or cloth, as these can retain moisture and promote spoilage.
How do I prevent mold from growing on my cured winter squash?
Maintain good air circulation by storing the squash in a single layer, away from direct sunlight and heat sources. Regularly inspect your squash for signs of mold; if you notice any, remove it immediately to prevent further growth.
Can I cure more than one type of winter squash at once?
Yes, but be aware that different varieties may have unique curing requirements. Separate the squash by type and store them in separate containers or areas with distinct climate conditions to ensure each variety receives optimal curing conditions.