Growing your own peas can be a delightful experience, but it can also be intimidating if you’re new to gardening. With so many varieties to choose from and techniques to master, where do you even start? In this step-by-step guide, we’ll walk you through everything you need to know about growing delicious and healthy peas. From selecting the perfect variety for your climate and soil type to providing the right support, watering, and fertilizing techniques, we’ve got you covered. Whether you’re a seasoned gardener or just starting out, this comprehensive guide will take you from seed to harvest, ensuring you enjoy a bountiful crop of tasty peas all season long. Let’s get started on your pea-growing journey!
Choosing the Right Variety
When it comes to growing peas, selecting the right variety is crucial for a bountiful harvest. With so many options available, you’ll want to consider factors like climate, soil type, and desired flavor profile.
Understanding Pea Types
When it comes to growing peas, understanding the different types is crucial for selecting the best variety for your garden. There are primarily three main categories: garden peas, snow peas, and snap peas.
Garden peas (Pisum sativum) are the most common type of pea and are characterized by their large, tender pods filled with 6-8 seeds. They have a sweet, slightly grassy flavor and are typically harvested when mature. Garden peas prefer well-drained soil and full sun, making them an ideal choice for home gardens.
Snow peas (Pisum sativum var. saccharatum), also known as flat peas, have flat, tender pods that are harvested before the seeds are fully formed. They are often used in stir-fries and other Asian-style dishes due to their delicate flavor and crunchy texture.
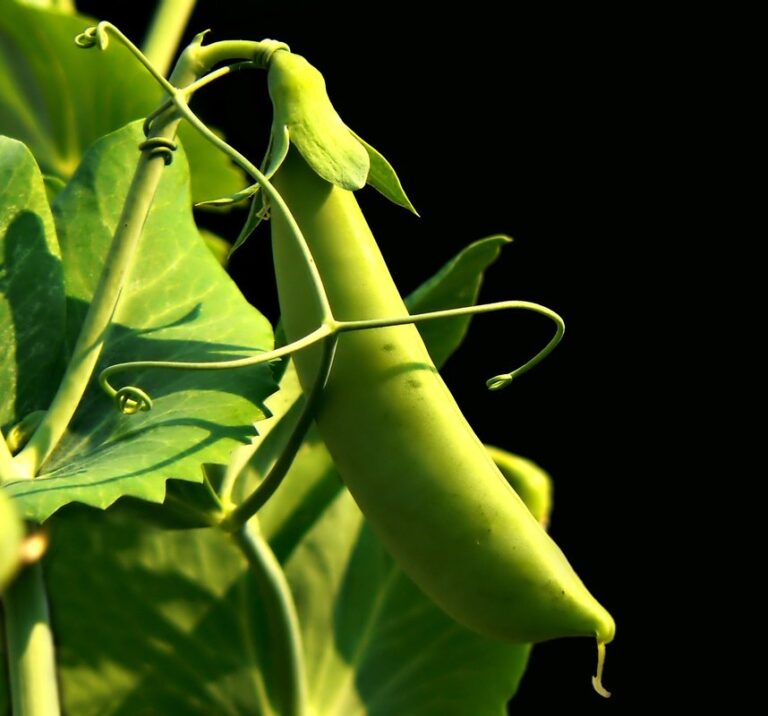
Snap peas (Pisum sativum var. macrocarpon) are similar to snow peas but have a thicker pod and sweeter taste. They can be eaten raw or cooked and are often used as a snack or side dish. Each type of pea has its own unique characteristics, growth habits, and uses in cooking. By understanding the differences between these varieties, you can choose the best peas for your garden and enjoy a bountiful harvest.
Factors to Consider When Selecting a Variety
When selecting a pea variety, there are several key factors to consider. The climate and soil type of your growing area will play a significant role in determining which varieties thrive best. For example, if you live in an area with hot summers, look for varieties that are heat-tolerant or drought-resistant. On the other hand, if you have a cool and wet climate, opt for varieties that prefer these conditions.
You should also consider the intended use of your peas. Are they for fresh consumption, freezing, or canning? Some varieties, such as ‘Sugar Snap’ and ‘Snowpea’, are bred specifically for their crunchy texture and sweet flavor, making them perfect for snacking and salads. Others, like ‘Garden of Eden’ and ‘Green Arrow’, have a higher yield and are better suited for canning and freezing.
When choosing a variety, think about the space you have available and the level of support your plants will need. Some varieties, such as bush peas, require minimal support, while others, like climbing peas, may need trellises or other structures to climb on.
Preparing the Soil
Before you can even think about planting those delicious pea seeds, it’s crucial to prepare your soil for optimal growth. Let’s get started on creating a perfect environment for your peas!
Testing and Amending Your Soil
Testing and amending your soil is a crucial step in creating an optimal growing environment for peas. To determine if your soil needs any adjustments, start by collecting a small sample from several areas of your garden. Mix the samples together to create a composite sample that accurately represents your soil.
Next, have your soil tested through a local nursery or extension office. The test will indicate the pH level and nutrient content of your soil. For peas, an ideal pH range is between 6.0 and 7.0. If your soil falls outside this range, you’ll need to make some adjustments.
If your soil test reveals low levels of nitrogen, phosphorus, or potassium, consider adding organic amendments like compost or well-rotted manure. These additions will not only improve the nutrient content but also increase the overall fertility and structure of your soil. For example, if you’re adding compost, work it into the top 6-8 inches of soil to allow for optimal decomposition and absorption by the peas’ roots.
Creating a Pea-Friendly Soil Mix
When it comes to growing peas, having the right soil mix is crucial for their success. Peas prefer well-draining, fertile soil that’s rich in organic matter. To create a pea-friendly soil mix, start by mixing 2/3 of topsoil with 1/3 of compost or well-rotted manure. This will provide the necessary nutrients and improve drainage.
Next, add some perlite or vermiculite to enhance water retention and prevent waterlogging. A general ratio is 10% perlite or vermiculite to 90% topsoil mixture. You can also incorporate some worm castings or alfalfa meal to boost nitrogen levels and promote healthy growth.
If you’re using a bagged potting mix, look for one specifically designed for legumes like peas. These mixes usually contain the right balance of nutrients and pH level. Avoid using regular garden soil as it may be too dense and prone to waterlogging.
Remember to test your soil pH before planting, as peas prefer a slightly acidic to neutral soil pH (around 6.0-7.0). Adjust the mix accordingly if necessary. By following these tips, you’ll create an ideal environment for your pea plants to thrive in.
Sowing Seeds
Before you start growing peas, it’s essential to prepare your soil by sowing seeds at the right depth and spacing. This ensures healthy germination and a bountiful harvest of delicious pea pods.
When to Plant Peas in Your Region
When it comes to planting peas, timing is everything. The best time to plant peas varies depending on your region and climate. In general, peas prefer cooler temperatures between 40°F and 70°F (4°C and 21°C). They also require adequate daylight hours, typically around 6-8 hours a day.
In temperate climates with mild winters, such as the Pacific Northwest or New England, you can plant peas as early as February or March. In these regions, it’s essential to check the frost dates and wait until the soil has warmed up to at least 40°F (4°C) before sowing seeds directly into the ground.
In warmer climates with hot summers, such as California or Florida, it’s best to plant peas in late winter to early spring, around February or March. This allows the plants to mature before the heat sets in and reduces the risk of bolting.
When planting peas in regions with cold winters, like the Midwest or Northeast, you can start seeds indoors 4-6 weeks before the last frost date. This gives them a head start on the growing season and ensures they’re ready to be transplanted outdoors when the weather warms up.
Keep in mind that cool-season crops like peas thrive in the cooler temperatures of spring or fall. Avoid planting peas in the middle of summer, as they’ll struggle with high heat and humidity.
How to Space and Sow Pea Seeds Correctly
When sowing pea seeds, it’s essential to get the spacing and sowing technique right. Peas are a dense crop that requires sufficient space to grow properly, and overcrowding can lead to disease and reduced yields.
As a general rule of thumb, plant pea seeds 1-2 inches deep and 1-3 inches apart, depending on the variety. For bush peas, you can sow them 2-3 inches apart, while climbing peas require 3-4 inches between each seed. Make sure to leave enough space between rows for easy access and harvesting.
To ensure accurate spacing, use a garden tape measure or a small piece of string to mark out your sowing pattern. Sow the seeds in drills, spaced evenly apart, and firm the soil gently with your fingers or a gentle rake. Keep the soil consistently moist during the first few weeks after sowing, as this will help the seedlings get off to a strong start.
Providing Support
Growing peas can be a bit of a challenge, so we’ve put together some tips on how to provide your plants with the support they need to thrive. From trellises to cages, we’ll explore your options.
Types of Trellises and Supports
When it comes to supporting your peas as they grow, you have several options to choose from. Let’s explore some of the most popular types of trellises and supports that’ll help your pea plants reach their full potential.
First off, T-posts are an excellent choice for creating a sturdy support system for your peas. These metal posts can be driven into the ground and used as a base for twine or wire to train your peas up. You can space them about 6-8 feet apart to provide adequate support for your plants. If you’re looking for a more rustic look, consider using wooden stakes or trellises made from natural materials like cedar or bamboo.
Another option is wire fencing, which can be used to create a teepee-style support system for your peas. Simply drive the posts into the ground and attach the wire mesh to them. This method is great for larger gardens where you have a lot of space to work with. For smaller spaces, consider using DIY options like chicken wire or old tomato cages to provide support for your pea plants.
When choosing a trellis or support system, keep in mind that it should be sturdy enough to hold the weight of your mature peas. Also, make sure it’s tall enough to allow your plants to grow without becoming too leggy.
How to Train Peas on a Trellis or Support
To train pea vines onto a trellis or support, start by gently twirling the stem around the structure, securing it with a soft tie or clip. As the vine grows, regularly inspect and re-tie loose sections to maintain even spacing and prevent sagging. For optimal growth, space your supports about 3-4 feet apart, depending on the variety.
Once the plant reaches about 6 inches tall, begin training the stem up towards the top of the trellis by gently twirling it around any available wires or strings. As new shoots emerge from the base of the plant, repeat this process to encourage vertical growth and discourage sprawl.
To maximize yields, try using a “teepee” system with multiple supports positioned in a square shape. This will provide more surface area for the vines to grow up while allowing for good air circulation between plants. Regularly inspect your peas for signs of pests or disease, and adjust training accordingly to prevent damage. By following these simple steps, you’ll be on your way to growing healthy, productive pea plants that make the most of their support system.
Watering and Fertilizing
Proper watering and fertilizing are essential for healthy pea growth, so let’s dive into the specifics of how to provide your peas with what they need.
Pea Watering Requirements
When it comes to watering peas, getting the frequency just right is crucial. Peas need consistent moisture, especially when they’re young and producing those delicious shoots. The ideal watering schedule for peas depends on factors like climate, soil type, and temperature.
In general, peas need about 1-2 inches of water per week. If you live in a hot and dry climate, you may need to water your pea plants every other day during the hottest months. On the other hand, if it’s been raining lately, you might not need to water at all for a few days.
To check if your peas are getting enough water, stick your finger into the soil up to the first knuckle. If the soil feels dry, it’s time to water. Avoid overwatering, which can lead to root rot and other problems. Water your pea plants in the morning so the leaves have a chance to dry off before nightfall.
If you notice yellow or wilted leaves, it may be a sign that your peas are experiencing drought stress. Make sure to provide enough moisture, especially when they’re producing pods. By paying attention to these signs and adjusting your watering schedule accordingly, you’ll be well on your way to growing healthy and productive pea plants.
Fertilization Techniques for Healthy Peas
When it comes to fertilizing your peas for optimal growth, there are several techniques you can employ. Organic options such as compost tea and manure can provide essential nutrients while promoting soil health.
For a more targeted approach, consider using synthetic fertilizers like ammonium sulfate or urea. These products contain high concentrations of nitrogen, phosphorus, and potassium – the three macronutrients peas require for healthy development.
To give your peas an extra boost, consider side-dressing with a balanced fertilizer once they’re about six inches tall. This will provide an immediate nutrient surge that can help support vigorous growth.
Some gardeners also swear by using fish emulsion or bone meal to promote healthy root development and prevent disease issues. When choosing a fertilization method, keep in mind the unique needs of your peas and adjust accordingly. Always follow the recommended application rates to avoid over-fertilizing, which can be detrimental to plant health.
By incorporating these tips into your fertilization routine, you’ll be well on your way to growing healthy, productive pea plants.
Common Issues and Solutions
As you start growing peas, you may encounter some common problems that can hinder your success. Let’s take a look at some potential issues and their straightforward solutions to help you troubleshoot along the way.
Troubleshooting Common Pea Problems
Yellowing leaves are often the first sign of trouble in your pea patch. This can be caused by overwatering, which leads to root rot and subsequently turns the leaves yellow. To prevent this, make sure the soil drains well and avoid getting water on the foliage when watering. Instead, water at the base of the plants.
Aphids are another common issue that pea growers face. These small, soft-bodied insects can cause curled or distorted leaves, stunted growth, and a sticky substance called honeydew on the plant’s surface. To get rid of aphids, use neem oil or insecticidal soap according to the product label instructions. Introduce beneficial insects like ladybugs or lacewings into your garden to provide natural control.
Powdery mildew is a fungal disease that appears as a white, powdery coating on leaves. It’s often triggered by high humidity and poor air circulation. To prevent powdery mildew, ensure good air movement around the plants by spacing them far enough apart. Remove any infected leaves to prevent the spread of the disease.
Some common signs of aphids and powdery mildew include curled or distorted leaves, stunted growth, and a sticky substance on plant surfaces. Regularly inspect your pea patch for these symptoms and take action promptly to prevent infestations from getting out of control.
Encouraging Continuous Harvests
Encouraging continuous harvests of peas can be achieved through various techniques that extend the growing season. One way to do this is by planting multiple rows of pea varieties with different maturation dates. This ensures that you have a steady supply of peas throughout the summer months.
Another technique for extending the harvest period is to use a technique called ‘succession sowing’. This involves planting small batches of peas every 1-2 weeks, starting when the first batch reaches maturity. This allows for continuous harvesting without having to replant the entire crop at once.
You can also try using cold frames or row covers to extend the growing season. These can protect your pea plants from frost and allow you to harvest peas in the early spring or late fall. By implementing these techniques, you can enjoy a bountiful and prolonged harvest of delicious homegrown peas.
Frequently Asked Questions
Can I grow peas in containers or do they require a lot of space?
Yes, you can definitely grow peas in containers! In fact, container gardening is a great option for small spaces or for growing multiple varieties at once. Make sure to choose a large enough container with good drainage and use a well-draining potting mix specifically designed for containers. Peas are compact plants and can thrive in containers as long as they receive full sun and regular watering.
How often should I water peas, especially during hot weather?
Peas need consistent moisture, especially when they’re producing pods. Water them deeply once or twice a week, depending on the weather conditions. During hot spells, you may need to water every day or two. Make sure not to overwater, as this can lead to root rot and other issues.
What’s the best way to prevent pests from damaging my pea crop?
One of the most common pests that target peas are aphids, slugs, and snails. To prevent these pests, use row covers to keep them away or introduce natural predators like ladybugs or lacewings into your garden. Remove any weeds that can harbor pests and keep your soil clean by removing debris.
Can I grow multiple varieties of peas together in the same bed?
Yes, you can definitely intercrop different varieties of peas! In fact, companion planting can enhance growth, flavor, and pest resistance. However, make sure to choose varieties with similar growing requirements and mature times. Some popular pea varieties that do well when grown together include ‘Green Arrow’, ‘Telephone’, and ‘Sugar Snap’.
How long does it take for peas to mature after sowing seeds?
The maturation time of peas depends on the specific variety, but most garden peas take around 50-60 days from sowing to harvest. Snow peas typically mature in about 40-45 days, while snap peas can take around 55-65 days. Keep an eye on your plants and check for signs of maturity, such as full pods or the right color for harvesting.