Germinating peas can be a challenging process for even the most seasoned gardeners. But don’t worry, with the right guidance, you’ll be on your way to successfully growing this nutritious and delicious legume in no time. When it comes to germinating peas, choosing the right seed is crucial. Not all pea seeds are created equal, and some varieties will perform better than others depending on your climate and desired outcome.
In this comprehensive guide, we’ll walk you through the ins and outs of germinating peas, covering everything from seed selection and optimal growing conditions to indoor vs outdoor germination techniques. Whether you’re a seasoned pro or just starting out, our expert advice will help you overcome common challenges and achieve a bountiful harvest of fresh, homegrown peas.
Choosing the Right Seeds
When it comes to germinating peas, selecting the right seeds is crucial for a successful harvest. Let’s dive into the key factors to consider when choosing your pea seeds.
Understanding Seed Quality and Viability
When it comes to growing peas, selecting high-quality seeds is crucial for a successful harvest. High-quality seeds will have a higher germination rate and be more resilient to environmental stressors like drought and extreme temperatures.
To check the viability of your pea seeds, perform a simple germination test. Soak 5-10 seeds in a cup of water overnight. The next day, count the number of seeds that have sprouted. A minimum of 8 out of 10 seeds should sprout within 24 hours to ensure good quality. You can also store your pea seeds at room temperature (around 70°F) for 7-10 days to observe how many seeds germinate during this time.
Factors like seed age, storage conditions, and handling can affect seed viability. Seeds stored in airtight containers or bags and kept in a cool, dry place tend to retain their quality better than those exposed to moisture and heat. Even if you purchase high-quality seeds from a reputable supplier, poor storage conditions at home can still impact their germination rate.
Considering Different Types of Pea Seeds
When it comes to selecting the perfect pea seeds for germination, you’ll find a variety of types available. Each type has its unique characteristics that can impact the growth and flavor of your peas.
Heirloom pea seeds are a popular choice among gardeners due to their rich history and distinct flavors. They often produce varying sizes and colors, adding visual interest to your garden. However, keep in mind that heirloom varieties may require more maintenance and care during germination. For instance, they tend to be more sensitive to temperature fluctuations.
Hybrid pea seeds, on the other hand, are bred for their high yields and disease resistance. They typically offer faster maturation rates and are often preferred by commercial growers. Nevertheless, hybrid peas might not provide the same level of flavor and nutritional value as heirloom varieties.
Organic pea seeds have gained significant attention in recent years due to their environmentally friendly production methods. These seeds are free from synthetic fertilizers and pesticides, making them a great choice for gardeners who prioritize sustainability. Organic peas may require more time to mature but will reward you with healthier produce.
When choosing between these types, consider your specific needs and preferences. If you’re looking for a hassle-free germination process, hybrid seeds might be the way to go. However, if you value unique flavors and are willing to provide extra care, heirloom or organic pea seeds could be the perfect fit.
Preparing Your Seeds for Germination
Preparing your pea seeds for germination is a crucial step to ensure healthy and successful growth. Before planting, it’s essential to clean and disinfect the seeds to remove any impurities or debris that may hinder their ability to sprout.
Start by examining the seeds for any visible signs of damage, rot, or mold. If you notice any issues, it’s best to discard those seeds to avoid infecting the rest of the batch. For smaller quantities, gently rub the seeds between your fingers under running water to remove any dirt or debris. This will help ensure the seed coat is intact and not compromised.
If you’re dealing with a large quantity of seeds, consider using a gentle seed cleaning solution (usually 1:10 ratio of white vinegar to water) for about 30 minutes. Afterward, rinse the seeds thoroughly with clean water. Make sure to dry them completely before storing or planting, as excess moisture can lead to rot and poor germination rates.
By taking these simple steps, you’ll be giving your pea seeds the best chance at successful germination and a healthy start to their growth cycle.
Starting Peas Indoors vs. Outdoors
When it comes to germinating peas, you’ll need to decide whether to start them indoors where they’re protected from extreme weather or directly in the garden outdoors. This section helps you choose the best approach for your climate and growing conditions.
Advantages of Indoor Germination
Starting peas indoors offers several advantages that can give you an edge over outdoor growing. One of the primary benefits is earlier harvesting. By germinating peas indoors 4-6 weeks before the last frost date, you’ll be able to enjoy a head start on the growing season. This means that your pea plants will mature and produce pods sooner than those grown outdoors.
Indoor germination also allows for better control over growing conditions. You can provide your seedlings with optimal temperatures (around 70°F), humidity levels, and light exposure – all of which are crucial for healthy growth. Additionally, indoor spaces are often more protected from extreme weather fluctuations, pests, and diseases that can be detrimental to pea plants.
By starting peas indoors, you’ll also have the ability to harden off your seedlings gradually before transplanting them outside. This process helps them adapt to outdoor conditions, reducing stress and promoting healthier growth. With indoor germination, you can ensure a bountiful harvest of delicious, fresh peas in no time!
Setting Up an Outdoor Garden Bed
When setting up an outdoor garden bed for pea germination, it’s essential to consider two critical factors: soil preparation and sunlight exposure. Let’s dive into the basics of creating a thriving environment for your peas.
Start by selecting a location that receives full sun (at least 6 hours of direct sunlight) and well-drained soil. Peas prefer cooler temperatures, so choose a spot with some afternoon shade to prevent scorching. Prepare the bed by loosening the top 8-10 inches of soil to a depth of about 12-18 inches using a garden fork or tiller.
Next, mix in a balanced fertilizer (5-5-5 NPK) according to package instructions to provide essential nutrients for germination and growth. If your soil is heavy clay or sandy, amend it with organic matter like compost or well-rotted manure to improve its structure and fertility.
Consider adding a trellis or support system to help peas climb as they grow. This will also make harvesting easier. Make sure the bed is at least 3 feet wide to allow for easy access and maintenance.
Keep in mind that outdoor soil conditions can vary greatly depending on your location, climate, and specific weather patterns. Be prepared to adapt your garden bed setup accordingly to ensure optimal growth conditions for your peas.
Tips for Transplanting Seedlings
When transplanting seedlings from indoor containers to outdoor gardens, it’s essential to do so with care to minimize shock and ensure healthy growth. Start by choosing a cloudy or overcast day for the move, as direct sunlight can be intense for newly transplanted seedlings.
Before moving the seedlings outdoors, harden them off by gradually exposing them to outdoor conditions over the course of 7-10 days. This involves moving the containers outside during the morning and bringing them back inside during the hottest part of the day. Gradually increase the duration of time spent outside each day until they’re fully acclimated.
When transplanting, gently remove the seedlings from their containers and inspect for any damaged roots or leaves. Gently tease out the roots to encourage new growth, then place the seedlings in a hole that’s about twice as deep as the container. Water well after planting to settle the soil around the roots. Finally, water regularly during the first few days after transplanting to ensure they establish themselves successfully.
Methods for Germinating Peas
To successfully germinate peas, it’s essential to understand various methods that work best depending on your desired outcome and available resources. We’ll walk you through each step of these effective approaches.
Water-Germination Method
The water-germination method is another popular way to germinate peas without using soil. This method involves placing pea seeds in a container filled with water, allowing them to absorb moisture and sprout.
To get started, you’ll need a clear glass or plastic cup, some water, and a few pea seeds. Fill the cup about 2/3 full of lukewarm water (around 70-80°F). Next, gently place one or two pea seeds into the water, making sure they’re fully submerged.
It’s essential to use lukewarm water, as cold water can slow down germination, while hot water can cause the seeds to rot. Keep the cup away from direct sunlight and maintain a consistent temperature between 65-75°F (18-24°C). Check on the seeds daily to ensure they’re not developing mold or fungal growth.
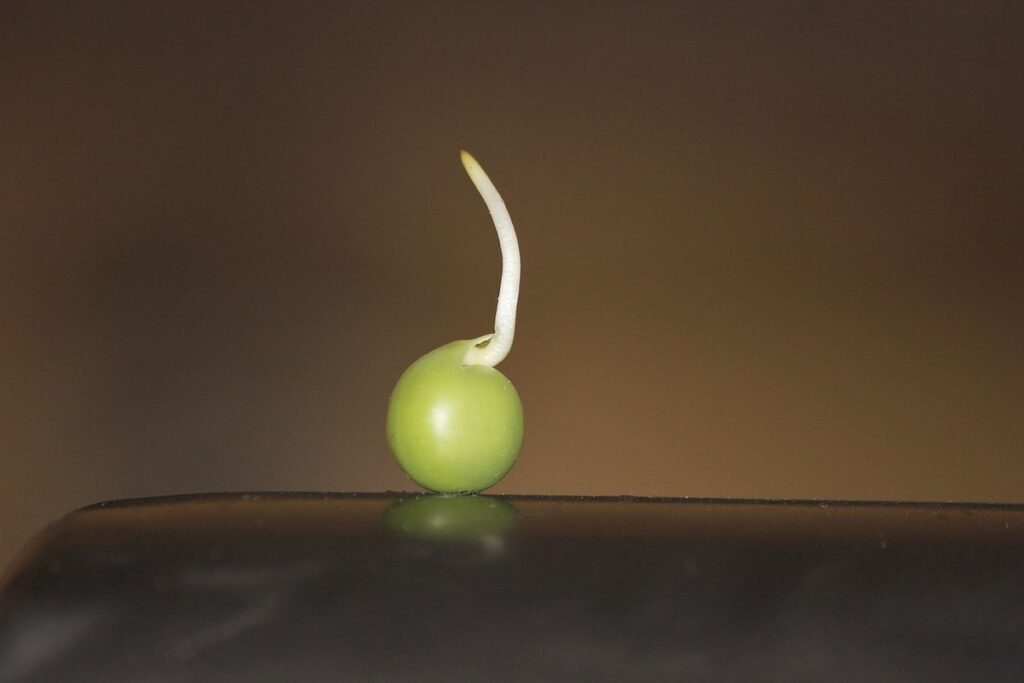
After 3-5 days, you should start seeing tiny roots emerging from the seed coat. Once the radicle has appeared, transfer the seedlings to a pot filled with well-draining soil, taking care not to disturb their delicate roots.
Paper-Towel Wrap Method
The paper-towel wrap method is a popular alternative to water germination that offers several advantages. This technique involves wrapping moistened paper towels around a seed tray or container to provide the right amount of moisture and humidity for germination. The main benefit of this method is that it allows for precise control over the moisture levels, which can be challenging with water germination. By monitoring the paper towel’s saturation level, you can ensure that your seeds receive exactly what they need.
One potential drawback of the paper-towel wrap method is the risk of overwatering, which can lead to mold and fungal growth. However, this can be mitigated by adjusting the amount of moisture in the paper towels or changing them frequently. To use this method effectively, start by wetting a paper towel with distilled water, then place it around your seed tray or container. Seal the wrap using masking tape or rubber bands to maintain humidity and prevent drying out. By following these steps, you can successfully germinate peas using the paper-towel wrap method and achieve higher success rates compared to traditional water germination methods.
Using Seed Starters or Germination Trays
Using seed starters or germination trays can significantly improve the germination rate of pea seeds and reduce the mess associated with traditional methods. These specialized containers are designed to provide optimal conditions for seedling growth, promoting healthy root development and minimizing the risk of fungal diseases.
When using seed starters or germination trays, make sure to choose a tray that has drainage holes to prevent waterlogged soil. Fill the tray with a well-draining seed starting mix, and sow one or two pea seeds per cell, depending on their size. Cover the seeds lightly with the starter mix, and maintain a consistent moisture level until germination occurs.
Using seed starters can also help reduce mess by containing the soil and preventing it from spilling onto surrounding surfaces. This is especially useful for small kitchens or limited workspace areas. Additionally, these trays often come with built-in labels or markers, making it easier to keep track of your seedlings’ progress and avoid confusion when transplanting.
By utilizing seed starters or germination trays, you can enjoy higher success rates and a neater growing environment, setting yourself up for a thriving pea crop.
Providing Optimal Conditions
To ensure your pea seeds germinate successfully, it’s essential to provide optimal conditions, including adequate moisture and a warm, dark space. Follow these guidelines for achieving the perfect environment.
Temperature Requirements for Pea Seeds
Pea seeds germinate optimally between 60°F (15°C) and 70°F (21°C). While this range is ideal, the temperature can fluctuate depending on various factors. For instance, if you’re sowing peas indoors, keep them away from heating vents or radiators to avoid overheating.
In outdoor conditions, temperatures above 75°F (24°C) can slow down germination, while temperatures below 50°F (10°C) may prevent it altogether. If you’re sowing in a greenhouse, ensure proper ventilation and shading to maintain an optimal temperature.
To control temperature fluctuations, consider using row covers or cold frames when planting outdoors. These structures can shield your pea plants from extreme temperatures and retain heat during the night.
Keep in mind that some varieties of peas are more tolerant of cooler temperatures than others. Research your specific variety’s requirements to ensure you provide the best conditions for germination.
Light Exposure and Photoperiodism
Light is essential for pea seed germination and growth. When it comes to providing optimal conditions for germinating peas, getting the light right can make all the difference. Peas are photoperiod-sensitive, which means they respond to changes in daylight hours. This sensitivity affects their ability to sprout and grow.
To provide adequate light exposure without overheating or scorching seeds, keep your seeds at a consistent temperature between 60°F to 70°F (15°C to 21°C). Place them near a south-facing window or under grow lights. Aim for 12-14 hours of daylight per day. Be cautious not to expose seeds directly to direct sunlight, which can cause scorching.
For optimal results, use LED grow lights specifically designed for seedlings. These emit minimal heat and provide the necessary spectrum for seed germination. Keep the lights about 6 inches above the soil surface to prevent overheating. Monitor your seeds closely, adjusting light duration and intensity as needed.
Humidity and Air Circulation
Maintaining stable humidity levels and good air circulation is crucial for promoting healthy pea seed germination. High humidity can lead to fungal growth and root rot, while low humidity can cause the seeds to dry out before they have a chance to sprout.
To achieve optimal conditions, it’s essential to maintain a balance between these two factors. A relative humidity of 50-70% is ideal for pea seed germination. You can achieve this by placing the seeds on a tray or in a container with a lid, which will help retain moisture without creating a humid environment.
Good air circulation also plays a vital role in promoting healthy root growth and preventing fungal diseases. To ensure good air circulation, make sure the area is well-ventilated, and avoid overcrowding the seeds. A simple way to improve airflow is to place the container on a tray or shelf, allowing for air to circulate underneath.
By maintaining stable humidity levels and ensuring good air circulation, you’ll create an environment that promotes healthy pea seed germination and sets your plants up for success.
Troubleshooting Common Issues
If you encounter any difficulties getting your peas to germinate, don’t worry – we’ve got some troubleshooting tips to help you identify and resolve common problems.
Identifying Causes of Poor Germination Rates
When you’re struggling with poor germination rates, it’s essential to identify the underlying causes. This will help you take corrective action and improve your chances of successful germination.
Old or low-quality seeds can be a significant factor contributing to poor germination rates. Seeds that are past their prime or have been stored improperly may not have the necessary energy to sprout. Check the packaging for an expiration date, and avoid using seeds that are beyond their shelf life. If you’re unsure about the quality of your seeds, it’s best to err on the side of caution and purchase fresh ones.
Other factors to consider include inadequate moisture, poor soil conditions, or insufficient light. Make sure you’re providing your pea seeds with the right environment for germination. Check the seed packet for specific temperature requirements and ensure that your growing medium is well-draining and not too dense. By identifying and addressing these common causes of poor germination rates, you can take a step closer to successfully germinating your peas.
Managing Pests and Diseases
When sowing pea seeds, it’s essential to be aware of common pests and diseases that can affect your seedlings. One of the primary culprits is slugs and snails, which thrive in moist environments and feed on tender shoots. To prevent this, use copper tape around planters or individual pots, as these pests don’t like to cross over it.
Another issue you may encounter is aphids, tiny insects that can spread diseases and weaken your plants. Regularly inspect your seedlings for signs of aphid infestation, such as curled leaves or sticky substance on stems. If you notice any issues, treat with neem oil or insecticidal soap according to the product’s instructions.
Diseases like powdery mildew and root rot can also affect pea seedlings. To prevent these, ensure your seeds have good air circulation and aren’t waterlogged. Remove any infected plants immediately to prevent the disease from spreading. Regularly inspect your plants for signs of disease, such as yellowing leaves or soft stems.
Some common pests that target peas include cutworms, flea beetles, and pea moths. Use row covers to prevent these pests from reaching your seedlings.
Common Mistakes to Avoid During Germination
When germinating peas, it’s easy to fall into common pitfalls that can hinder successful growth. One of the most critical mistakes is over-watering or under-watering the seeds. Peas require consistent moisture, but excessive water can lead to rot and fungal diseases. On the other hand, inadequate water can cause the seeds to dry out and fail to germinate.
To avoid this issue, make sure to keep the soil consistently moist during the first few days after sowing. Check on the seeds daily and gently water them if the top inch of soil feels dry. Another common mistake is not providing adequate light. Peas need indirect sunlight to germinate, so place them near a sunny window or under grow lights.
Additionally, using old or stale seed can also lead to low germination rates. Fresh seeds are essential for successful growth, so make sure to purchase high-quality seeds from reputable suppliers. By being mindful of these common mistakes and taking steps to avoid them, you’ll be well on your way to successfully germinating your peas.
Harvesting Your Peas
Once you’ve successfully germinated your peas, it’s time to bring in the harvest. This section will walk you through the process of harvesting your peas at the peak of freshness and flavor.
Understanding Different Maturity Times
When it comes to harvesting peas, timing is everything. The type of pea you’re growing can significantly affect its maturity time, which is why it’s essential to understand the specific needs of each variety. For example, sugar snap peas and snow peas typically mature within 50-60 days of planting, while shelling peas take around 60-70 days to reach full maturity.
On the other hand, garden peas like ‘Telephone’ and ‘Green Arrow’ have a longer maturation period, requiring about 70-80 days before harvest. If you’re growing snow peas, be sure to check for tenderness by gently tugging on the pod – if it comes off easily, it’s ready!
To ensure optimal flavor and texture, make note of the specific maturity time for your chosen variety. Harvesting at the right moment will not only preserve the pea’s natural sweetness but also prevent over-maturity, which can lead to a loss of nutrients and flavor. Keep in mind that different weather conditions and soil types may affect maturation times, so be prepared to adjust your harvesting schedule accordingly.
Selecting the Right Tools for Harvesting
When it’s time to harvest your peas, having the right tools on hand can make all the difference. You’ll want to consider both safety and efficiency when selecting a harvesting method.
For small-scale gardens, hand-pulling is often the most practical approach. This involves gently pulling the pea plants out of the ground, being careful not to damage the stems or roots. To do this safely, wear gloves to protect your hands from thorns and sharp edges. It’s also essential to harvest in the early morning when the peas are at their peak freshness.
For larger gardens or commercial operations, mechanical harvesters can be a significant time-saver. These machines use a combination of rollers and cutting blades to strip the peas from the plant, often leaving the roots intact. Be sure to choose a harvester that’s specifically designed for pea harvesting, as this will ensure efficient and effective results.
When selecting either hand-pulling or mechanical harvesters, make sure they’re in good working condition and suitable for your garden’s specific needs.
Tips for Storing Fresh Peas
Proper storage of fresh peas is crucial to maintain their flavor and texture. After harvesting, gently pick the peas into a ventilated container or basket to prevent damage and moisture accumulation. If you’re not planning to use them immediately, store them in the refrigerator at a consistent temperature below 40°F (4°C).
To keep your peas fresh for up to five days, ensure they are dry before storing. Remove any excess soil from the pods and gently pat them dry with paper towels. Do not wash the peas as excess moisture can lead to spoilage.
For longer storage, you can also consider freezing or pickling your peas. Blanching in boiling water for two minutes can help preserve their color and texture. Then, cool them immediately in an ice bath before storing them in airtight containers or freezer bags.
Frequently Asked Questions
Can I use old pea seeds for germination, or do I need to purchase new ones?
While it’s technically possible to use old pea seeds, they may not have the same level of viability as newer seeds. Old seeds can be prone to deterioration and reduced germination rates. For optimal results, it’s recommended to purchase fresh seeds from a reputable supplier. Fresh seeds will give you the best chance at achieving high germination rates and a successful harvest.
What if I don’t see any signs of germination after 7-10 days? Is something wrong with my seeds or method?
Don’t worry – it’s not uncommon for peas to take longer to germinate, especially in cooler temperatures. If you’re using the right conditions and high-quality seeds, it’s possible that your seeds are simply taking a bit longer to sprout. Try gently checking the soil moisture and ensuring that your seeds have adequate light exposure. You can also try providing a slightly warmer environment or adjusting the humidity levels.
Can I use different types of containers for germinating peas, like plastic cups or yogurt containers?
Yes – you can experiment with various container materials and shapes to find what works best for you. However, it’s essential to ensure that your container provides sufficient drainage and is clean before sowing your seeds. Some gardeners prefer using biodegradable containers, like paper cups or coconut coir pots, which can be composted at the end of the growing season.
How do I know when my peas are ready for transplanting outdoors?
Peas typically require 2-3 sets of leaves to develop a robust root system before being transplanted outside. Look for seedlings with two sets of leaves and a visible stem, which indicates they’re ready for outdoor conditions. Harden off your seedlings by gradually exposing them to outdoor temperatures and light levels over the course of 7-10 days.
What if I notice mold or fungus developing on my seeds during germination? How do I prevent it?
Mold and fungus can be a common issue when sowing peas, especially in humid environments. To prevent this, ensure good air circulation around your seedlings by providing adequate space between containers. You can also use a gentle fan to circulate the air or improve ventilation in your growing area. If you do notice mold, carefully remove affected seeds and treat the remaining ones with a mild fungicide solution.